
GINGER SEWALONG PT 4: SEAM FINISHES FOR JEANS

Before we get into the actual cutting and assembly of your Ginger Jeans, it is worthwhile to go over the variety of seam finishes you can use, since sturdy seams are the key to making jeans that will last for years.
A note about machines: you can make this pattern using one regular machine. If you’d like to avoid changing your topstitching thread in between steps, having a second machine set-up can be helpful for sewing regular seams exclusively. However, because you don’t need to put topstitching thread in your bobbin, I was never particularly annoyed by changing to regular thread on top. Having a serger makes finishing seams a breeze, but is not required, especially if you want to use flat fell seams.
FLAT FELL SEAMS
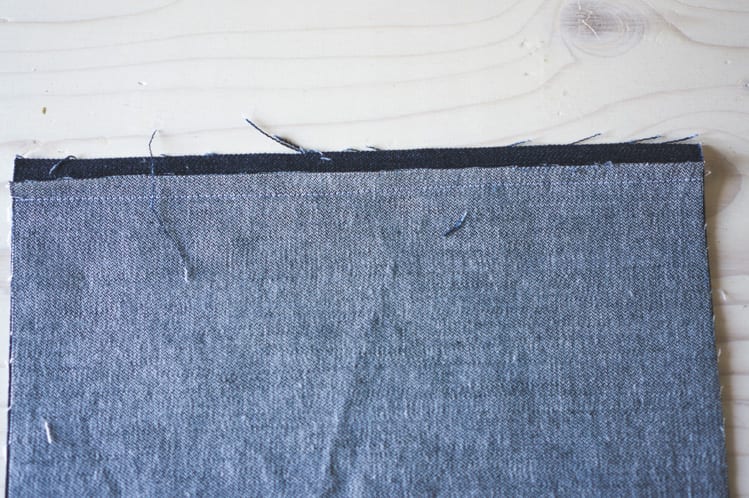
The original jeans seam finish: sturdy enough to withstand the rigors of gold mining, and pretty enough to be worth the time for your own jeans. These seams are similar to french seams in that the raw edge is completely encased but the process is a little different.
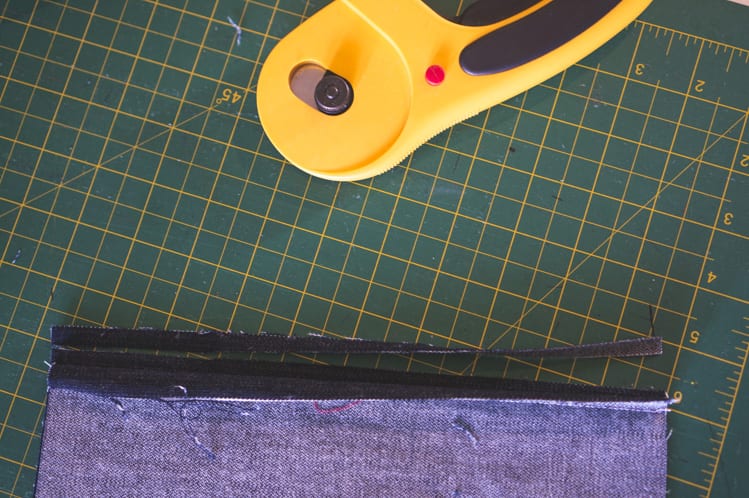
To start, sew your 5/8″ seam like you would normally with right sides together. Then trim one side of the seam to 1/4″ (trim the side that you intend to press towards). You can use scissors to trim, or a rotary cutter if the seam is straight.


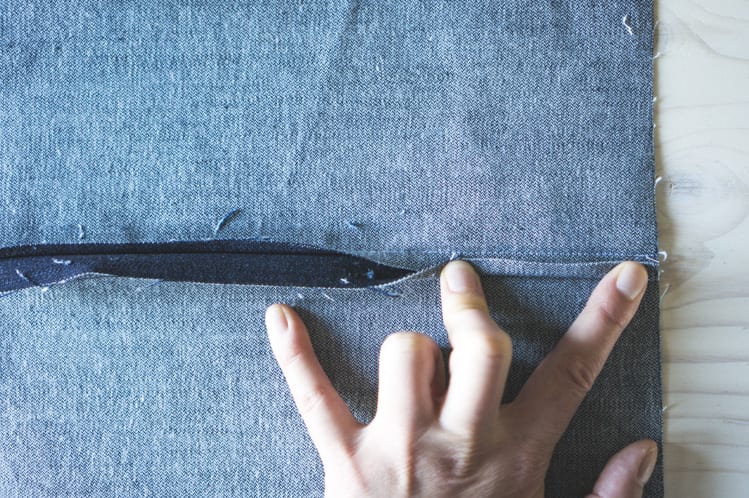
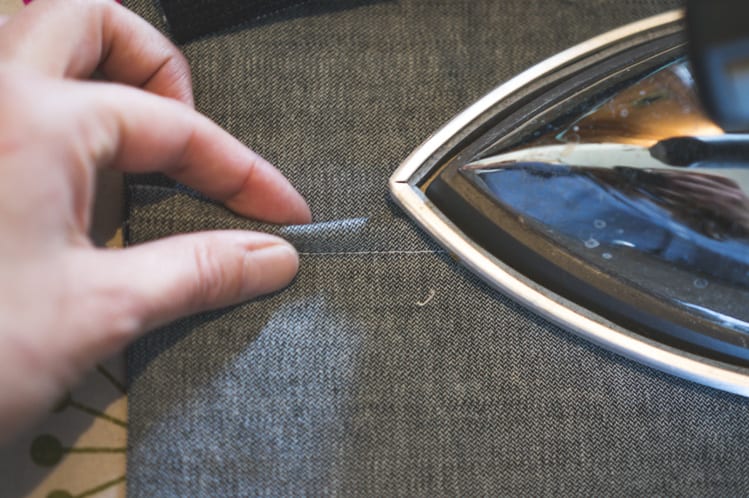
Fold this long seam under, making sure you are encasing the shorter seamed you just trimmed. Press flat – if you have a clapper this is the perfect time to use it.


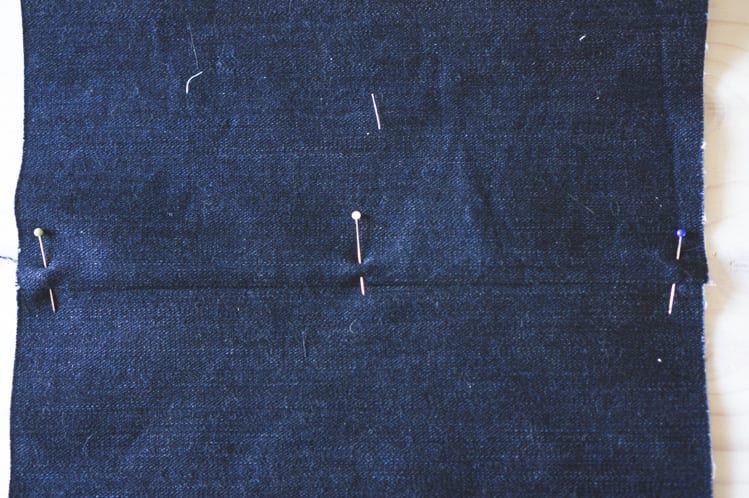
Traditionally you would sew the seam closed from the wrong side of the fabric, but the bobbin side of topstitching is generally not very pretty. We will be sewing from the right side, so it’s important to carefully pin the seam closed since you won’t be able to see it when you’re sewing.

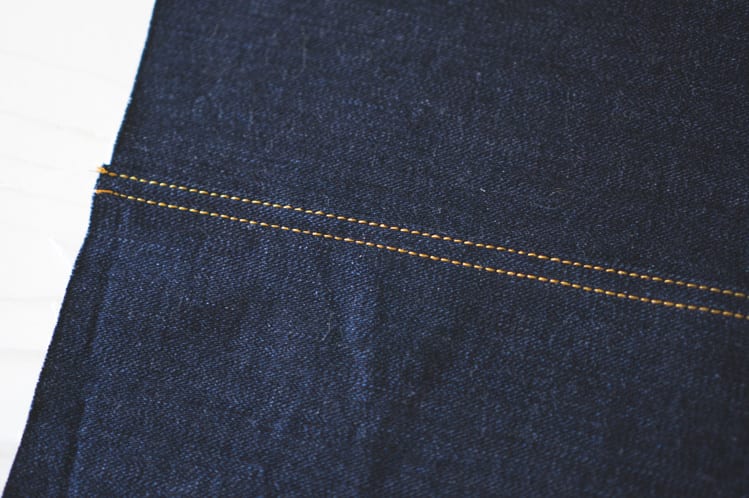
Start topstitching 1/8″ from the seam line. Sew another line of topstitching 1/4″ away, making sure you are catching the folded seam below.


Clean, rugged, and guaranteed to last. Flat fell seams are definitely more work, but I think the final effect is totally worth it. Keep in mind that these are quite thick seams, something to think about if your machine gets angsty going over multiple layers of denim. For this reason, I would not flat fell your front crotch seam. Serge it or finish it using the technique below. Every RTW pair I’ve looked at serges the front crotch, I’m guessing to reduce bulk at the crotch inseam intersection.
SERGED SEAMS
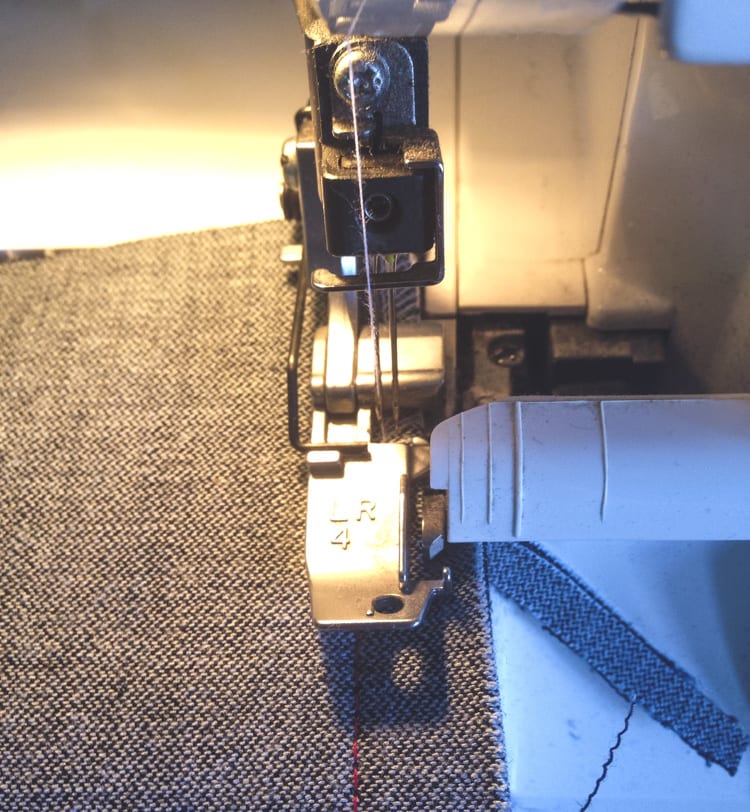
If you have a serger, you can get a clean finish inside by trimming and overlocking your seams before topstitching. Sew your seam on your regular machine and finish it on the serger – trim off about 1/4″. You want to make sure your seam is still wide enough to catch the two lines of topstitching. Quick serger tip: you should have some guidelines on your machine that indicate seam allowances just like a regular machine – you can see in the example below that I am aligning mine with the 3/8″ mark, just next to the cutting knife.

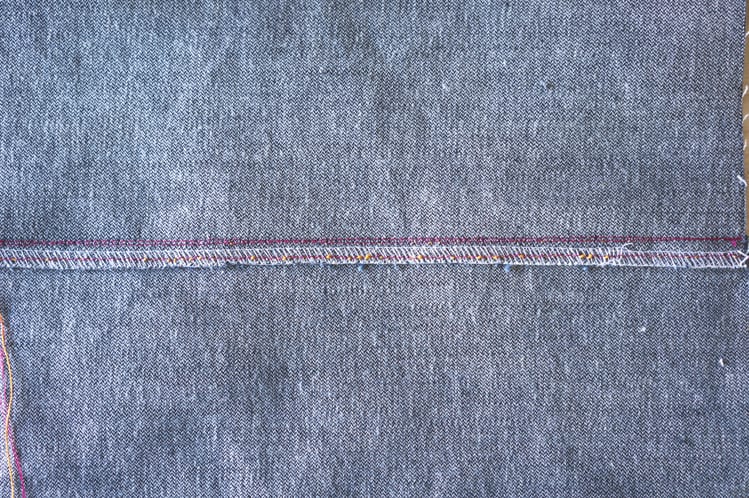
Press the seam flat and sew two lines of topstitching 1/4″ apart. It will look like this on the inside.

FINISHING SEAMS ON A REGULAR MACHINE
If you don’t have a serger and don’t want to do flat fell seams, you can still get a pretty clean finish by trimming your seam allowances to 3/8″ and zig zagging the seam using the widest zig zag possible. Even better if your machine has an “overlocking stitch”. On the example below, I used an overlocking stitch next to a zig zag stitch to show the difference.
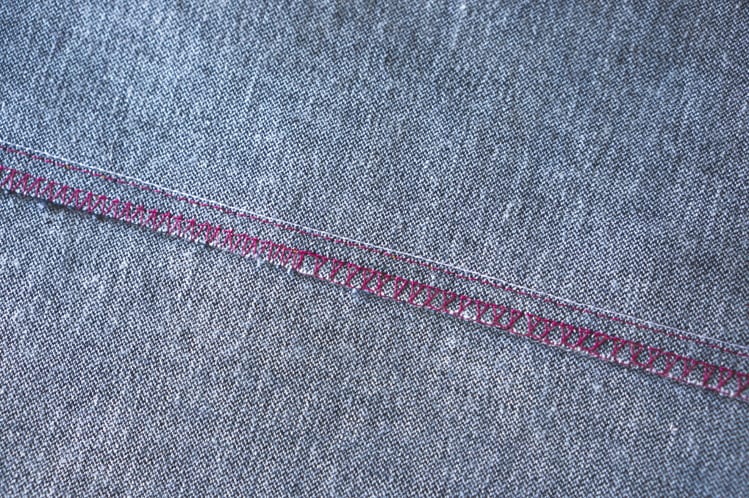

GETTING EVEN TOPSTITCHING
This may be one of the trickiest things about making jeans. Since your topstitching thread is most likely in a contrasting colour, it’s important to sew slowly and carefully, especially around curved edges like the pockets. There are a few feet that may help you get clean, even lines, but I almost always use my standard foot. Here is how I get even topstitching using a normal foot.
For the first pass, I align the centre guide on my foot to the seam line, and move my needle over about 1/8″ (this is only possible if your machine has more than three needle settings).
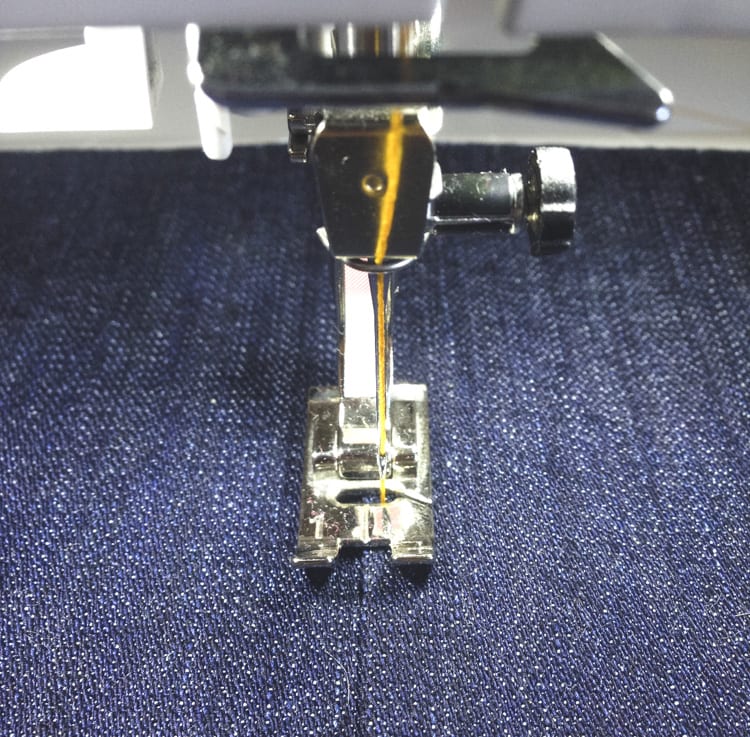

For the second pass, I align the left inside edge of my foot to the first line of topstitching, keeping my needle in the same position as the step before. This gives me 1/4″ between lines of topstitching.
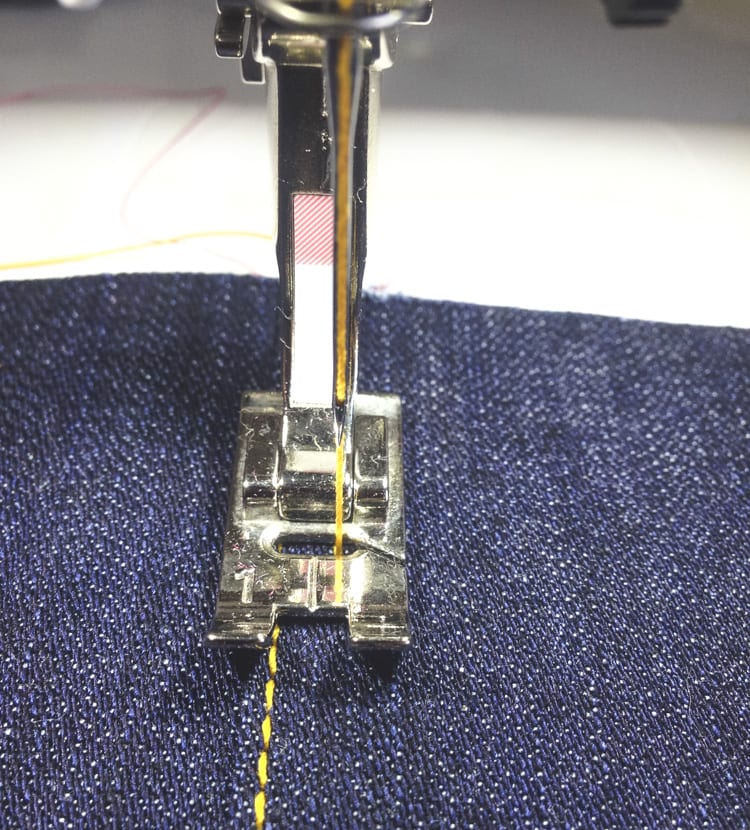

Even if your needle only has three positions (left, center, right) try experimenting with the feet you have to see if you can find an easy way to align your topstitching. Once you have this part figured out it goes much more smoothly! Write down your settings if it will help you remember later.
If you have an edge-stitch foot, you can use the guide in the centre to help create nice, straight topstitching lines. Personally, I never use this method even though I have the foot because I always end up with tension issues. However, my machine can be a little moody with topstitching thread, so I encourage you to give it a try.
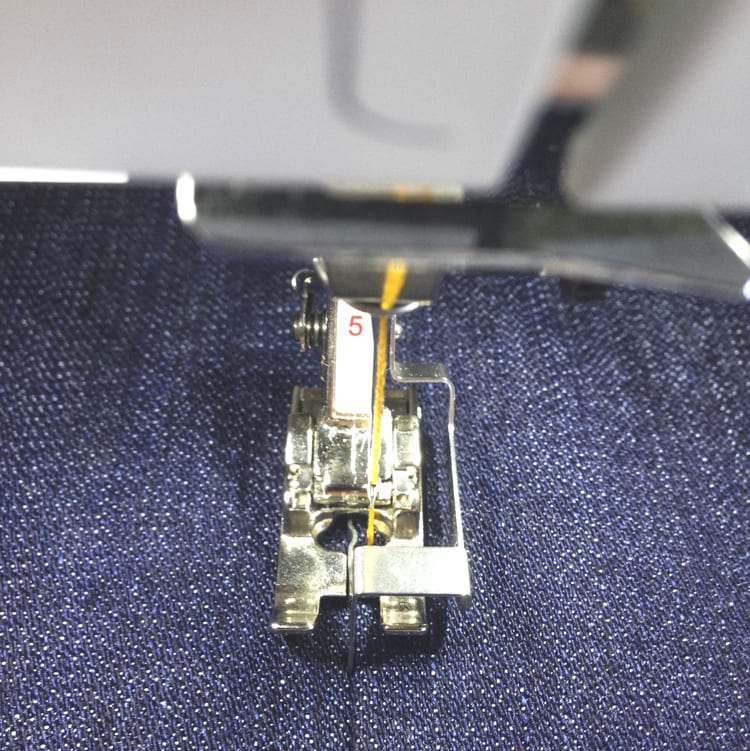

If you’re having issues sewing around curves, make your stitch length a little shorter; 2.5 – 3mm works well for me. Draw guides with a chalk pen if it will help you stay on course, and look at the needle rather than the seam guide so keep that line as smooth as possible.
Tomorrow we will start cutting out our pieces! See you then.
Related posts:
- GINGER SEWALONG PT 1: SOURCING DENIM
- GINGER SEWALONG PT 2 – JEAN MAKING SUPPLIES
- GINGER SEWALONG PT 5: FITTING