
AN ANNA // CHARLOTTE HOLIDAY HACK

Hello lovelies! As I type there is approximately 2 feet of snow outside, my new parka is getting broken in and I have stacks of wrapped Christmas gifts on the cutting table. It’s that short, beautiful time of winter where the weather hasn’t started to feel oppressive and all of the holiday parties take the edge off the fact that snow boots are your new daily staple.
Speaking of holiday parties….. I took a break from sewing comfy, loungey knits to make some icing. Some gilded, foiled icing that makes me feel like a Christmas decoration in the best possible way. It feels like it’s been forever since I made an actual dress with darts and a zipper and it was fun to get back to my sewing roots: ridiculously over the top dresses that rarely get worn but make you smile every time you see them.


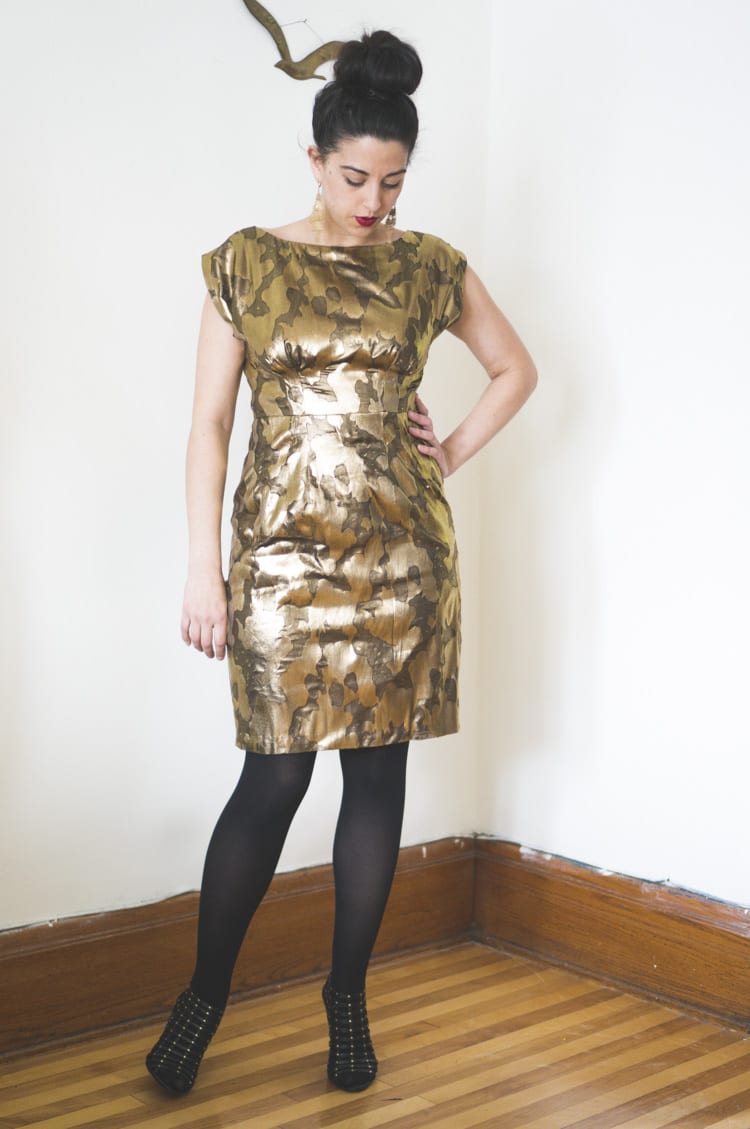
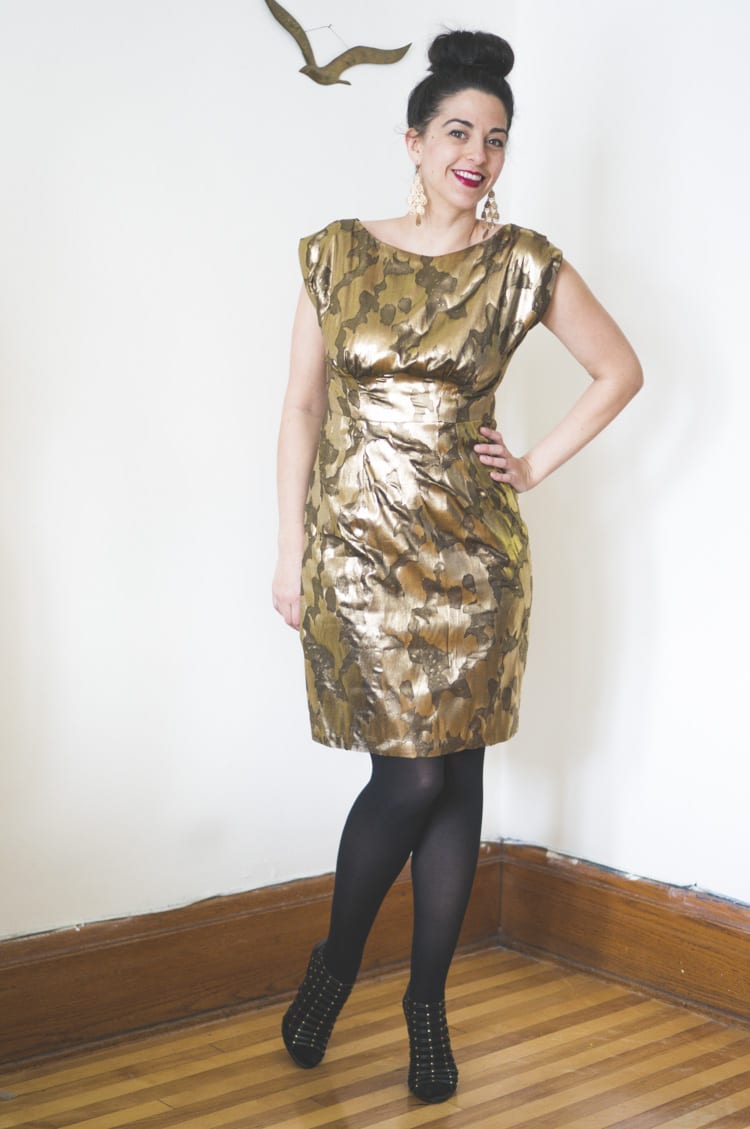
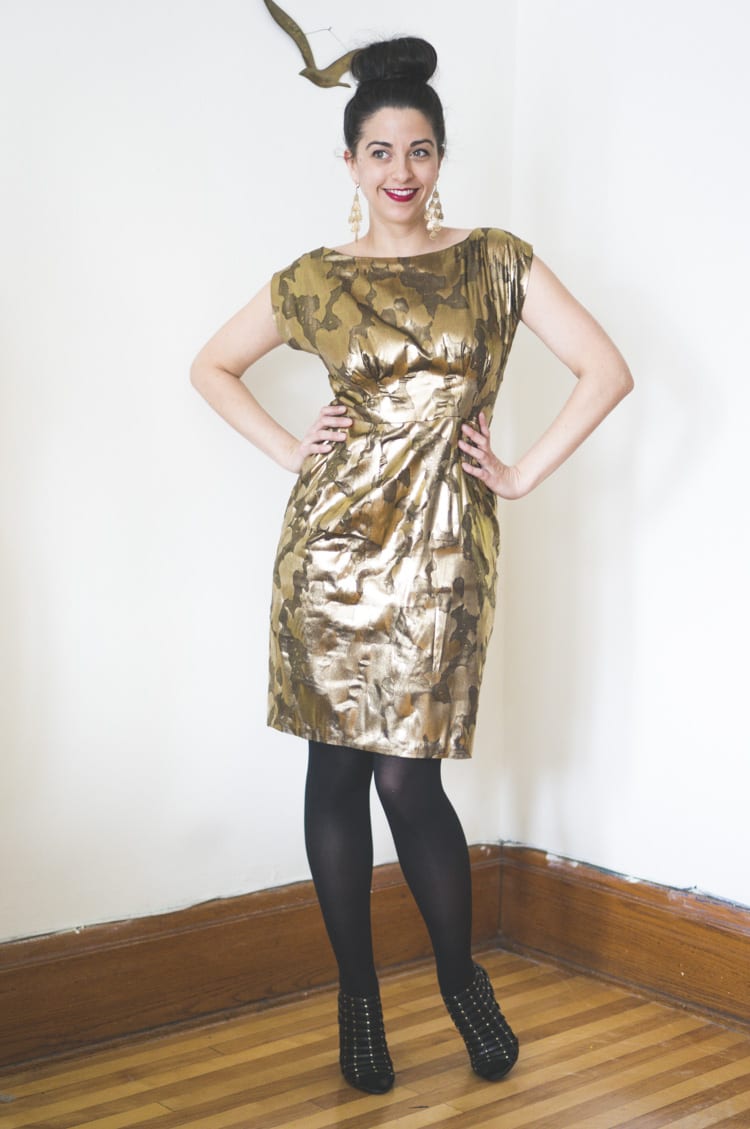
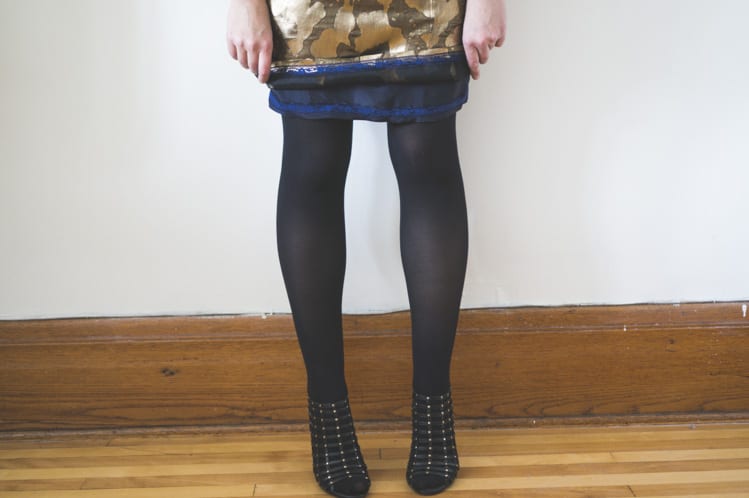
The fabric really called the shots for this project. On one of my trips to the wholesale wonderland that is the Chabanal district in Montreal, I stumbled on this gold foil organza. It reminds me of camo print, like if Ted Nugent did drag (if anyone is wondering what my dream Christmas gift would be, it is Ted Nugent giving Liza Minelli realness, fyi). I couldn’t resist it’s gilded lure, especially for $5 a yard. I brought it home, draped it on the form and tried to figure out what pattern would work. I wanted something with simultaneous softness and structure, so I turned to an old favourite, the Anna dress from By Hand London. Inspired by the beautiful Anna/Charlotte hack from Diary of Chain Stitcher, I decided a cocktail dress with a pencil skirt was the way to go.
I made the Charlotte way back when, but it was too tight and the fit was off (the things you realize in hindsight). This pattern has double darts in front which makes me look pregnant with hollow air babies. However, I wanted to keep them so that they lined up with the double pleats on the Anna bodice. I made a few muslins to try and perfect the fit, since this fabric magnifies drag lines like you wouldn’t believe. I cut a US10 for the bodice and a US12 for the skirt. Here’s a list of pattern modifications I made:
- Took out a wedge from front and back neckline to prevent gaping.
- Shaved 2 inches off each shoulder, basically removing a wedge and tapering to nothing at the under arm, since the fabric was too stiff for the wider kimono sleeve.
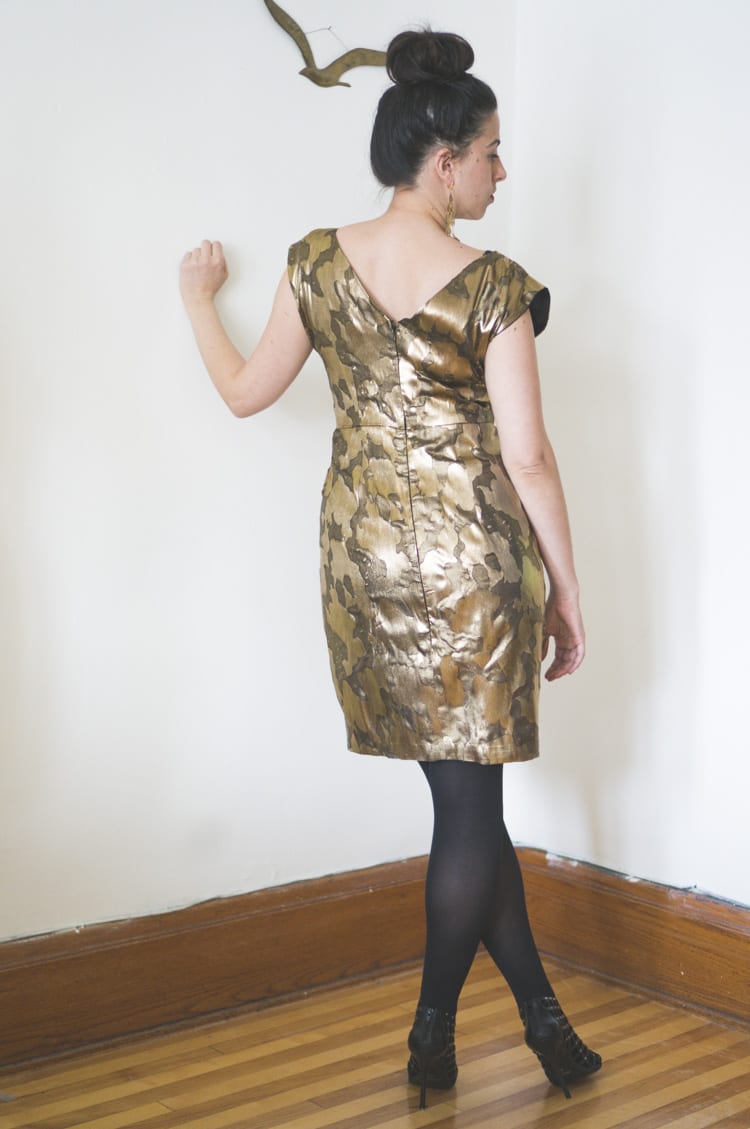
- Drafted a deep V in the back. Since this means fabric is cut on the bias, to prevent gaping I shaved 1/8″ at the inner back shoulder, tapering to nothing at the outer arm. It helps pull the fabric in a little.
- Shortened the front pleats by about 3/4″. I’ve never had to make this modification before but in this fabric, the pleats weren’t ending beneath the girls like they should have.
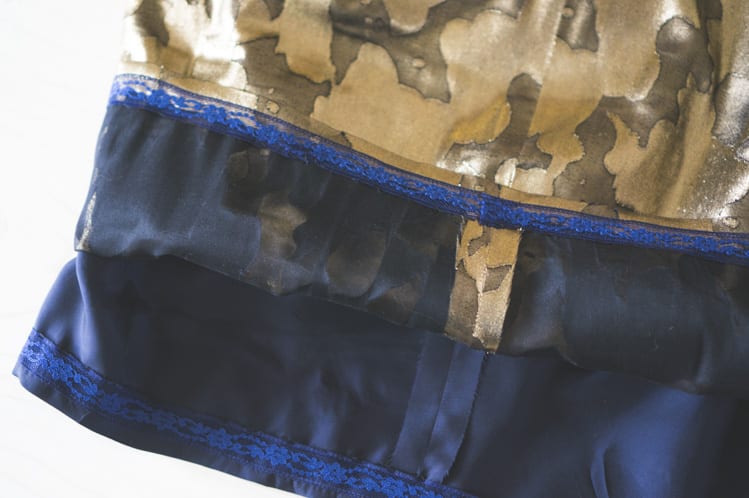
- The skirt gave me some headaches since I was moving the darts higher than they were designed to sit on the body. I was getting crazy volume under my tummy, so I narrowed the front darts on the skirt to half the original size, lengthened then by about 1″and moved them over to align with the pleats. I then removed the excess width at the waist, and moved the side seams over so they aligned with bodice.
- Lengthened the back dart by 1″ and moved it over so it aligned with bodice dart.


I was fairly happy with the fit in the end, but in hindsight I’d shave more off the back shoulder seam since the back gapes ever so slightly. It’s also a little hard to assess if the fit is spot on or not since the fabric is so distracting and stiff. I think I could have made the front darts even skinnier since there is still a little too much volume around the baby maker.
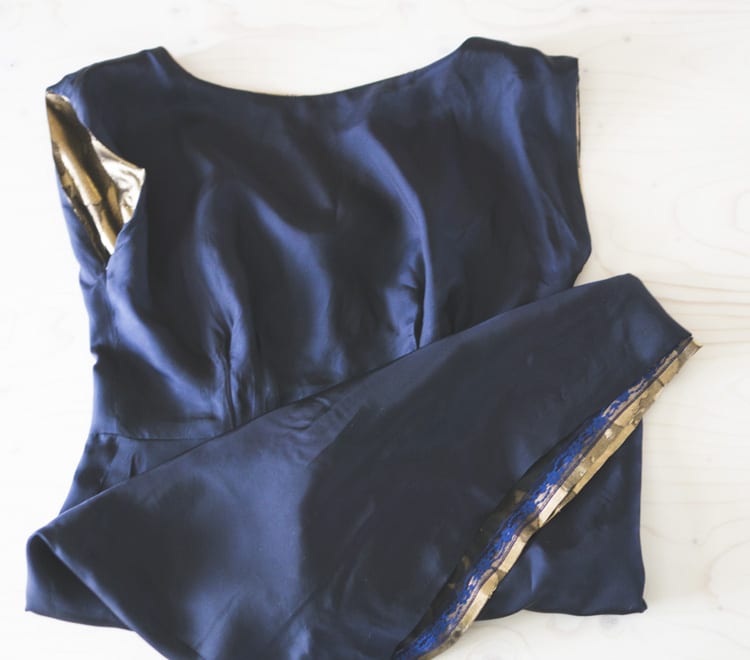
In terms of construction, I left the seams raw since they were ever so pretty, hemmed with lace tape, fully lined it with a navy bemberg rayon, interfaced the CB for an invisible zipper and added a hook and eye at the top. I used my favourite method to line the bodice, which is to sew both the bodice and lining at shoulder seams, and then sew then together along the neckline and arm opening. You then pull one end of each side through the shoulder opening and sew the side seams in one continuous line (refer to this tutorial if that is not clear). I was in a bit of a rush and didn’t have time to handstitch the lining to the zipper, so I tried flipping everything inside out and machine stitched the lining to the zipper. I’ve never done this before and it was a little tricky to get everything aligned but it’s a good time saver. My lining ended up looking a bit wonky at the top but no one will ever see it so, pffft.


I wore this to a holiday party last weekend in New York, and will probably pull it on New Year’s Eve. It’s been a long time since I made a party dress and I forgot how much I missed the process! The only real problem is that this fabric creases like CRAZY and looks a little worse for wear after an evening of sitting. I’m hoping a good steam will release some of those creases.
How about you? Any holiday dress sewing plans?