Runs with SPOOKY Scissors

Well, the leaf piles have been cleared from the Penny Black front yard. However, the Halloween decorations are up and I became tangled in all those polyester spider webs!
I did enjoy seeing the amazing leaf projects done by the Penny Black designers. And the projects this past week? Amazing! Where would we be without our adhesives? Sometimes, it’s the only thing holding me together!
Halloween is coming, Halloween is coming
Skeletons will be after you
Witches, cats and big black bats
Ghosts and goblins too!
I have had this little musical ditty floating in my head all day as I worked on my Halloween and Fall cards. It must have been 3rd grade when I learned it, the same year I learned “Rally” and “City Nights”! Our teacher was a firm believer in repetition and the songs I learned that year are burned into my hard drive. I may forget birthdays or appointments, but I can still sing the “Rally” song followed by “City Nights”. My grandsons used to think it was amazing; Mr. RWS? Not so much!
I am so excited about the Fall 2014 release! Making Halloween cards was pure joy!

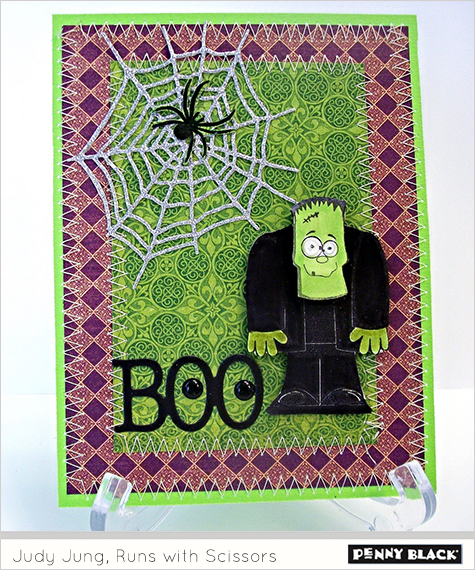
I cut the Spider’s Internet (The people who designed and named this die are my kind of people! I am pretty sure they run with scissors, too.) from silvery glitter paper and made sure there was a spider in residence. Ironically, my original coloring of Frankenstein’s face was not acceptable and I ended up doing a face transplant! How cool is that? I added Glossy Accents to his eyes and love that one eye is larger than the other! I added a couple of black eyeballs to the sentiment, just because it was a fun thing to do!

Many years ago I lived with my kids in a 100 year old house. While it didn’t look exactly like this, it was close! The tree in the front yard was an old pine tree, much taller than the house. And bats were a reality, finding their way in through whatever cracks they discovered. We won’t even mention the mice … that’s a story for another day. So often people would mention to me how charming old houses are. I knew right away they had never lived in one. (What is charming about the window shades blowing when the windows are closed?)
That little fence from the Haunted Hollow die set has become one of my favorite dies. It will not be tucked away with the Halloween goodies. I love it that this card is mostly dies. I could have added two more die cut bats from the Boo Crew set, but wanted to use the bat stamp from the Spooky Spheres set. That set has so many little Halloween images to make your cards perfect for Halloween.

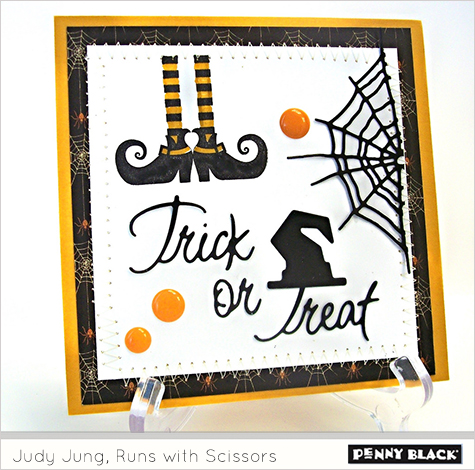
I wanted to try my hand at a clean and simple card and this is the closest I got! There are so many adorable images and dies in this release that I wanted to use as many as I could. I liked the card when it was finished, but I fell in love with it when I thought to add the witch’s hat to the word “treat”. I love little surprises like that!
Making the Trick or Treat card brought back so many memories of Halloween when my kids were little. I think our family invented the concept of recycling. Each of my five goblins would gulp a quick supper, change into their put together costume, take their pillowcase (yes, I said pillowcase!) and go off into the dark and sometimes very cold, Wisconsin night to join their friends for a night of Trick or Treating.
We lived in a small town so the kids could literally knock on almost every door in town. There were no worries of tampered food, bad guys or too much traffic. The kids would be gone for hours, but periodically they would come home to empty their pillowcase and venture out for more. (One didn’t want to appear greedy holding open a pillowcase full of candy and asking for more!) I would recycle some of their huge accumulation to hand out to those who came to our door. Who knows? Some of the kids who came to our door may have left with candy that originated from their own house!
We interrupt the Halloween fun for a leaf-themed card that just had to be made!

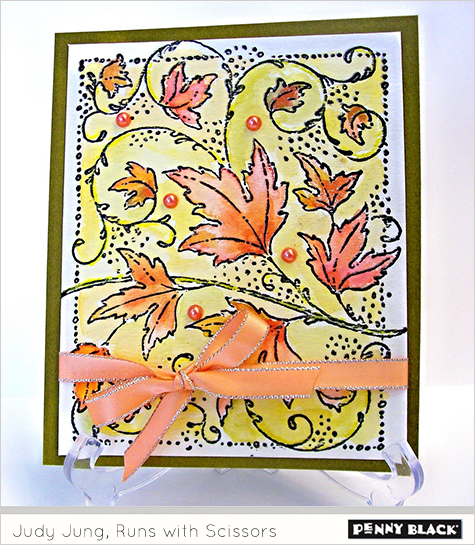
This large stamp is probably my favorite stamp in the Fall 2014 release. The first card I made with it I colored with the embossed resist technique. But I knew this image needed to be watercolored. I mentally went to my really calm place (no scissors needed) and got out the watercolor pencils and water and a brush and enjoyed applying color to these leaves. I used Jill Foster’s technique of first laying down clear water onto the leaf and then filling your brush with color and touching it to the “puddle” of water on the image. Magically, the color travels and creates the shading. I wiped my wet brush against the colored pencils to get the color. The light wash for the background was so relaxing. And since watercolor is supposed to look irregular, it’s a technique made just for me!
When my first two children were about five and six, I decided my life was not complicated enough (there was a 2 year old, too) and I would make Halloween costumes. I bought the patterns, the material and the notions and set to work. It was quite a discovery to learn that pattern makers treated Halloween costumes with the same respect as a wedding dress! All that detail and perfection for one night of Trick or Treating? Anyway, my five year old daughter was the prettiest witch ever and her older brother was a very unhappy mummy! Silly me, I had used a pattern that made a mummy “robe”(translated by a 5 year old boy to mean “dress”) instead of a mummy pair of pants! It was great with yards and yards of gauze bandages attached to the muslin base .. but it did not go trick or treating that year. Lesson learned!

Well, I began to run out of time for stamping and there were so many images and dies I hadn’t used yet! A Pop-It card seemed to be a good idea.
Entering the Pop-It card “zone” is necessary for success when making a Pop It card. It is a process similar to putting together a jig-saw puzzle, only this time you get to decide what the picture will look like when it is finished. Luckily, there are YouTube demos if you get confused.
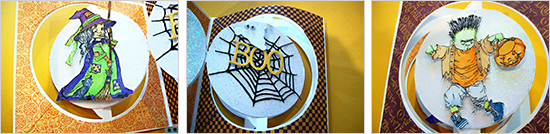

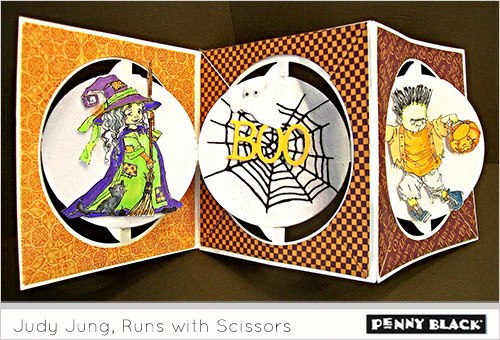
The first panel is the sweet witch who reminded me so much of my daughter in her once- in-a-lifetime witch costume. She is Glenda from the Glenda and Frankie transparent set. I do believe Glenda was the good witch! The middle panel features various dies from the new release. I loved that I had google eyes tiny enough so the little ghost can see all the Halloween fun. The third panel is Frankie. I am certain this is the image my six year old son had for his Halloween costume instead of that “dress” mummy outfit! It’s the kind of put together costume my boys would have come up with.
We had years of ghosts, pirates, gypsies, brides, cowboys and monsters: maybe a gangster or two. What fun it was to watch the kids’ excitement. Who cared that many years a winter jacket appeared to be the costume of the day?
What a fun day this has been playing with the Halloween stamps and dies! I love smiling while I create and I love thinking about the smiles that will happen when these cards are opened by the recipient. I hope you’ve found some inspiration here and a smile or two. It’s not too soon to start on your Halloween cards. The dies, especially, make success a sure thing. Once purchased, you will have them your entire stamping life to be used year after year on the cards you make.

Shop for today’s featured Penny Black supplies:
- Stamps: 40-333 Spooky Wishes, 30-249 Spooky Spheres, 30-250 Glenda & Frankie, 40-357 Autumn Dance
- Creative Dies: 51-076 Spider’s Internet, 51-073 Haunted Hollow, 51-075 Boo Crew, 51-077 Eeek!