
Butterick 5821 - Summer Version
My winter version of this dress was made in January 2013. I used a laminated ponte knit for the first one. This version is all linen with a little sumthin' sumthin'.

Supplies ~
Fabric ~
Black 'n white polka dot linen from Fabric Mart
White linen from Mood Fabrics
Notions ~
White bemberg rayon lining
Black bemberg rayon lining
22" invisible zipper
black/white striped piping
black rayon seam binding
The Fabric ~
I bought this fabric from Fabric Mart a couple of months ago. As with most of my Fabric Mart purchases, they disappear from the site as soon as I buy them. But this piece is a wonderful medium weight black linen with white polka dots that are embroidered onto the fabric. Seriously for a fabric ho like me, this fabric is heaven!

The Beginning ~
This is not the dress I was originally going to make with this fabric. Originally I was going to make my TNT dress and a jacket/topper from Vogue 8982. However, I only had 3 yards of fabric when I thought I had 5. As the GPS Unit says, recalculating, recalculating.
I really wanted to use the black 'n white polka dot fabric because it was up next in my creative rolodex. So after flipping through my TNT patterns, still getting my sewing mojo back so I didn't want the adventure of something new, I touched Butterick 5821. Let me remind you of what the line art of the pattern looks like although sadly the pattern is out of print.
I realized that there were some creative options to be had using this pattern again. I fiddled around and drew up this...

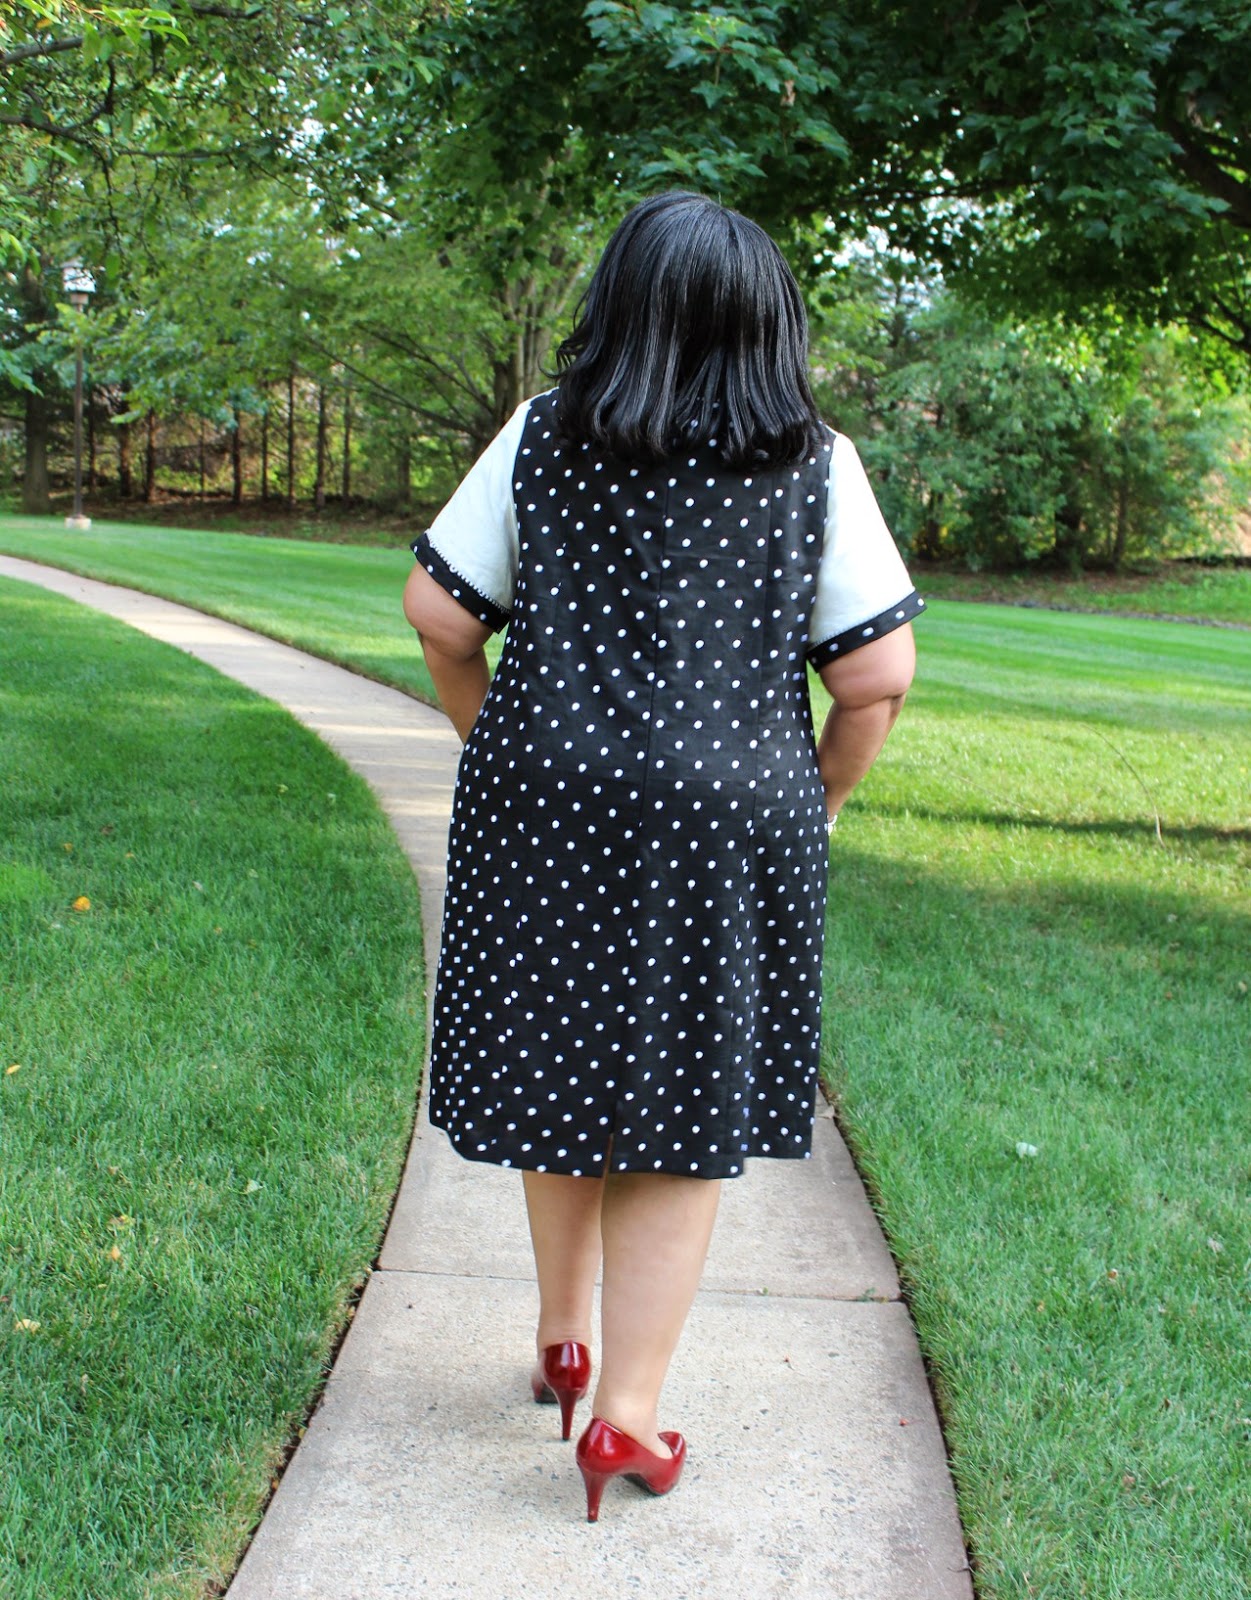
Then when I laid the fabric onto the cutting table, I was moved to go in a slightly different direction. Originally I was going to sew a seam down the dress bodice front and make one panel black linen and the other from white linen. As I started to handle the fabric, I realized that I didn't want that much color blocking. A simple white linen top would suffice with an interesting piping detail.
Construction ~
- Both the dress front bodice and skirt were cut on the fold where the pattern instructions tell you to sew a center front seam on the bodice.
- I switched the pattern's back pieces out and used my 4-piece back pattern pieces instead which fit me so much better.
- For this version I added sleeves from the white linen. I also added a band of the black 'n white polka dot fabric and the black 'n white striped piping.
- I've had this piping in the collection forever and had forgotten about it. It wasn't until a visit to the sewing cave by some sewing friends that it was uncovered...and even though some of this went home with a friend...I did keep a little for myself.
- I used both white and black lining for the dress. The white bodice has a white bemberg lining and the dress skirt front and the back is all in a black lining from the collection. It's not bemberg but a slippery lining that I had just enough for this dress.
- Since the polka dots were embroidered onto the fabric, the serger and the sewing machine had to work a little harder at times to sew through them or serge them in half.
- There were no challenges constructing this dress...unlike the first time where I omitted the sleeves because the fabric wouldn't ease. Since I was using linen it was a dream to sew. See how sewing the same pattern from different fabrics can affect the construction process?
- I'm going to do a follow up post on how I constructed the sleeves, in case you want to add this color blocked sleeve to one of your garments.
Some Construction Photos ~


Conclusion ~
This dress brought my sewing mojo running back home to me. So much so, that I have another dress and a skirt to show you. However, I must share something with you, I don't know how this dress is going to launder. I know I should be worried but I'm going with the flow and hoping that I don't spill anything on it during it's first outing.
Also, this dress cost about $40 to make. All of the items used in the dress were already residing in the sewing cave. I came up with the idea on a Saturday afternoon and spent that Saturday night and Sunday working on 90% of it. The rest was finished during the week but seriously I bought NOTHING to make this dress. It all lived in either the fabric collection or the notions stash. That's the power of a well curated stash! *LOL*
Finally, I know the last couple of posts have been longer than usual and all inclusive. It's because I really did just want to sew during my final days of vacay. So I made the "editorial" decision to give as much detail, as well as, posed pictures all in one post. This won't become a feature here because I like process posts. When I pull a pattern out to use again and reread those posts, it helps to see all the notes & info contained in the process posts.
Just one more thing...I took the sleeves out of the dress and put them in again. I didn't like the way they were hanging in the photos so they had to go. Again, this is the power of choosing a good photo...you can't see the problem in all the shots because those chosen don't show it. The other good thing about taking pictures of garments all gussied up, you can see things that you don't normally see.
I hope you're not tired of new garments because like I said earlier, I still have another dress and a skirt to share.
...as always more later!
More posts from Carolyn