
{DIY} Asymmetrical Golden Ring

I've really been into simple, asymmetrical rings lately, but when I couldn't find exactly what I had in mind during my last mall excursion, I thought I would try my hand at making one myself. And although it's not completely what I had envisioned, I'm one step closer to having the ring I've been lusting for — plus a backup ring I'm totally loving!
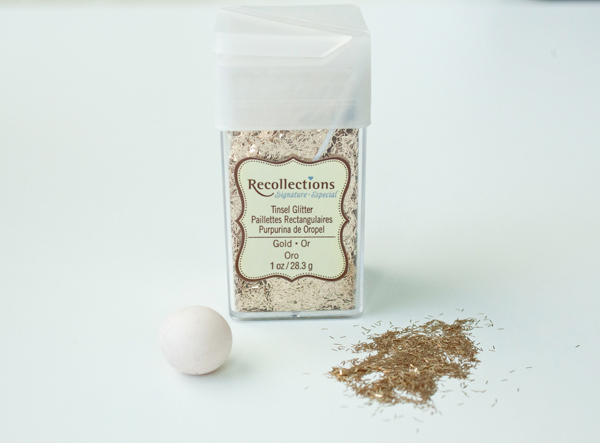
Wanna make an asymmetrical ring too? Here's what you'll need:
Wanna make an asymmetrical ring too? Here's what you'll need:


Start by coating the clay with your tinsel glitter. As you do this, gradually mold it into your desired shape. I went for an asymmetrical look, but you can create any shape you like. Once your shape is formed, go over it once more to make sure it's entirely covered with the glitter. Bake it in the oven as per package instructions— or about 30 minutes.

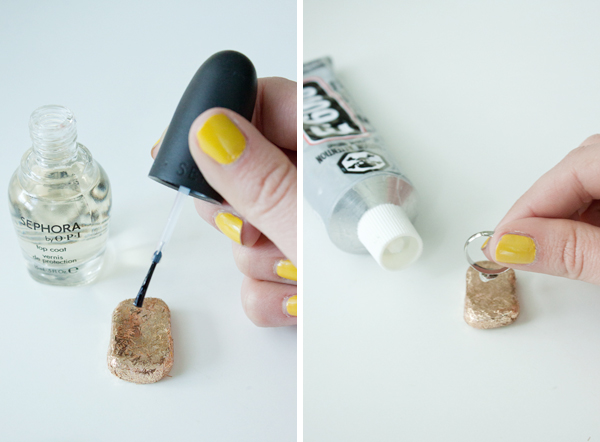
Once cooled and hardened, coat the clay with clear nail polish to seal the glitter. You can also use a glue like Mod Podge for this step — I just happened to have my nail polish handy at the time. When the varnish dries fully, apply a ring base to the back of the clay using a strong glue. Press firmly for 30 seconds to adhere and let it dry for a couple hours before use.

Et voila! A shiny new ring for little time, money and effort... Now I don't know about you, but that's my kind of DIY! xx
More posts from Vickie Laliotis