
Single Fold Binding Tutorial
Binding Tutorial Posts
Perfect Binding
Basics Post #1
Binding Flange
Basics Post #2 - Bias Binding
How to bind curves
Basics Post #3 - Scrappy Bias Binding
How to bind 120° angles
What do you want to know about binding?

Single Fold Binding Tutorial
Above you'll find all the links to previous binding posts.
This tutorial is all about the steps to bind a mini quilt, like one of my Mini Jaybird Quilts.
Single fold binding is great for Mini Quilts and small projects. *Please note it is less durable and not recommended for quilts that will be used and washed often. 1. Cut binding strips 1 1/4" wide.

2. Piece strips together at a 45° angle to create one continuous strip long enough to go around the entire quilt.


5. Leave a 5" - 7" tail of binding loose at the start, & sew binding onto quilt with a 1/4" seam allowance.

6. Stop 1/4" from the corner and backstitch. Take your time & be precise with this step. Mark the 1/4" on the binding if needed.


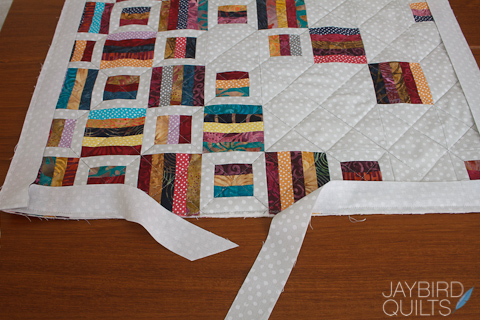
9. Continue sewing the binding in place with a 1/4" seam allowance stopping and repeating the steps above at each corner. Stop 9" to 10" from where you started to sew the binding on the quilt.

10. Trim the starting edge of the binding to a 45° angle as shown below if it is not already cut at a 45° angle.


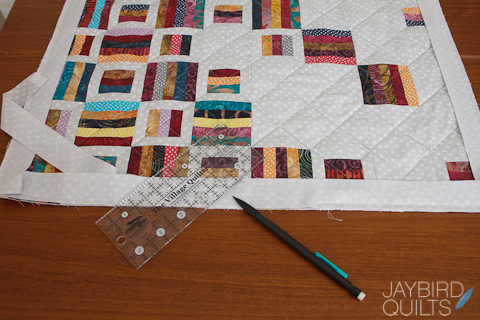
12. Lay the starting tail of the binding on top of the long end as shown and use a ruler to mark the location on the longer piece.


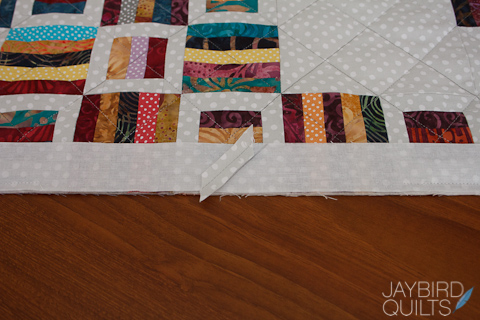
14. Draw a line 1/2" further past the first line. (This will account for the 1/4" seam allowance needed on each of the pieces.


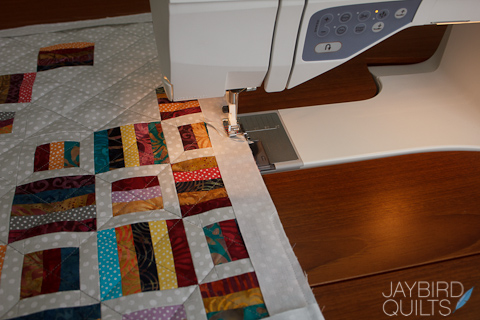
16. Place the ends right sides together as shown. It helps to fold the quilt so you don't have to pull on the ends as much.


18. Finish sewing the binding in place with a 1/4" seam. It should lay flat & you shouldn't be able to tell which seam was the last seam sewn together in the binding.

19. Use an iron on medium heat to press the binding away from the front of the quilt. (Don't press much in the corners.)


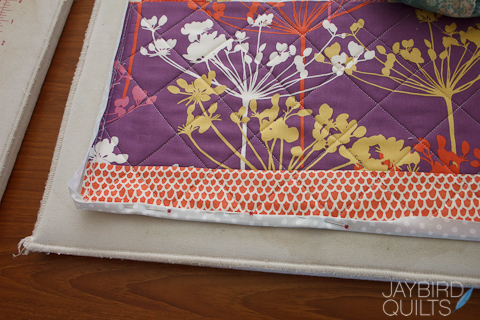
22. Turn the raw edge under and pin in place with glass head pins. Repeat around the entire quilt top. Miter each corner as you go.


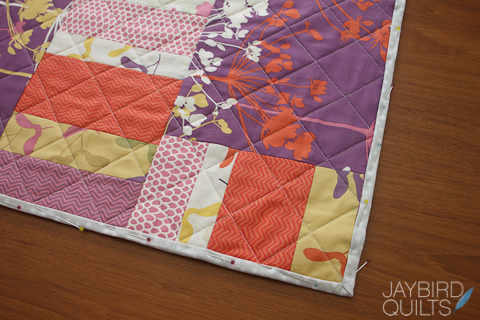
24. Once the binding is ironed in place, remove the glass head pins and replace them with wonder clips. Hand sew the binding in place to finish your project.


{250x250}
enjoy!!
--
© 2014 Julie R. Herman. All rights reserved. No part of this tutorial may be reproduced without written consent of Jaybird Quilts.

More posts from Julie Herman