
make it: glittering birthday crowns

It’s that time again – time for the Cricut Design Space™ Star Competition! My team is creating projects for a Roaring 20’s birthday party. And for this project, even if you don’t own a Cricut, you can download and print out your very own crown too. I want to make all of my readers happy!

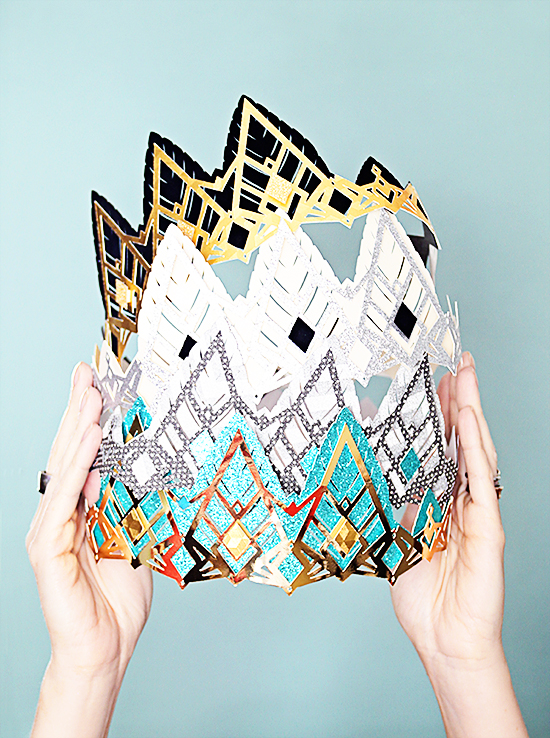
I became so obsessed with the design details of this Roaring 20’s Birthday Crown, that when I came up for air and took a hard look at it, I was a little worried it came out too serious for a playful design blog like Small for Big. I knew I loved it – and would gladly wear it at my own birthday parties, but what about the kiddos? When Birdie came home from school, saw my mid-photoshoot chaos, and gave a loud gasp with her jaw dropped, I knew things were fine. She then loaded all 4 crowns up on her arms and head and began parading around the living room. So I can practically guarantee little girls will like these crowns too – and dare I say little boys? Let them be Queens and Kings! And let them eat lots of cake!
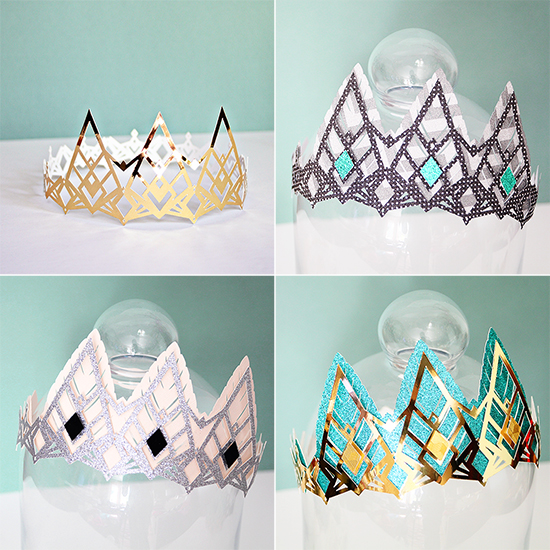
This crown can be made in several different ways. The fully-decked version features 2 layers and paper jewel accents (as pictured at the top), but you could also create a crown with just the 2 layers and no jewels, or just one layer for a more ethereal look. You can mix and match to suit your mood.
What you’ll need:
- 3 different Cardstocks – I used glitters, metallics, and even a flocked black paper.
- Adhesive Foam Dots.
- Double stick tape.


- Download the Roaring 20’s Birthday Crown svg file for your Cricut or other cutting machine.
- Within the software, do not ungroup the shapes, but resize the group so the largest piece measures 14″ across.
- When you click “Go”, the Cricut software will tell you the image is larger than the cutting area, that’s ok, just click continue.
- In the preview window, rotate your pieces so they are at a 45 degree angle on the cutting surface, then they’ll fit perfectly!
- Cut your pieces with the regular blade and standard grip cutting mat. (note, for glitter or metallic papers with a glossy backside, use the light grip cutting mat for less curling).
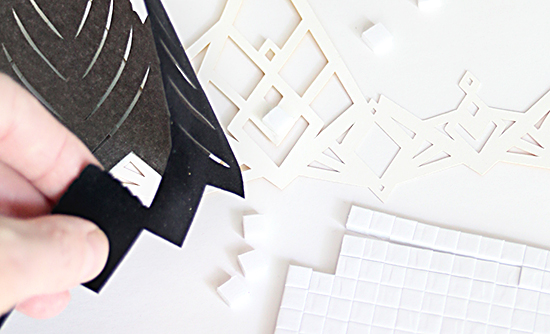
- Use adhesive foam dots to attach the two layers of the front of the crown (see the photo above).
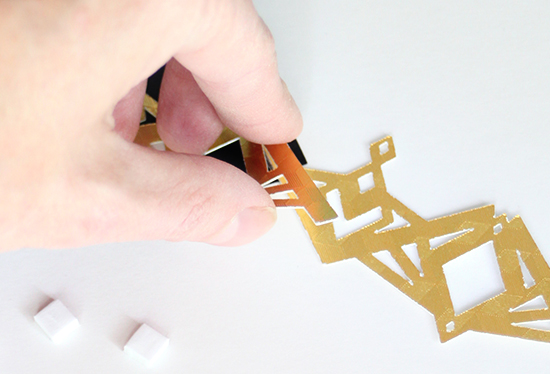
- Cut double stick tape to size and attach the outer back piece to the front (see the photo above).
- Then fit the inner back piece inside the crown and tape in place.
- Attach the 3 diamond jewels to the front using foam dots.
Free Printable Version:
Don’t feel like cutting it out on a cutting machine? Feel free to download this birthday crown printable and just cut out the edges with a scissors. You’ll need legal-size paper to print it out full size. I’ve included 2 back pieces instead of one, to ensure you have enough to overlap and adjust the crown to fit whatever size head you need.
Check out more Roaring 20’s projects from my teammates:
- Three Little Monkeys Studio: DIY Tuxedo Shirt
- Little Retreats: DIY Glass and Bottle Embellishments
- Aesthetic Nest: Roaring 20’s Birthday Invitation
- Gifting Sweet: Roaring 20’s Chalkboard Coasters

This post is in partnership with Cricut. I received product as part of the Cricut Design Space™ Star Competition. All opinions, as always, are my own.

The post make it: glittering birthday crowns appeared first on Small for Big.