
DIY Pouf Ottoman ~ Tutorial and Lessons Learned

Hey everyone! It’s Katie again from Addicted 2 DIY. Today, I have (1) a tutorial on how to make a fun DIY pouf ottoman and (2) a few lessons I learned while I was making mine that will help you out when making your own. I’m pretty certain it’s hard to miss the fact that pouf ottomans are everywhere right now. The problem is the price. These babies are expensive! I refuse to pay a high price for something that I can make myself. I bought some fabric and figured out how to make my own!

I’m no pro at sewing, so know that this is a tutorial for even a novice sewer! Sewing is not one of my chosen hobbies, but I do love the fact that I am able to save a ton of money when I make things myself.
Materials:
- 1 1/2 – 2 yards of fabric (I bought outdoor fabric on sale at JoAnn’s)
- Upholstery thread in a coordinating color
- 5 – 6 yards of Piping trim (optional). Tutorial to Make Your Own Piping
- 16″ zipper in coordinating color
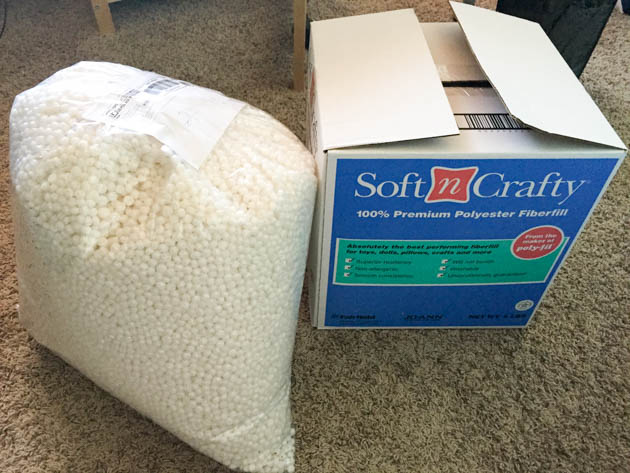
- 1 lb fiberfill
- 3-4 cubic feet of polystyrene beads (I purchased four cubic feet total)
Instructions:
Cut your fabric pieces. For the top and bottom of the pouf, cut two squares of fabric at 19×19″. For the sides, cut four pieces at 19×15″.

Sewing on the Zipper:
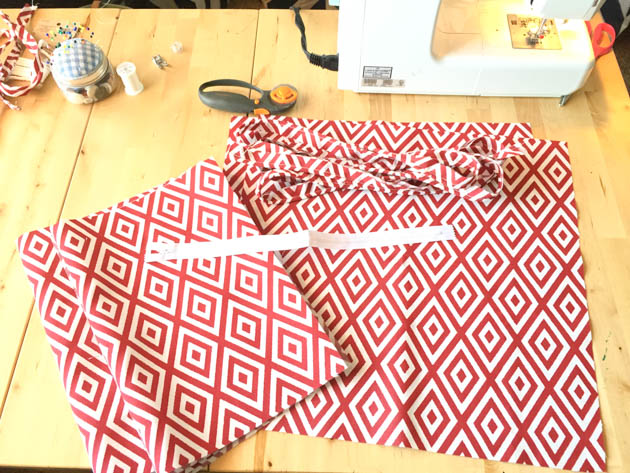
Sew two side pieces together (on the short sides) with a basting stitch. Press open the seam and place the zipper face down on the seam. Pin the zipper in place. (Note: You don’t have to use a zipper, and I didn’t on my first pouf, but it will make it difficult to sew together when it is stuffed because the polystyrene beads will try to fall out everywhere.)

Using a zipper foot, sew the zipper to each side. Because the zipper is longer than the fabric, sew across the zipper near the bottom of the fabric to create a stop.


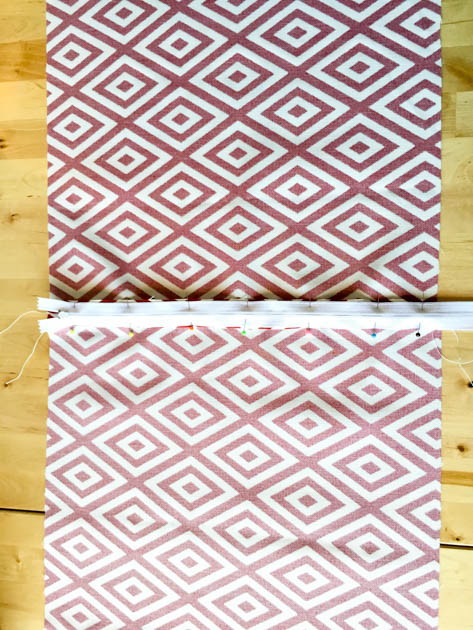
Sewing the Pouf:
Using a 1/2″ seam allowance, sew the remaining sides of the pouf together until they join to form a tube.

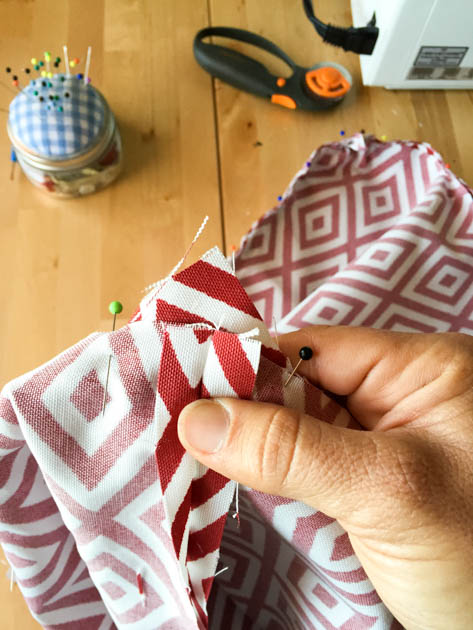
Pin the right sides of the top piece to the raw edges of the sides of the pouf. If using piping, be sure to pin the piping in between those seams at the same time. (Piping inside with the right sides, and raw edges out.)

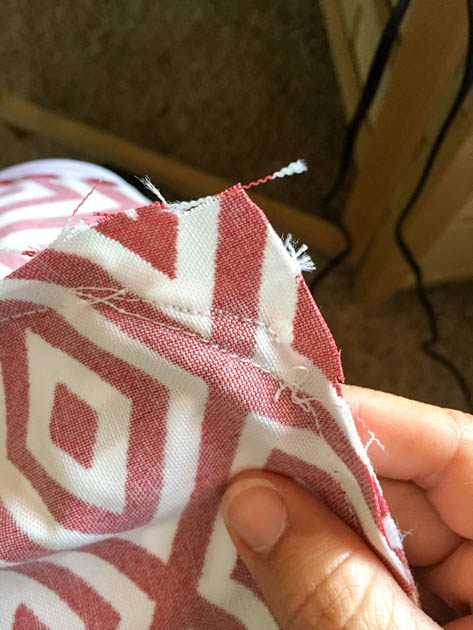
For the corners, match up the seam of the sides with the point on the corner. It is easiest to pin this on each side of the corner, then pin the center. The corners should look like this when you are pinning them. Sew it together using a 1/2″ seam allowance.


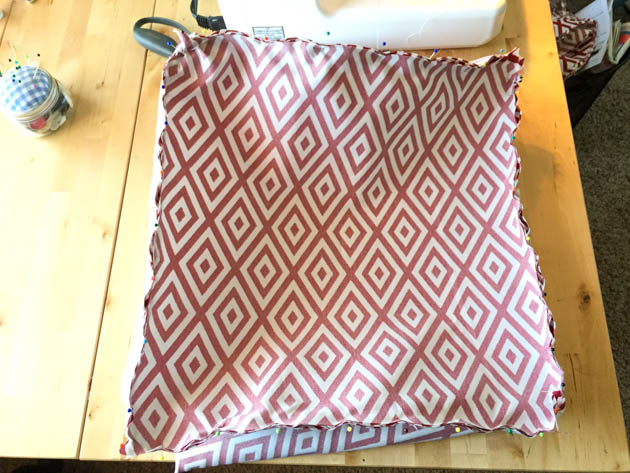
Once the pouf is sewn together, check your seams on what will be the outside of the pouf. In the corners, sometimes the piping likes to wander a bit and will not be tight against the seam. It is easy to fix by just sewing another seam against the piping. It also acts as a reinforcement for the corners. Trim the corners with scissors.

For the filling, you can use polystyrene beads by themselves, or a combination of fiber fill and beads. The beads take some patience as they want to spill out everywhere, but they give you a nice, light, and dense pouf that is sturdy enough to put your feet on or to sit on.

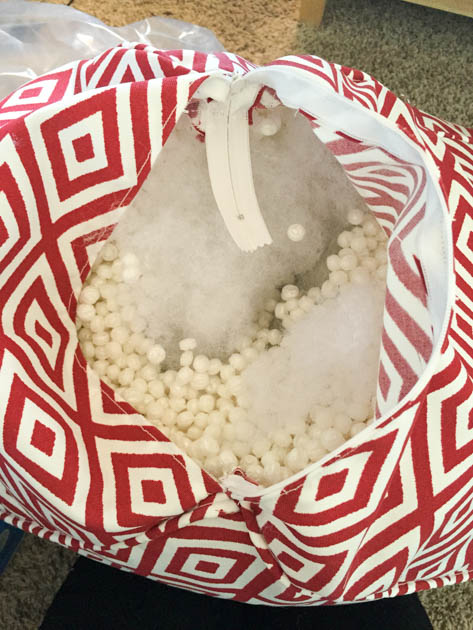
When filling the pouf, try to fill it as full as possible with the beads and fiber fill (if using). Carefully zip the zipper closed and fluff the pouf into shape. I used a combination of beads and fiberfill. (I was looking for dense but a bit fluffy at the same time. I would have preferred it to be a bit more dense, so my next pouf will definitely have less fiber fill, if any.)

I made two poufs using this method. The first pouf I made (on the left) was filled using the “recycling” method of grabbing old clothes and towels to stuff it, along with fiberfill. It ended up being super heavy, and not dense enough at all. Plus it just wouldn’t hold its shape. I’ll be ordering another bag of polystyrene beads (2 cubic feet) and re-stuffing it with those instead.

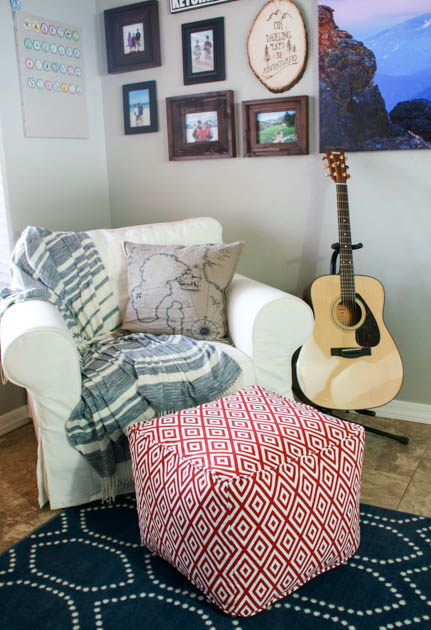
The finished pouf looks great in my newly made over den! Now I’ve got a place to prop my feet up when I’m sitting in my cozy chair, or my boys have a spot to sit when they want to read a book or play on the iPad.

I spent around $35 to make this pouf. A huge savings compared to purchasing one, plus I got to make it with the fabric of my choosing.
