Distressed Denim DIY

Boyfriend jeans have been a wardrobe staple over the last couple years. Lately on my shopping adventures I’ve been noticing distressed denim popping up and though I like the look, I’m not loving the price tags. Coincidently I had a pair of boyfriend jeans from Joe Fresh that had been forgotten about in my closet. During my New Years clean, we became reacquainted and I decided to distress them myself.
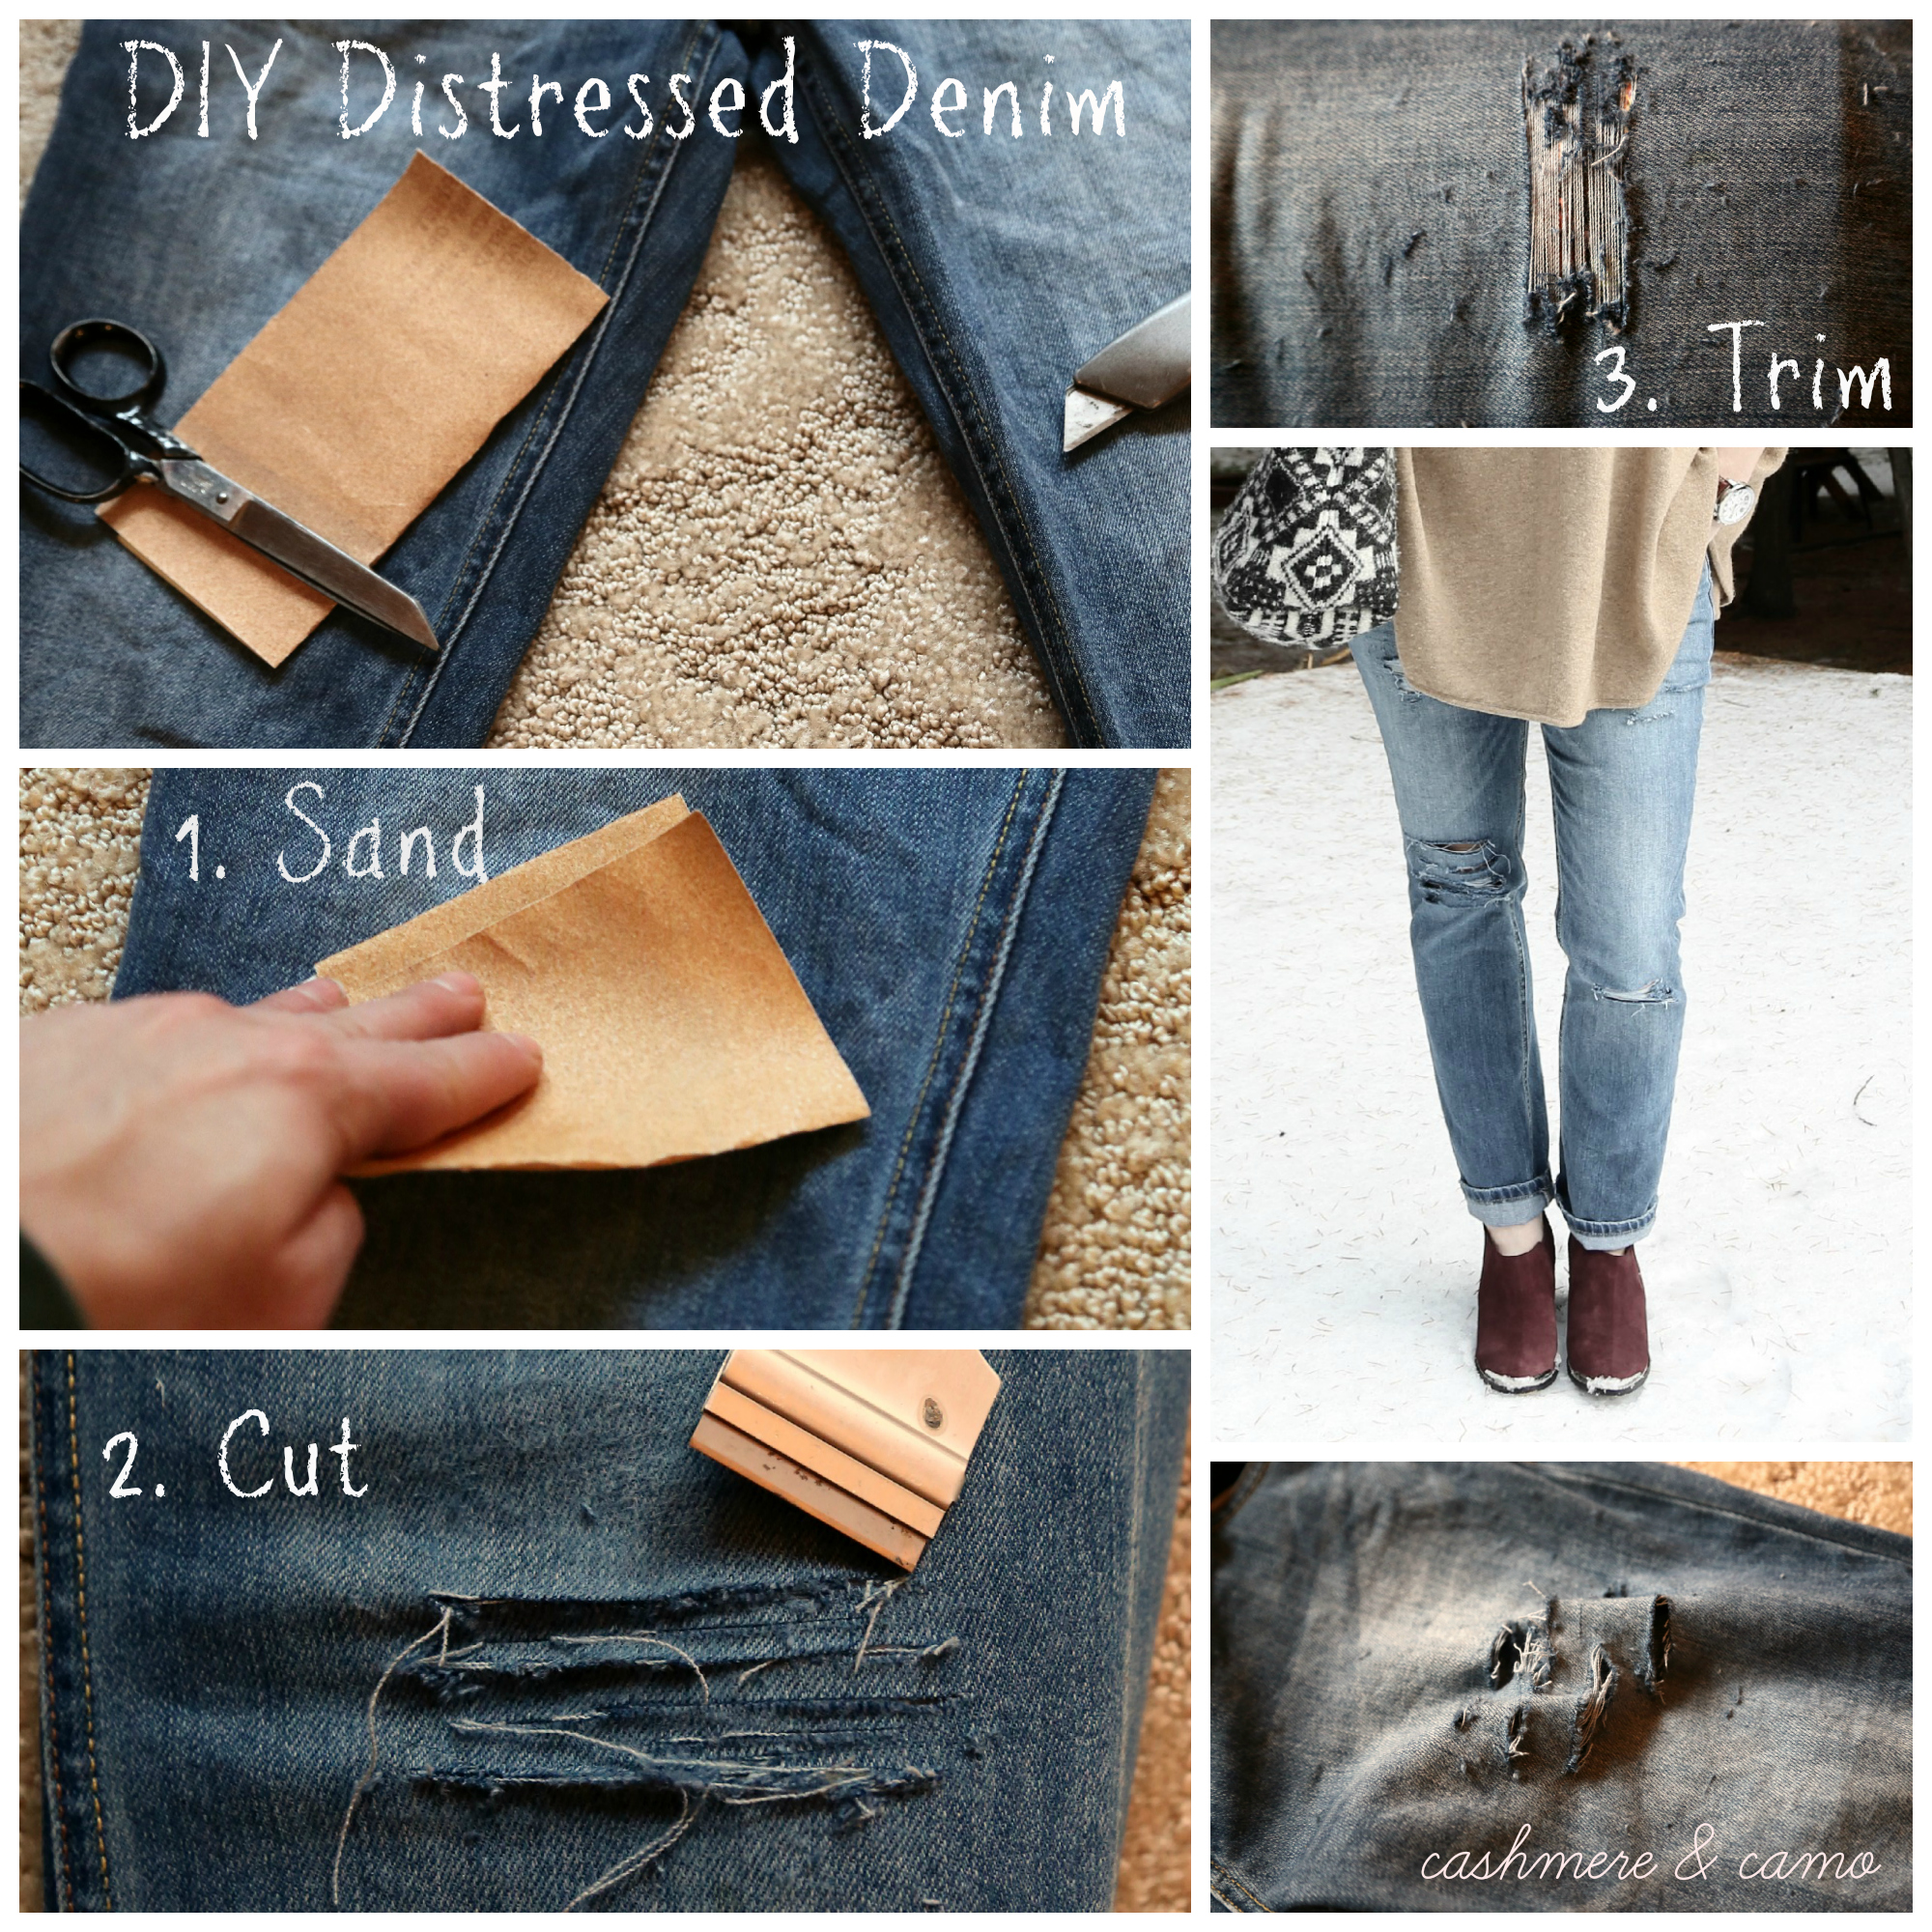
Distressing denim is truly as easy as 1,2,3. All you need is some coarse grain sand paper, box cutters and scissors. To make them look as natural as possible, make sure you still to distressing around areas that wear the most naturally, such as the knees, around the pockets and hem edge.
1.Sand areas of the denim that you want to lighten or cause subtle abrasion.
2. Put cardstock or light cardboard in your jeans to protect the back side of the area you are cutting. Choose where you want a hole, or distressed area and mark with a pen. Cut horizontal strips about 1/4″ apart.
3. Use the sandpaper to go over these areas and strip the additional denim off to reveal the white threading underneath. Trim the ends with scissors.
To finish off the distressing, wash your jeans before wear, remember washing them can exaggerate the distressing you have done.
The post Distressed Denim DIY appeared first on Cashmere & Camo.