And The Eyes Have It: Graphic Elbow Patch Project
Being a fan of pretty much all prints and designs, I couldn't be more psyched that "eyes" are having a major fashion moment this fall! So before it becomes chilly enough that my thermal shirt becomes second skin, I decided to take a moment to give it a little upgrade. This also has some holiday appeal, seeing as we are inching ever closer to Halloween, but I'm pretty sure this is going to be an any-old-day kind of shirt for me:)


Step 1: First thing to do is make 3 patterns:
-1 small circle (the pupil)
-1 larger circle (the iris)
-1 tear drop shape with points at both ends (for the whites)
-1 small circle (the pupil)
-1 larger circle (the iris)
-1 tear drop shape with points at both ends (for the whites)


Step 5: Whip stitch together by bring the needle up the outer edge of the smaller circle and over onto the larger one.


Step 6: Now repeat steps 4 and 5 to connect the circles to the largest piece of felt. This time you will be whip stitching over the edge of the larger circle.

Steps 7: Repeat steps 4 through 6 on the remaining pieces of felt. When you're finished, you will have two finished eyes!

Step 8: Find proper placement on one of the sleeves. (You'll probably want to out the shirt on for this part to make sure you correctly found where the elbow sits.)

Time to stitch down! Start by sticking your hand into the sleeve. You'll want to do this to separate the front of the sleeve from the back of the sleeve, otherwise you may accidentally stitch them together.
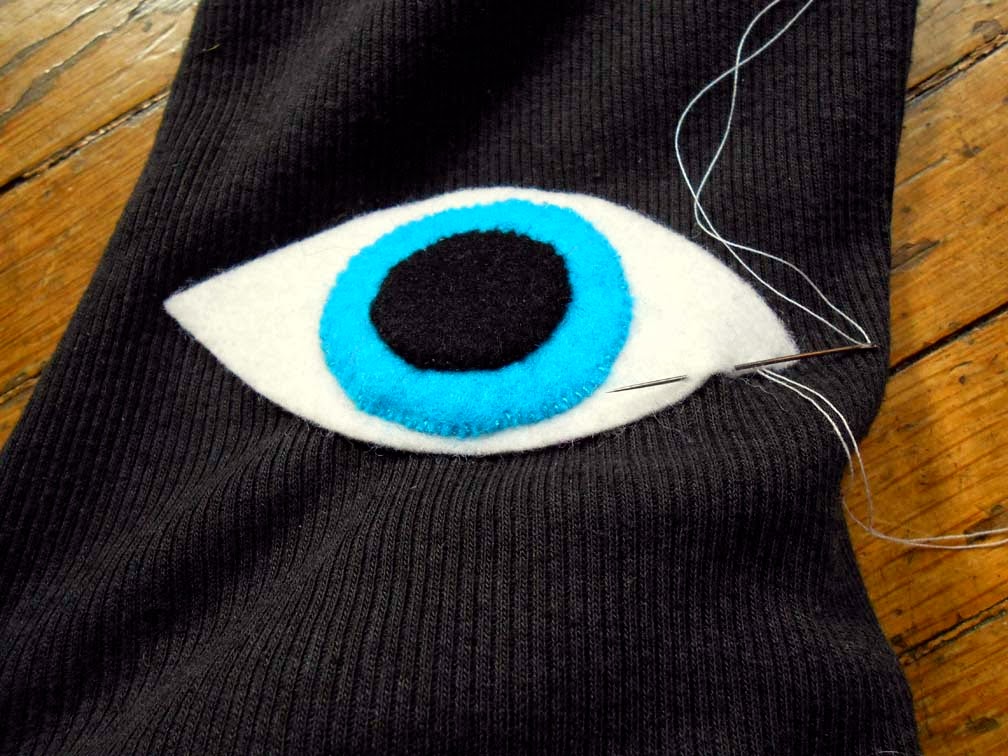
Step 7: Starting in the corner, push up from the bottom of the white felt with your needle and begin a simple running stitch around the perimeter of the eye.

Step 8: Every time you go back down with the needle be sure to go down just deep enough to go through the felt, as well as catching a bit of the shirt fabric. Immediately come right back up through the felt about a 1/4" away. When you gotten back to your starting point, tie off on the underside of the white felt.


... and use the placement of the first stitched eye as a guide for symmetrically placing the second. Repeat steps 7 and 8 to finish!


TOOLS
-scissors -needle and thread -pins
More posts from