
Thrifty Thursday
I must be in a handbag kinda mood lately. Actually, I need a bag to go with the dress that I'm making for an upcoming summer party. Remember the Susan Khaljie pattern and video for the cocktail dress? More about that next week. Actually, you'll probably get more than your fill of that next week as I must finish the dress by the end of next week!!! Nothing like waiting until the last minute.
So back today's post. I came across a cute pattern from Sew Vera Venus that I loved. Vintage styling, but, I think anyway, super cute!

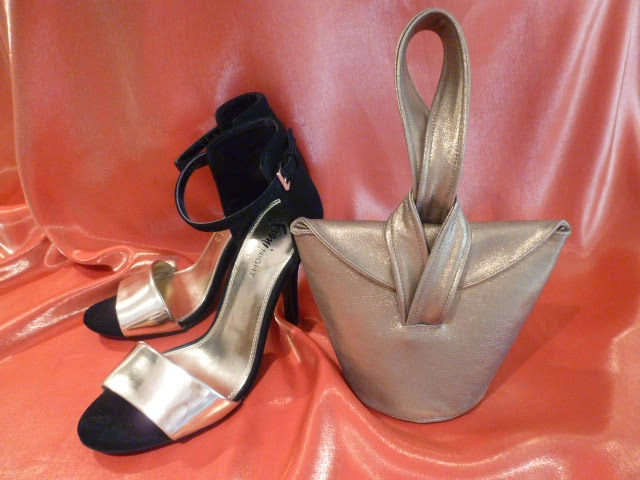
Here's my version. I made mine out of a piece of gold leather. I've included the shoes in the picture so you can get a feeling of the size of the bag. I wear a size 7 shoe, so my shoes are not too large. In the original pattern, there is a loop that holds the front loop that goes around the back loop handle. I"ll explain what I did later in the post.


Because of the stiffness and thickness of this product, you do not want to have seam allowances as it would be far too bulky. Since I do not have seam allowances on my interfacing, I butted the 2 pieces together and zigzagged them together.

The circular piece for the bottom of the bag was not attached to the sides, rather just laid in the bottom. Note too that I did not include the interfacing for the flap of the bag as I felt it would add too much bulk with the leather.

To give the bottom of the bag a little more stability, I cut a piece of chip board(heavy cardboard)and placed it in the bottom on top of the interfacing piece.

Rather than stitch my handles to the outside of the bag, I cut a slit in the leather for them to go through. The pattern is marked for placement of the handles.

I transferred the marking of the slit to the interfacing and stitched my handles to the interfacing and them fed them through the slit opening. Because they have been anchored to the interfacing, they will stay in place. And remember, leather does not fray!


I know that a number of you are thinking, "but, I have no occasion for a bag like this." The bag is perfect for anyone going to prom as the bag will hang on her arm throughout the night with no worry of losing it or it being stolen. So it's perfect for any dance occasion. Nice for a lovely dinner out too! I have not tried this, but I think it will work. For a larger version of the bag, cut the pattern out and then take it to your local copy shop that has large scale printing. Have them scale it to a size that you would like for everyday use. On my next trip to the copy shop, I am going to give it a try. I'll be sure to let you know how it works out. You can find the pattern here, http://veravenus.com/diy-things-to-make-tutorials-patterns/. Just scroll down until you find the pattern entitled, Dinky Little Handbag. Sew Vera Venus has a number of other free patterns , a few I must try, and she also has a brand new Flickr page that you can find here, https://www.flickr.com/groups/sewveravenus/ You'll see my Dinky Little Bag posted there shortly!
More posts from Rhonda Buss