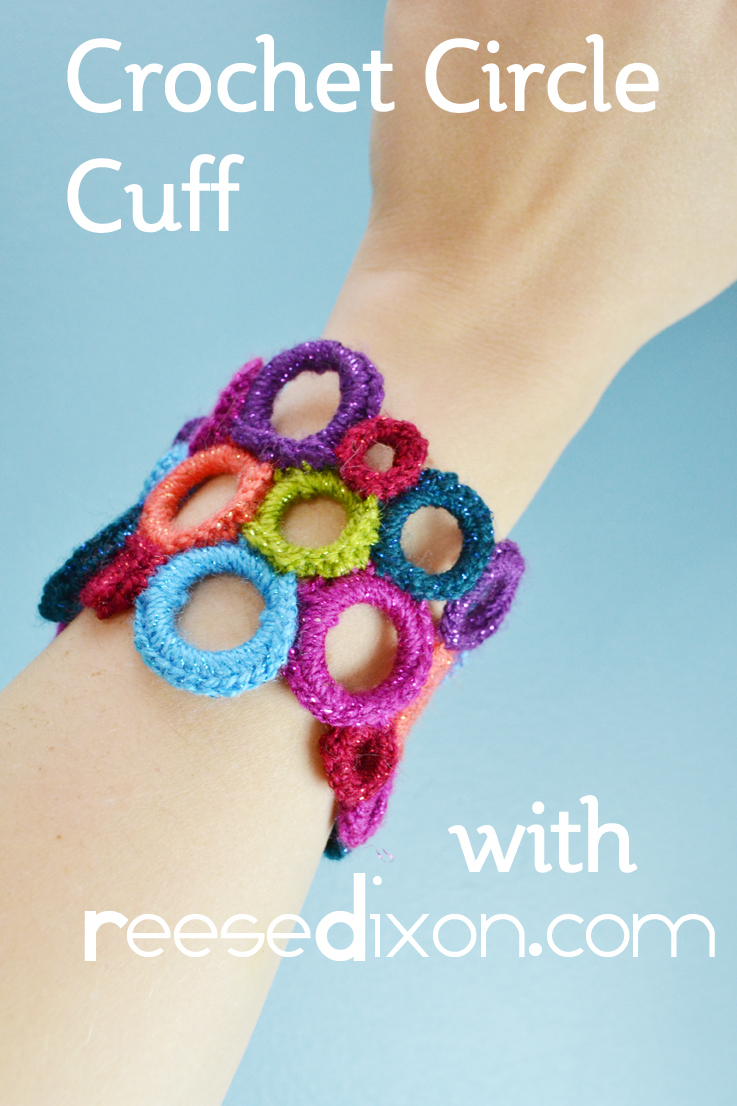
Crochet Circle Cuff

Crochet Circle Cuff
The idea for this bracelet has been cooking away in my brain for nearly two years, always getting bumped down the priority list for other things that seemed more important than decorating my arm. But a new friend I made at CHA made me put myself first for a change. I met Michelle from Simplicity at a blogger party where I was wearing my crocheted necklace, and she instantly recognized those little circles (apparently they’re actually called cabones) as coming from her company. I met up with her at the tradeshow the next day and we were hugging like long time friends and she gave me all kinds of great stuff under the condition that I make something great with them. So here I am, keeping my promise, getting this project out of my head after all this time, and giving myself a new bracelet for Valentine’s Day.

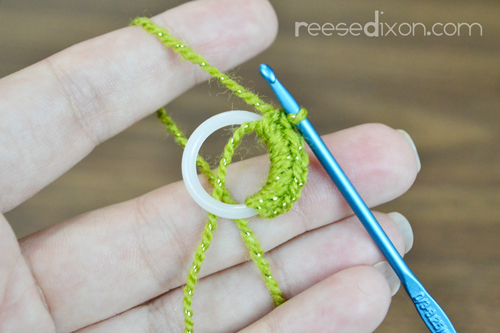
If you can single crochet you basically know all you need to know to make this bracelet. Watch the video below for a full demonstration in action, but I promise, even if you’ve never held a crochet hook you can make this bracelet. I’ve already gotten a jump start here, but the process is the same. Begin with a slip knot on your hook.

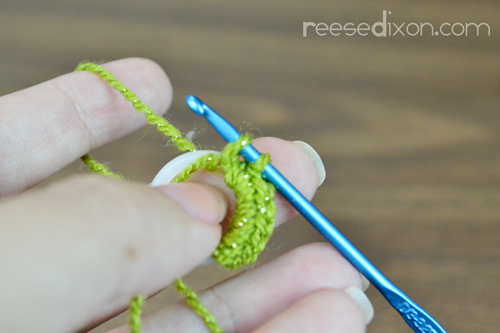
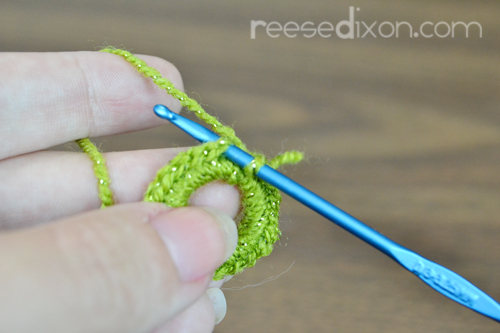
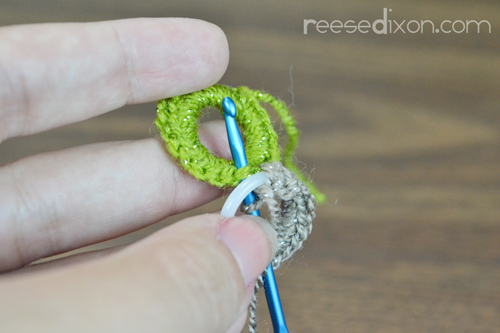
Push the hook down through the circle. Grab the yarn and bring it back up through the loop to where you started so you have two loops on your hook. Grab the yarn again and pull it through both loops so that you’re back down to one loop left on the hook. You’ve just made a single crochet stitch. Now do that over and over again until you’ve covered the whole cabone with neat little stitches.

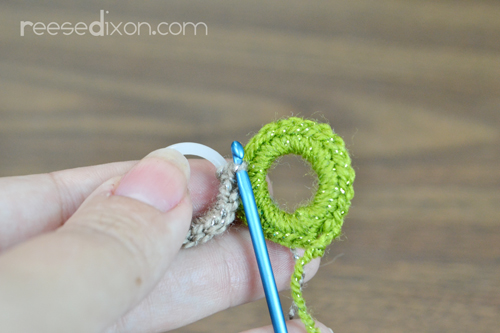
When you meet back up with where you started you’ll need to join your circle together. If you have a favorite way of doing then, go for it. I just made another single crochet stitch by pushing my hook through one of my first stitches, grabbing the yarn, and then pulling through the loops as usual. Snip your thread and pull it tight, leaving about a two inch tail.

For your second ring and every ring after, you’ll start it just the same way. You always want to get your crocheting started before you reach a point where you’d have to join it to another ring, even if that’s only a few stitches.

Hold the rings how you want them to be arranged on the bracelet. Once you reach a point where they’ll join up, begin just as you would a single crochet stitch. Push your hook down through the center of the ring, but when you come back up the other side, come up through one of the stitches on the other ring. Then grab the thread and pull it back up to the front and finish your single crochet as normal.

Repeat this everywhere your rings touch, but to keep it good and stable I’d recommend at least three stitches to join each ring. When you’re all done weave in all your ends and snip off whatever threads remain.

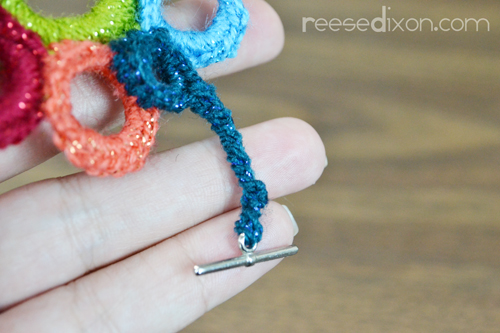
Once you have your whole bracelet put together the way you want it, you’ll need a way to keep it on your wrist. Luckily those cabones make perfect toggle closures all on their own, you just have to add the toggle part of it. On my last ring I joined the circle together as usual and then instead of snipping the thread I chained a few stitches. Then I threaded the yarn through the toggle and tied a great big knot.

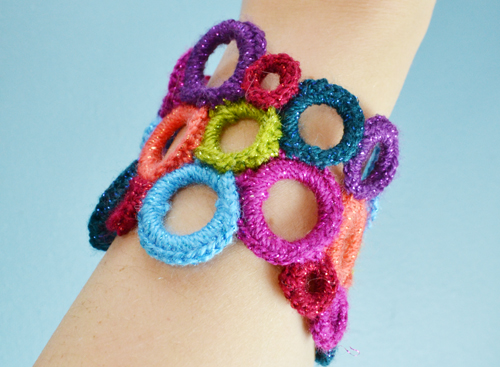
What I love about this bracelet is how the open circles in a variety of sizes makes such a mod pattern, but the crochet on top makes it so homespun, and the two together just make magic to me.
Originally published at Reese Dixon Crochet Circle Cuff Reese Dixon - Motherhood and other creative adventures