
Shoemaking: How I customised my shoe lasts

I mentioned in my first post on shoemaking that I bought myself a pair of shoe lasts in my size (39) to start my adventures in making shoes. I've been thinking about the process all week and one thought that kept popping up was fit. I've reached a point with my sewing where I can't overlook fit issues. If it's obvious to me that something isn't going to sit right and it's within my skill level to change the pattern prior to starting I will always do that. So as I looked through all my materials for shoemaking I began worrying about how my first pair of shoes were going to fit. Here I was with the perfect kit of materials knowing that the end product would be a pair of handmade shoes, in leather no less. So to crack open a comprehensive kit and a leather hide without considering how the end product would be shaped just didn't seem right.
Interesting fact - I have flat feet. I'm double jointed/hypermobile which means I never developed arches in my feet, which in turn means my feet are quite wide. I've noticed that the fabric on the sides of my shoes right beside the sole tend to wear out first because once I've worn shoes a couple of times I stretch them out and the side of the shoe is no longer the side but part of the sole. Knowing this I decided to adjust my shoe lasts to accommodate this extra width before I even touch the kit.
I tried to research customising shoe lasts on the internet before starting this. While I've been busy compiling links and videos and blog posts that talk about shoemaking (more on that later) I haven't actually stumbled across anything that covers customising shoe lasts. So a warning to any of you who might be thinking about making shoes. The below is my process that I made up. I'm not actually sure that it's going to work properly yet but I'm sharing it because it's the only way I can think to customise shoe lasts and I'll explain why I think it's going to work a little later on.
Customising my foot lasts
Tracing and comparing
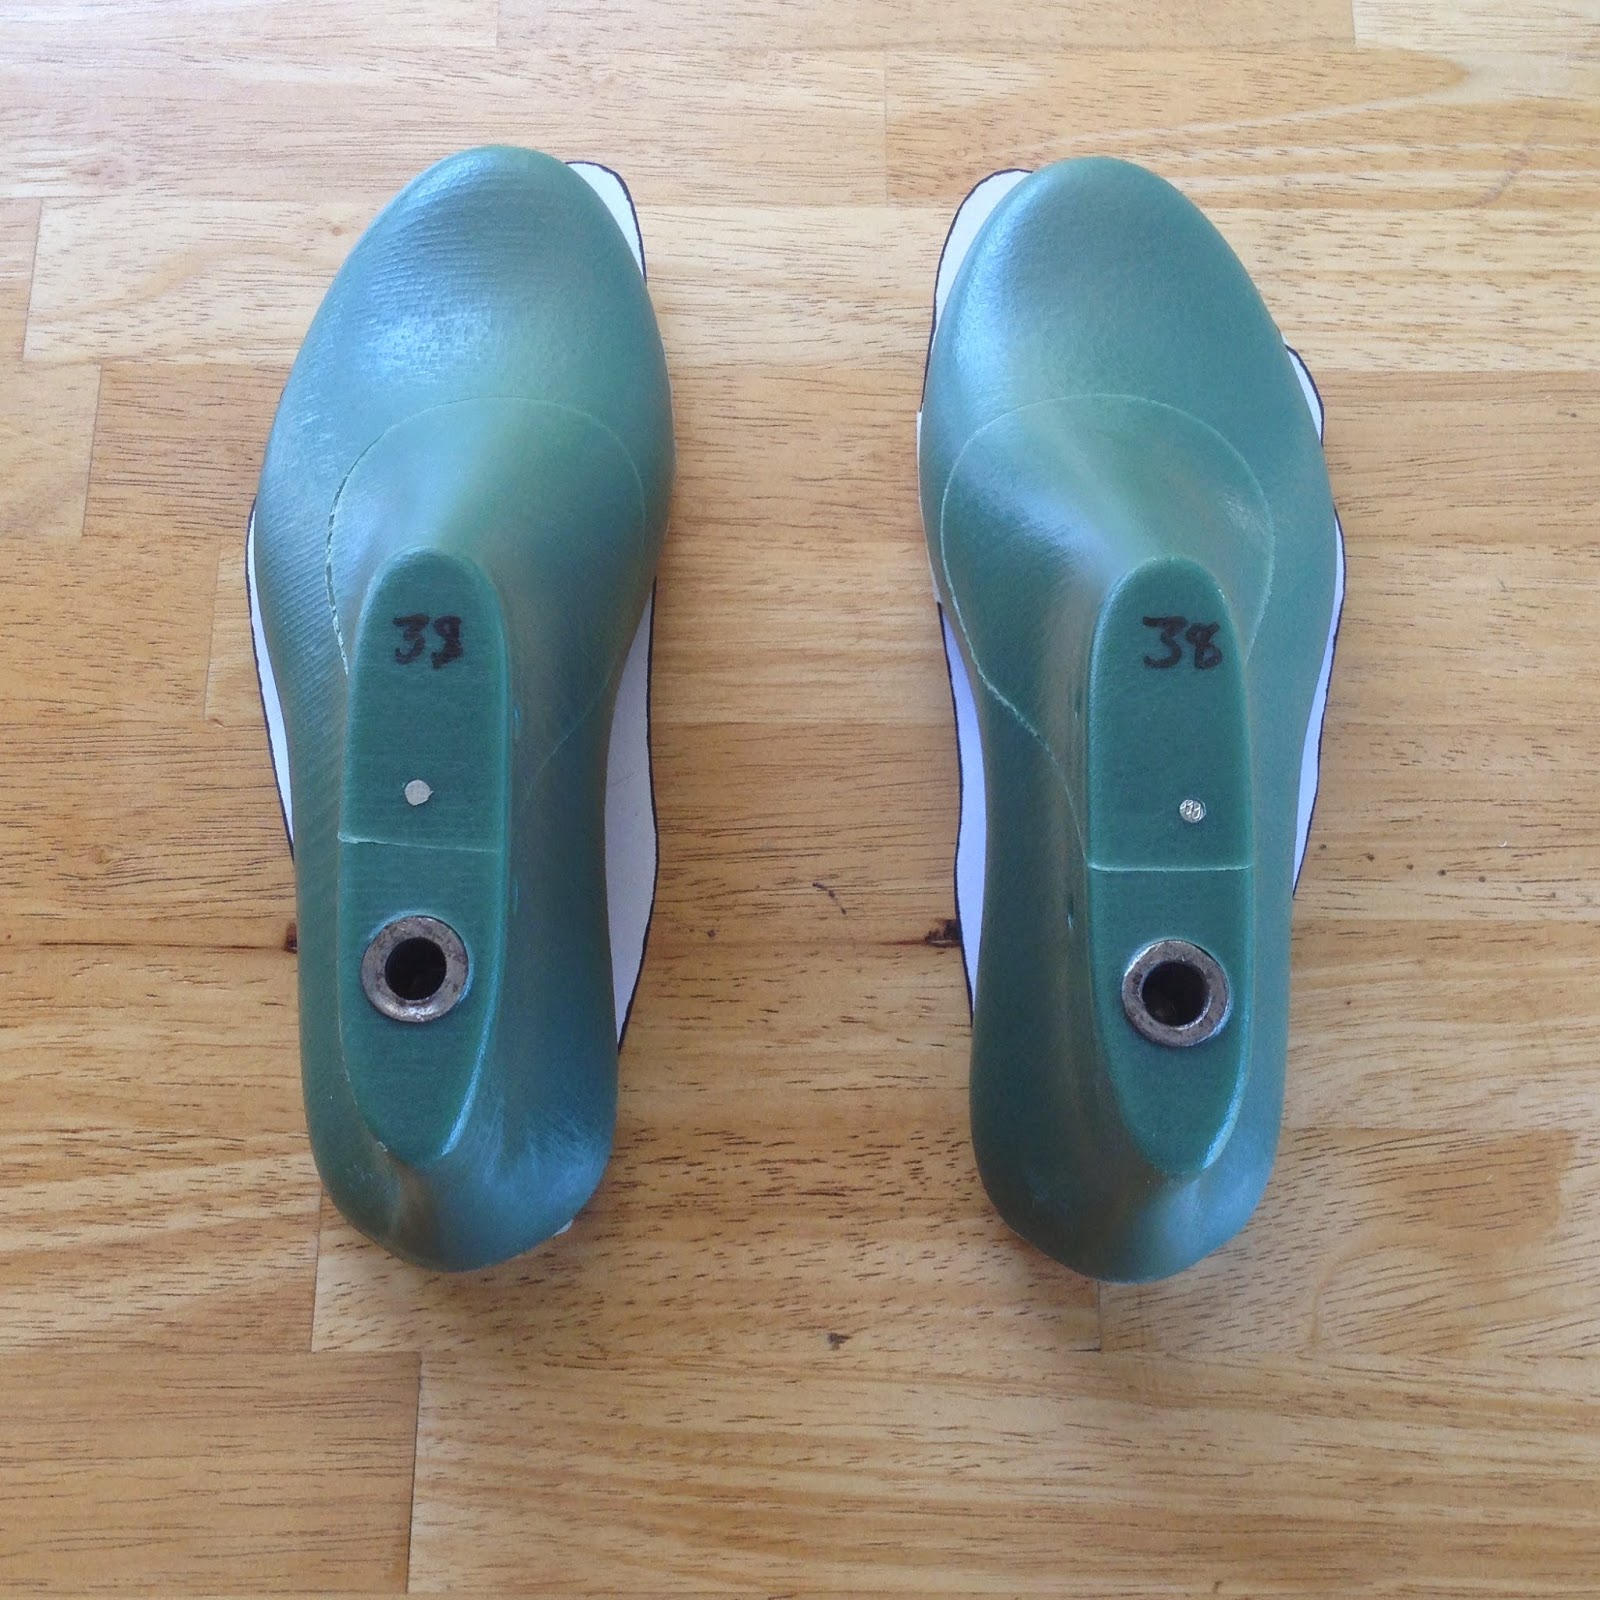
I started by tracing around the edges of each of my foot lasts and drawing over the line with a Sharpie. I then traced around both my feet and drew over the line with a Sharpie. The above photo shows you why a regular shoe just doesn't work for my foot shape. There are multiple spots where my foot is off or even way off the tracing of the last. These are the areas where my foot generally has fabric beneath it rather than proper soling on all of my ballet flats. Below you can see my foot tracing taped to the bottom of the last so I could visualise where I was going to need extra width.

Building up the last with clay
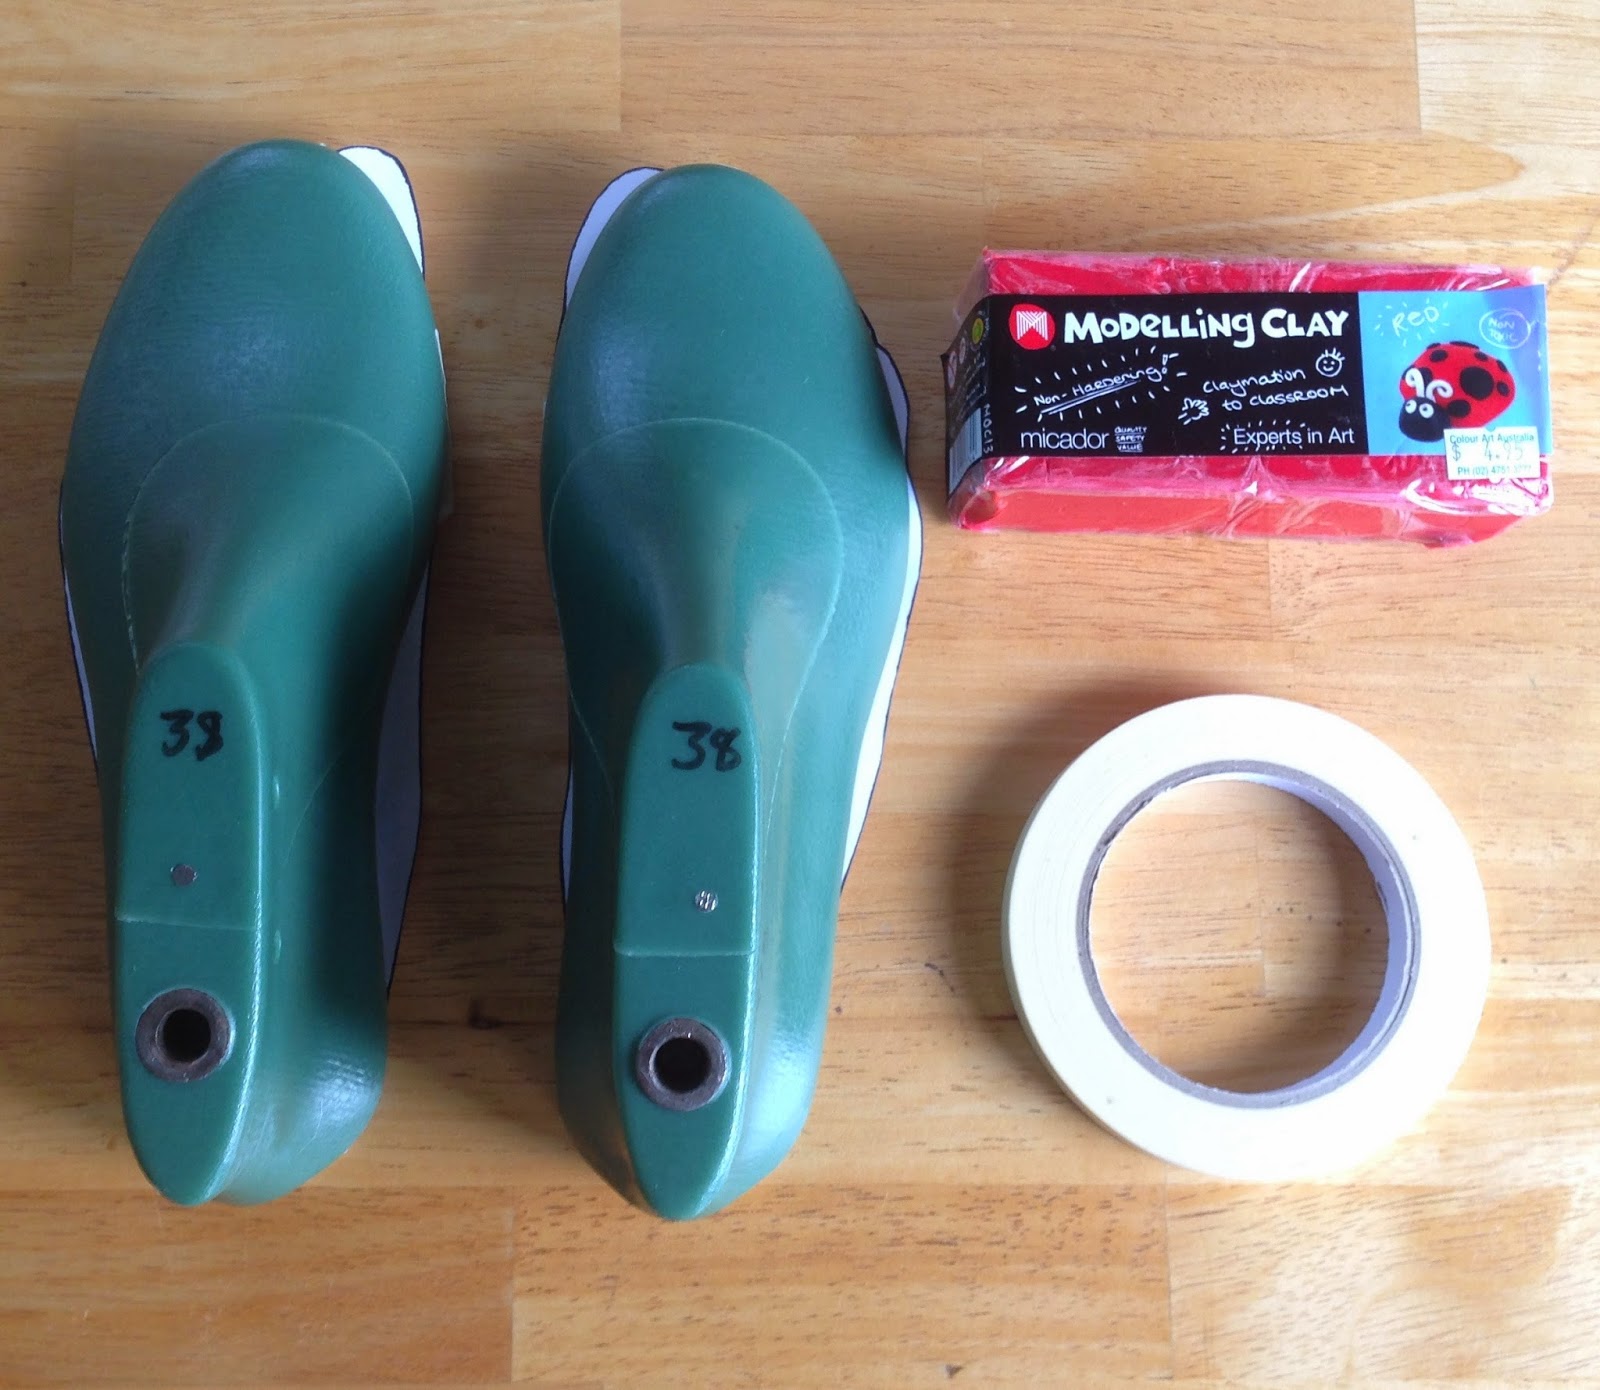
I knew to customise my lasts I would need to add something to these areas where I can see the tracing extending beyond the foot last. I came across one picture online where a foot last had some cork added to it but since this was a material I hadn't worked with and couldn't easily find in my local art store I took a chance on regular modelling clay. It was $4.95 for this pack you see below and I only used a quarter of it so you won't need much.

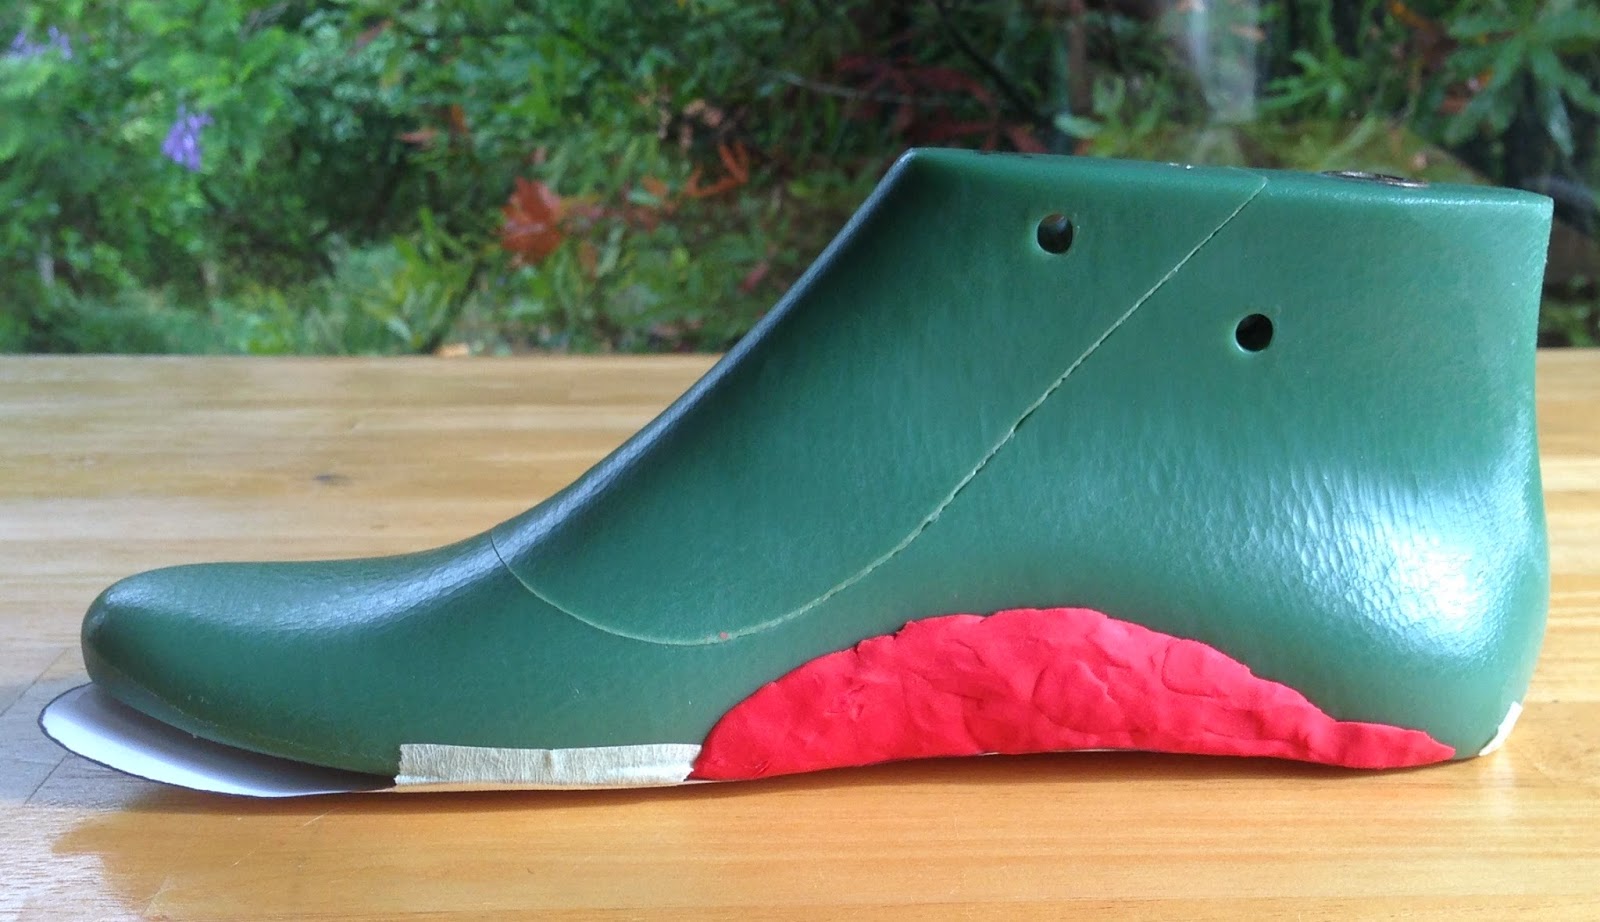
I carefully added modelling clay to fill in all the spots where the tracing extended past the last. I had to hold my hand underneath the paper to give it a smooth, firm base to mould the clay against otherwise the sole would have been lumpy and irregular. I smoothed out the clay and tapered it out to nothing just a little way up the last to mimic the shape of my own feet. I deliberately chose not to do anything with the toe shape. Firstly because I like the rounded shape of the last and that's what shaped toe I'll end up with. Also my toes currently fit into size 39's just fine. Accommodating for the extra width of my feet was a much bigger concern than my toes fitting in - because they already do?

Below you can see how much clay I added and how high I brought it up on the last to mimic my foot shape.


Taping the clay down
Once I was happy with the shape of the clay I tore strips of masking tape and taped it all firmly in place. Again I had to have my hand underneath the last keeping a smooth, firm base so the clay wouldn't warp and move around as I was taping. Below you can see what my lasts look like now.

Remeasuring my lasts against my feet
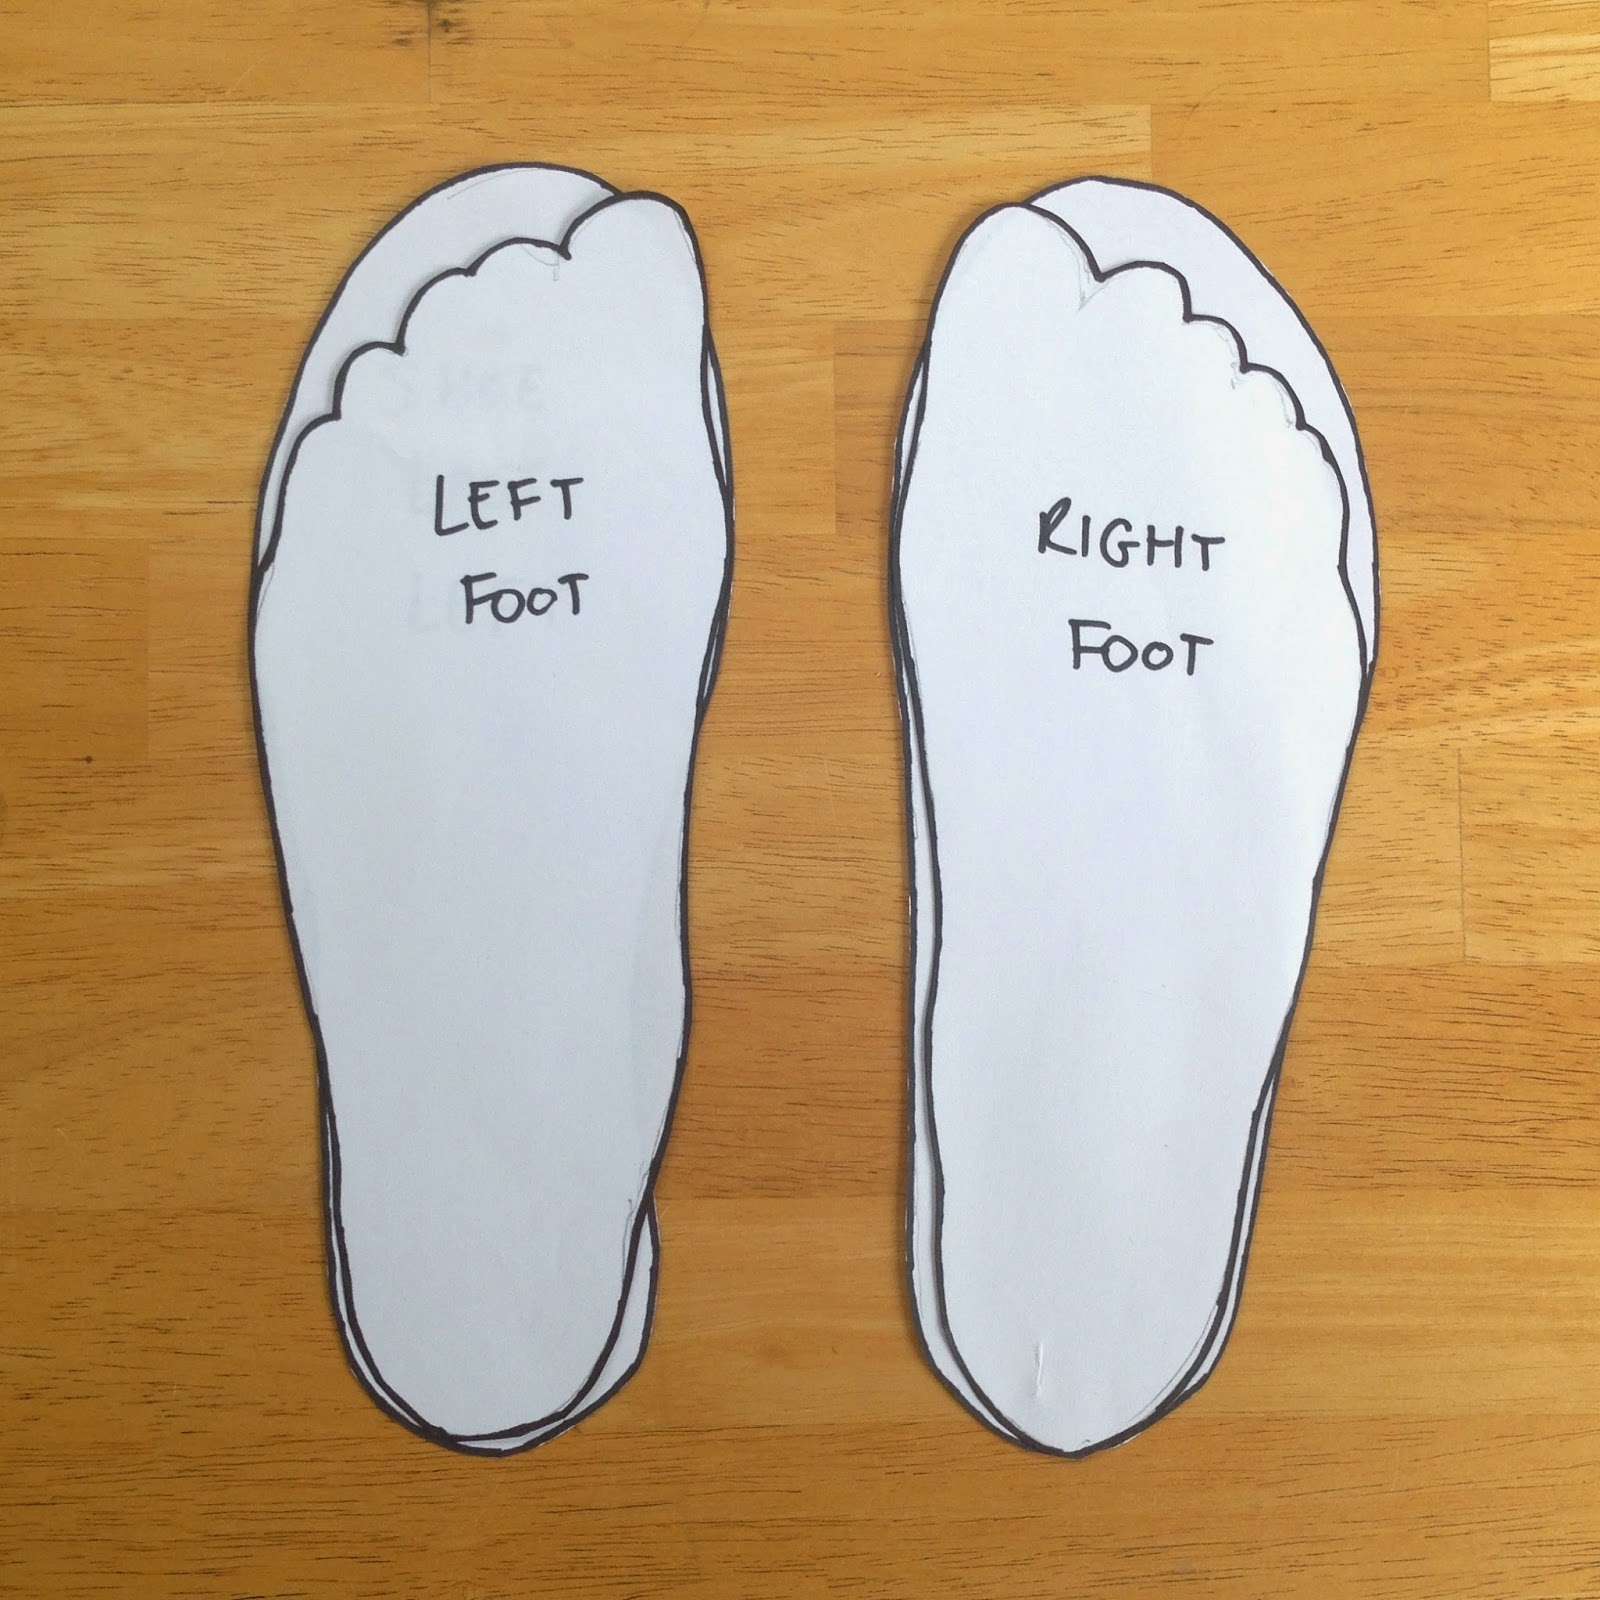
Once I'd finished this I traced the outline of my customised lasts and drew over that with a Sharpie. Below you can see the difference between my left foot, the original left foot last and the new left foot last after customisation. On the right you can see my foot tracing sitting over the top of the customised right shoe last. The difference between this picture below and the picture I started the post with is quite subtle. Below you can see there are points where the edge of my foot meets the edge of the shoe last but there's never a point where the foot tracing extends beyond it. This is exactly what I intended so that I could make my whole shoe wider.

Below you can really see the difference between the left foot tracing sitting over the original left shoe last whereas the right foot tracing is sitting over the customised right foot last. Hopefully this should make for a better fitted shoe.

What does this change?
Unfortunately it changes everything. Now that I have a new sole shape I also have to have a new inner sole shape and I have to redraft the entire pattern for the leather. I debated whether to do all this work at the beginning when I hadn't even made a shoe yet but I feel like it's worth getting right. If you're planning to make shoes for yourself you might not need to do this step at all, particularly if your foot is close to the shape of the last.
My next step is to create a pattern based on the new, customised last. I'll be doing a post on it so you can see the difference in shape between the two patterns.
So this customisation thing, is it going to work?
I've already had this debate in my mind for the last week. Part of me thinks the modelling clay will be too malleable and might shift around as I'm trying to stretch leather over the edges and maybe it will be. However just like during this process where I held my hand beneath the last as I moulded, I will have an insole taped to the bottom of the last. The insole is leather and is covered in another layer of leather so it's quite strong and sturdy. This means that as I stretch the upper leather over the edges of the last, the insole will be pushing back against the clay which means that even if it wants to squish, it won't have anywhere to squish to.
If it all goes pear shaped I'll blog about that too and I'll update this post to reflect any changes that might need to be made but for now I believe in this enough to cut into a brand new leather hide!
I bought an entire hide of this mint green/ice blue colour to make my first pair of ballet flats from. I also bought this natural leather to make a pair of sandals from too. I'm so excited to get started!

More posts from Jodie Clark