
DIY Ornament Boxes
* Don’t worry, I know it’s September. BUT! I’m excited to share a little holiday preview with you today because ScotchBlue.com is running a contest where you can enter to win $5,000 towards a home makeover! Woah baby! More info at the bottom of the post. But first, a brief trip forward in time to Christmas!

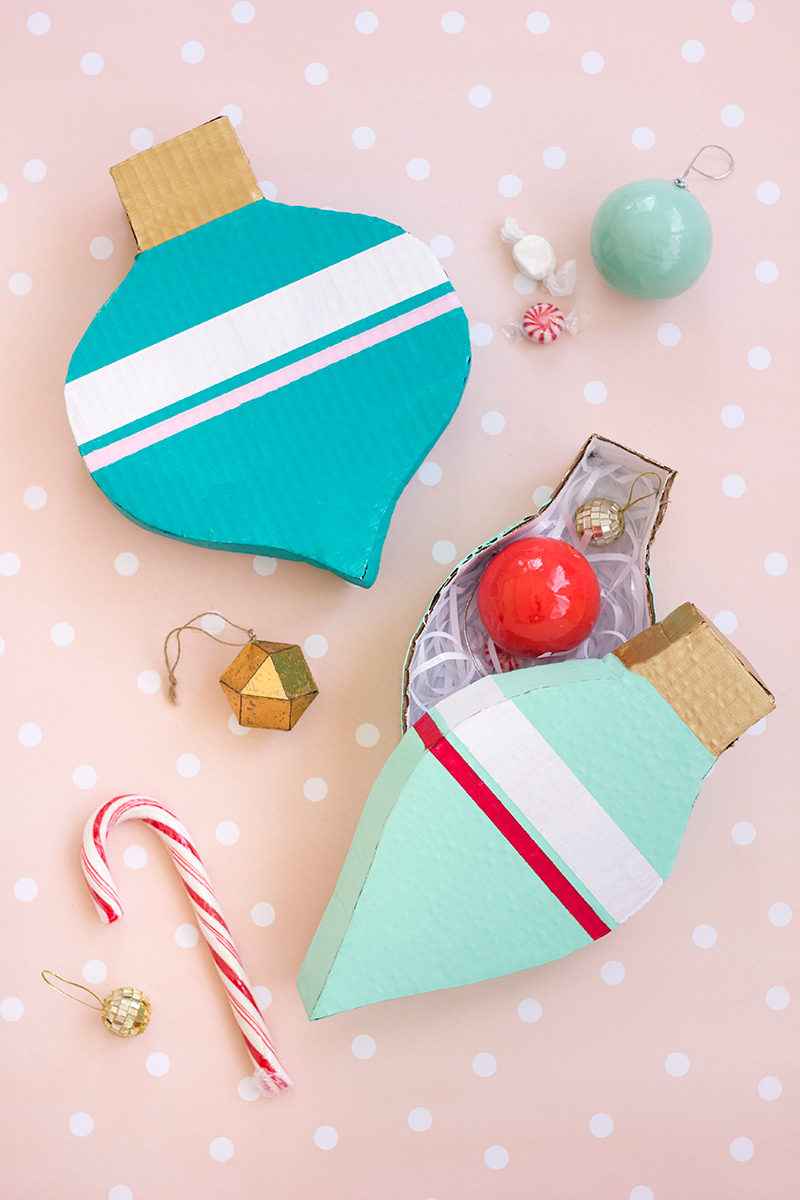
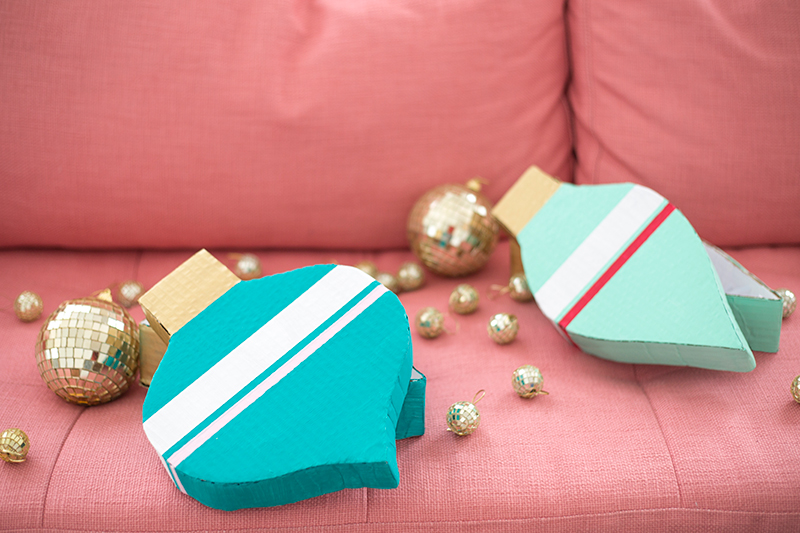
When it comes to the busy holiday season, any project that can accomplish two tasks in one is right up my alley! These DIY ornament boxes make such a fun gift (perfect for holiday hostesses!) and they also double as great holiday home decor! Keep them on the coffee table for a decorative touch, and store treats inside for little fingers to discover!


Cardboard (Thin but sturdy is best!)
Computer Paper
Craft Paint Paintbrushes
Pencil
Hot Glue Gun
Craft Knife, Cutting Mat Ruler (Optional)
ScotchBlue™ Painter’s Tape Delicate Surfaces with Advanced Edge-Lock™ Paint Line Protector (#2080EL)


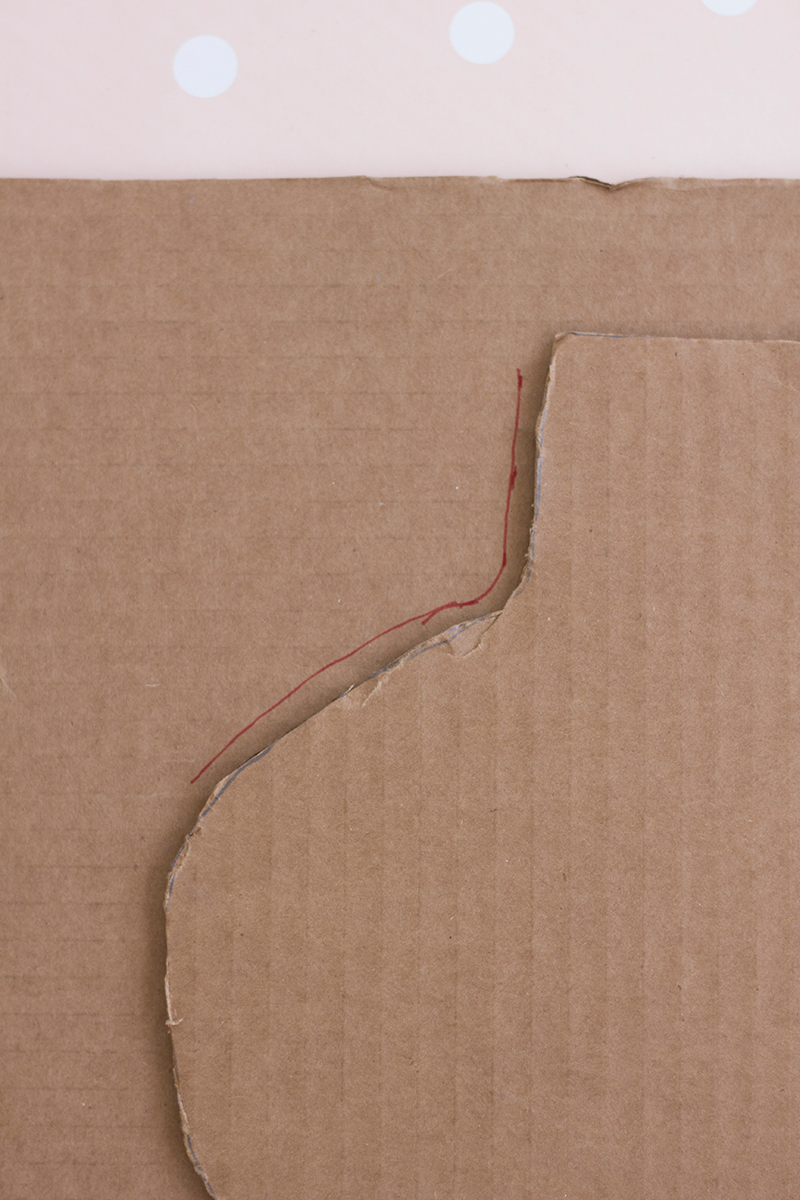
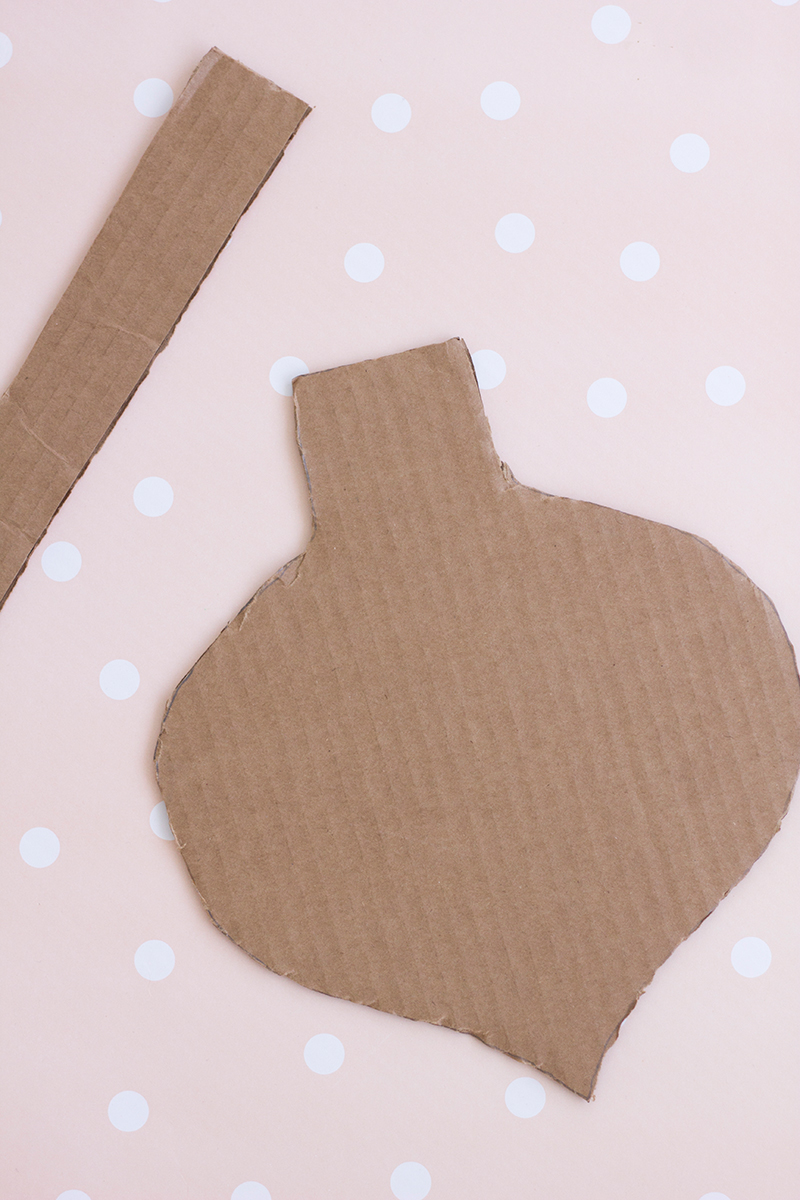
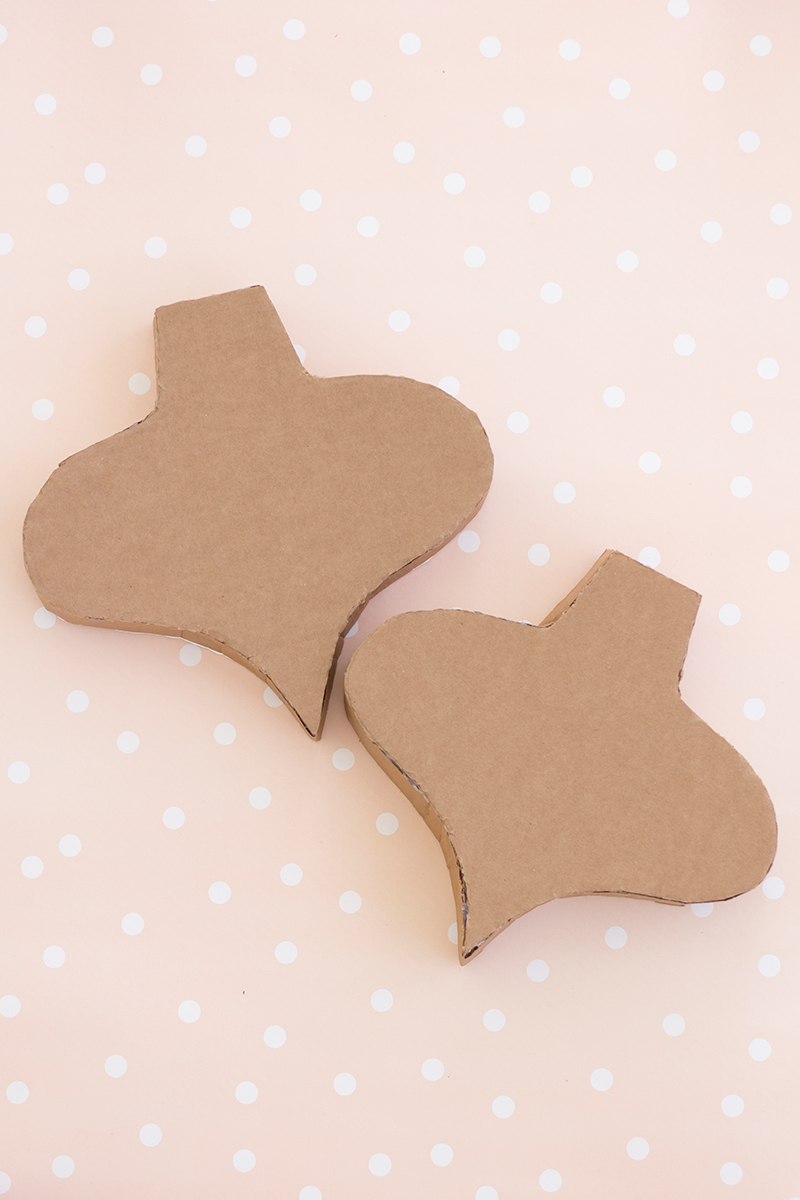
1. Use computer paper to make templates for your different ornaments shapes. Trace your shape onto the cardboard and cut it out.
2. To make the lid of the box, you’ll need to make the same ornament shape 1/16” larger all the way around. To do this, I recommend tracing the piece you already cut, then using your ruler to measure 1/16” from the edges. Mark with a pencil, creating a new slightly larger ornament shape and cut out.
3. Lastly, you’ll need to cut out the sides of your box. For the lid of the box, cut strips of cardboard that are 1.5” wide. For the bottom of the box, cut strips that are 2” wide. How many strips you need will depend on the size of the box, and how long your cardboard is. (I recommend using the longest piece of cardboard possible to minimize seams!)
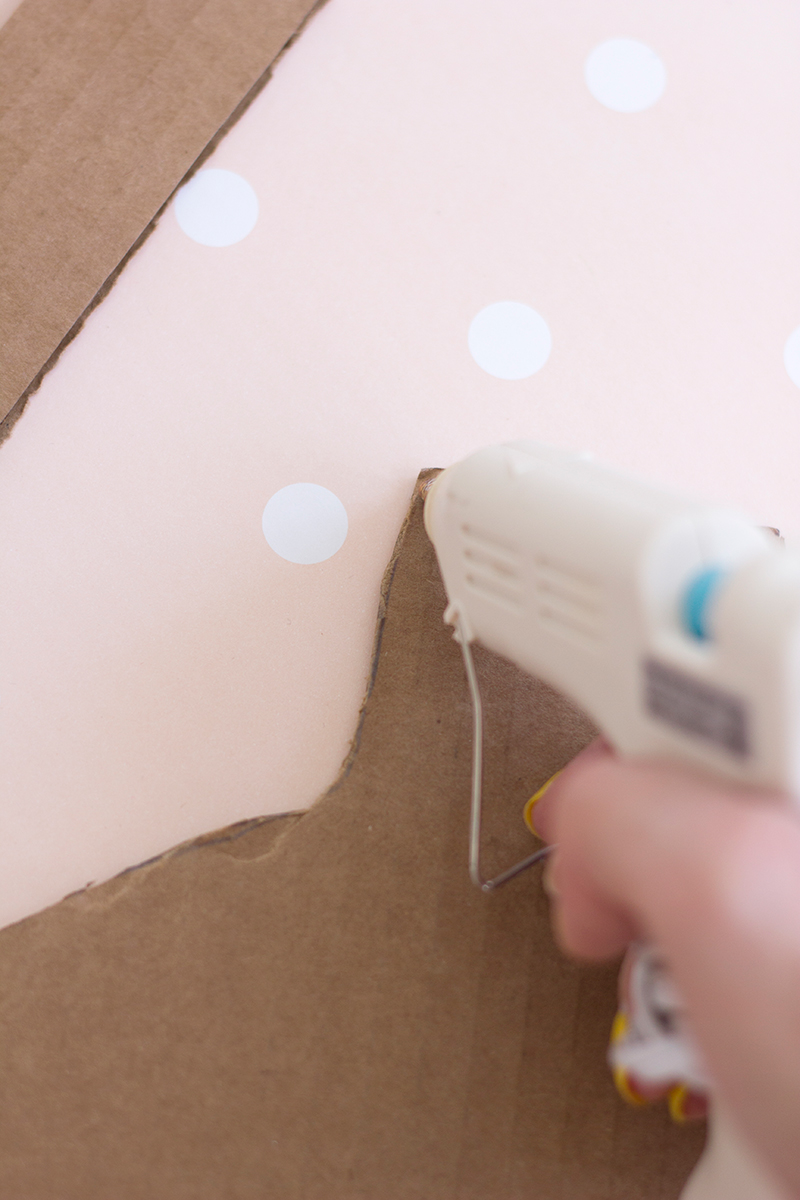
4. Use hot glue to assemble your box. Start with the bottom of your box. Run a thin line of hot glue along a couple inches of the edge, then adhere to the edge of one of your 2” wide strips. Hold in place until glue sets, then continue working in small sections around the edge of the box. On curved edges, slightly bend/fold your cardboard strip so it can form to the shape.
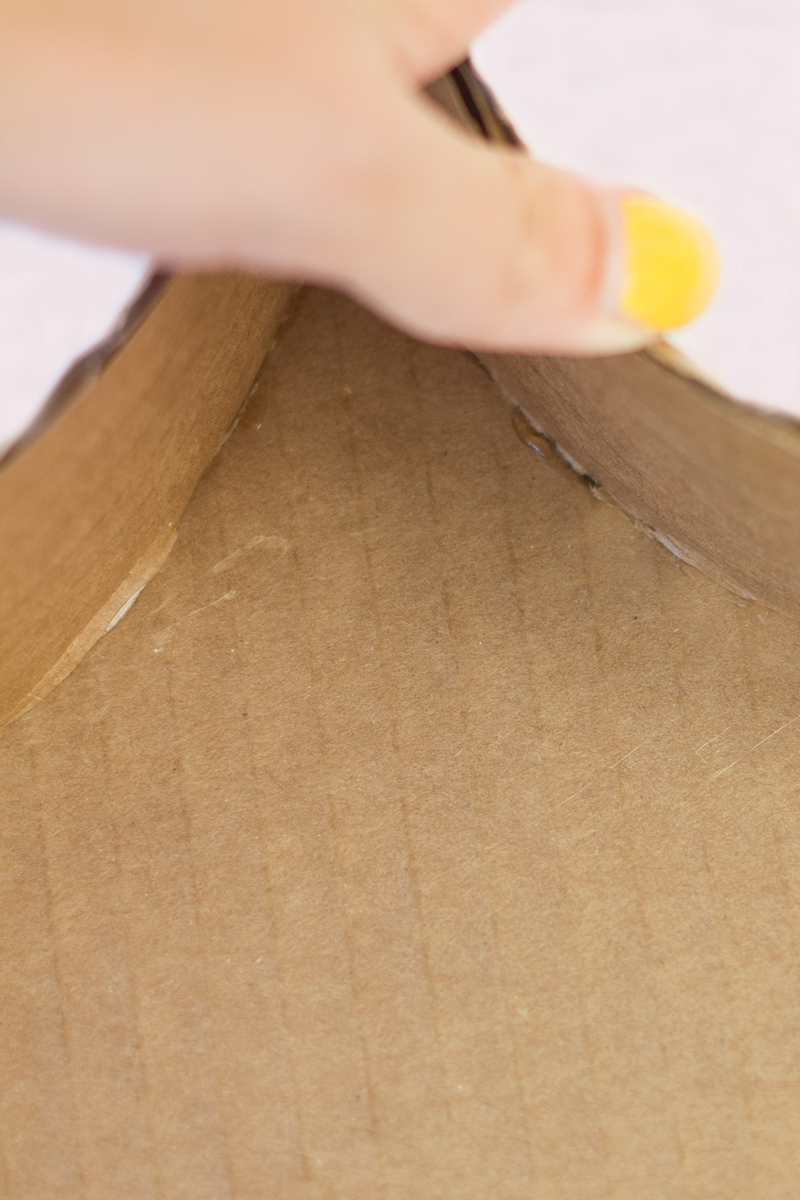
5. If you have to seam together two strips, I recommend doing so on a corner (such as the top or bottom points). Simply run an extra line of hot glue along the end of one strip and glue to the other.
6. Repeat the same steps with your lid pieces.
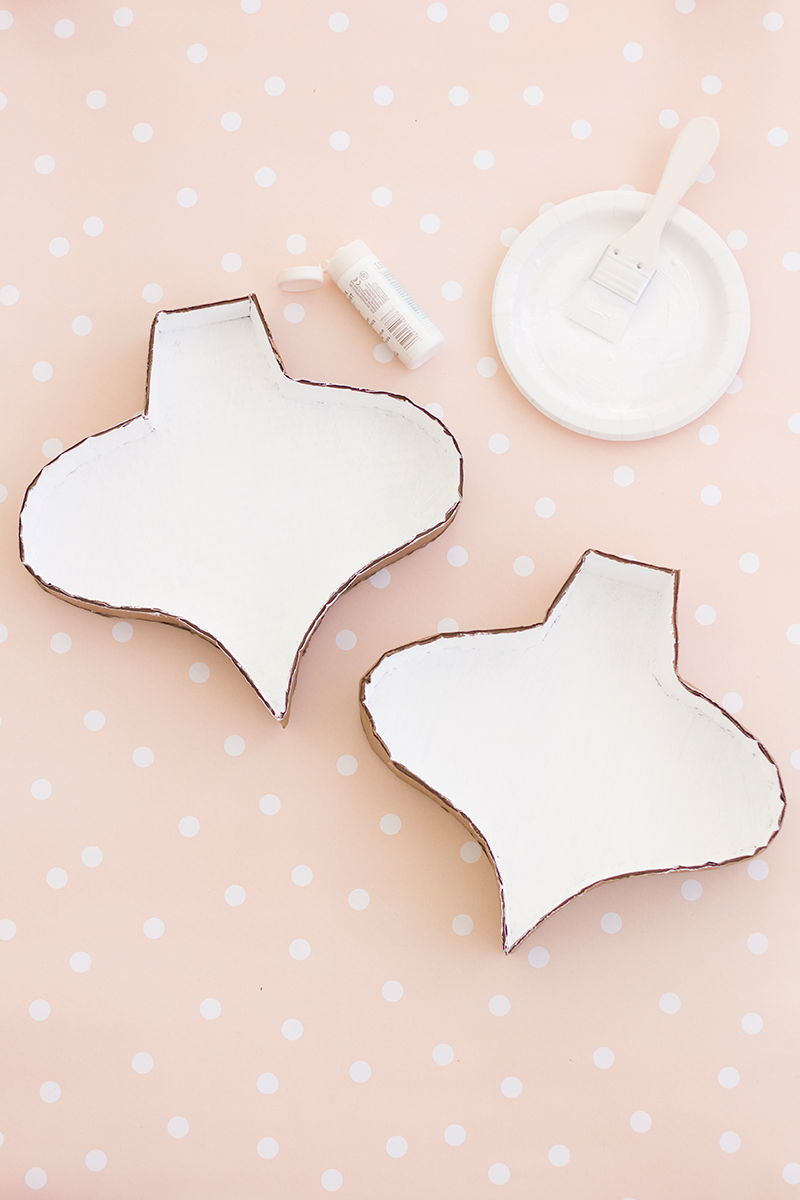
7. Now it’s time to paint! Paint the inside of your box first. I just left mine solid white. Let dry completely.
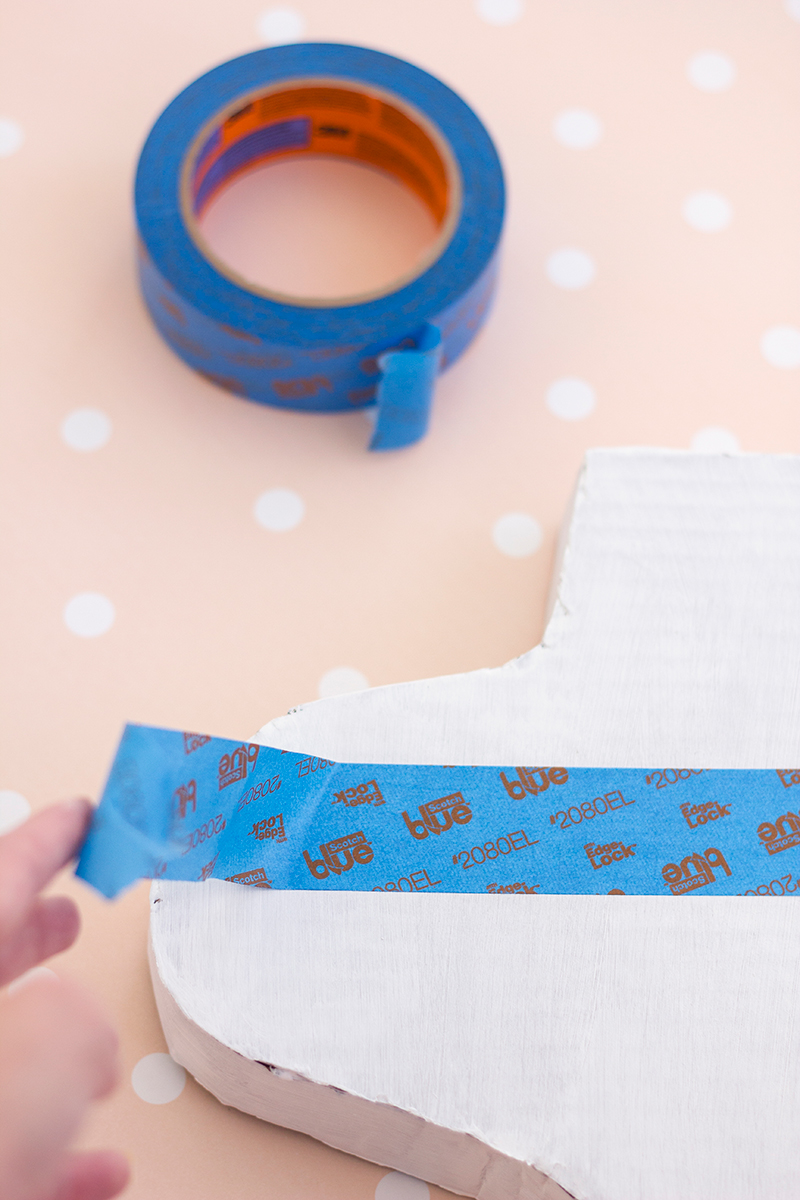
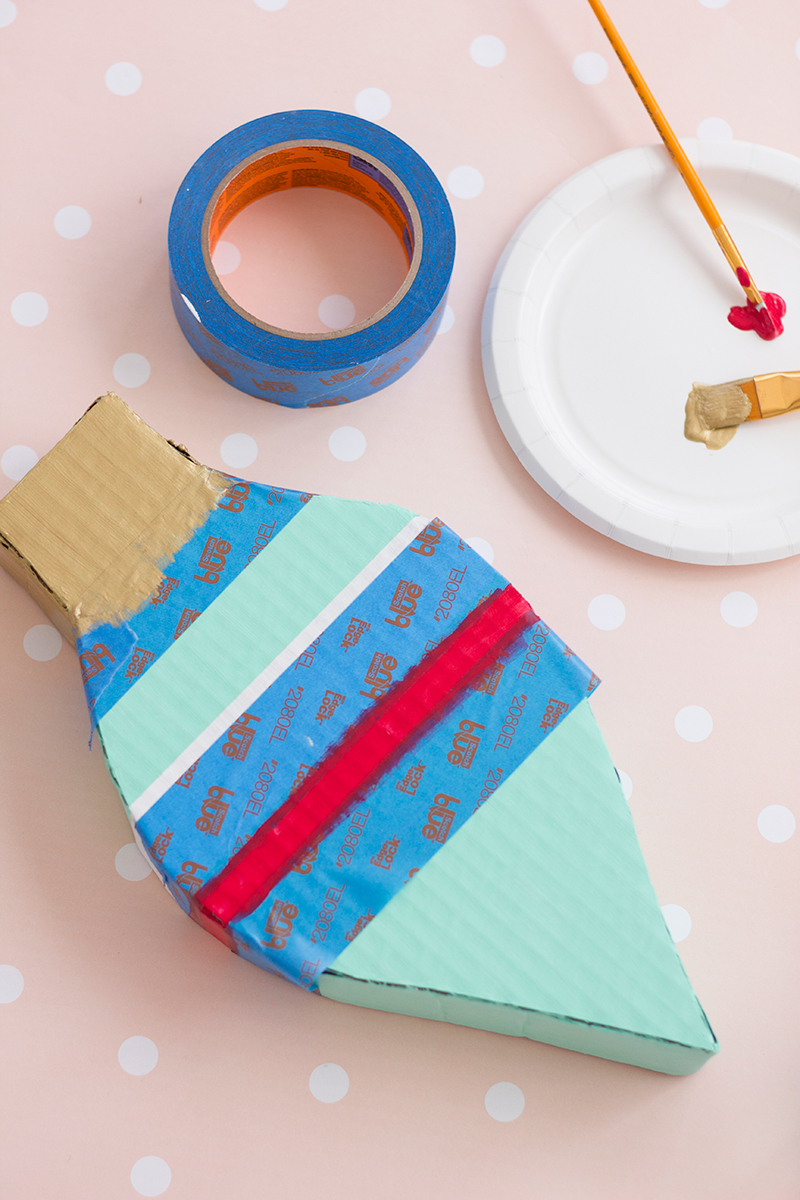
8. Use white paint to prime the outside of your box, which makes the colors “pop” so much more! Let dry. Paint the bottom of your box your desired color and then get ready to decorate the lid! I recommend sketching out on a scrap piece of paper the design you want. To create stripes like you see on mine, use ScotchBlueTM Painter’s Tape to block off the sections of the lid that you’ll want to be a different color. Fold the tape over the sides so your stripe continues around the sides of the lid.
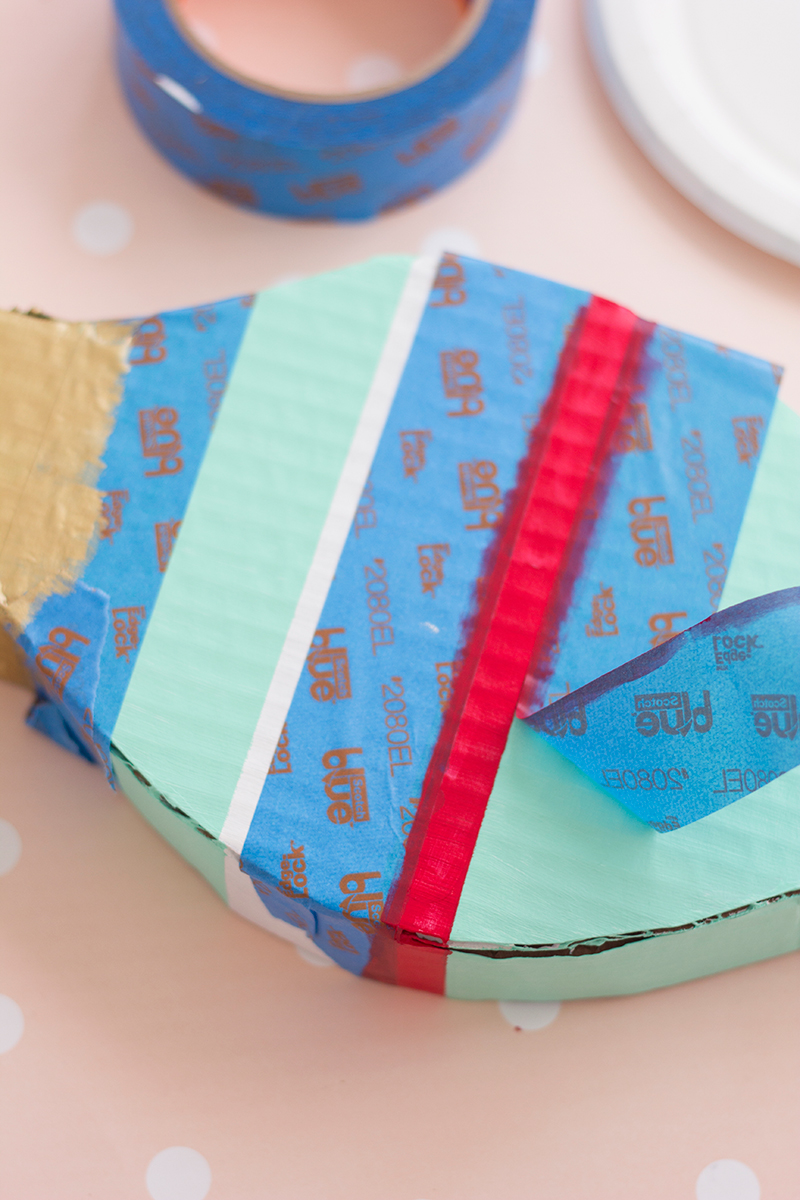
9. You can use the tape as your “stripe” and paint a contrasting color right overtop, leaving what is underneath white. Then you can add additional stripes by marking off sections like you see here. To create the gold tops so they really look like ornaments, mark off the bottom of the section with tape and paint above it!
10. Remove the tape (Ah, look at those straight edges!) and let dry completely. It’s really important to let these dry completely before putting the lid on the bottom.
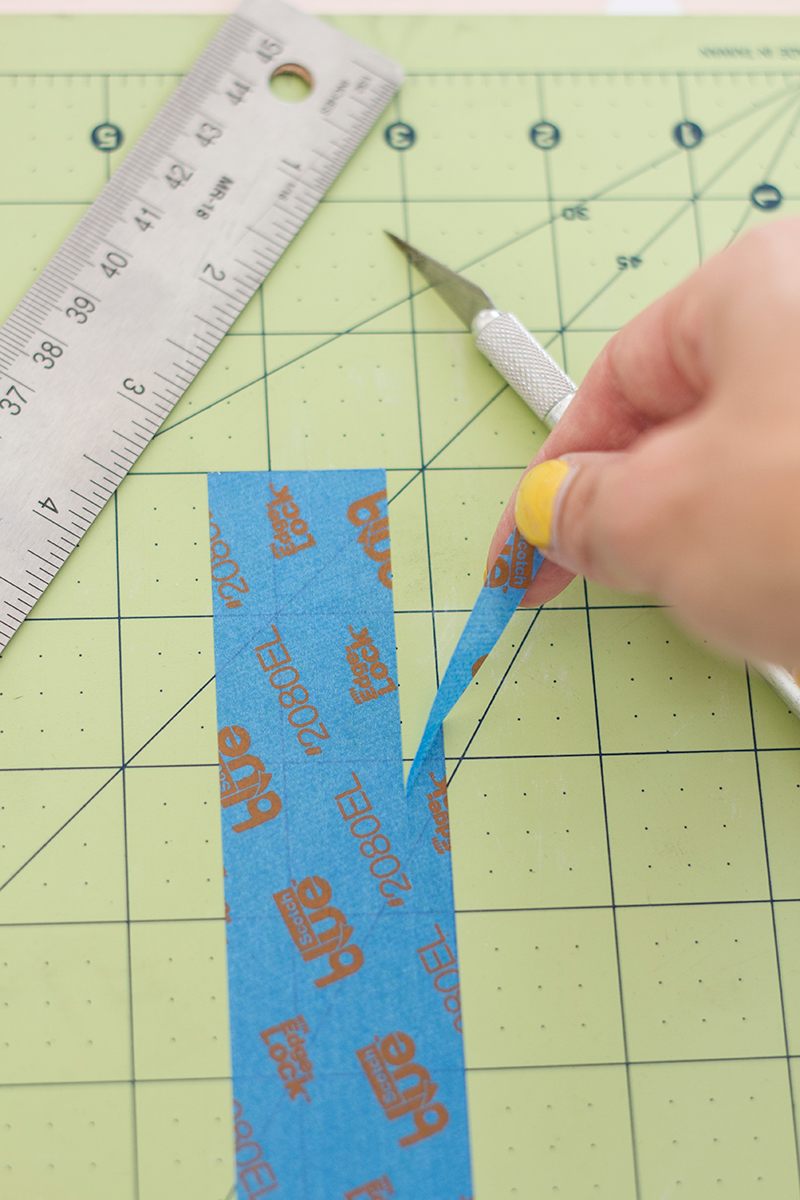
11. Tip: To create skinnier stripes that you want to leave white, place a piece of tape on your cutting mat, then use your ruler and craft knife to carefully make a skinnier strip. Adhere to the box and paint your color right over top. Remove tape and let dry!


All Photos by Studio DIY
Enter the Home of ScotchBlue™ Painter’s Tape Contest at www.scotchblue.com/homecontest October 1,2014 through November 15, 2014 and you could win $5,000 to put towards a home makeover! The first 500 to submit an eligible entry will receive one (1) roll of the new ScotchBlue™ Painter’s Tape with Advanced Edge-Lock™ Paint Line Protector!
Check out this project as a featured project example in the contest, and head over to ScotchBlue™ Facebook page , ScotchBlue™ Twitter page and ScotchBlue™ Pinterest page for more fun ideas!

Contest open to legal residents of the U.S. and D.C. (excluding AZ, MD, NJ, ND, TN and VT), who are 18 (19 in AL & NE and 21 in MS) at the time of entry. Void where prohibited. Enter from October 15, 2014 at 12:00:01 a.m. CT through 11:59:59 p.m. CT on November 15, 2014. All contest communications, entry/judging criteria and details subject to the full Official Rules. To enter and for Official Rules, visit www.scotchblue.com/homecontest . Sponsor: 3M Construction and Home Improvement Markets Division, St. Paul, MN.
I am proud to be a 3M sponsored blogger, and, as part of my responsibilities, I get the opportunity to evaluate ScotchBlue™ Painter’s Tape. Opinions are my own and additional products used in the project were selected by me.
