
{How to Print Large Images Using Microsoft Word}
Hey, y'all! Tuesday I left you hanging at the end of the post without telling you what happens to Manny and the kid down the street how to tile print using Microsoft Word. I showed you how to create large graphics using PicMonkey, but I didn't show you how to print those large images. Today I'm giving you the full tutorial, which is easier than you may think.

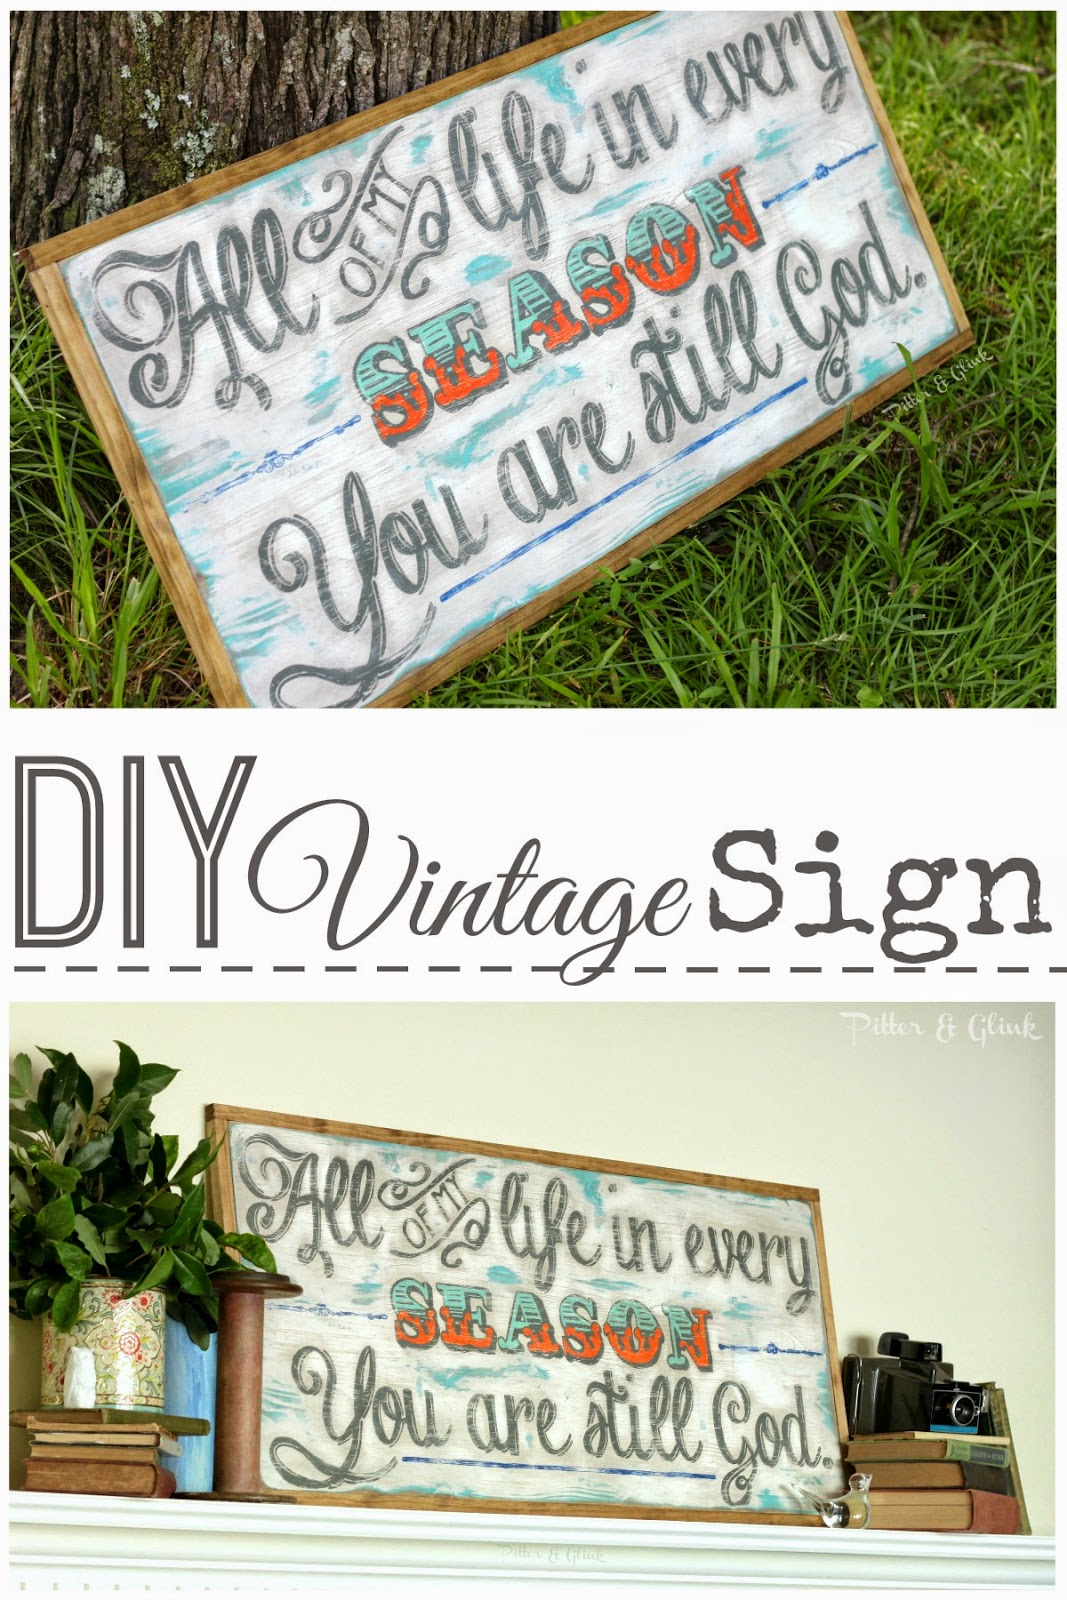
When I made my DIY Vintage Quote Sign, I created a graphic the exact size of the board I was using. That was great, but when it came time to print that image, which was 16" x 36", I couldn't figure out how to do it. Yes, I Googled how to print tiled images. I found a couple of tutorials, but the problem was that none of them used programs or versions of programs that I own. I have Photoshop Elements, but the tutorial I found for using that program to tile print used a different version of Elements. I have PowerPoint, but once again, the same problem. After those fails, I was determined to figure out how to tile print using Microsoft Word. I probably sat at the computer for two hours until I got pretty angry. I have patience to a certain extent--I have to have patience because I teach high school students--but when I get fed up, I get angry fast. So, yeah, I got angry. And then the clouds parted and the sun shone down (metaphorically of course)! I realized that I was complicating something that was pretty darn easy. I guess that should have made me angry too, but I was just happy to have found a solution. Here's the super simple how-to...

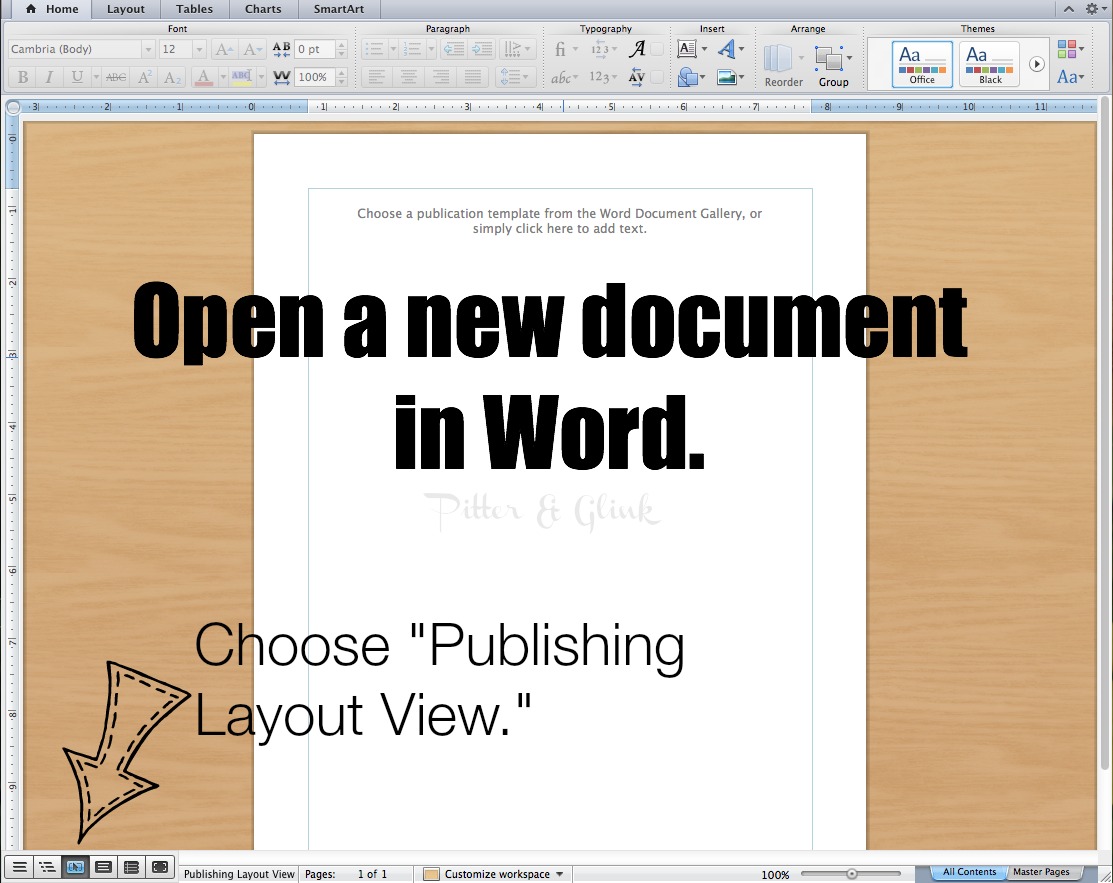
The very first step is to open a new document in Word. **Please note that I am using Microsoft Word for Mac 2011. If you have a different version of Word, your program may look a little different, but you should still be able to figure out the steps of the process.** I like to work on a large image in the "Publishing Layout View," so since the screen shots are using that view, I suggest you use it as well.

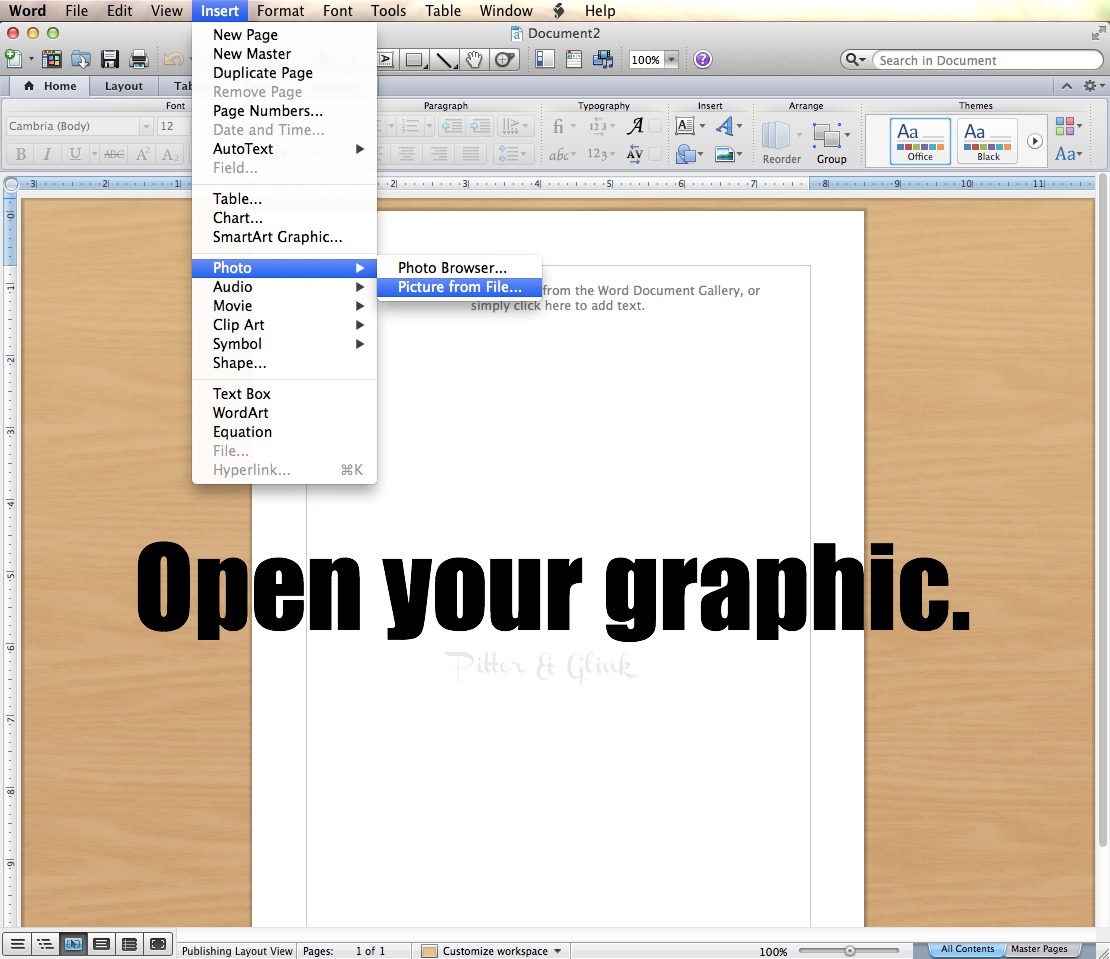
Next you want to open the large graphic you created by choosing "Insert," "Photo," and "Picture from File." A window will open that will allow you to choose your graphic from its file name.

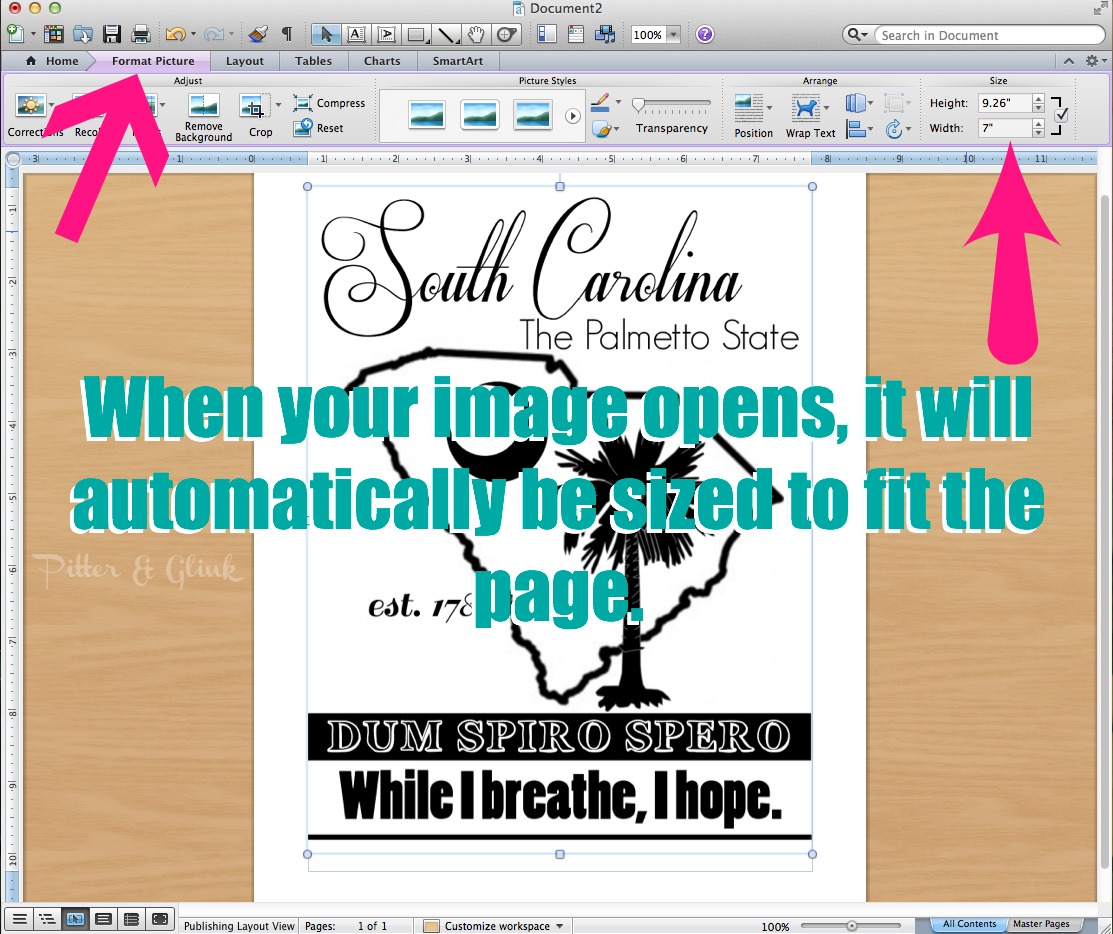
When you open the graphic/image, it will automatically be sized to fit the page. That defeats the whole purpose of printing a large image, so you'll need to resize the image.

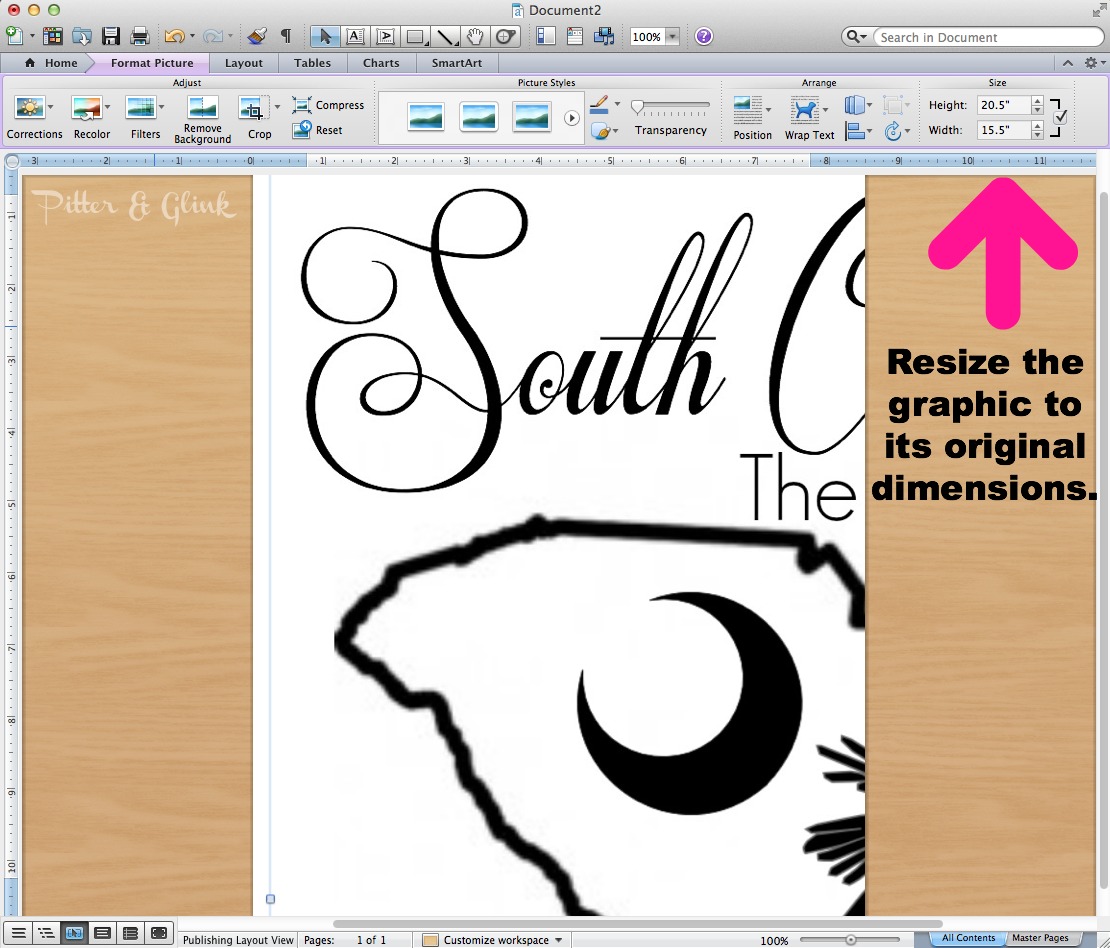
Under the "Format Picture" tab, change the height of the image to to its original dimensions. If you have that little box checked next to the height and width measurements, it will automatically choose the correct width measurement. (The checked box locks the aspect ratio, keeping the height and width ratio.) Now you have a huge image on a white rectangle the size of computer paper. The next step? Print the image. That's right. Print the image you see on the screen.

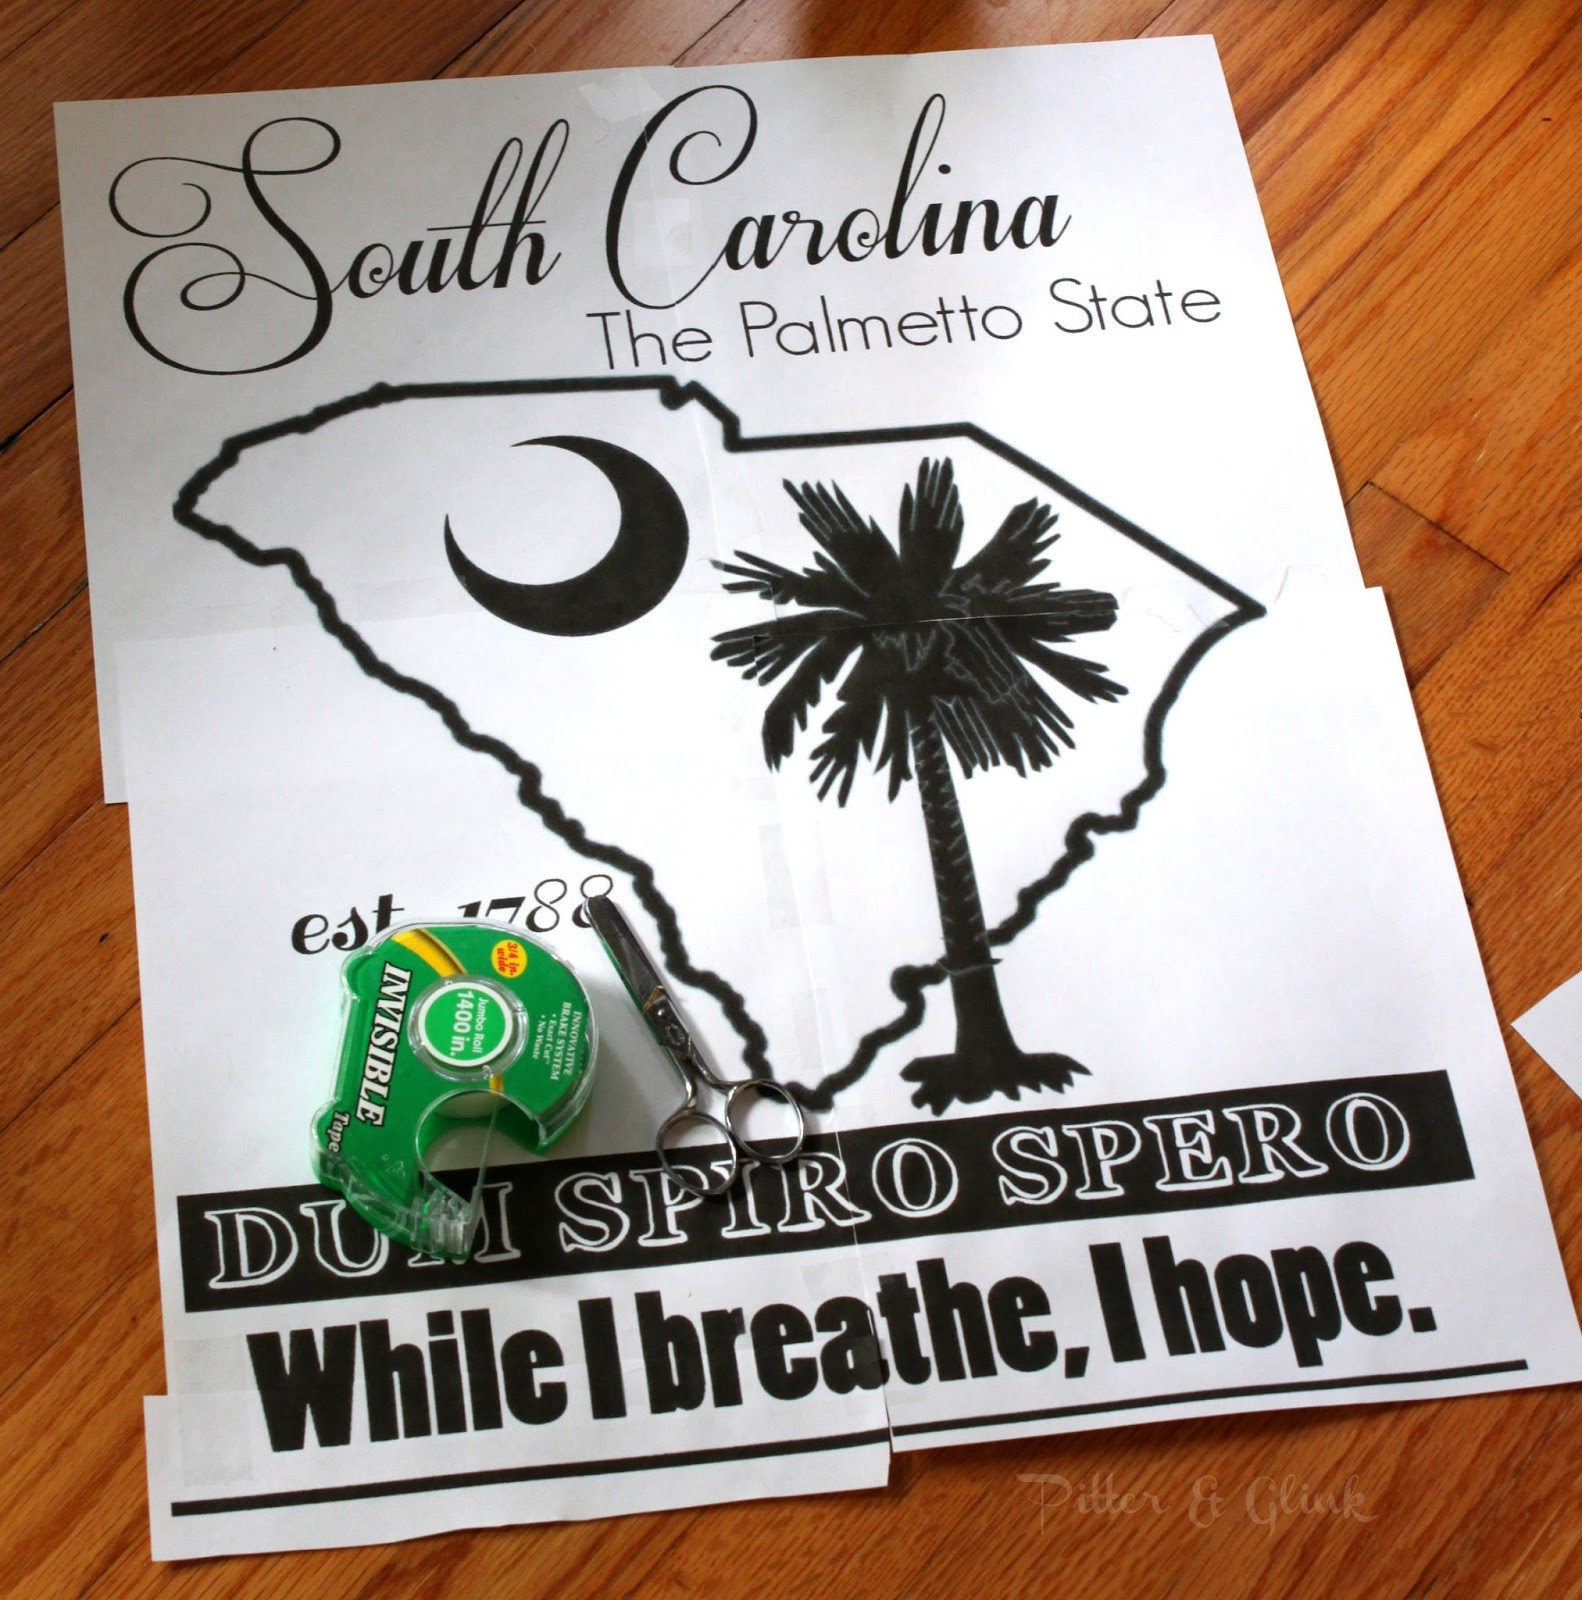
Look at your printed image and move the graphic around to print out more of the image. The image on the left is the first part of the image I printed. I then moved the image to where you see on the right. You want to print out a bit of overlap so that it will be easy for you to tape your printed papers together. Continue moving the image and printing until you get all parts of the image printed. Tape the images together, being sure not to tape over the image because that will make it harder to trace when you begin creating your sign. Also, you may need to trim off some of the white border around the paper to get the images to line up correctly. It's kind of like putting together a puzzle. :)

Once you have the graphic taped together, you can follow the steps I used to make my DIY Vintage Quote Sign to make your own sign. I hope this tutorial helps you the next time you need to print a large graphic or image for crafting purposes. And please let me know in the comments if you have any tips for printing large images. I love to learn new things!


More posts from Bethany Lee