I'm back.... with a wee bunny pouch tutorial for you
Hello there. I've been on a long & bumpy journey since my last post, but I am hopeful that the path is smoothing out & a new & better normality is beginning to emerge. Thank you to all of you who have sent such lovely & messages & kept precious friendships going through instagram, pinterest & facebook. I really appreciate each one of you. Although I’ve been busy stitching lots of bits & pieces (which you can check out here & here) it’s lovely to be back. As a thank you to those of you who have stuck with me in my silence & to welcome new readers, I wanted my first blog post back to be something special for you. Easter is just around the corner, & I'm sure many of you will have special things planned with friends & family & hopefully these little bunnies will help you along your way…

Bunny Pouch Tutorial
What you will need:- 2 fat 1/8s fabric or 2 pieces of scrap fabric approx. 7” x 18”
- Approx. 38“narrow ribbon / cord (1/4 inch wide) - Embroidery thread or buttons for the face
Finished pouch size (excluding the ears): 6½” x 7½” approx..
Download the templates here. Use ¼” seam allowance throughout, unless otherwise indicated & backstitch at both ends of seams.
1. Cutting out your pieces: a. Using the pouch template, mark & cut out:
x2 from outer fabric & x2 from lining fabric b. Take both outer pouch pieces and trim ¼” off the top straight edge. Your lining pouch pieces should now be ¼” deeper than your outer fabric pouch pieces.
c. Using the ear template, mark & cut out:
x2 from outer fabric & x2 from lining fabric

2. Making the face:
a. Using the templates as a guide embroider a nose, mouth and eyes on one outer pouch piece.
3. Making the ears:
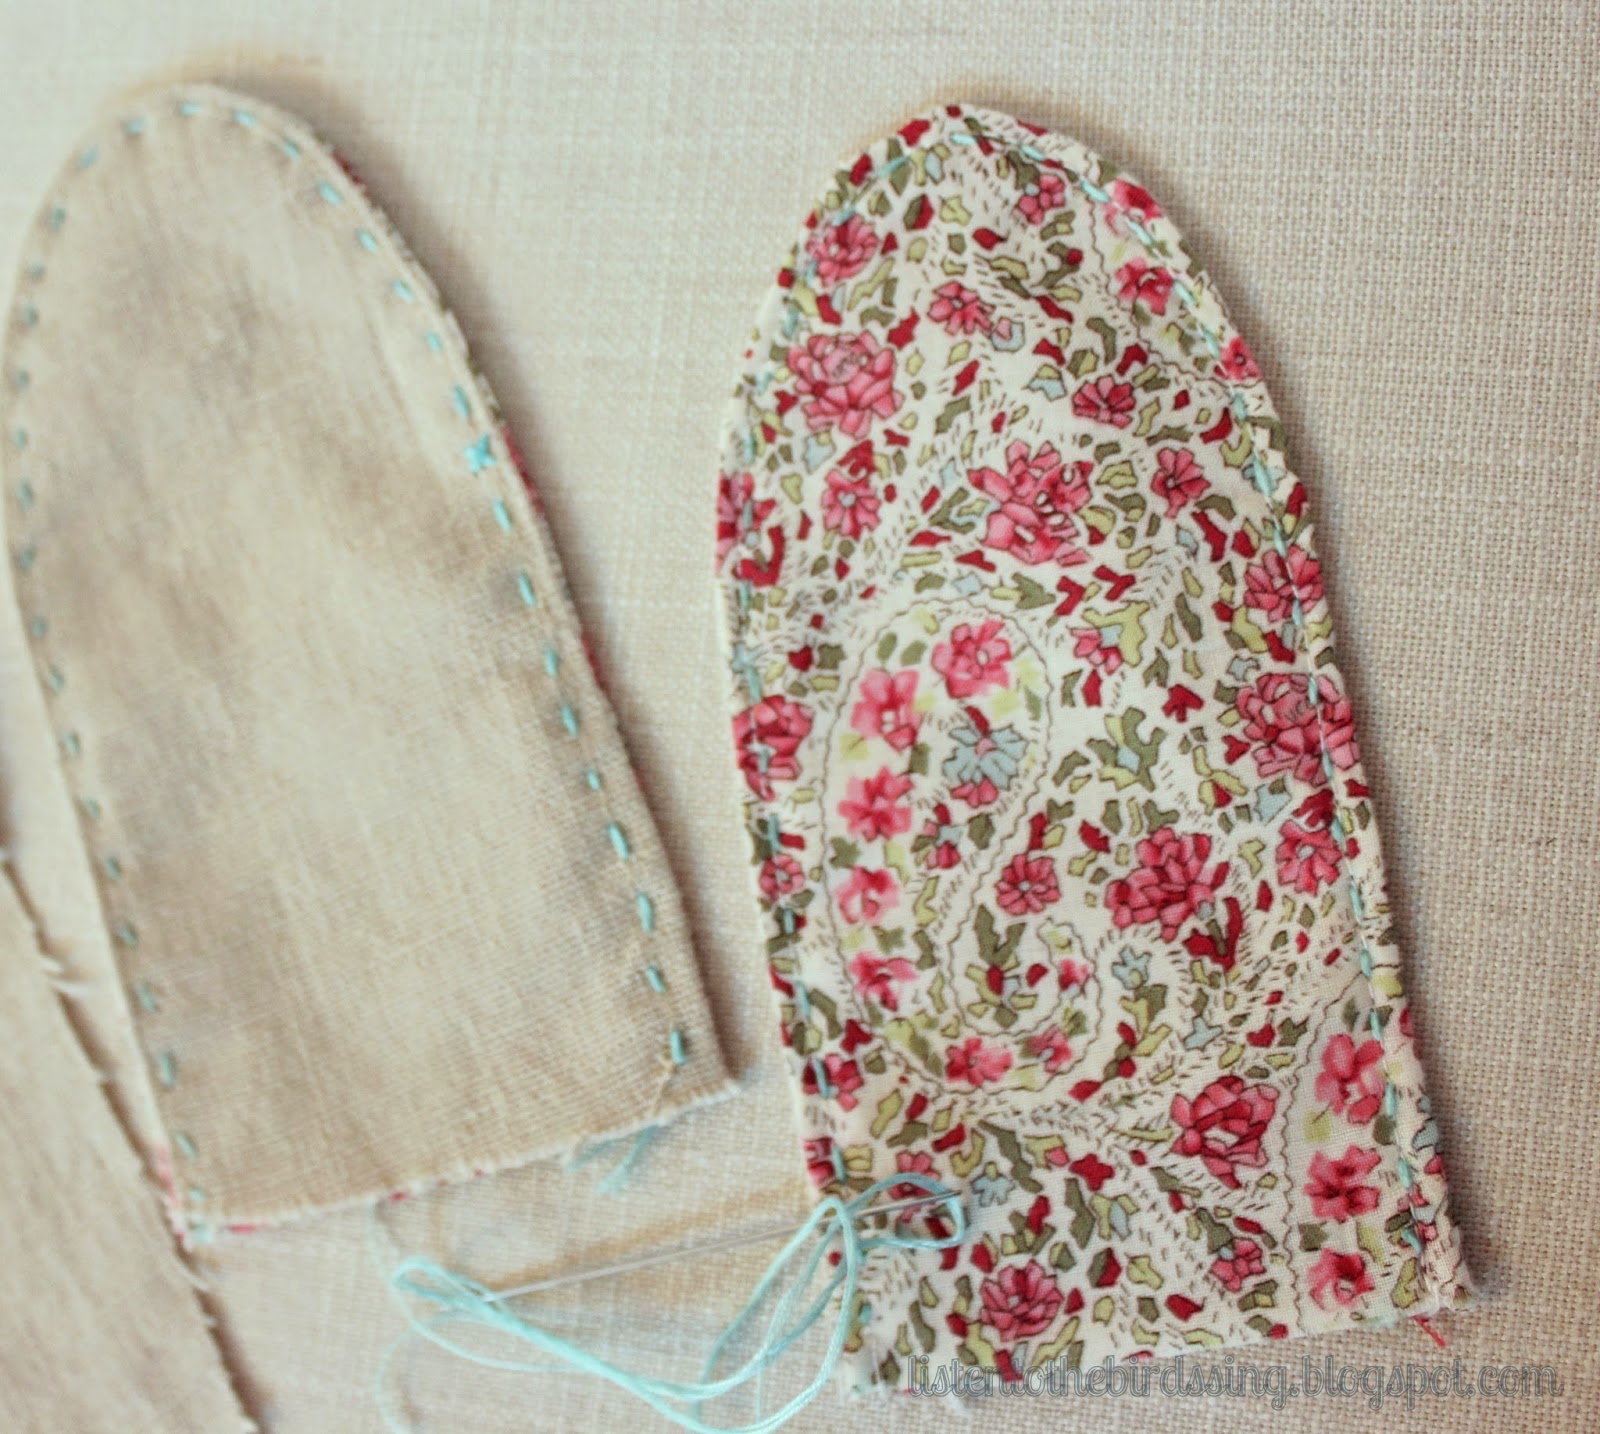
a. Pin one ear piece from outer fabric and one from lining fabric right sides together. Using a ¼” seam allowance, stitch the whole way round, leaving the bottom ear section unsewn. Tip: if you decrease your seam length you may find it easier to sew a nice curve around the ears.
b. Repeat with the other ear.
c. Clip carefully around the curves, turn the ears right side out & press.
a. Using the templates as a guide embroider a nose, mouth and eyes on one outer pouch piece.
3. Making the ears:
a. Pin one ear piece from outer fabric and one from lining fabric right sides together. Using a ¼” seam allowance, stitch the whole way round, leaving the bottom ear section unsewn. Tip: if you decrease your seam length you may find it easier to sew a nice curve around the ears.
b. Repeat with the other ear.
c. Clip carefully around the curves, turn the ears right side out & press.

d. Top stitch or hand-sew with embroidery thread around the whole ear, again leaving the bottom section unsewn.

4. Making the pouch:
a. Pin one outer piece to a lining piece with right sides facing & stitch along the top straight edge
a. Pin one outer piece to a lining piece with right sides facing & stitch along the top straight edge

b. Take the other outer piece & fold in half lengthwise. Using this crease-line to mark the middle of your pouch, pin the ear pieces in place with approx. ½” space in between the ears, right sides together. Baste in place with 1/8” seam allowance.

c. Carefully place the other lining piece on top, right sides together
d. Stitch along the top straight edge (using ¼” seam allowance).
e. Open up both pouch pieces & press the seams open.
d. Stitch along the top straight edge (using ¼” seam allowance).
e. Open up both pouch pieces & press the seams open.

f. Take one of the outer pouch pieces, wrong side up & mark 1/2" down from the seam on either side of the outer pouch piece to mark where your casing will be.
g. With right sides facing, pin the two pouch pieces together - lining sections together and the outer sections together.
h. Starting at your ½” mark, sew around the whole outer pouch piece, stopping at the other ½” mark. Remember to decrease your stitch size & backstitch at both ends
i. Starting on the seam line, sew around the whole lining piece, leaving a 3”opening in of one of the sides of the lining section for turning. Again keep your stitch size small & backstitch at both ends

j. Clip curves carefully & turn the pouch right side out through the gap in the lining. Press.
k. Hand-stitch or machine-stitch the gap in the lining to close it.
5. Making your drawstring casing
a. Gently push the lining into the outer pouch & pull it up approx. 1/4”, so that it shows above the top edge of the pouch & press in place (that’s why we made the outer pouch slightly smaller than the lining pouch).
b. Stitch in the ditch (along the lining/outer seam line) the whole way round the top straight edge of the pouch. This will make the top of the casing. Tip: if you take the arm off your sewing machine you will find this a bit easier.

c. Using your foot as a guide, or by moving your needle stitch another line ½” down from the seam line the whole way round your pouch.

d. Cut the ribbon/cord in half lengthwise.
e. Using a safety pin, thread the ribbon through the casing on one side, and right around to exit on the same side. Knot the ends together securely
f. Repeat with the other piece of ribbon from the other opening. Knot the ends together securely.
e. Using a safety pin, thread the ribbon through the casing on one side, and right around to exit on the same side. Knot the ends together securely
f. Repeat with the other piece of ribbon from the other opening. Knot the ends together securely.


I hope you have enjoyed this post & am excited to see your versions of this wee cutie.
Do please link back if you use this tutorial & remember, if you get a chance, try to listen to those birds singing!
Karen x
More posts from