
DIY Vertical Herb Garden
Fresh herbs. Yum. There's nothing better than fresh, home-grown basil in pasta or fresh cilantro in a batch of homemade salsa.
Maybe it's my body's desperate attempt to change the weather, but when that hint of Spring air blows through, all I want is to have fresh vegetables garnished with herbs for every meal. There are only so many times I can sprinkle dried basil in canned tomato soup before I NEED tomato, basil and mozzarella on a toasted ciabatta bun.
This year I decided I wanted to have as many fresh herbs at my fingertips as it was humanly possible. But because of my indecisive nature, I was unsure of how to incorporate a practical solution in a semi-permanent way.
That is, until I spotted this gorgeous window display by Anthropologie featuring a vertical garden. I knew I could translate the idea into my ideal DIY herb garden.

Of course, I didn't want to hang my garden right on the side of my house - that's way too permanent for me - so I used the deck railing as my canvas instead.


Materials Needed to Build a DIY herb garden: 6 ft fence posts, Saw, Hand sander, Drill, 3/8" drill bit, Screwdriver, 3/4" screws, Paint - I used Americana Decor Chalky Finish paint, Flower pots, Zip ties, Herbs and flowers
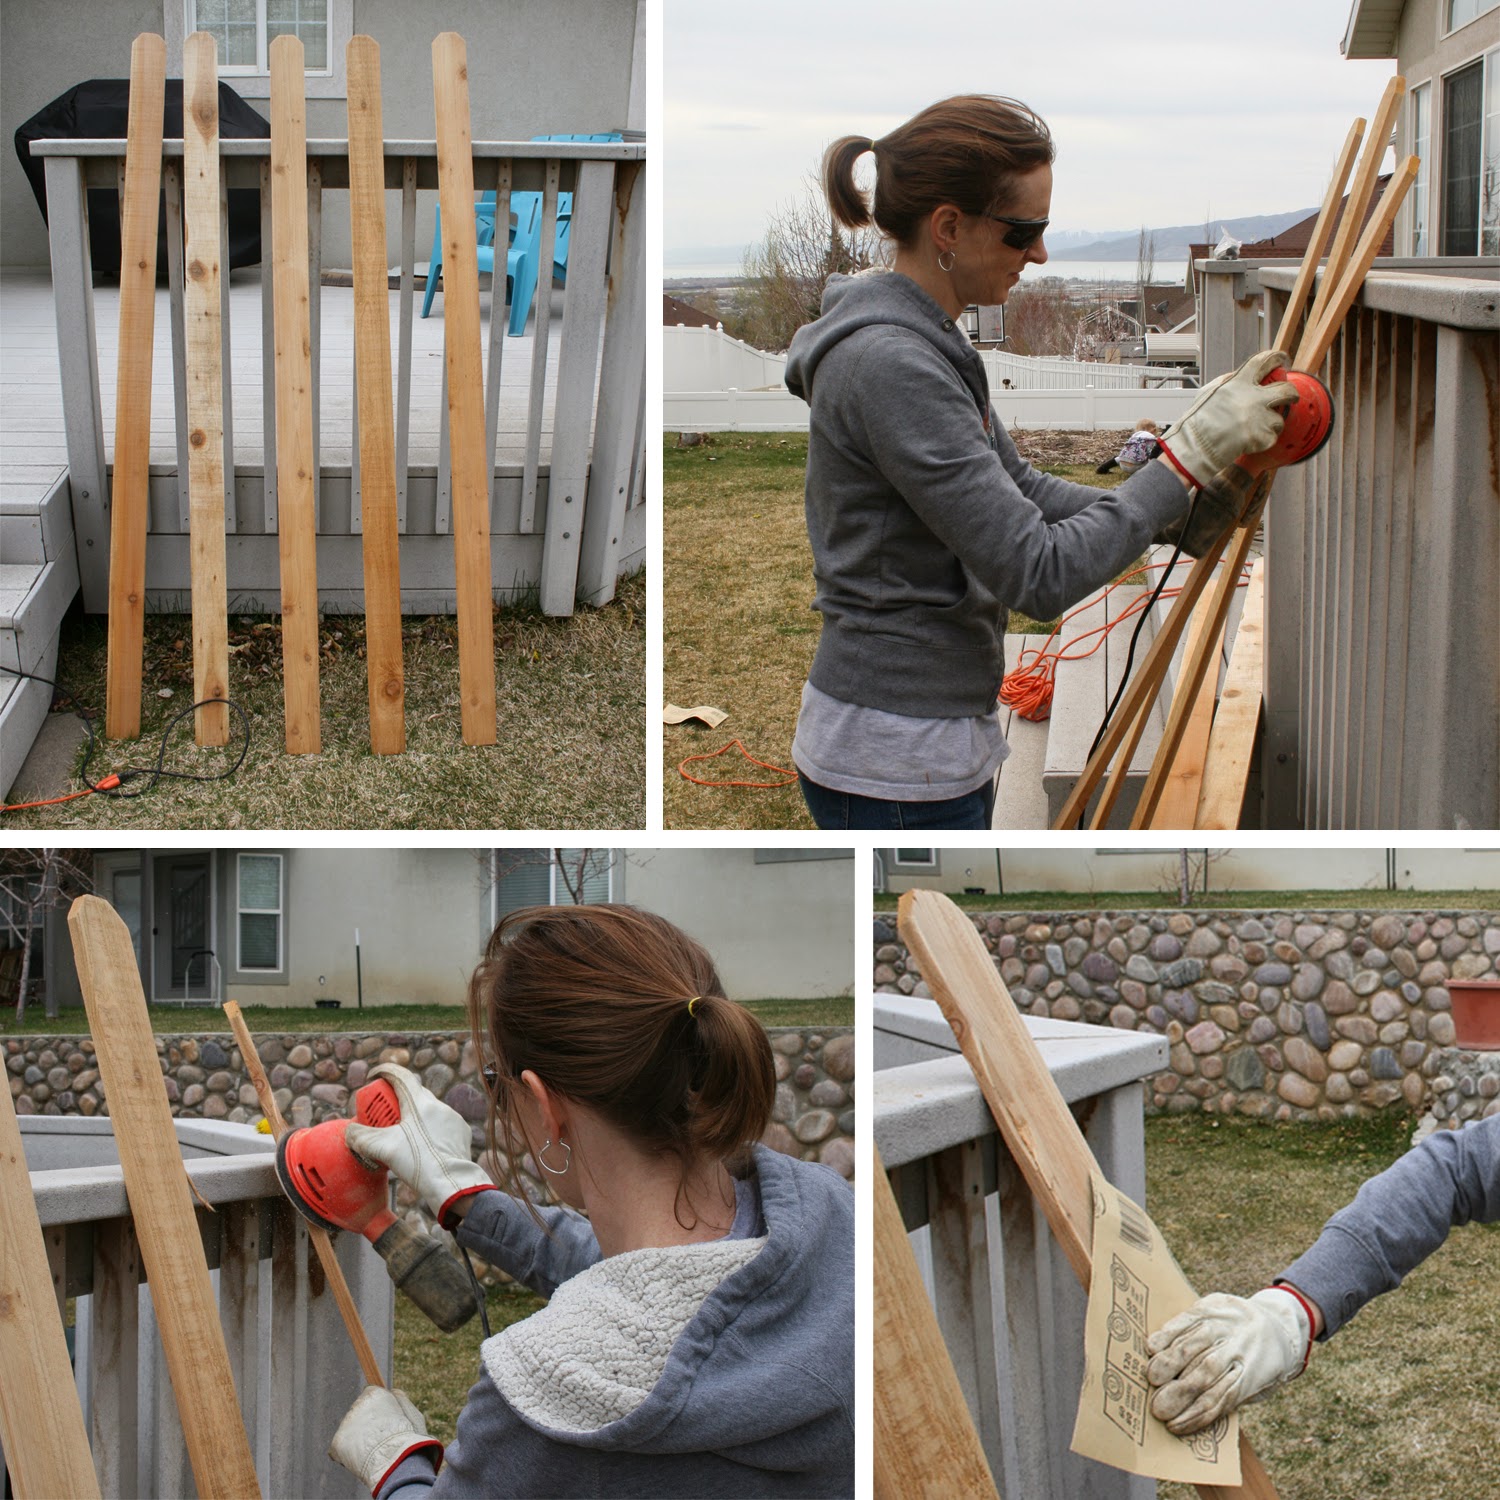
Step One: Buy fence posts from your local hardware store (about $1.64 each) and cut to size. My deck's railing measures 30 inches high so I cut my fence post into two 30-inch pieces. I bought six total fence posts which made 12 different canvases.

Step Two: Sand the heck out of the fence posts. They aren't pretty folks and need a major sanding. I sanded them with my hand sander using a coarse grit paper and then finished off with hand sanding with a light grit paper.
Step Three: Paint your boards or seal them in some way. I chose to use Americana Decor Chalky Finish paint without a wax sealant because I wanted my boards to look a little rustic. And over time, they will wear beautifully. I love Americana Decor paint's vibrant colors. All it took was one light coat to fully cover my fence posts.

The new Americana Decor Chalky Finish paint is now available at Home Depot and Michaels stores. It is also available for purchase online at homedepot.com.
If you want your project to withstand the ages, use a soft-touch varnish or clear wax.
Step Four: Drill two holes in your pots, one at the top and one in the middle. Use a 3/8" drill bit to make a big enough hole for your 3/4" screws. Because I used this lacy pot from IKEA, I didn't have to drill a hole in the top.

Step Five: Screw the planter pot right onto the fence post. Start the screws with a screwdriver and then finish them off with a drill.

Step Six: Use gravity to your advantage and set the bottom of the fence post on a solid surface. Use zip ties to attach the fence posts to it's new home. You could use an actual fence, a trellis or a deck railing like I did. Just as long as it has something vertical to hang on. Trim excess zip tie material.

Step Seven: Plant flowers and herbs in your pots. I put a handful of rocks on the bottom of the planters to aid in drainage.

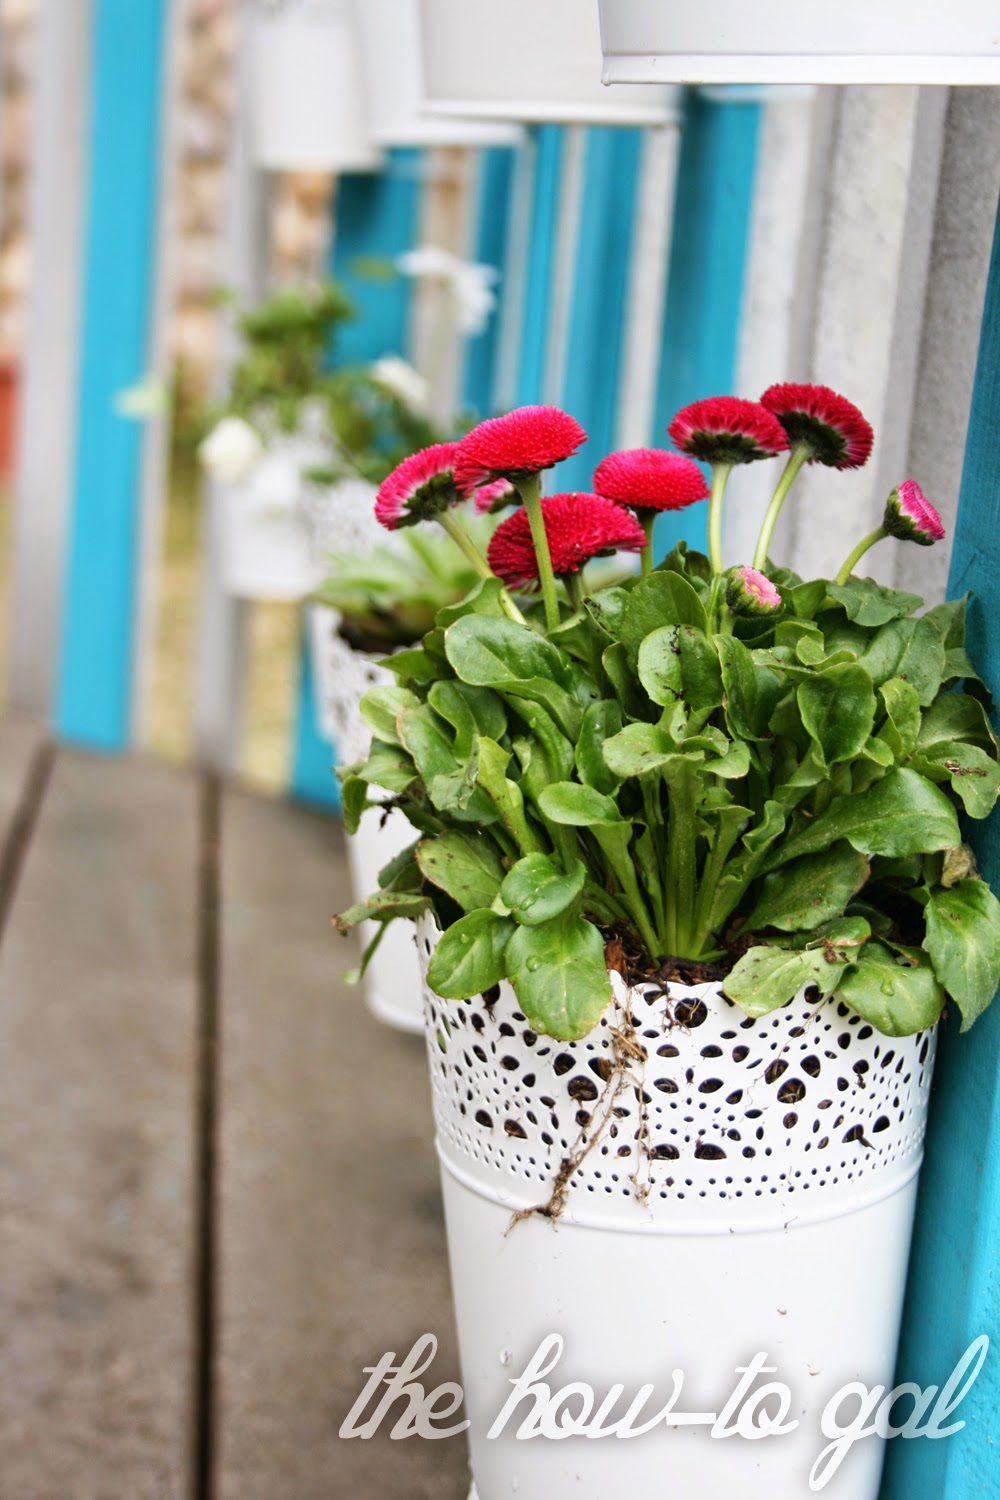
In every other pot I placed flowers to break up the herbs. The plants were the most expensive part of my outdoor herb garden. You could save money by starting seeds in your home before transplanting them outside.

English daisies, pansies and pink ranunculuses make me so happy. The pops of pink really add to the fresh, outdoor ambiance.

I can't wait to sit on my deck this summer, enjoy my view and smell the delicious scent of fresh herbs growing steps away from my kitchen. Come on over one night and I'll make you some yummy salsa :)
xoxo,

For more information on the Americana Decor Chalky Finish paint I used in this post, visit the DecoArt Chalky Finish website.
*I was sent sample products for a DecoArt campaign, all opinions and awesome project ideas are my own.
More posts from Anna Rose Johnson