
Jackie Coat Sewalong - Bound Buttonholes

Once you have cut out your fabric and fused your interfacing the first sewing step for Jackie is to do the bound buttonholes and welt pockets. We do these steps first as they are fiddly and are much easier to do on the jacket front before it is sewn together and becomes more bulky and awkward to handle.
If you have decided to do machine sewn buttonholes for your Jackie you can skip this whole post, as you will be making your buttonholes at the very end. But I do encourage you to consider trying bound buttonholes. This method is very achievable if you take your time and results in such a beautiful finish.
Iconic Patterns show a variation on the welt bound buttonhole technique, which includes a simple trick to ensure your welts stay absolutely lined up and perpendicular to each other while you sew them, which is vital to get neat looking buttonholes.
I have linked to my favourite online tutorials showing similar (but not identical) techniques at the bottom of this post.
Firstly, you cut a single long strip of fabric based on the (finished width of your welts x 4) x (the length of your buttonholes side seam allowances x 5). The pattern recommends buttons that are around 28-30 mm (1 ⅛” - 1 ³⁄₁₆”) in diameter or you can go bigger if you like. I would not go smaller than 25mm or 1" as a coat needs a larger button to look in proportion. I am going to have a head explosion if I keep trying to convert into inches for all of this so I am going to do the rest of this post in metric and if you need to convert into inches here is a really handy conversion chart.
Lets take a moment to admire my buttons:

If you are using the standard recommended buttons you cut a strip fabric 4 cm (1 ⁹⁄₁₆”) wide and 25 cm (10”) long. I cut mine longer than this as I was using bigger buttons.
Interface it with a strip of interfacing half the width of your welts placed smack along the centre line, like this:

Here is me checking how long I need my welts to be. My buttonhole plus wiggle room (roughly the buttons thickness, plus a decent amount either side for seam allowance). As I have an extremely useful grid marked on my fabric, I using that as my unit of measurement. My actual welt is 3 squares long plus a square each side for seam allowance. So I am cutting my welts 5 squares long and 4 cm (1 ⁹⁄₁₆”) wide. I really like the look of slimline buttonholes with slender welts.

I find that when doing buttonholes you just can't avoid lots of basting. Accurate measurements at this stage is very important for neat buttonholes. You fold both your long edges into the centre line and baste 5 mm from the edge.
As my fabric is thick and spongey I hand basted my edges closed first before machine basting the 5mm line. It really helped to keep everything lined up and even.


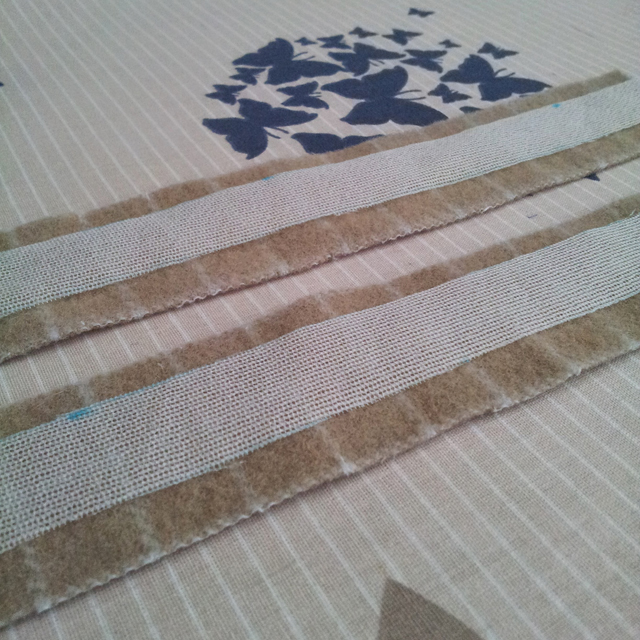
Now this is the little extra trick that you won't find on other tutorials. Most tutorials have you make individual welts, in this one, you are keeping them together until they are stitched down. This keeps your welts perfectly aligned and parallel to each other. So keep them together like this for now.
Next up, positioning onto your right jacket front. Normally, you need to baste or mark with tailors chalk very accurate lines (called a buttonhole ladder) onto your fabric to show you clearly where your buttonholes are going and to make sure that they are perfectly horizontal. I didn't need to do this as my fabric pattern provided the most perfect readymade grid for me. I actually slightly shifted my buttonhole positions to centre them inside a grid. If you don't have this handy feature, then baste or mark your fabric now, using your pattern piece markings as a guide.
Here are my buttonhole welts pinned into position. I then hand basted them down along the centre line. You can never have too much basting with bound buttonholes. I think I said that already but it bears repeating. It's important.

Once you are happy with the position you sew your two parallel lines along the 5mm basting line. If you are like me you do this step with heart pounding and having a minor stress attack because IT HAS TO BE PERFECT. ARRGGGHHHHHHH. Just do your best. It is difficult to get the two lines stopping and starting at exactly the same place. This is is where good marking/basting is (surprise surprise).... important.

Here are my two lines from the back. Normally you would see basting lines marking the stop/start points but I cheated and used the gridlines on my fabric.

But here is a shot from my practice buttonholes, and you can also see a good example of proper basting here:

It is only now that you have sewn your two lines of stitching that you cut your welts into two welts. Cut straight down the centre line of the welt. You are only cutting your welt. You are not cutting your jacket front yet.

Here is the divided welt. I don't find it difficult to do this step as I can get my scissors in the gap very easily but do be careful not to cut your fabric body during this step.

Once you are separated your welts, you then cut into your jacket body. I use a seam unpicker to open up a small hole and then use sharp scissors for the rest as it gives more control. Do this from the wrong side of your fabric so you can clearly see where you need to snip. You need to snip as close to the start/end of your stitching lines as you can get without going over them or cutting past them. Once again, hyperventilating and panicked hand flapping is optional at this step but I always like to do it. And then you have this:

You then turn your welts to the wrong side of your jacket front. This is hard to descibe but here is what happens. Firstly, from the wrong side:


Wow. Give yourself a huge congratulations. That there is a bound buttonhole. I usually start breathing again about now. Next up we secure the sides of your buttonholes so the triangle cut you made doesn't fray or flip out. (I like to use a walking foot especially when sewing with thick fabric, that is the foot you see here):


I also like to catch stitch my welts down at the back to help prevent fraying and also to help them sit flatter. Be sure to do this rather loosely if you feel you need to do this step so you don't cause pull marks on your jacket front. I just catch a thread of the interfacing only but it still needs to be loose.

And last of all, baste your buttonholes together, just so they don't get pulled or distorted while you are working on your jacket.

Next up, after some breathing space, recovery and a stiff drink or cuppa or cake or a walk or all of the above, are your welt pockets. These will be a breeze after your buttonholes as they are essentially just a giant variation of a bound buttonhole. Maria has covered this already so go and check it out when you are ready.
I hope this helps and if you have any questions, just leave a comment!
You can find all the posts of the sewalong here.
The full set of buttonhole photos are on my Flickr Album here.
Futher reading for bound buttonholes are:
Iconic Patterns Tutorial for Bound Buttonholes
SunnyGal Studio Bound Buttonholes
Sewaholic Bound Buttonholes
I recommend you check these other tutorials out to get a really solid understanding of the technique and then practice on some scrap fabric a few times before doing your "proper" ones if you have never tried bound buttonholes before.
More posts from Janelle