
Gloss48 Launches GellieBeans Gel Polish – Swatches & Review

Today I have a review of a new-to-me gel polish that is being featured on Gloss48. If you’re not familiar with Gloss48, they offer amazing independent beauty brands that aren’t available at Sephora or the department stores. They carefully curate (and try!) all of the products offered on their site. For the first seven days that products are on the site, they offer a promotional discount so that customers can try new products without breaking the bank. After the launch week, the products are available on the site at regular price. All new members get $10 off of their first order of $30 or more!
Gloss48 is launching GellieBeans gel polish today. The GellieBeans sale starts today, Nov 19th at 11am and lasts one week (until Nov 26 at 11am). Below is a quick summary of the deals that you’ll find on their site for the next 7 days:
- GellieBeans Starter Kit – $36 (regularly $59.99)
- GellieBeans LED Lamp – $48 (regularly $79.99)
- GellieBeans Individual Gel Polishes – $7 (regularly $11.99)
Head on over to www.gloss48.com/gelliebeans to take advantage of this sale!

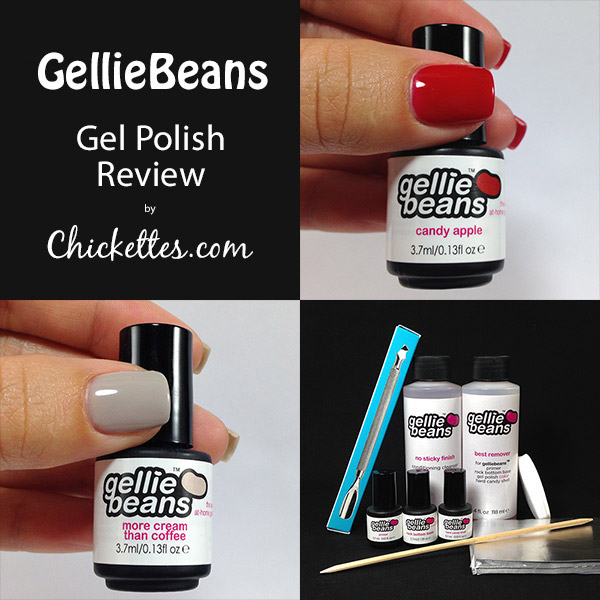
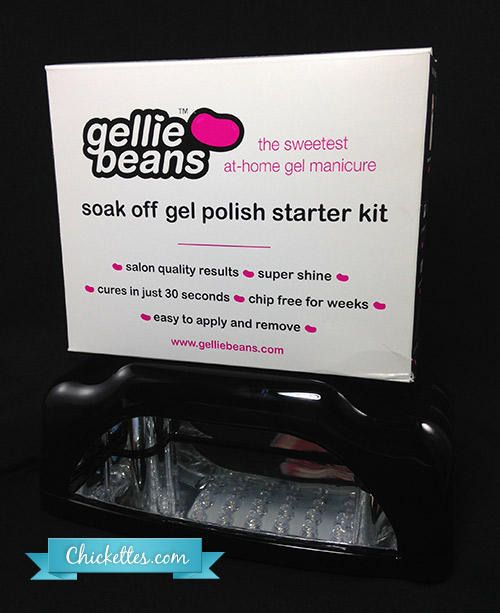
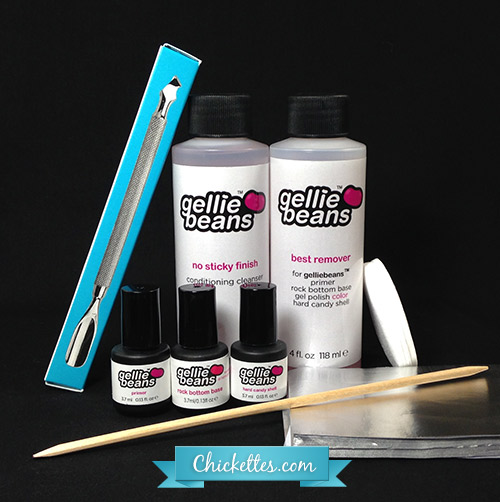
Gloss48 sent me a GellieBeans starter kit, LED lamp and 2 gel polish colors to review. Since this is a brand that I haven’t used before, I put it through a full wear & removal test. Above is a picture of the GellieBeans starter kit and the LED lamp. Gellie Beans is a DIY brand meant for the at-home user. The starter kit includes the following:
- No Sticky Finish (conditioning cleanser) – 4 fl. oz.
- Best Remover – 4 fl. oz.
- Primer – 3.7 ml
- Rock Bottom Base (base coat) – 3.7 ml
- Hard Candy Shell (top coat) – 3.7 ml
- Lint-free Wipes
- Remover Foils
- Orange Stick
- Cuticle Pusher/Remover
- Direction Sheet
Please note that the kit does NOT include the LED lamp or color gel polishes, those must be purchased separately.

Application & Wear
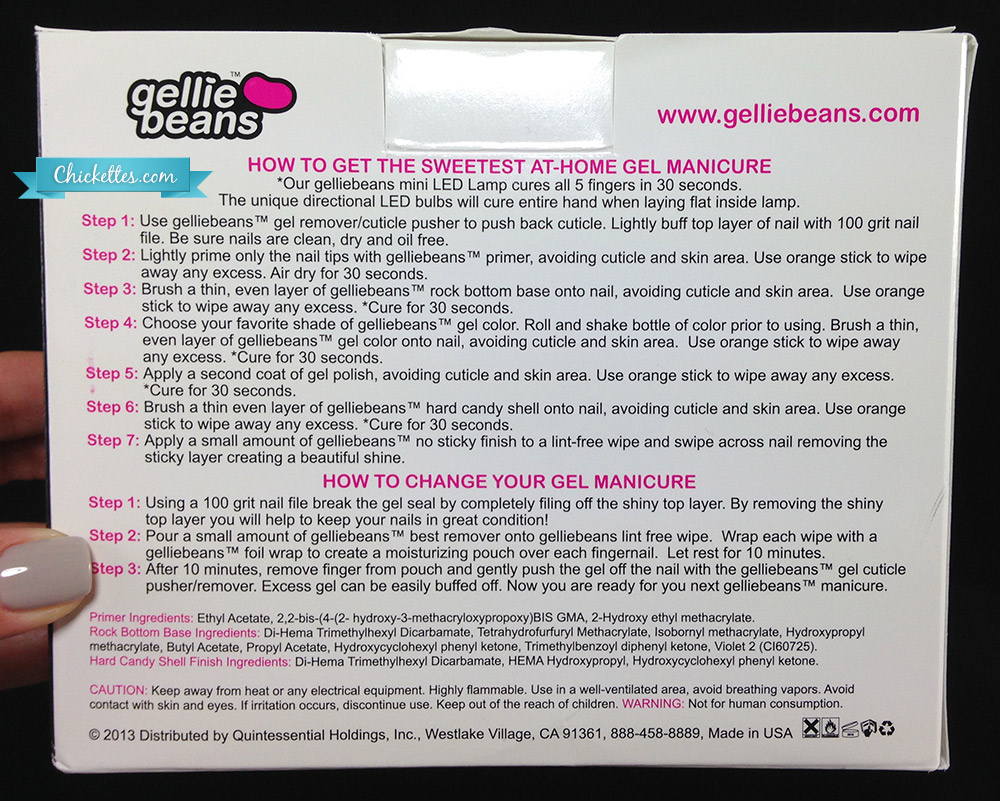
I followed the step-by-step directions that are included on the back of the GellieBeans starter kit box. A picture of the instructions are below (click on the image for a larger view). There are a couple of quick things to note:
- Step 1 says to lightly buff the top layer of your nail with a 100 grit nail file. The kit doesn’t include a nail file, but I want to point out that a 100 grit file is too coarse to use on the surface of your nail. Please use a 180 or 220 grit buffer instead.
- Step 2 says to apply the primer on your nails. I used the primer in my wear test since it was recommended in the instructions. Primer helps bond the gel polish to your nails and is great for people that regularly have issues with chipping or peeling gel polish, but generally is only needed on the tips. Applying primer will make your soak-off take a little longer than normal.

I used the GellieBeans lamp for the curing process. The lamp appears that it would be wide enough to fit your full hand, but it’s not deep enough to fit the thumb at the same time as the fingers so the thumb has to be cured separately. It only has a single on/off switch on the back, and doesn’t have a timer so you have to manually time the cure. I really wish the lamp at least had a 30 second timer on it.
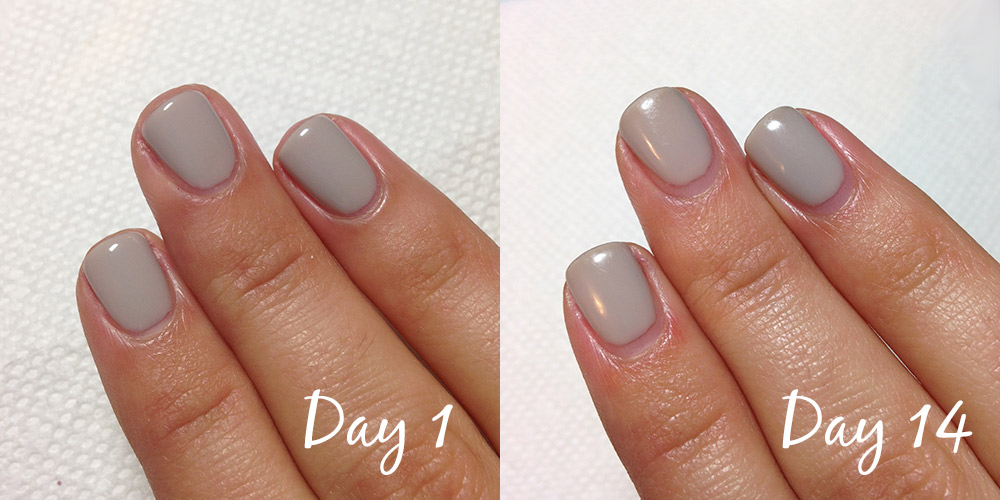
I applied two coats of “More Cream Less Coffee” on my right hand for the wear test. I’m happy to report that my GellieBeans manicure lasted for two full weeks with no chipping or peeling. Below is a picture of my nails after 2 weeks of wear. The top coat got a little scuffed up, but overall the polish held up well. And yes, the nails on my right hand are super short right now! I suffered a bad break on the middle nail prior to starting the wear test and filed all of them down.

Removal
I also followed the instructions for the removal process, which says to break the seal with a file and then apply some of the remover liquid onto a lint-free wipe and wrap it around the nail with a piece of foil. I was actually skeptical that this would work since the lint-free wipes are so thin, so I used the wipes on two nails and cotton on the others… in the end they all worked exactly the same. I checked my nails after 10 minutes of soaking and the edges of the nails were starting to peel up, but the polish was still adhered pretty well to the center of the nail. I repeated the soak/scrape process a few times until it was all off. The total removal time took about 20 minutes. I believe that applying primer to the whole nail probably made the soak-off take longer than it should have. I recommend using primer on just the tips if you find that you have issues with chipping or peeling.
The Colors
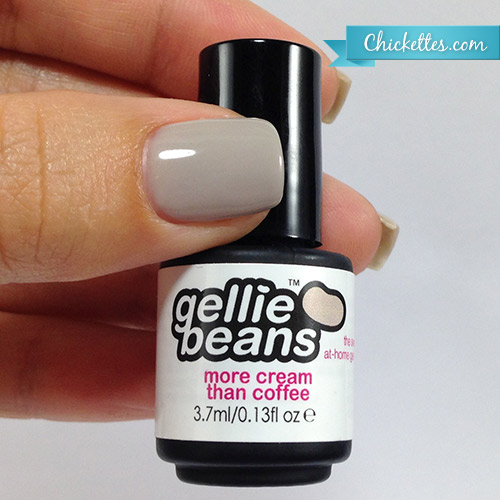
As seen above, this is More Cream Than Coffee, a creamy light grey. You’ll notice that my swatch photos only show three fingers, and that’s because the bottles are very small and I couldn’t do my normal 4-finger pose. The GellieBeans bottles are 3.7 ml / .13 fl oz, which is about a quarter of the size of a typical full size gel polish bottle.


Overall Thoughts
I was impressed by the application and wear of GellieBeans gel polish. The removal took a little longer than normal, however I attribute that to the primer. My nails generally hold gel polish well and I don’t typically need a primer. The retail prices are high considering the size of the bottles and the lack of features on the LED lamp… the special Gloss48 sale prices are more reasonable. I think these polishes might make a good gift for a teenager or someone that’s just starting out with gel polish, but avid gel polish users will likely find the bottle size to be too small.
You Might Also Be Interested In:
- Plum Paisley Stamped Nails and Liquid Palisade for Easy Nail Art Clean-Up
- Bio Seaweed Gel UNITY All-In-One Color Gel Polish Review
- NailMates for Gel Polish Removal
- YouVeeShield Review – UV Protection Solution for Gel Polish Manicures & Pedicures
- Gelish 18G LED Lamp Review