DIY: Leather Luggage Tags + My Trip to Hawaii!

This post is in collaboration with Allegiant Air and Oahu Visitors Bureau.
Aloha crafters! If you've been following me on Instagram then you might know that I just got back from Hawaii. Wow, what an adventure! I was only there for four days, but it was one of the most relaxing, beautiful, fun and rejuvenating trips I've been on.
I feel so lucky to have been asked to join Allegiant Air on the launch of their non-stop service from Los Angeles to Oahu, the heart of Hawaii. Luckily, Allegiant Air is making it a little easier on the wallet for me and my fellow Angelenos to travel to paradise with flights from LAX to Honolulu for as low as $149 one-way (limited seating restrictions may apply). That might even be affordable enough for a quick weekend getaway! Check out my full Hawaii recap below after the tutorial.
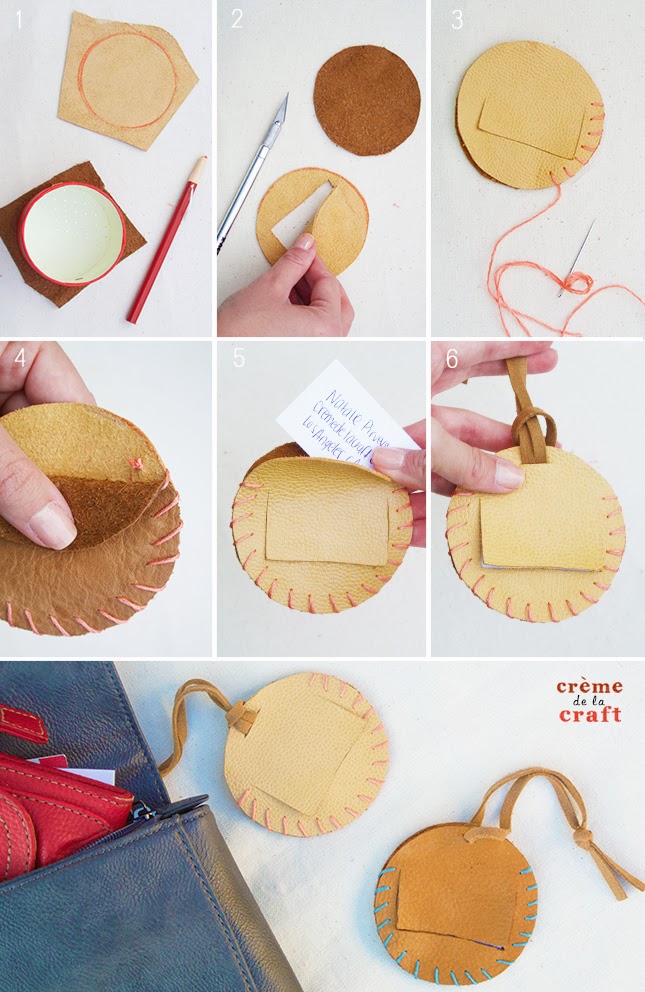
Now, let’s make some luggage tags for your next trip. Starting with a brand new video tutorial...
As I hope to do more traveling in the coming years, I decided to create a stylish ID tag for my suitcase. These will not only help identify your bag in a sea of other look-alikes, but it adds just a dash of personality to help you travel in style! Or they could even make a great gift for a loved one who will be going abroad.
I chose leather for this project because of its durability, which is important when traveling. Plus, I had some scraps lying around. This project involves some minimal hand-sewing, but nothing you can’t do while watching some TV on the couch. So let's begin!

Materials: • 2 leather pieces (not too thick so you can sew them together) • Round container or cup (to be used as a stencil) • Pen or colored pencil • X-acto knife • Scissors • Embroidery floss & threading needle • Ribbon or leather strip

More posts from