My DIY Wedding Save the Date Cards


engagement session photo by Luna Photo
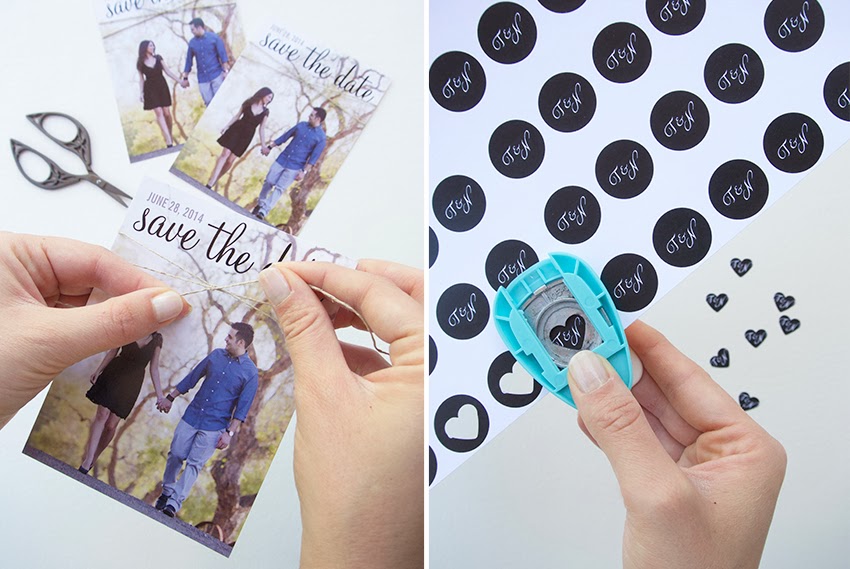
I can’t believe our wedding is almost four months away! I’ve been getting a lot of questions about the wedding craft projects I’ve been working on so I’m going to share them all in the next few months…starting with my save the date cards! I printed them through Zazzle, which has hundreds of beautiful designs to choose from. The crafty side of me wanted to add a personalized touch though. I wanted to incorporate our initials in the design while also adding some dimension, which is how I came up with the idea of attaching little heart-shaped embellishments. What do you guys think?

I need to send a special shout-out to our incredibly talented wedding photographer Paula from Luna Photo who captured the beautiful photo on the card. She took us to some beautiful locations in San Diego and made the entire shoot feel so comfortable...and fun! Tony and I have been together for many, many years so we probably have hundreds of pictures together, but Paula captured some of my favorite photos of all time. Her blog is filled with breathtaking pictures...see for yourself! This engagement session is my personal favorite. We can’t wait for her to capture our wedding day and I’ll be sure to share them with you as well!


engagement session photo by Luna Photo
Materials:
• Save the Date invitations (see all of their designs here)
• Twine
• Sheet of the couple’s initials printed on cardstock paper (I created my template in Photoshop, but you can also use Word or even Excel)
• Heart hole punch
• Scissors
• Glue gun

Steps:
• Wrap some twine around the card and knot it to secure. Make sure the knot faces the front of the card (we will cover it with the heart).
• Punch out your heart-shaped initials from the cardstock paper. Hold the hole puncher upside down so you can see what you are punching.
• Attach the heart to the twine using a very small amount of hot glue.


More posts from