
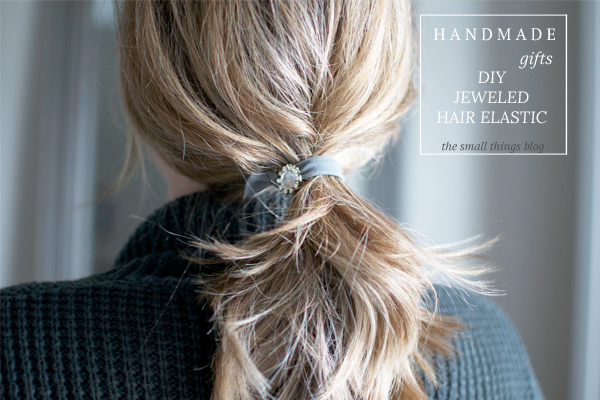
Handmade Gifts: DIY jeweled hair elastic

Usually every night before David’s bath time my hair gets thrown in a ponytail using a soft hair elastic like these. Since I’m using them more and more, I thought of a simple DIY for a handmade gift.
And when I say simple, I mean that in the most literal of terms.

You will need an elastic hair tie. You can purchase them from Elisabeth Ashlie, Anthropologie or Loft, but I wouldn’t recommend the ones from J.Crew because they are too tight. Or, you can purchase elastic by the yard and tie them yourself! The perk of purchasing the elastic directly is you can choose the exact colors and patterns you would like. I have purchased from this Etsy shop previously and had a great experience.
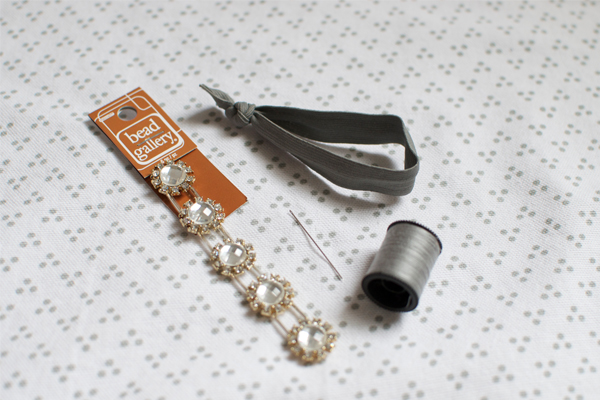
Tools supplies:
hair elastic
slider bead that will lay flat, or even a button*!
needle & thread
*these would be pretty on a dark grey or cream elastic
*heck, forget the needle and thread altogether and just slide one of these on for a monogramed hair tie!

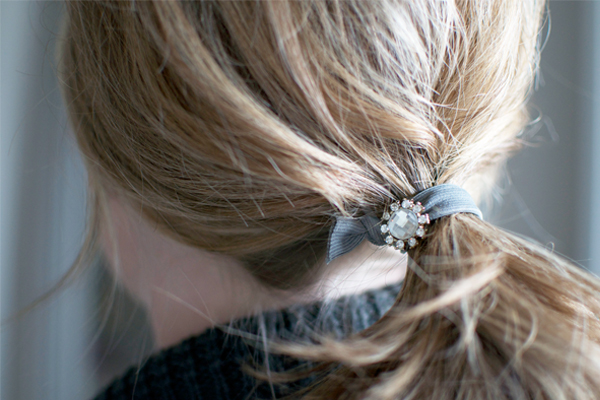
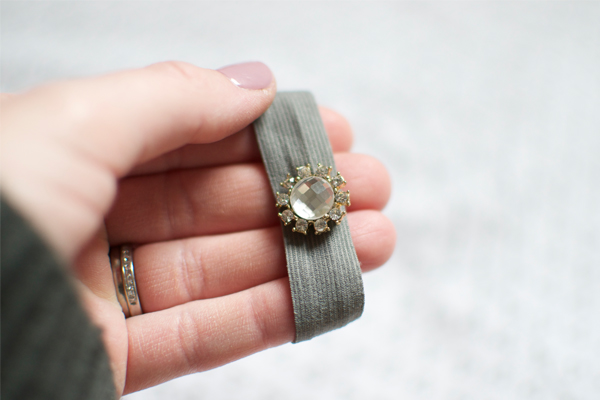
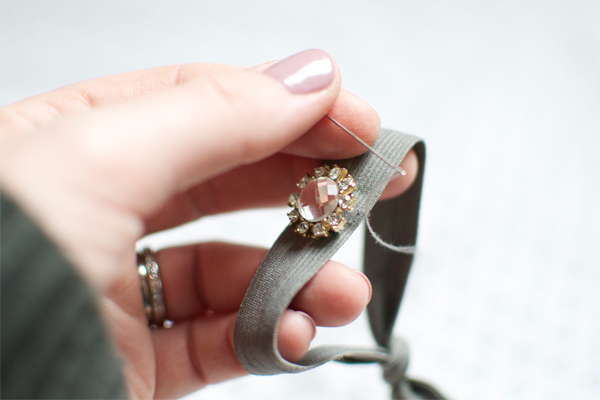
Make sure your elastic is the right size before you add the bead. It seems that the average length (untied) for elastic hair ties is about 7 inches. Place your button or bead across from the tied end. It’s natural to want to center it, BUT keep in mind if you do center it the tied end will line up perfectly with the bead when the elastic is wrapped twice around the hair. So, while it may look strange unworn, it may be a good idea to scoot the bead or button over an inch or two so the tied end will sit below the ponytail and allow the beaded end to be on top.

Tie a large knot at the end of your thread. The elastic stretches (duh kate) and a small knot on thin thread will slide right through a hole.

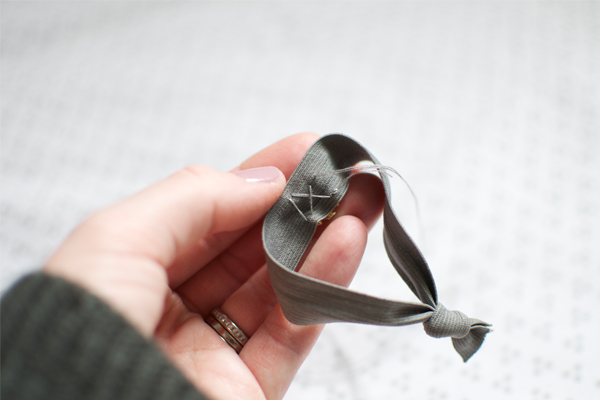
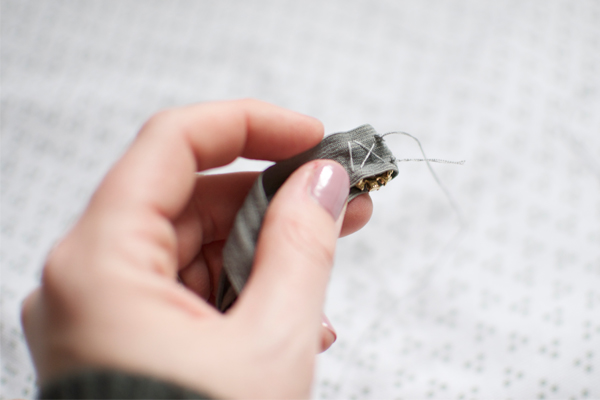
Criss cross your stitches on the underside of the elastic. Make sure the bead or button is tight enough to be in place without being stretched too tight. You want a little give for when you wear the hair elastic.

Make sure you tie another large knot at the base of your thread once the bead or button is attached. It may not even hurt to reinforce it with a bit of superglue!


It’s a perfect little stocking stuffer that takes such a small amount of time and effort, and is fun to make! It would even be fun to make your own at a christmas party!
Did you catch my last handmade gift?