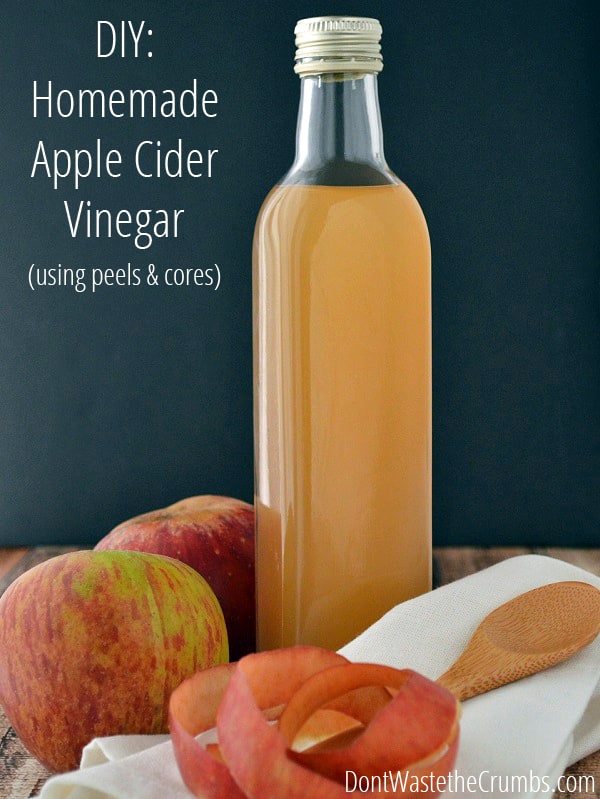
DIY: Homemade Apple Cider Vinegar (using peels and cores)

We try really, really hard to waste as little food as possible.
Soft or squishy tomatoes are perfect for homemade ketchup and brown bananas are excellent in Mr. Crumbs’ favorite muffins. Any other fresh produce that goes uneaten from snacks or meals is tossed into a container in the fridge, and at the end of the week, is added to whatever smoothie concoction we’re making at the time. Leftover plain oatmeal becomes any numerous flavors of baked oatmeal or a chocolate snack cake.
Chocolate cake, if I get to choose.
But what REALLY makes my day is when those last little bits of food can be turned into something else that I normally buy. Rinds from oranges, limes, lemons and even key limes are soaked in vinegar to make the easiest all-purpose (and all-natural) cleanser ever, and we haven’t bought a cleaning solution in well over a year.
Apple season (and a visit to a local u-pick farm) means we almost always have some sort of apple dish in the kitchen. (Our favorite continues to be the oatmeal apple breakfast bars.)
Naturally, apple dishes means lots of apple cores or peels. We were using them in smoothies… and adding them to our garden dirt (one the easy and free ways to improve the dirt now, for next season)… but at the rate we were going through apple dishes (both for testing, and enjoyment), I still had plenty on hand.
As it turns out, you can use apple peels and cores to make homemade apple cider vinegar! This, my friends, is truly an ingenious idea. We use apple cider vinegar for a variety of things… soaking grains, warding off cold bugs, as a facial toner and even to remove moles!
Pasteurized apple cider vinegar is what most stores carry, and it’s fairly affordable. However, it’s always best to get the raw and unpasteurized version whenever you can. Unfortunately, the better option comes with a bigger price tag - $20 for 64oz of “raw and unfiltered” on Amazon.
On average, it takes us a couple months to go through a 32oz glass jar of apple cider vinegar. Spending $5 each month isn’t so bad, but still. If I can make the same thing for FREE, then why not?!
Apple cider vinegar earns bonus points too, since you don’t have to really “work” to make it.
DIY: Homemade Apple Cider Vinegar (using peels and cores)
Supplies
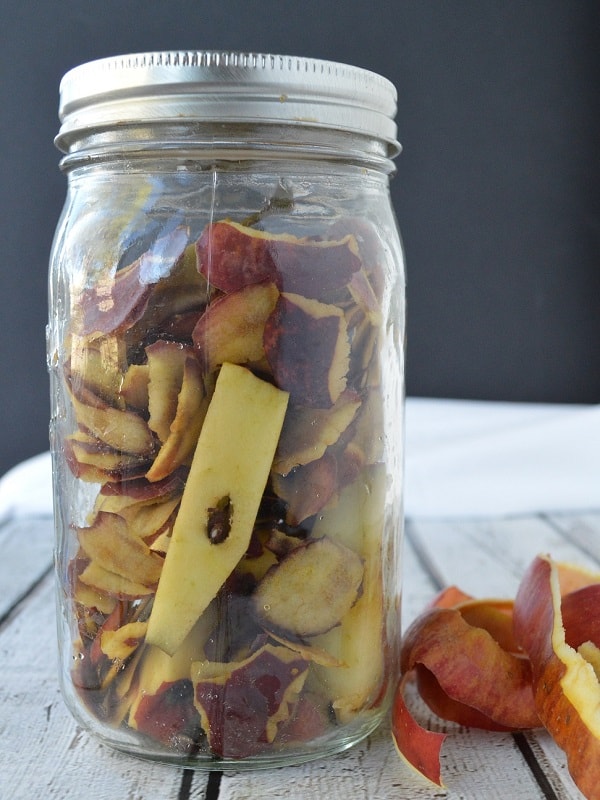
- apple peels, cores and any browning/discolored flesh from pesticide-free apples (approx 6 large apples)
- one quart-sized jar
- one canning lid (the ring, not the part that seals), OR a rubber band
- coffee filter
- 2 – 2 1/2 Tbsp granulated sugar
- 2 – 2 1/2 cups water, boiled and allowed to cool
Note: You want the peels to be from apples that have been scrubbed very, very well. Organic apples are preferred, but simply buy the best you can afford and use this all-natural produce cleaner. Secondly, it’s okay to use brown or bruised apples. However, it is NOT okay to use moldy or rotten apples.
Method
Place apple peels, cores and/or any browning or discolored flesh in a quart-sized glass jar.
Tip: You don’t HAVE to use a quart-sized jar, but it’s what I readily have available. Feel free to use whatever size jar you have on hand.

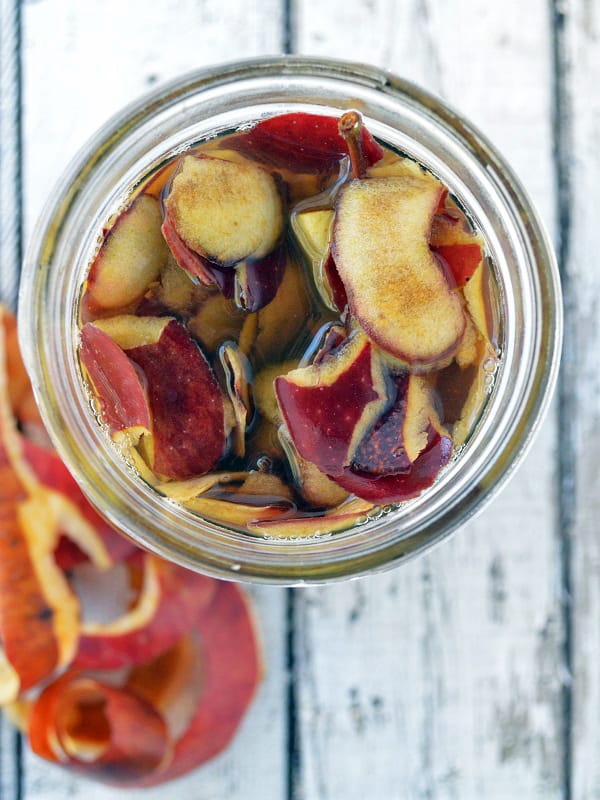
Add 2 Tbsp of sugar and 2 cups of filtered water to the jar so that the apples should be completely submerged in water. If they are not, you can add an additional 1/2 Tbsp of sugar and 1/2 cup of water.
The sugar is used to help feed the fermentation and while optional, it helps to speed up the process.
Stir the apples, sugar and water and cover with a coffee filter. Secure with a canning band, or a rubber band.
Tip: If you’re using a different sized jar and adjusting the quantity of sugar and water, the ratio is 1 Tbsp sugar per 1 cup water.


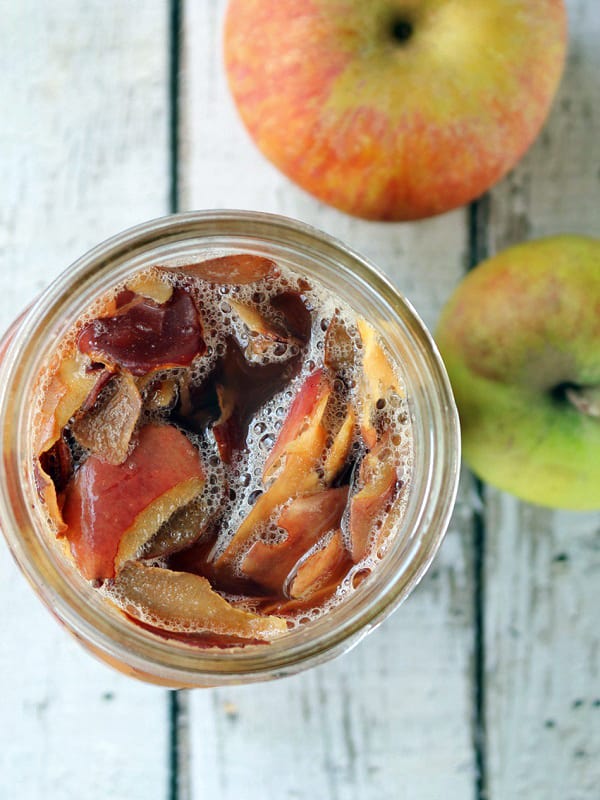
Allow apples to sit in a warm, dark place for 2 weeks. Above the refrigerator or on the top shelf of a cupboard are great places. Just don’t forget you put it there!

After 2 weeks, you might notice some fizz or some bubbles. That’s good news! Strain out the apples and compost (or feed them to your dog or whatever… just don’t throw them away!). Cover the apple cider vinegar again with a coffee filter and canning band and allow to continue to sit.

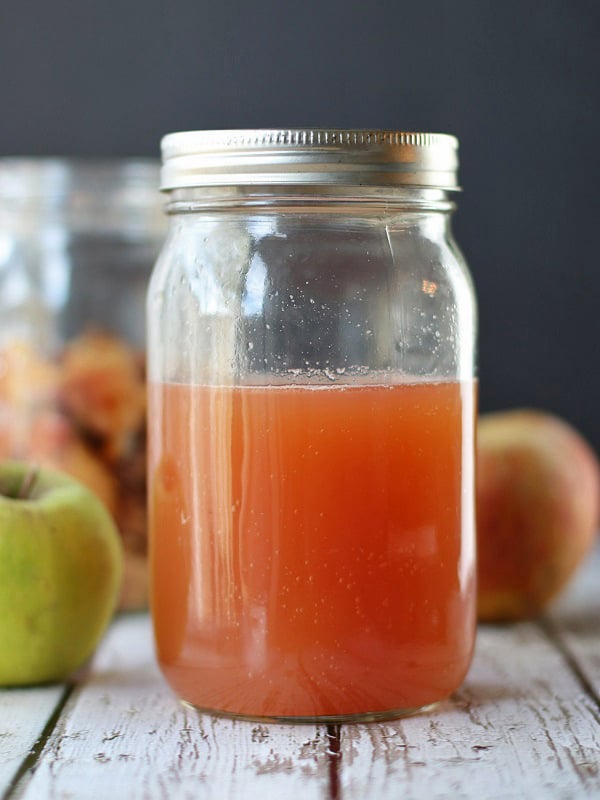
The vinegar may become cloudy or a SCOBY could form on the top, both of which are normal. Taste the vinegar once a week until it’s your liking. You can stop the fermentation process by replacing the coffee filter with a canning lid and storing it in the refrigerator.
And that’s it! You’ve just made your own apple cider vinegar and saved yourself some cash!
Cost Breakdown
Well, it’s hard to say that this recipe really costs anything at all, since you’re using what was going to be in the trash can in the first place. BUT, I did say you needed sugar… so, we’ll do the math anyway.
As written, this recipe makes approximately 28 ounces of vinegar and costs just 1¢ per tablespoon of sugar. So one batch of homemade apple cider vinegar costs $0.02.
Additional Recipe Tips
The entire process can take anywhere from 2-6 weeks. If you would like to speed up the process, you can add 1 1/2 Tbsp raw, unpasteurized apple cider vinegar for every 2 cups of water, when you add the sugar. This would be called a starter, and helps to kick start the fermentation process. Strain the apples after just one week, and taste each week thereafter.
You can substitute honey for the sugar, but since it’s eaten by the yeast anyway, I prefer to use a less expensive sweetener.
You can also omit the sweetener altogether, but the total fermentation time will be up to six months.
FAQ’s
Can you use this apple cider vinegar to make more? Yes!
What do I do if I have a SCOBY? I would use it to make more vinegar, but I’ve heard dogs really them as a treat.
My vinegar is moldy. Is it still good? No, toss it out and try again. I’m usually willing to toe the “is it still okay?” line, but I draw the line at mold.
Looking for Apple Recipes Just to Make Apple Cider Vinegar?
Here’s a few of my favorites:
- homemade applesauce
- apple butter (plus 7 variations)
- salted caramel apple bars
- slab apple pie
- oatmeal apple breakfast bars
- dehydrated apple chips
- no-bake apple oatmeal cookies