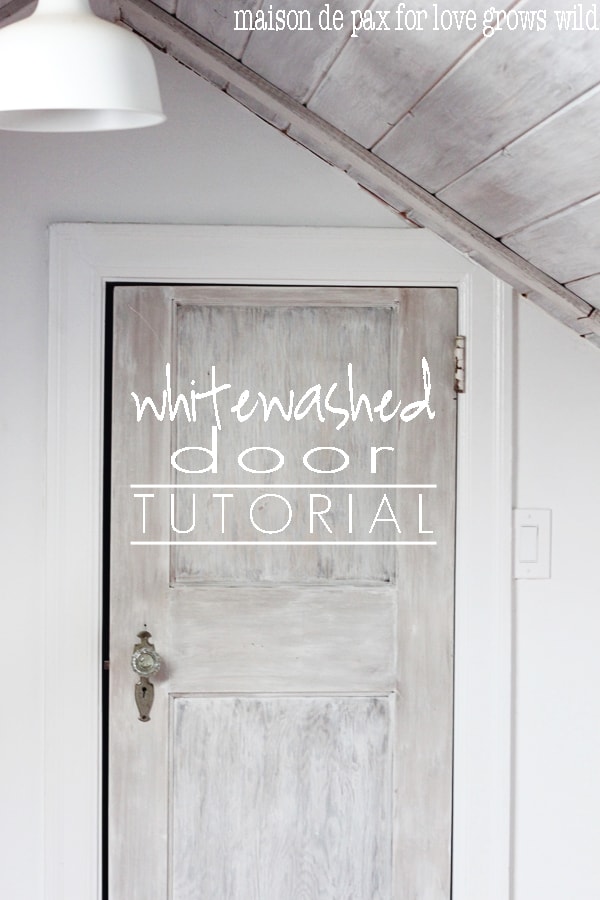
Whitewashed Door Tutorial
Hi Love Grows Wild readers! It’s Rachel again from Maison de Pax, and I’m so excited to share this latest DIY with you. Who can resist something with beautiful texture, depth, and richness, especially if it also functions to brighten a space? Today we are going to look at how to whitewash a door.

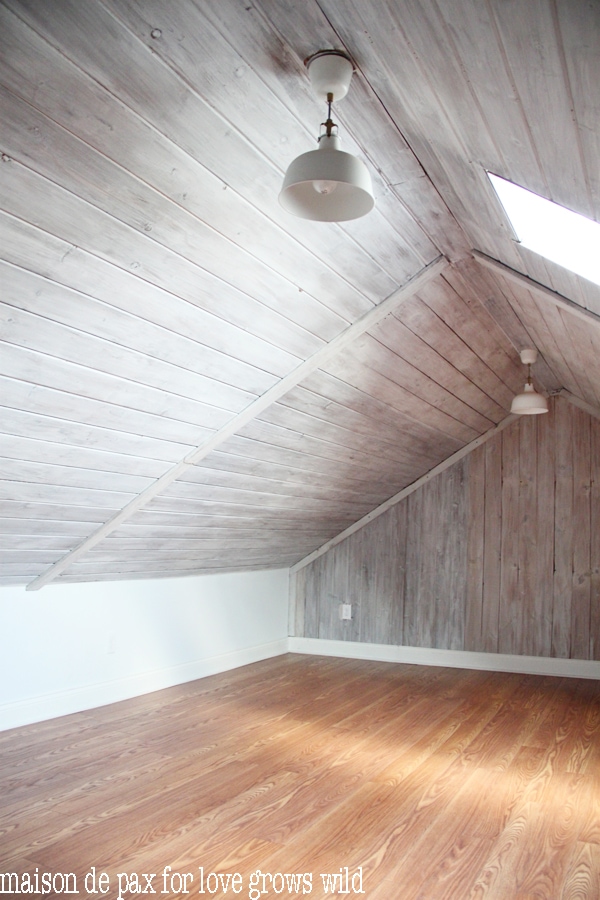
If you follow me on instagram (and if you don’t, I’d love for you to do that here), you’ve seen some serious renovations in progress. In preparation for the arrival of our third child in May, we decided to finish out the third floor attic space as a guest room, freeing up the previous guest room to be her nursery. Long story short, we’ve had a TON of exciting, exhausting, and downright entertaining DIY projects as we frantically work to finish this space. Just last week, I shared how to whitewash planked walls and ceilings.

But that’s a huge project, requiring planking your walls and/or ceilings in raw wood, staining, and whitewashing… What if you want just a little touch of the whitewashed look? That’s where the door comes in.

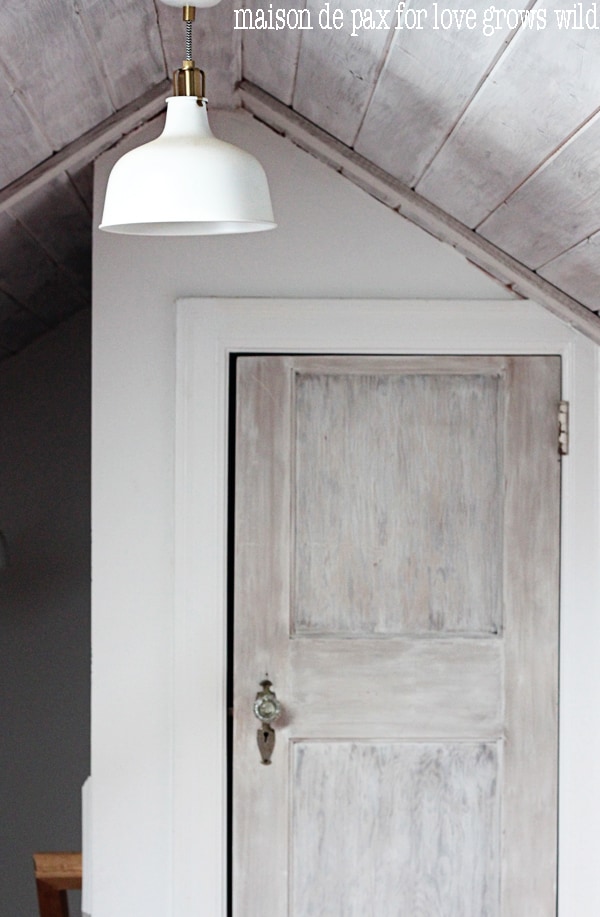
We found this little thing in the attic of our 1940 colonial (side note: I LOVE living in a home that has treasures hidden like that!), and it was raw, aged cedar. Pretty cool, but way too rustic cabin-looking for my taste. Rather than paint it white like the rest of the doors in the house, I thought we should capitalize on the wood grain and give it a whitewash like the planks. (By the way, don’t judge the giant gap; we have another piece of trim that still needs to go up; I just couldn’t wait to share this tutorial with you!).

But what if you don’t have a cedar door hiding in your attic? Any old, wooden door will work. Check the curb, the thrift store, lumber yards, etc… You never know what you might find. If you really wanted to get creative, try painting a door a dark brown and then using this whitewash technique; who knows, the brown peeking through might just have a similar effect.
On to the tutorial… How to whitewash a door:
- Sand (if necessary, ours was rather beat up) and clean your door.
- Mix 1 part water to 2 parts flat, white, latex paint.
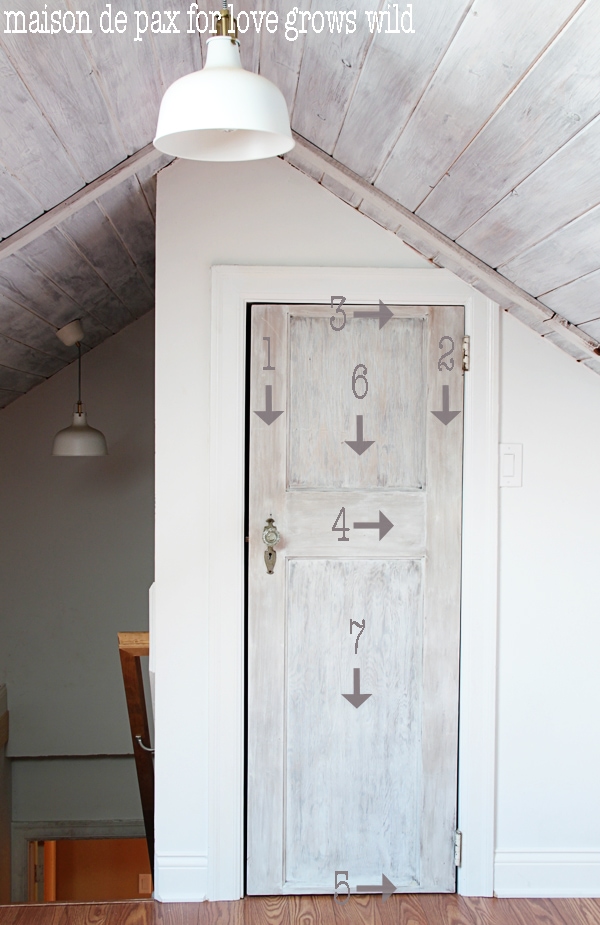
- Brush (don’t roll) your paint in the direction of the wood grain (see below).
- Have paper towels or rags on hand to wipe, smudge, and rub the paint mixture into the wood in the direction of the grain.
- Repeat #4 if desired.
- Consider dry brushing some of the whitewash mixture to achieve the desired look. (I realize that “dry” brushing watered-down paint may seem contradictory, but to do so, merely squeeze out your brush, dab just a bit of the paint mixture onto the ends, and lightly brush the door in the places where you need more. Generally, you won’t want to rub away dry brushed paint; you simply use the brush to give it the desired texture.)
The only tricky part is getting the brush strokes to look right. Since you’re not painting the door completely, the heavier paint at the corners or ends of strokes can really stand out. The brush strokes also add to the texture of the piece, though, so you don’t want to erase them completely. Be sure to paint in the direction of the grain; see below for what that looks like on a two-paneled door like ours.

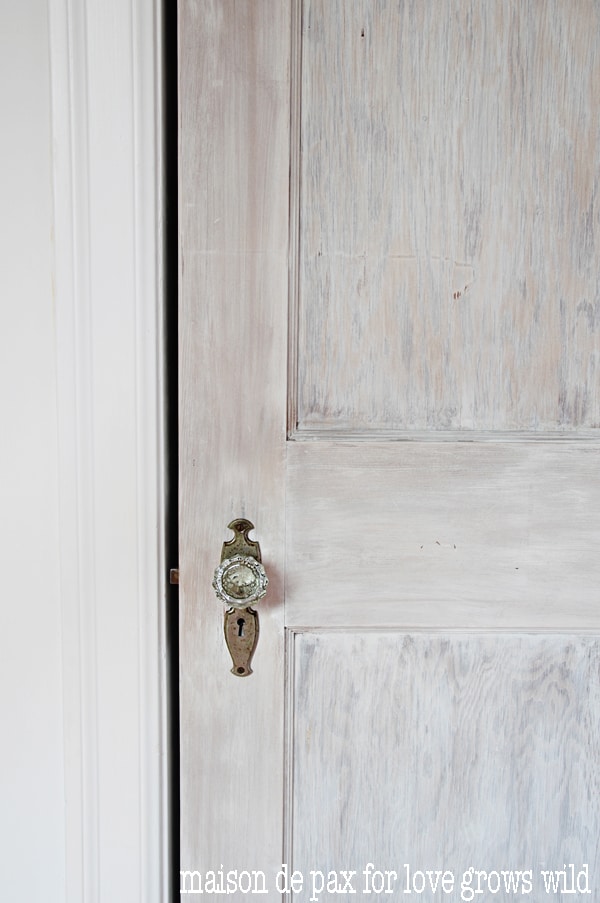
Also, a little tip: keep a damp towel on hand in case you get too many brushstrokes. Even if the paint feels dry to the touch, you can usually rub vigorously and remove some (until it fully dries, obviously, at which point you’ll just have to paint over or sand off!). Most importantly, remember that it should have texture and imperfections… that’s where the beauty lies.

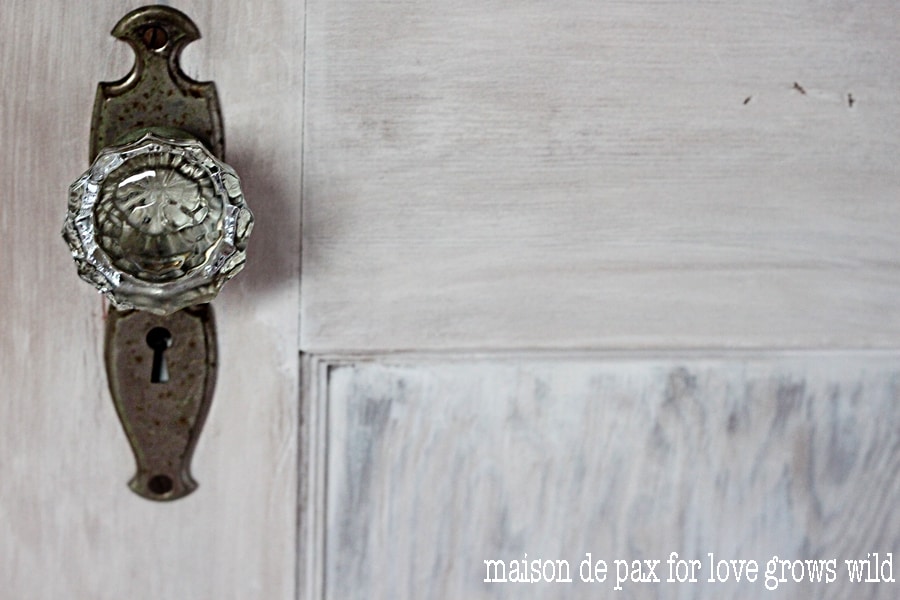
And, if you can, don’t forget to dress your door in some fabulous, vintage jewelry, like this crystal knob… Every girl needs some bling!

I hope you enjoyed this tutorial, and if you did, I would love to have you follow along with the rest of our attic renovation!
Connect with Rachel:
