
Tutorial Tuesday
Happy Tuesday, everyone!
Today's tutorial comes to you out of somewhat of a necessity in my world. I sew and stitch quite a bit and realized that I needed a thread catcher for the floss tails, threads, and fabric pieces that I snip off of my projects as I am working on them. I know I am not the only one who needs a quick place to toss the excess threads and floss while I am sewing and stitching. I am hoping you can make use of this project in your workspace as you stitch up your WIP, as well!

To make this thread catcher basket out of fabric, you'll need:
- Fabric for exterior (11 inches tall by 14.5 inches wide)
- Fabric for lining (11 inches tall by 14.5 inches wide)
- medium weight interfacing (11 inches tall by 14.5 inches wide)
- sewing machine and supplies
- scissors
- embroidery hoop, floss, and needles
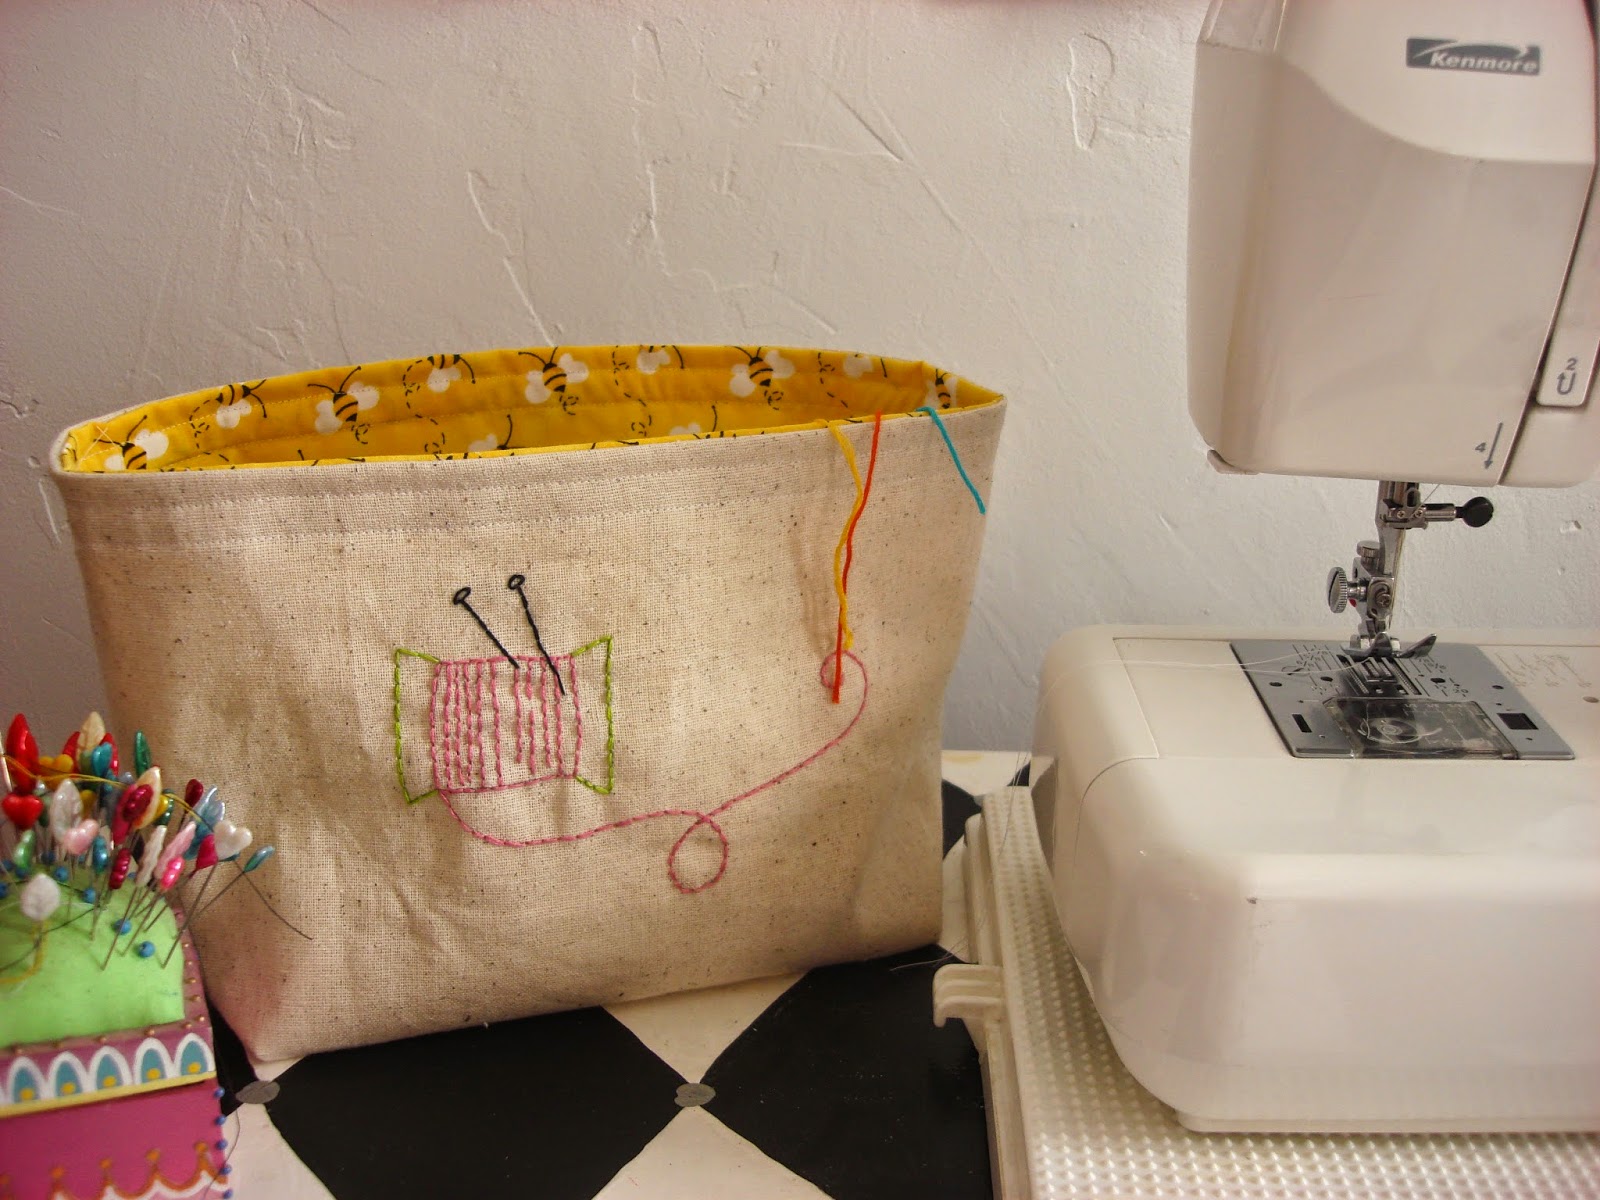
I used the spool image from the Sewing Collage pattern available at Urban Threads.

Step One: Transfer the embroidery pattern to one of the front exterior panels of fabric, keeping it 2-inches from the top edge. Stitch. I used a 3-ply backstitch for this spool pattern.

Step Two: Place the exterior fabrics right sides together, with a piece of interfacing on the wrong side of each exterior piece. You should have a fabric sandwich with interfacing, exterior piece right side up, exterior piece right side down, then a piece of interfacing on top of that.

Step Three: Sew around the three sides of the exterior and interfacing using a 1/2-inch seam allowance, leaving the top open.

Step Four: To create a flat bottom for our fabric basket, take one bottom corner and fold it so the seams are laying flat against each other.

Mark 2.5-inches from the center of the seam, where there is a V. Stitch straight across using the 2.5-inch mark as a guide.


Step Five: Take the interior or lining pieces of fabric and place them right sides together. Stitch along the three edges with a 1/2-inch seam allowance, leaving a 2-inch space open along the center of the bottom edge.

Step Six: Square off the bottom of the lining as we did for the exterior in Step Four. Mark 2.5-inches from the center of the seam, where there is a V. Stitch straight across using the 2.5-inch mark as a guide. Clip the excess fabric away. Repeat for other side

Step Seven: Turn the exterior ride sides out. Place this inside of the lining, right sides together. Stitch along the top edge with a 1/2-inch seam allowance.

Step Eight: Flip the fabric basket right side out, by pulling through the opening in the bottom seam of the lining.

Step Nine: It is optional for you to press this top edge. Top stitch along the top at the 1/4 inch and 1/2 inch marks.


Step Eleven: Place close to your sewing machine or work area and toss your clipped threads, floss pieces, and fabric scraps into the basket.

I hope you enjoy this thread catcher fabric basket and take the time to make one for yourself. It really does help around the work room.
Hope you have a great Tuesday!
More posts from Floresita H