
{Tutorial} How to Sew a Pillow with Custom Welting
Welting is one of those details that adds a totally polished touch to pillows and upholstery and makes a simple homemade pillow look instantly high-end. It's easier to make than you might think, too. Read on and I'll show you how to sew your own welting and attach it to a pillow for a custom look you can make yourself at home.
To sew the welting itself you need fabric and piping (also called cording) - I like cotton piping because of its flexibility.
Take one corner of your fabric and fold it up to meet the opposite edge, making a triangle.

Cut approximately 1 1/2" wide strips of fabric along the diagonal folded edge - cutting it like this (called "on the bias") gives added bendability to the finished welting so it can turn corners more easily. You'll need to measure how many feet of welting you need for the pillow (just add up the lengths of the sides of the finished pillow) and cut about an extra foot than this in fabric strips.
To sew the strips together to make one long continuous strip of fabric, place two strips together with the right sides facing each other. Sew a straight seam across the strips, and repeat until all of your strips are attached to each other.


Now you're ready to start sewing the welting. Wrap the fabric strip around the piping so the edges of the fabric meet. The right side of the fabric should be facing out.

Using either a welting foot or a zipper foot on your sewing machine, sew a straight seam right next to the piping that's tucked inside the fabric.


Once you've sewn piping inside all of your fabric, the welting itself is done. Now it's time to attach it to the sides of your pillow.
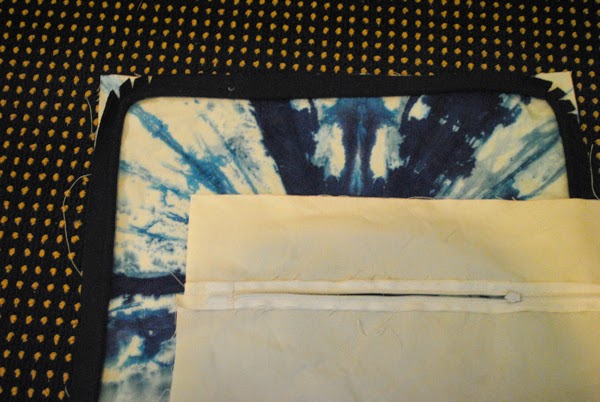
Line up the outer edge of the welting along the outer edge of one square of fabric that will make up one of the sides of your pillow - you can find a tutorial for sewing a pillow with a zipper HERE for all the details on how to cut your pieces and get the zipper attached. I did this pillow a little differently, but more details on that later.

Your fabric should be facing right side up at this point. Hold or pin the welting in place so the edges stay lined up, then using a zipper foot or welting foot on your sewing machine, sew a straight line right next to the cord. When you get to the corners, snip a few spots along the welting's overhang to make it easier to bend around the corner.


Continue around the whole square of fabric until you get close to where you started. Snip the welting so it goes past your starting piece by a couple inches.

Open the seam that's holding the fabric around the welting a bit, and fold the fabric back to expose the piping.

Cut the piping so the two ends meet exactly, then wrap some tape around the two pieces to connect them.


Wrap the finished edge side around the remaining side and hold in place while you finish stitching along the piping to attach the remaining loose welting to the square of fabric.

At this point, you'll have the welting attached to one side of the pillow, with the other side remaining.

To finish the pillow, lay the side with the welting attached on top of the other side with the right sides facing each other. Make sure you leave the zipper open at least a little bit so you can turn the pillow right side out when you finish! Keeping the edges aligned the whole time, sew a straight seam around the entire length of welting. The welting itself will be facing inward, so you can't see it but you can feel your way to keep the machine's presser foot right against it the whole time.

All that's left is to unzip the cover, flip it right side out, and stuff with a pillow insert.
But I'm going to keep you hanging a little on the finished pillow - stop by tomorrow for all the details on how I made the tie-dyed pillow I used for this tutorial!


More posts from Jennifer Bridgman