
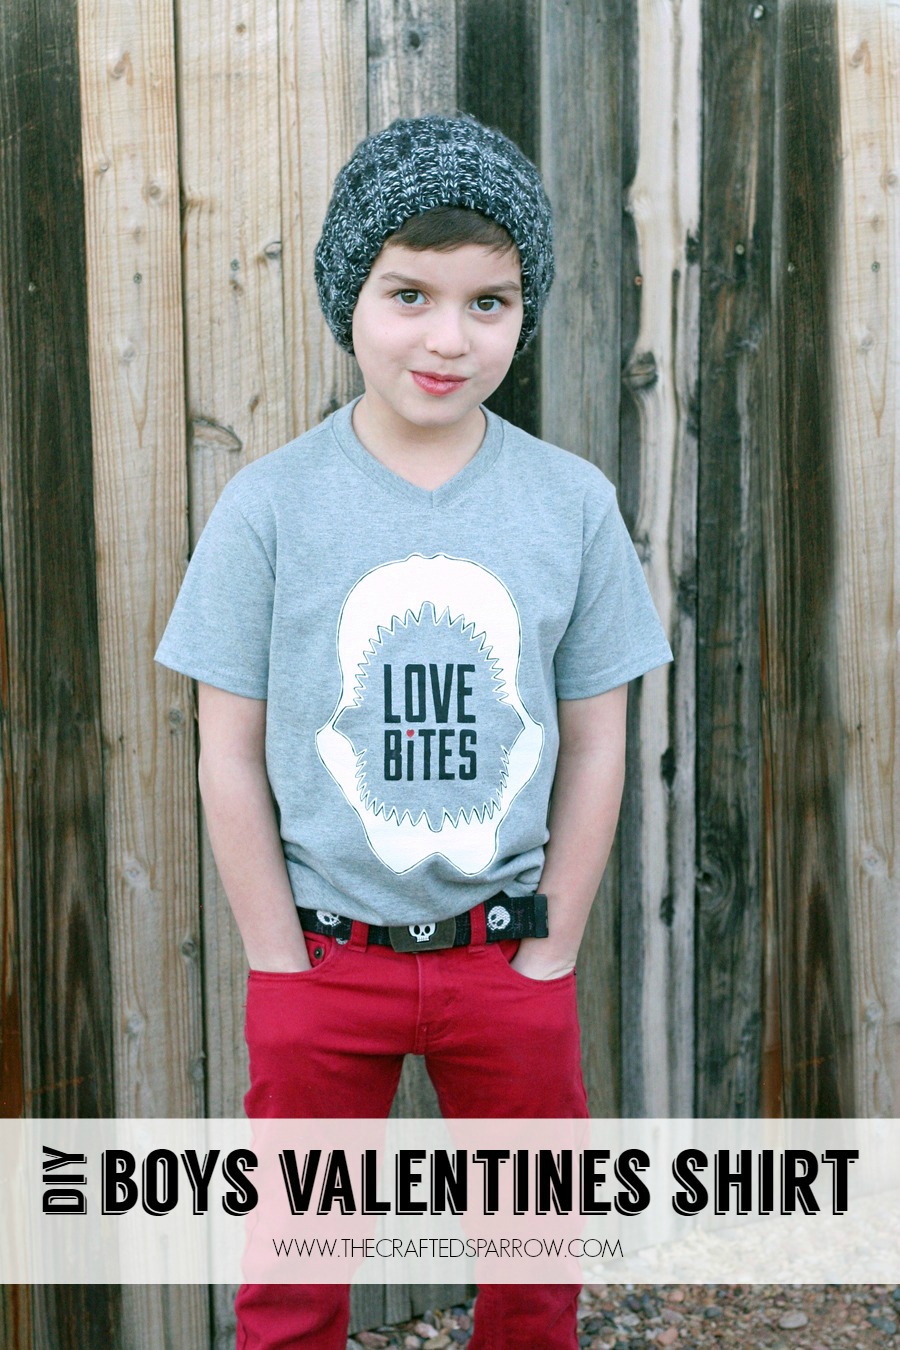
DIY Boys Valentines Shirt
Hi Classy Clutter friends! I’m Rebecca from The Crafted Sparrow, and I’m super excited to be here today sharing this fun DIY Boys Valentine’s Day Shirt.

Supplies:
T-shirt, Walmart – Target – and American Apparel all have great prices
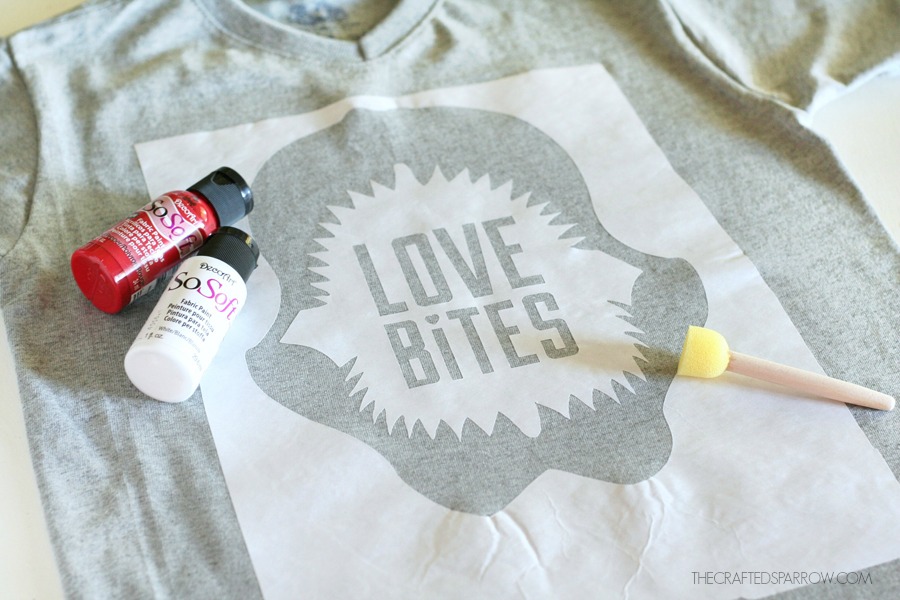
Fabric paint, DecoArt SoSoft brand is my fave
Freezer paper
Cutting machine or Xacto knife
Cutting mat if using the cutting machine
Round foam pouncer paint brush, medium and small
Small detail paint brush, optional
Note: If you don’t have fabric paint you can use acrylic paint with fabric medium mixed with a 2:1 ratio per package instructions.

I own a Cricut Explore cutting machine, and love it. It allows me to take my own custom images and upload them into their Design Space software and create a cuttable image easily. After creating my cuttable file and sizing it to fit my t-shirt I just hit GO on the machine. When using freezer paper to cut a stencil with a machine be sure you place it shiny side down on your mat.
Once the image is cut you can weed out the pieces and set them aside for a second because you’ll need them again.
Note: If for some reason you don’t have a cutting machine you can cut the image by hand. Simply print our your design on a piece of paper, lay the freezer paper over the image and using a fine tip marker or pencil trace your image. Then cut carefully on a cutting mat with your Xacto knife.

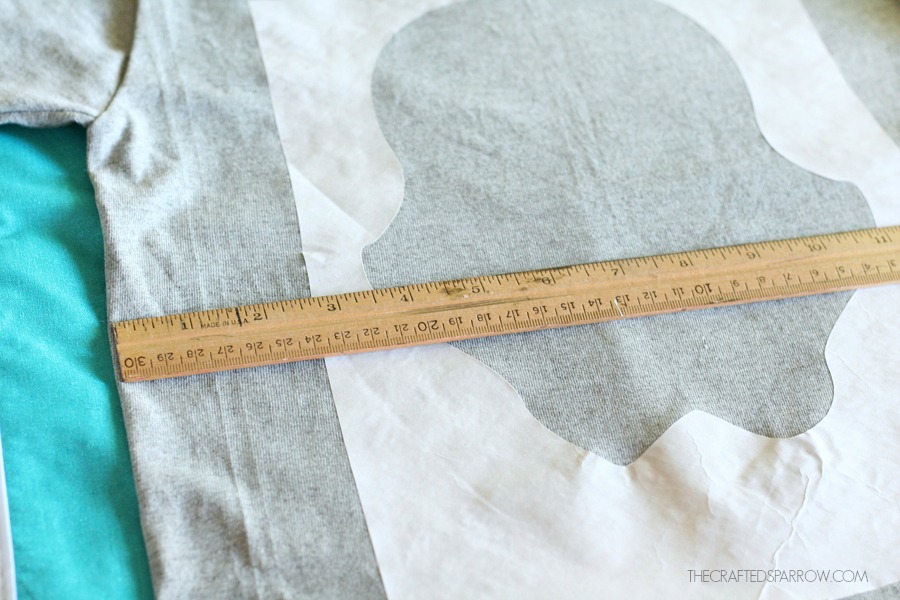
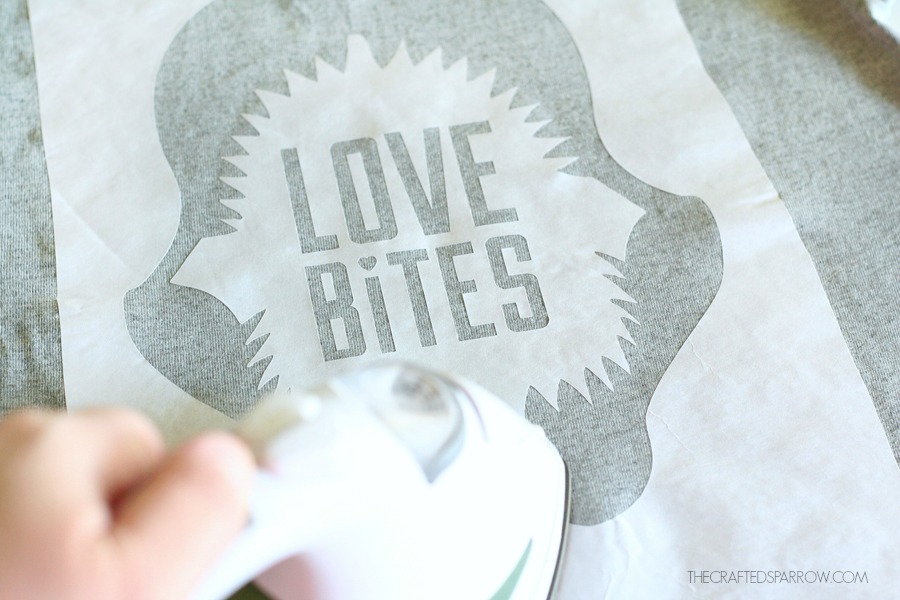
Using a ruler be sure your design is centered shiny side down on your t-shirt, you can use a small piece of masking tape to hold the freezer paper in place on the shirt until your ready to iron. Just be sure to remove the tape before you actually iron anything.
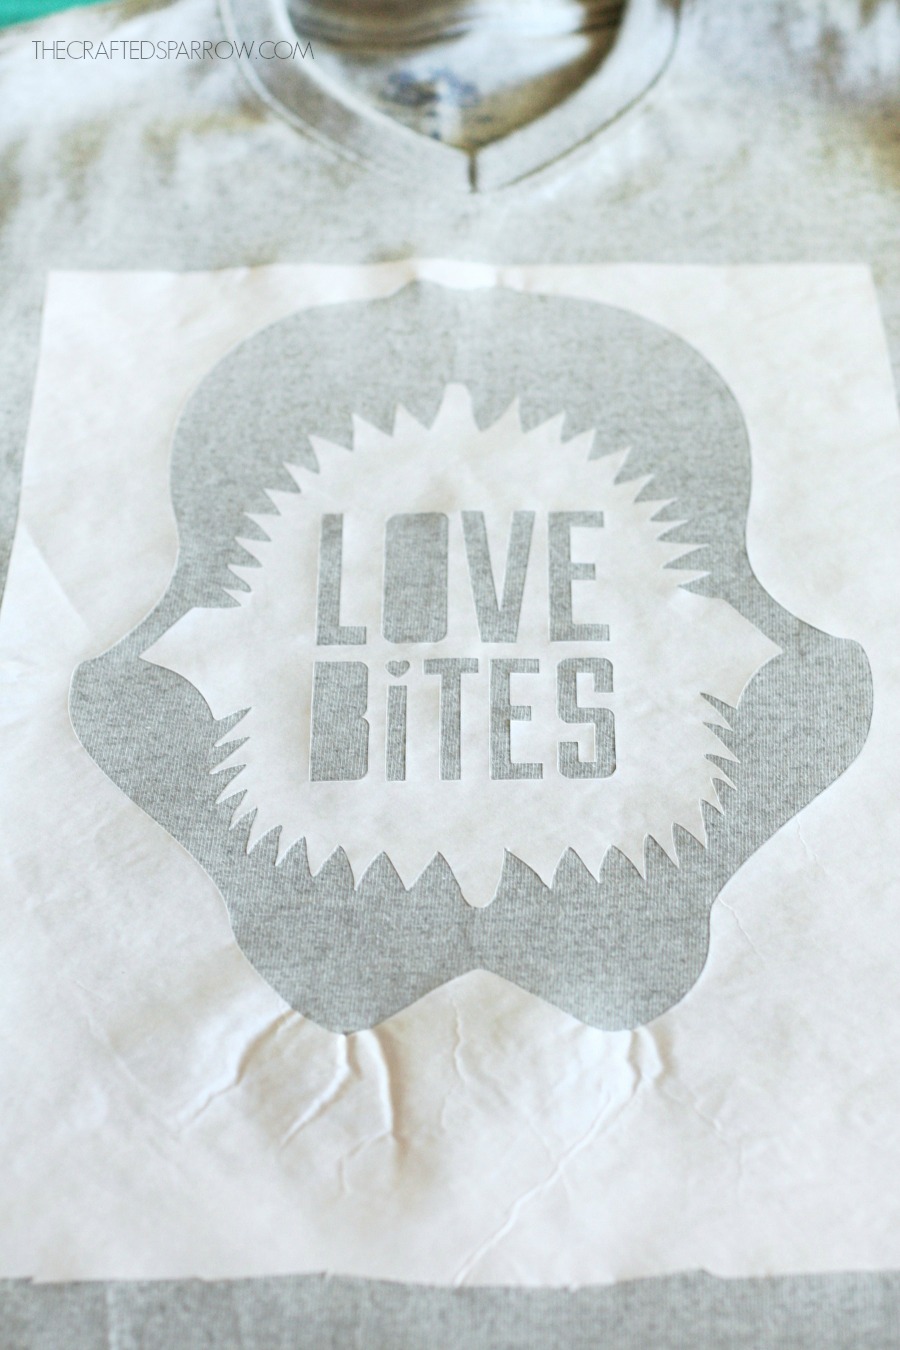
Once you have the large outline piece centered hold in place and carefully press it with the iron. Do not move iron around in circular motions, it’s best to lift and move it. Iron for a few seconds until it’s mostly adhered.
This is where your negative pieces that you weeded will come back, you can use them to fill in the whole design to be sure everything is aligned. Ironing each piece back in place for a few seconds until the image is whole again.


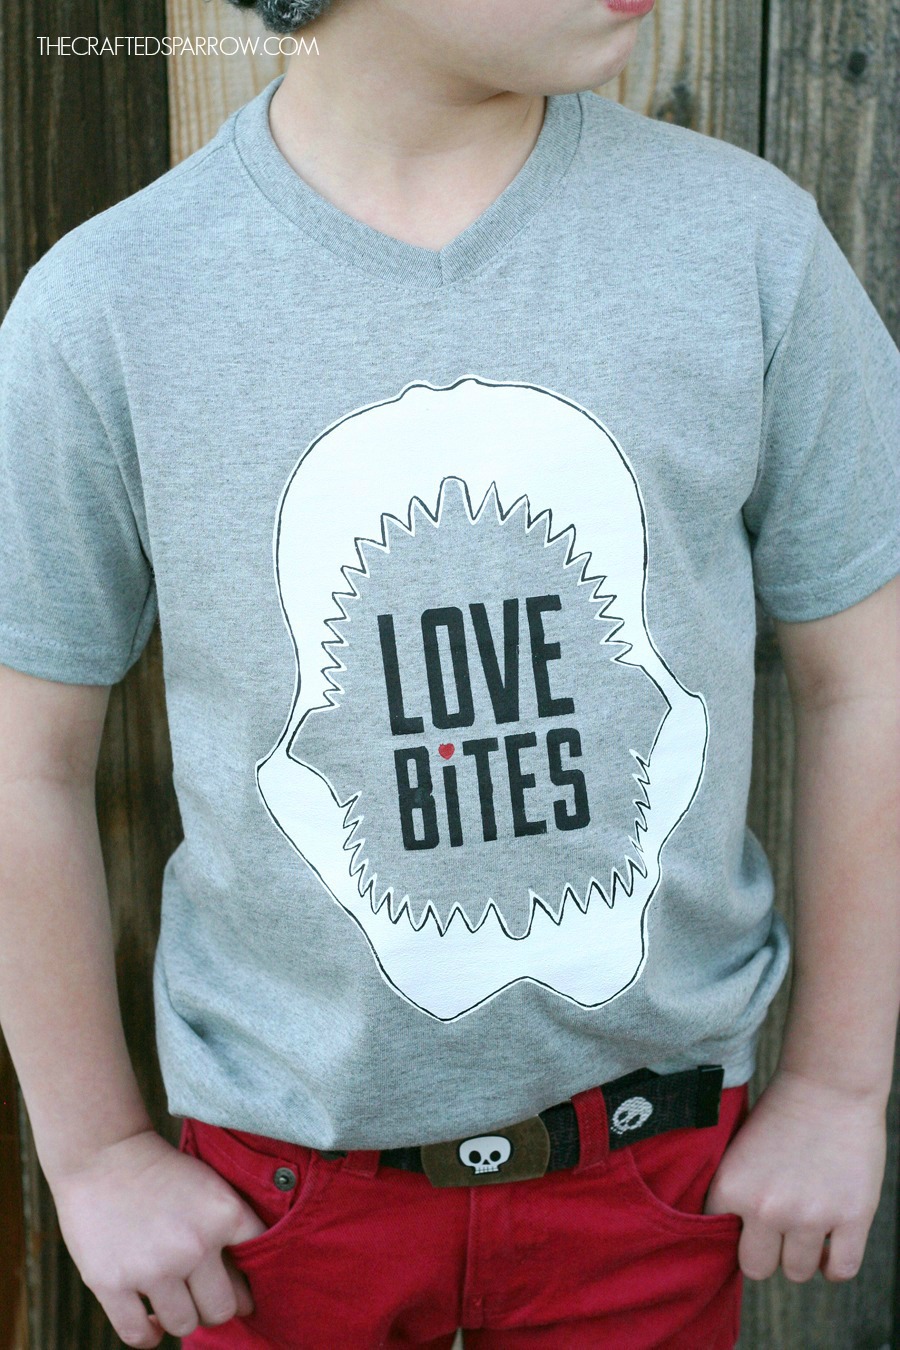
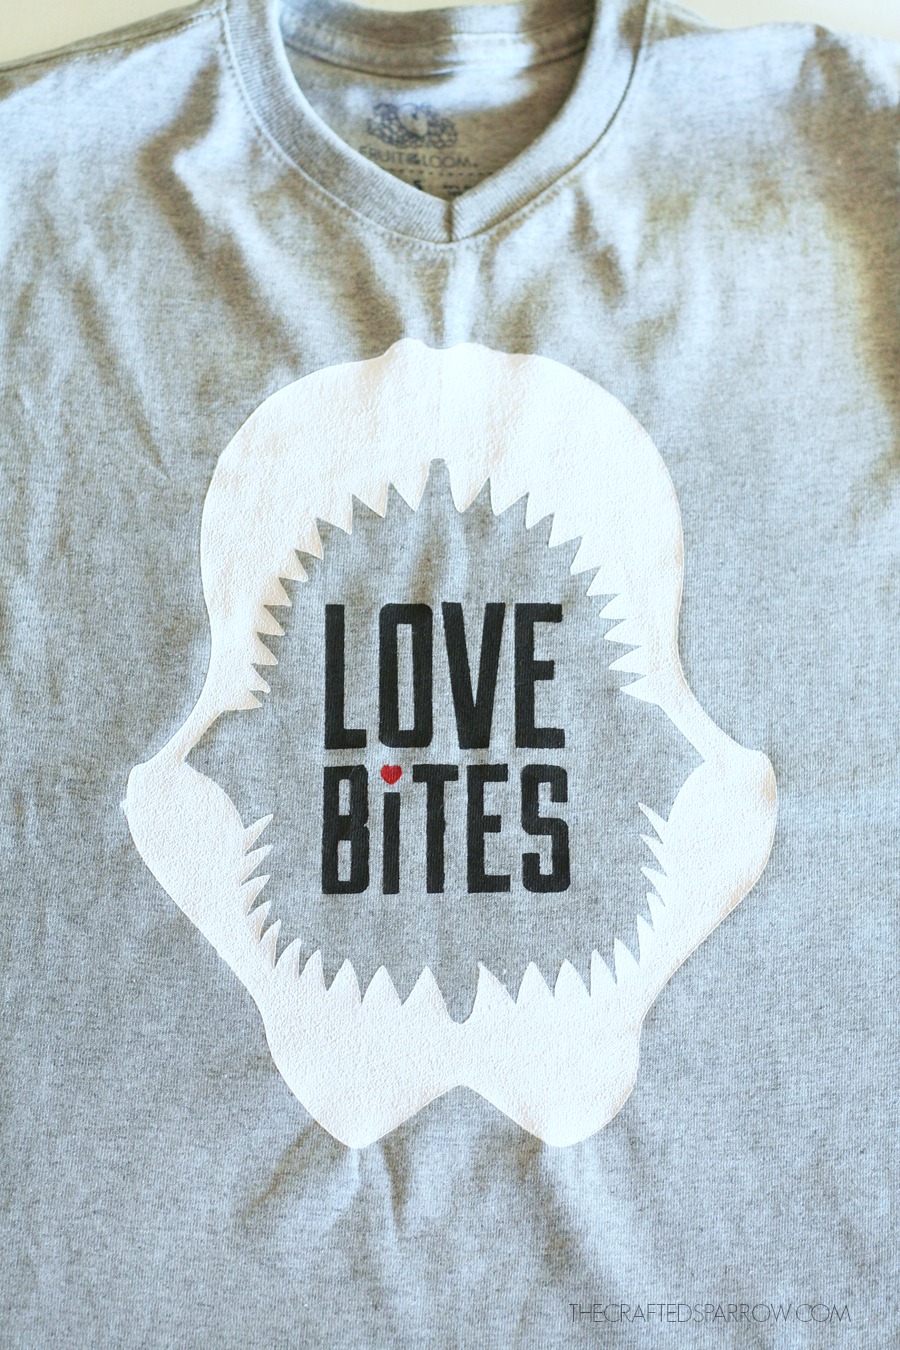
For the white on the jaws I needed 3 coats of paint, the black lettering only needed about 2 coats. I used red on the small heart and just used a small paintbrush to apply it.
Let your design dry 5-10 minutes between each coat, and let it dry for 24 hours before washing or wearing.

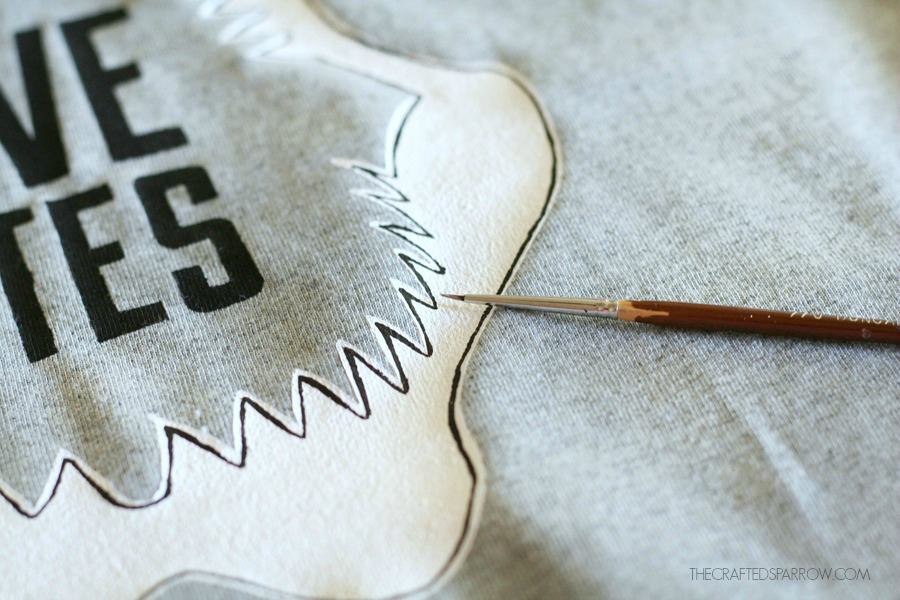
At this point you can leave the design alone and be done. Or you can be like me and grab a small detail brush and some more of the black fabric paint and add a finishing detail to the edges of the shark jaw.


And for even more awesome Valentine’s ideas like this Easy Felt Feather Valentine’s Wreath be sure to visit me at The Crafted Sparrow.

Be sure to follow The Crafted Sparrow
Facebook | Instagram | Google | Twitter | Pinterest
The post DIY Boys Valentines Shirt appeared first on Classy Clutter.