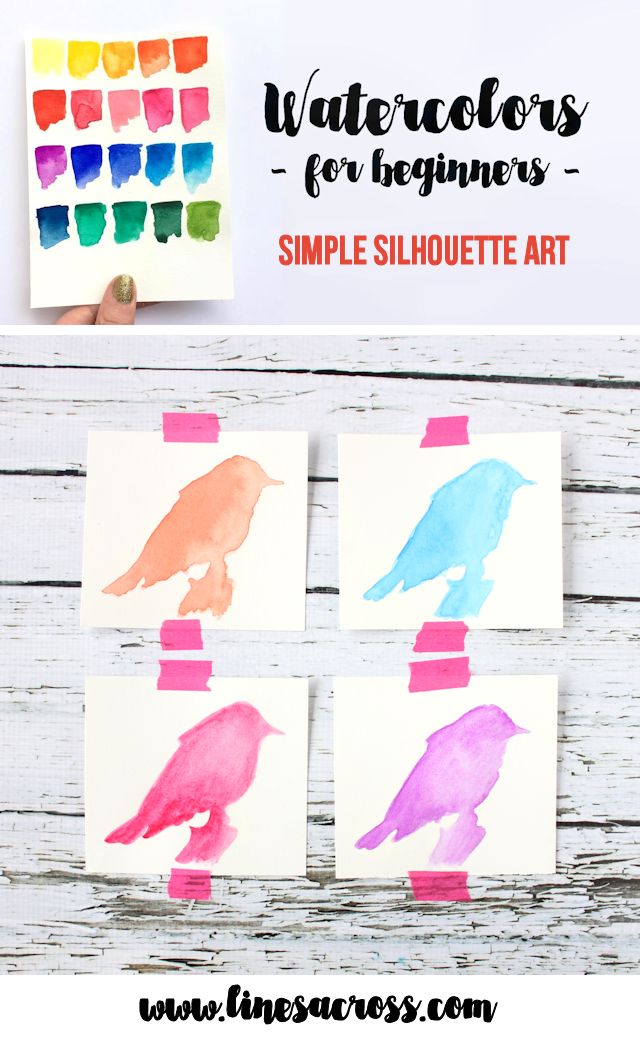
Watercolors for Beginners: Part 3 - Simple Silhouette Art
Catch up on this series: Part 1: Introduction Part 2: Supplies Follow me on Instagram for more watercolor ideas and inspiration
So you want to learn to paint with watercolors. You've gotten your supplies, maybe even a few books, and you're ready to start. You read the first few pages of the book where it teaches you some simple techniques like blending, shading, and layering and you think, "I can do this!" Then you turn the page to the very first project and it is this complicated scene like a seascape. You think to yourself "Never in a million years could I paint this," and then continue to flip through the pages looking at beginner projects that actually look pretty difficult. Maybe you even try one, but think to yourself that it looks like a child painted it. You put down the book and wonder, "What was I thinking? I'm not really an artist."
If you've ever tried learning to paint with watercolors in the past, it may have gone something like that. Honestly, painting with watercolors can be difficult. Because they are transparent, you can't just cover up a mistake with another layer of paint. However, you don't have to be a great artist to make beautiful art with watercolors. And although it's good to practice painting more difficult things and to learn some fun techniques, it's also nice to start off with a success. This project is fun and generally quick and is a great confidence booster. Plus, the project itself will be gallery wall worthy: something you would be happy to frame and hang for everyone to see.

First Things First
When you first get your watercolors, start out by playing around with them. Doodle words. Make hearts. Create patterns. At some point I would make some sort of a swatch card: a piece of paper with examples of each of your paint colors. You could make a very precise one, and even label each swatch with the name of each color, or you could just make a quick set of brushstrokes or circles. This is a great way to get a feel for the brush, the paint, and the water. Plus, many of the colors look a lot different on paper than they do in your paint set. You can use your swatch card in the future to remind you what each of the colors really looks like.
Silhouette Watercolor Art
This project is really very easy and doesn't take very much time. It's also a great way to practice different watercolor effects and looks. I cut my large sheet of watercolor paper into 6 different rectangles. I transferred the same outline of a bird onto all of them, and painted each one with different colors and slightly different looks. You only need one color per sheet, so you don't have to worry about mixing colors and blending just yet. You could follow this same tutorial to create all kinds of silhouette art such as animals, letters, words, objects, the outline of your state or country, or even simple shapes.
You can download and print the bird silhouette that I used here in two sizes.
How to Transfer an Image
This little trick is one of the most simple and helpful techniques that artists sometimes use. In just a few simple steps, you can easily transfer the outline of an image from one piece of paper to another. You will need: pencils (it works best with one soft and one hard), washi tape, a printed image, and a piece of paper.

Step 1: Flip over the printed image and cover the back of it with pencil. This works best when you use the edge of a softer pencil. Make sure you've covered all of the area that you want transferred.

Step 2: Flip over your paper and tape it to your other piece of paper. You don't have to use tape, but it really helps you be precise.

Step 3: Using a sharp pencil, trace the outline of the shape you want to transfer. You want to press hard enough for the image to transfer, but not so hard that you leave a deep indentation.

Step 4: Remove the tape, and your image should appear in pencil mark on your watercolor paper. These marks will also be erasable. You can use the same piece of printed paper a lot of times to transfer the image to multiple pieces of paper. If the pencil marks are getting light, flip the paper back over and cover the area again with pencil.

Paint your Silhouette Shape
1. Start by carefully painting the image in a very light wash. Paint carefully around the edges to get all of the little details. (I used a size 6 round brush for this project.)

2. While your paint is still wet, add some more watercolor paint to the middle of the image and gently blend it across the image.


3. Play around with different effects. For one painting use more water. For another make the middle of the bird the darkest shade. For another, try to create darker shadows near the edges.


*Remember, if you feel like any areas are darker than you wanted, you can work with the paint again after it has dried by brushing clear water over it. You can also use a paper towel or a Q-tip to remove paint from an area.

If you wanted to make this kind of project to frame and hang on your wall, make sure to trim the paper to the right size before you start painting.


More posts from