
In the which the Farmhouse Kitchen gets painted cabinets {and wooden countertops}
Here it is; the post some of you have been patiently waiting on. It's posts like these that make me wish I had mad photography skills (like my friend Wendy) but I did my best to show you how awesome my kitchen looks now.
I neglected to take a full set of before photos but I do have just enough to show you how drab and dull my cabinets were. They look so different now. In fact, my sister-in-law was here over the weekend and saw them for the first time. She (mostly jokingly) remarked that she thought she went into the wrong kitchen. It really does look like a totally different room. Enough blathering. I know you really want to see what I'm talking about. So.....

I didn't get them from quite the same angle but hopefully this side by side gives you an idea of the vast improvement. (How do you like my little photobomber?) :)


You may have noticed I had already started tearing off wallpaper and removing hardware in these 2 pictures. I literally decided to paint my cabinets that week and started in immediately. After working awhile, it occurred to me that I should take some before pictures so I snapped these few but unfortunately, it doesn't show some things that we changed. When I started, I was ONLY going to paint the cabinets but then I got the idea to move my stove to the other side of the kitchen (it was tucked in beside the refrigerator and I never like feeling hemmed in while I was cooking) and install a microwave above it. The microwave had always resided on the countertops and hogged precious horizontal surface. Quite some time ago, I had gotten an older GE under-the-cabinet microwave for $40. It was pretty dirty and although I had been assured when I bought it that it worked, I had never tested it.
So anyway, the refrigerator and stove were beside each other with a 10" cabinet between them. The fridge was so big that it stuck out past the doorway trim and bothered me. So, with hubby's approval and help, I set out to improve the layout of the kitchen. I moved the stove straight across the kitchen to where we had torn out a desk soon after we moved here. (My Hoosier had been sitting there.) On either side of the stove, we added cabinets. On the right, we put the 10" cabinet that had been between the stove and fridge. On the left, a cabinet that I had previously rescued from Uncle Cabinet Maker's burn pile. Hubby made that into a pull-out trash can cabinet using a door from one of the upper cabinets that we were no longer using. Above the stove we used a cut-down cabinet and mounted the microwave to it. A friend with electrical experience did the wiring for us. (The microwave works great, by the way.) So. much. better!
So anyway, the refrigerator and stove were beside each other with a 10" cabinet between them. The fridge was so big that it stuck out past the doorway trim and bothered me. So, with hubby's approval and help, I set out to improve the layout of the kitchen. I moved the stove straight across the kitchen to where we had torn out a desk soon after we moved here. (My Hoosier had been sitting there.) On either side of the stove, we added cabinets. On the right, we put the 10" cabinet that had been between the stove and fridge. On the left, a cabinet that I had previously rescued from Uncle Cabinet Maker's burn pile. Hubby made that into a pull-out trash can cabinet using a door from one of the upper cabinets that we were no longer using. Above the stove we used a cut-down cabinet and mounted the microwave to it. A friend with electrical experience did the wiring for us. (The microwave works great, by the way.) So. much. better!

Now on the other side where the stove had been we had a space. I was game to put in some odds and ends from the Habitat ReStore but hubby wanted to build one. Using Uncle's shop, knowledge, and help, he built a 36" base cabinet. We didn't have any more leftover doors/drawers so he used something from Uncle's discard pile. It's noticeably different but similar enough to be okay.

In the space above, we used another cut-down cabinet (When we moved here, it had been on the wall above where the stove currently is sitting.). It has an open area that I use for displaying my Celebrating Home stoneware.

This sweet little butter dish isn't Celebrating Home but I sure love it. I just picked it up at TJMaxx this week. I have been looking and looking for a butter dish that isn't just blah. This one looks so "farmhousey" and it didn't break the bank. I think it was only $5.


I was planning to reuse the hardware but DH didn't like that it was all knobs so he told me if I could find something I liked under $4, he would buy new. Challenge accepted! I found what I liked but unfortunately, they were NOT under $4 each. So I kept searching different websites until I found one that had them under $4 and free shipping! Score! (At the end of the post, I will provide a link.) I love how they look! We did reuse the hinges and honestly they are not noticeably different from the knobs/pulls.

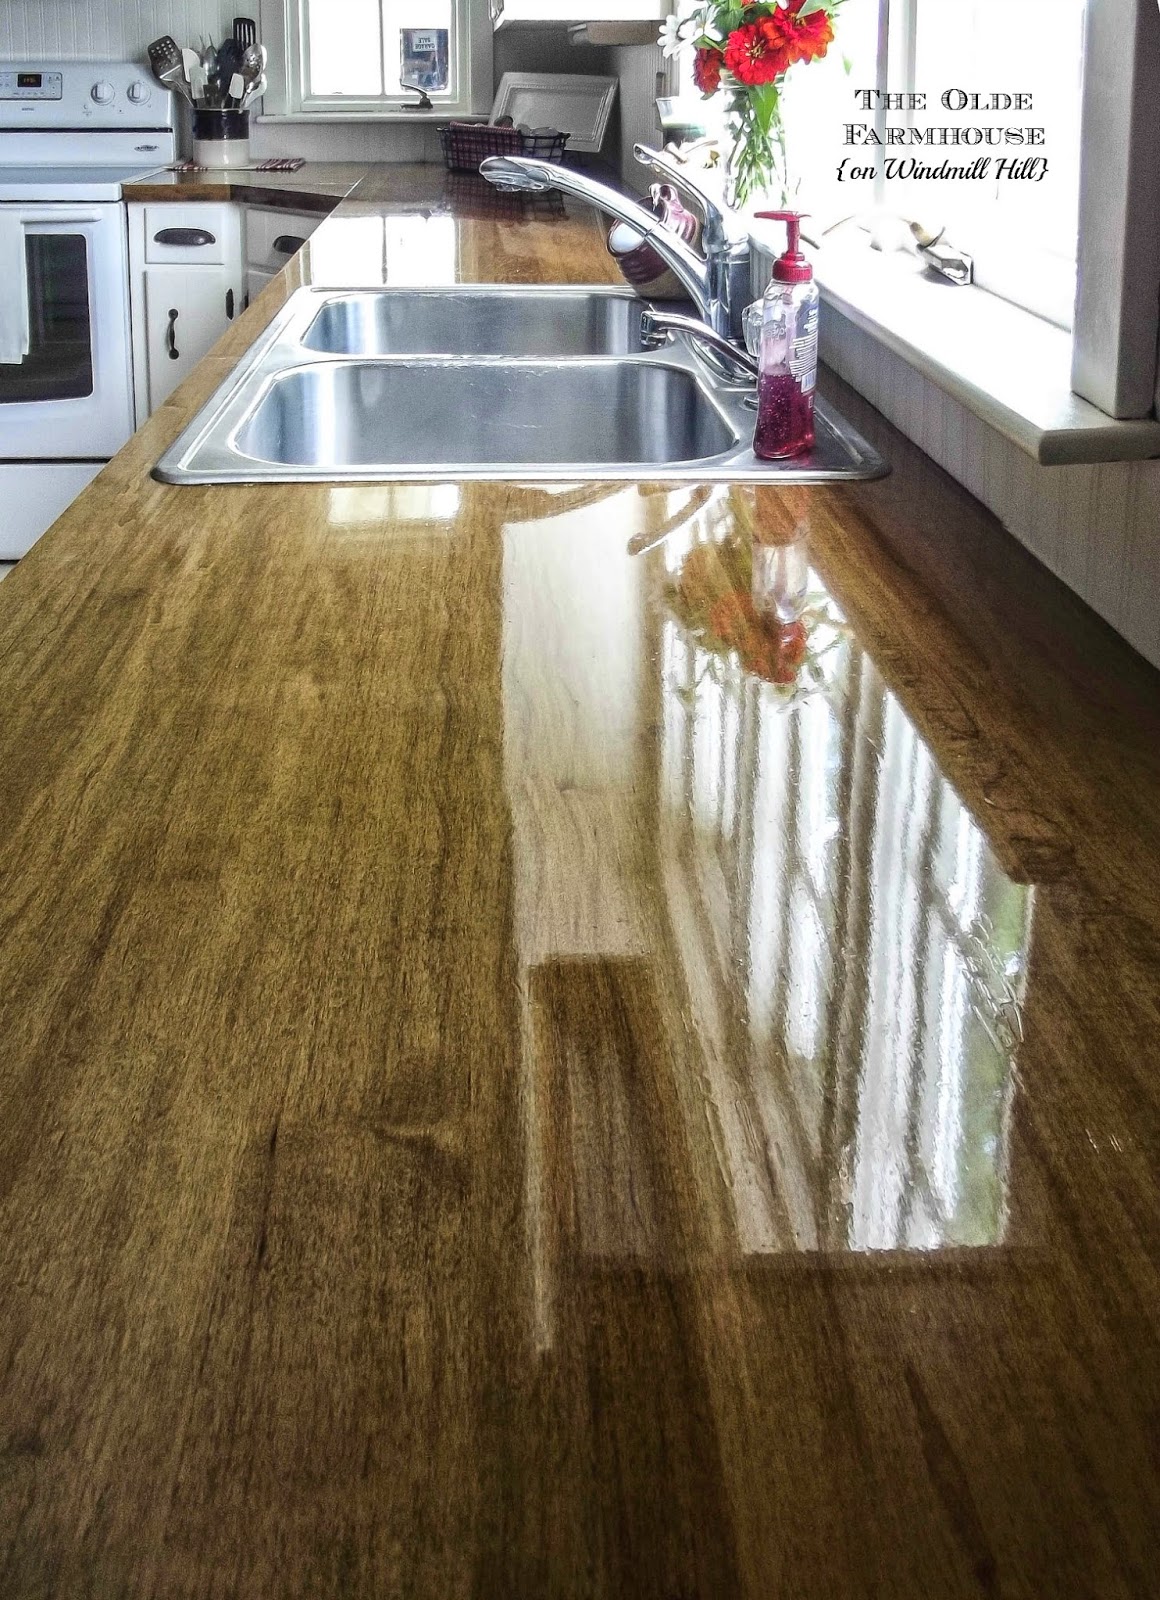
So now that we did all the changing around, that countertops were an issue. Again, I was willing to just put in some odd pieces from the ReStore to fill in the gaps but hubby wasn't happy with that. Since it was his wallet, I wasn't going to argue with him. ;) We priced new laminate but since we plan to upgrade our flimsy cabinets in the future, we wanted to go a less expensive route this time and do nicer countertops with the new cabinets. We tossed around other ideas and for awhile, DH was seriously considering attempting concrete countertops. He watched lots of YouTube videos and priced forms but ultimately decided it was too risky. The next option (and obviously the one we went with) was wooden countertops. This route cost us around $500 (less than half the laminate quote) but COUNTLESS hours. DH (with Uncle's help) did 95% of the work. Using Uncle's shop, tools, advice, and help, he sawed hard maple lumber into strips, glued them together, sanded them down, etc. I'm not going to go into detail on how he made and installed these but I will just say, he's a perfectionist and the countertops are lovely. I used Minwax dark walnut stain and Waterlox sealer on them.


Top of the refrigerator
And now, I never really addressed what paint I used and how hard the cabinets were to paint. So let's take care of that before I go. After much online research and reading of reviews, I decided to use Insl-X Cabinet Coat Acrylic Satin Enamel

. I was able to find it locally at one of our Ace hardware stores that is a Insl-X dealer but I bought their last gallon and she told me they wouldn't be carrying it any longer. So, I HAD to make that gallon do my whole project. I could have bought online and had it tinted (Swiss Coffee) at Lowes or Menards but I didn't really want to risk it not matching. The steps I took to paint the cabinets are as follows:
#1. Remove knobs
#2. Wash cabinets good with TSP and tape off any areas not being painted.
#3. Fill any holes with spackling. Let dry and sand smooth.
#4. Number all the doors and remove. It's nice if you have an area you can set up sawhorses and lay them all out at once. I did it in my workshop and I had to lay them out in 2 batches.
#5. Prime with a stain blocking primer like Kilz or BIN
#6. Paint 2 coats of paint on the cabinet faces and doors/drawers. Because I was trying to conserve paint, I only painted the backs of the doors with one coat of paint.
#7. Let dry and cure the recommended time and re-install.
#8. Put your hardware on and stand back and admire your hard work.
Ok, it's not quite that simple. :) The actual painting is not hard. The hard part is having your kitchen torn up while trying to carry on normal life. Obviously, this is not very detailed instructions. Because this post is getting too long, I will leave it at this. If there are enough questions on the how-to, I will do a separate post and address the questions. For now, I've kept it simple.
The hardware I used is:
If you use these names and do a google search, you can probably find them for a better price if you are buying quantity. Menards also has these in stock of you live near one of them.
This post contains affiliate links.
Linking to: Sizzle Into Summer @ DIY by Design Wow Us Wednesday @ Savvy Southern Style Knick of Time Tuesday @ Knick of Time Interiors
That DIY Party @ DIY Showoff From the farmhouse,

More posts from Rachel Bear