
DIY Pastel Shadowbox Shelf
Thanks, Minted, for sponsoring today's post!
Hey, y'all! I don't know about you, but I am thrilled that spring is a week away. We have had some very nice spring-like weather in SC the past few days, and that has me even more excited about the change of seasons and, of course, spring break!!! Today I have such a pretty project to share with you that just screams SPRING! With the weather warming up, I was able to work with my dad and power tools to create a beautiful shadowbox shelf featuring a lovely gift wrap Minted sent me.

Are you familiar with Minted? Minted is a leader it cute kids art and stationery, and they have many more beautiful products, including fabric and party decor. I was recently contacted by the company about doing a post using their products. I spent a few hours browsing the site. (It's easy to do, y'all!) I found the PRETTIEST wrapping paper, and it inspired my shadowbox shelf. To use the paper though, I first had to create my shadowbox. (Well, I could have bought a shadowbox, but what's the fun in that?!)

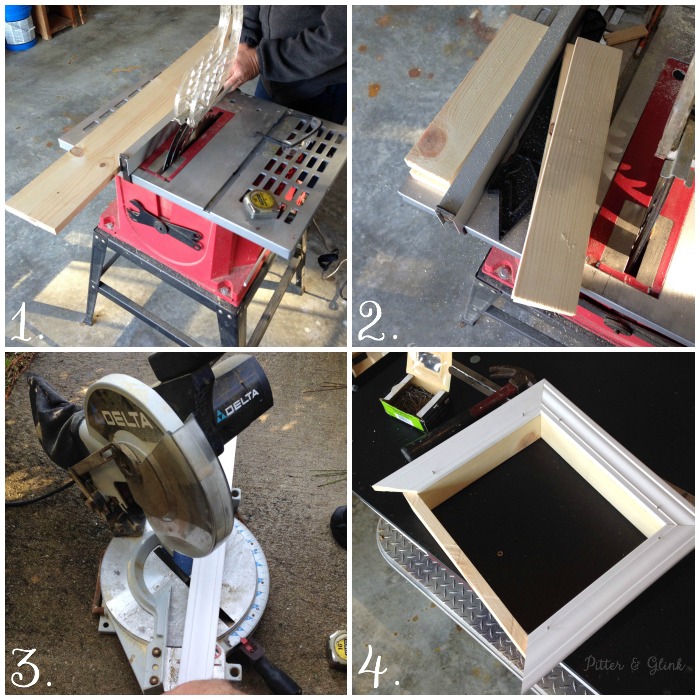
To create the shadowbox, my dad and I cut a 1x6 in half using our table saw. We then cut two pieces at 11" and two at 14". We arranged the pieces into a simple box shape and nailed them together. I bought some door molding from my local hardware store to create the frame. We used our miter saw to cut the molding at 45 degree angles and used nails to attach it to the wooden box. We then cut a piece of thin plywood the size of the back of the box.

Above is what it looked like when we finished the building process. (Note: the thin plywood backing is not attached yet.) I used caulking to fill in the nail holes and any gaps at the corner of the molding and around the box.

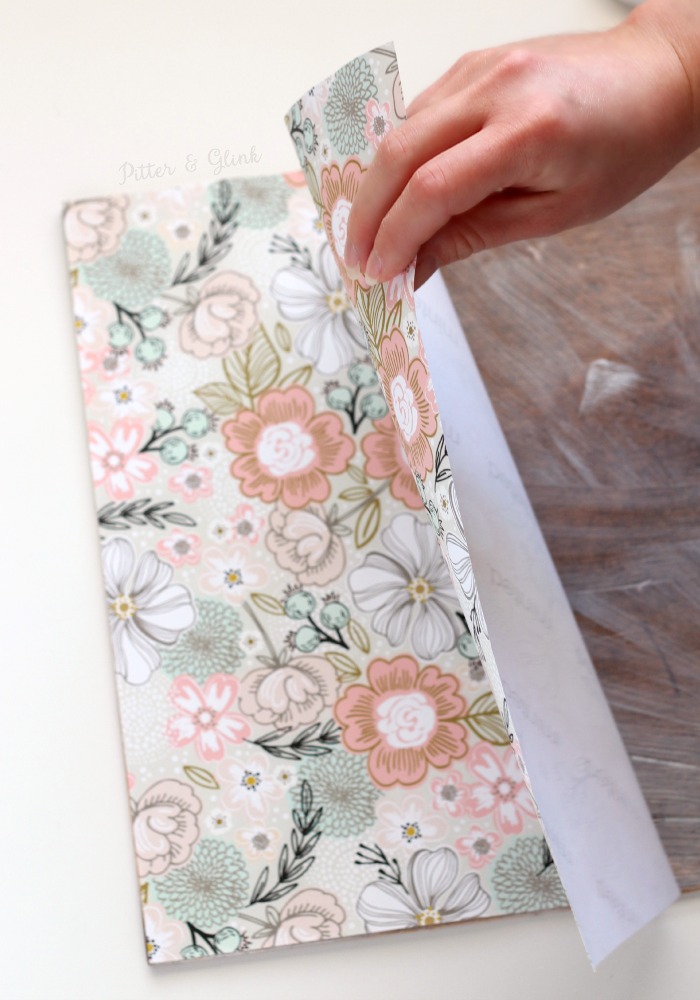
Once the construction of the box was complete, it was time to work on making it pretty. I got out my pretty gift wrap from Minted. This paper is called the Simple Snapshot Wrapping Paper. It comes in a set of five sheets, and it's perfect for adding a pop of pattern to something like my shadowbox. And, yes, you can wrap gifts with it too! ;)


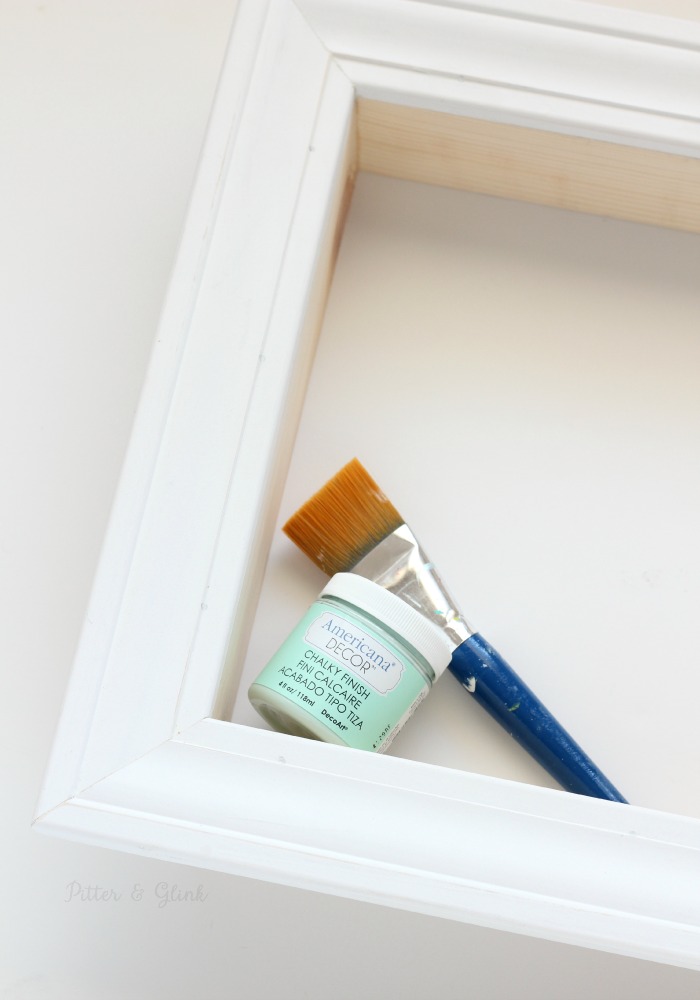
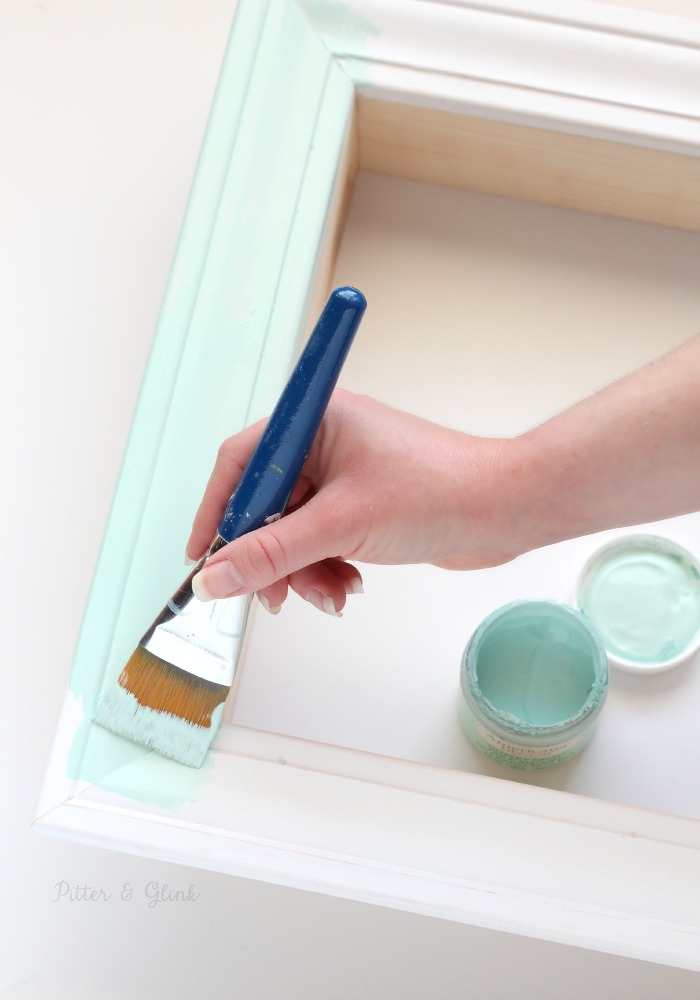
Once it dried, I covered the paper with a coat of Mod Podge to protect it. Then I started working on the shadowbox frame.


Once it dried, I used 220 grit sandpaper to rough up the edges a bit to help the detail in the molding pop.

I finished the shadowbox by covering it with a coat of wax. (I followed the package directions for applying the wax.)

All that was left once the wax dried was attaching the plywood to the back of the shadowbox using a hammer and some small nails. I must admit that since I'm a perfectionist I did end up painting the back of the plywood. No, no one will ever see it, but it would have bothered me if I wouldn't have. (I can't be the only one who is bothered by weird stuff like that!)

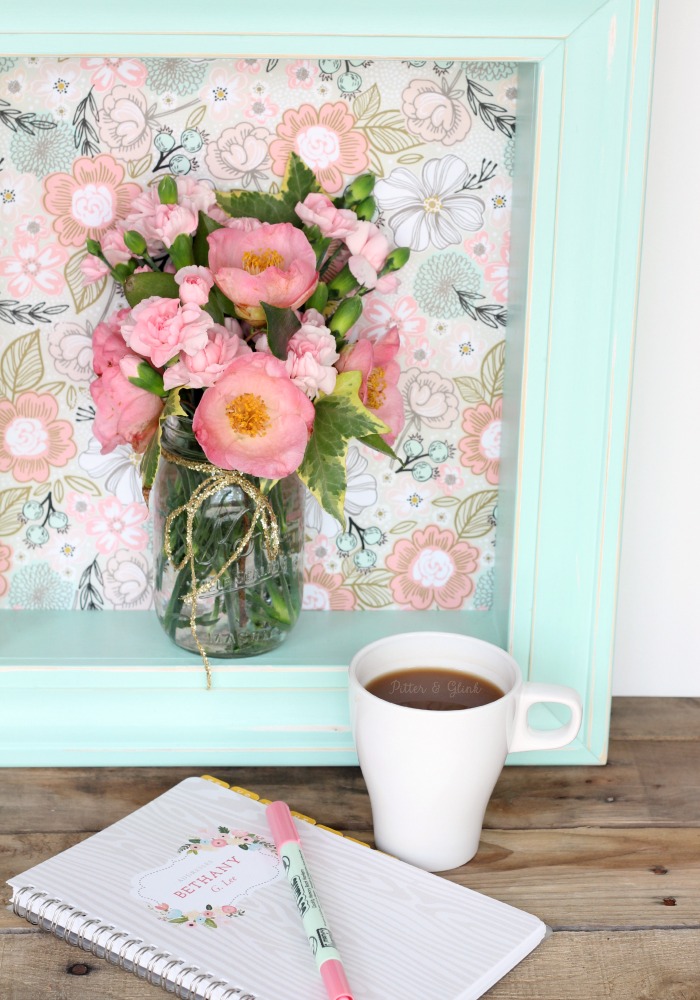
Y'all, the combination of the Simple Snapshot Wrapping Paper with the mint frame is just perfection!


Flowers look really pretty in it too! Do you see the gold bow around the flower arrangement I made? Minted sells ribbon too, and that's their Gold Glitter Ribbon.

And you know what else looks great with the shadowbox? My brand new address book. Yes, you guessed it: it's from Minted too! This one is the Woodland Botanicals Address Book. (You can get a planner or notebook in the same design.) I just love the pretty flowers and the subtle wood grain on the cover.

Since my dad and I mainly used scraps (besides the molding) to create the shadowbox, it was really inexpensive to make. And I love that I was able to take a plain wooden shadowbox and make it pretty with the help of Minted. I have another style of gift wrap, and I can't wait to come up with a project for it!

This post was sponsored by Minted. While I received product to use in my post, all opinions are 100% mine. To find out more about my disclosure policy, see the "Fine Print" tab at the top of the blog.
Related Posts:
Related Posts:


More posts from Bethany Lee