
The Trouser. The Sequel.
Thanks for your input on my last trouser post – it was really fascinating hearing everyone’s thoughts and opinions. I don’t think I’ve had a pattern disaster quite this bad before! In the aftermath I’m left wondering if indeed my perception of fit has been overly influenced by a lifetime of badly fitting RTW clothing.

Case in point – many of you mentioned that you could tell looking at this picture that the fit would be bad – mostly due to the way in which the side slant pockets stuck out and the pleat disappears. I’ll admit… that’s actually one of the things I like about this pattern, but I can’t explain why. I suspect it has something to do with spending the entirety of my teenage years wanting slighting bigger hips, and the optical illusion provided by those pants kinda delivers on that.
So, I turned to a variety of different resources to beef up my knowledge on pants fitting.
CRAFTSY
I logged in after what must have been two years to discover that at some point in the past I had bought the class ‘Pants Fitting Techniques’, by Sandra Betzina.

Via Craftsy
I watched the whole thing (for the first time) and it does have some excellent tips, if you don’t mind Sandra’s rather chaotic approach of explaining things, and that you already know what your areas for improvement are. There are some good descriptions of how to make changes based on your desired improvement, however what I really wanted was a before shot showing the issue, and then the correction. Visual learner here. Notwithstanding, for the small price point you pay, there’s some really useful information in this course that shows you how to adjust without delving into depth the reasons why you need to adjust (at least, beyond saying ‘because of protruding thighs).
KENNETH KING’S SMART FITTING DVD
Another recommendation left in the comments of my last post was this. I haven’t got it, but it’s something I’d maybe consider adding to my wishlist.
KENNETH KING’S TROUSER DRAFT DVD
This, I now have – and what a gem it is. I borrowed it from someone and ended up buying my own copy. He not only takes you through a very logical, easy to comprehend set of reasons why a particular adjustment is required, but shows the symptoms of the issue and the fix. I totally got his reasoning and I honestly think it’s going to change the way I look at fitting. Something about the way he describes ‘net loss and net gain’ just made my brain click all the missing puzzle pieces together – best US$25 I’ve ever spent. It also includes a detailed method and formula to draft your own pants block from scratch using the French Method. I did attempt to do this, but vowed to come back and revisit my numbers/calcs after a break because my pants draft looked really, really wrong. I must have an incorrect calculation in there somewhere, which just compounded the problem.
SO WHAT HAVE I BEEN UP TO SINCE?
I tried on Jacques again. And holy crap I must have been having a fat day of epic proportions previously, because they fit. I’ve got no explanation for that, especially as I tried them on multiple times previously.
I really, really want a pair of slim fitting trousers. Something a bit Brigitte Bardot-ish.

So with my new found knowledge of net loss and net gain all thanks to Kenneth, I spent several hours in front of the mirror, straining my neck and bending down to pin and back up again to check. His e-book does contain a lot of fitting information and solves, but nothing on the lower half of the legs.


I did initially attempt a ‘hyper extended calf adjustment’, as per what Cation Designs describes in her (really excellent) pants pattern alteration post, but preferred what I did above.
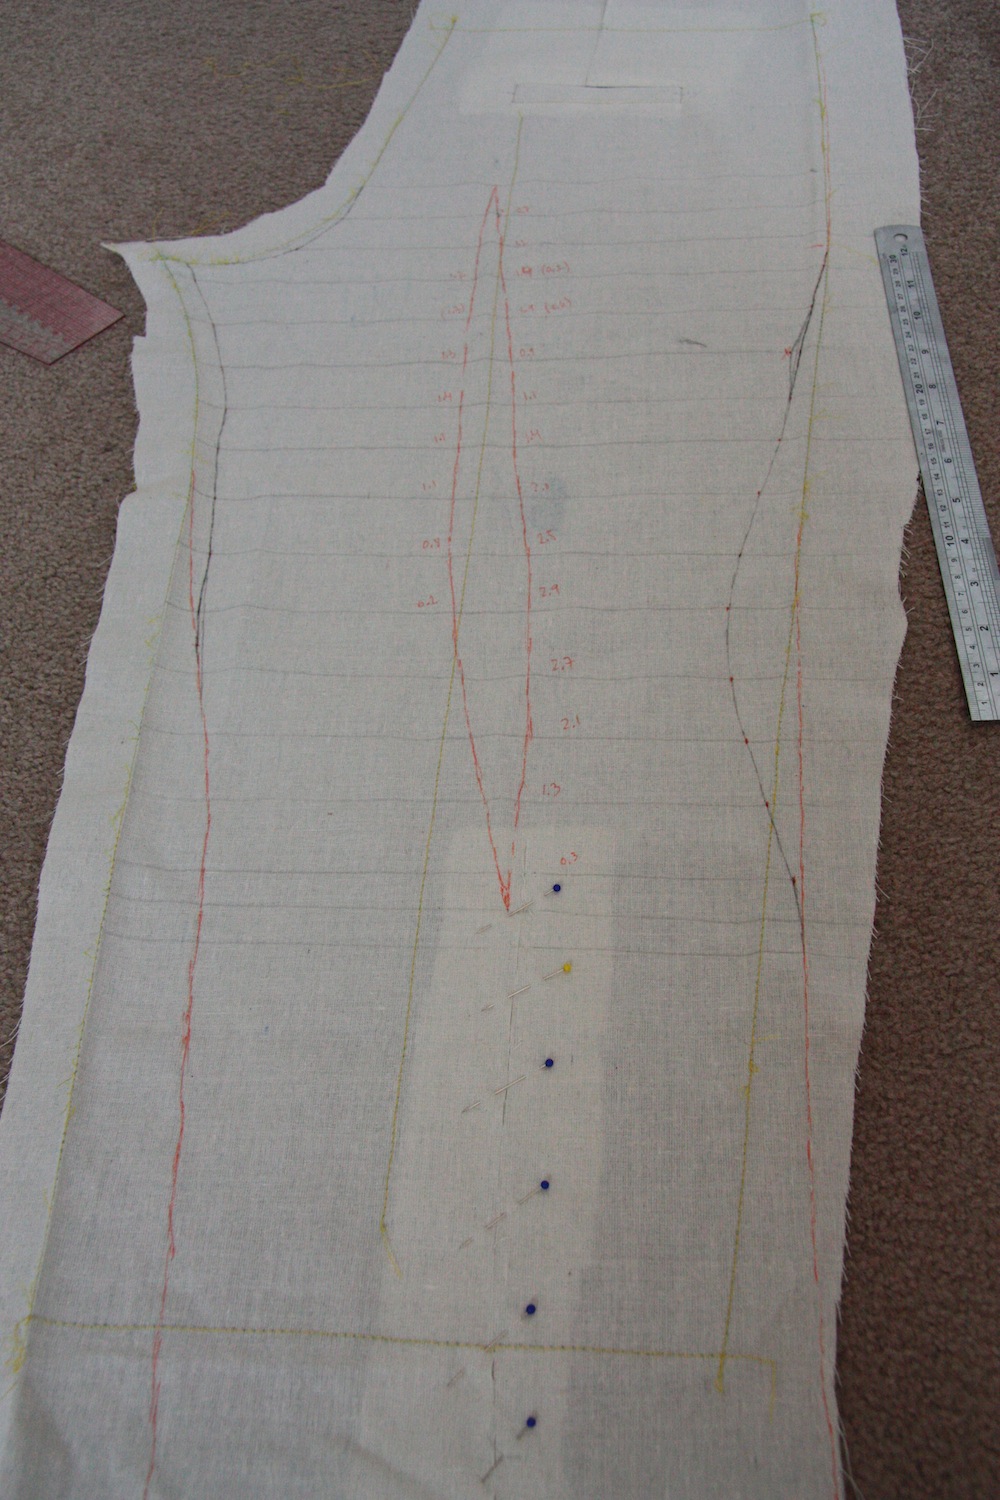
My legs aren’t straight – they curve outwards quite substantially at the knee. What I really wanted to see was how pinning out these pants to match my leg shape would translate into 2D. I was rather disturbed after unpicking everything, it looked… ugly. Not the lovely straight lines we’re accustomed to seeing from a sewing pattern! The yellow lines are the original pattern lines, the orange is where I’ve pinned out excess and the black is the final line where I’ve taken out the excess in a vertical dart.

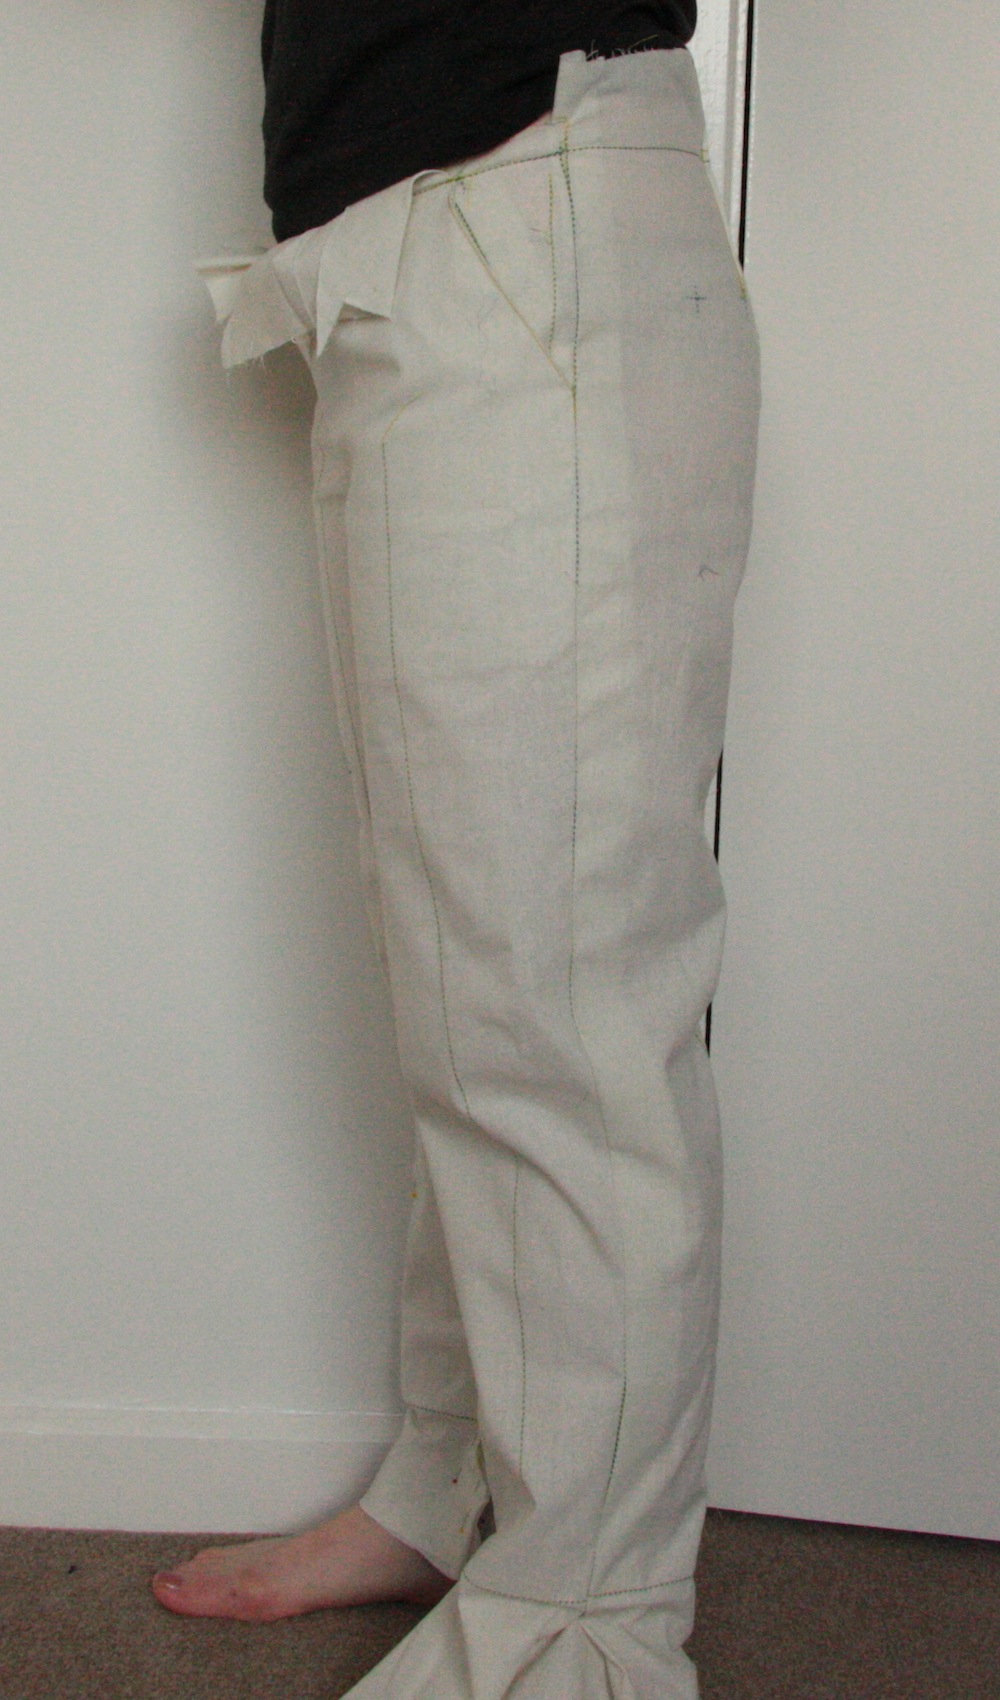
I then sewed my muslin back together again, this time along the new seam lines I’d marked, to see how it fit. I knew I’d still need to mark new side seam lines as they’re quite crooked in the photos above, but the moment of truth would be in how they looked now I’d been playing around with them a lot…
I’ve also sewn on the waist band here – it’s far too tight, I know. I may still grade up the waistband 2 additional sizes and see how the proportions sit then, but I think it’s unlikely you’ll ever see a finished version of these pants.
But I am really quite happy with the progress I’ve made on a slim leg!


The side that has not been tampered with. I’ve noticed when I ‘lock’ my knees back, I get the drag lines going on. These photos have made me realise that I actually quite like the leg of this pattern now. How fickle!


I have the waistband pinned where it’s folded over because I quite like the proportions of that depth of waist band on me. It’s still too tight between the waistband and pants though. Oh, and looks like I needed a hyperextended calf alteration afterall.
What I’ve taken an incredibly long time and huge amount of futzing to figure out – is that I need a ‘knock-knee alteration’. I guess the benefit of taking the long way to find that out is I know exactly how knock-kneed I am. Cindy from Cation Designs has an amazingly informative post on this alteration and a stack of others (including the hyperextended calf alteration) – definitely recommended reading.
What I have veered away from is making a comfortable trouser suitable for the office environment. I can see myself wearing these (very close fitting) pants made up in a floral cotton pique on a warm spring day, but they really are too tight for the office. Time to get back on brief!
A PANTS FITTING CLASS
Then, Oanh invited me to join her in a pants fitting class she was taking. It wasn’t quite what we thought it was (which was a trouser drafting course), but after a few short hours, I had a rather well fitting, high waisted wide leg trouser outline.

The Front. One leg has been tapered a little. Ok, maybe a lot. Also, the rise is higher than my natural waist.


The Side
They’re comfortable. Really comfortable! The kind of comfortable that I could spend anywhere between 8 and 12 hours straight sitting in – which means they pass the office-suitable test. They look good in the mirror. The fit even looks perfect on camera!!!
So why do I feel so ridiculously dowdy in them?
That’s something I think I’m just going to have to get over – because those muslin photo aren’t lying.
So I’m going to sew up a wearable muslin from a fabric I don’t mind sacrificing to this cause (which will be a wool crepe), which means I can effectively test drive how the style would work for me. I would like your opinions on a waistband treatment though:
1. A really wide waistband so I can work in the slanted pockets still (this is not a pair of pants I’d feel comfortable tucking my shirt into, so it would be covered. That way I’d still get the ‘look’ of hip height pants, but with the comfort of waist height.)
2. A facing and no front pockets?
3. A picked zip at the side seam, or a centre back invisible zip?
I await your advice!