
Assignment: Kim Dress

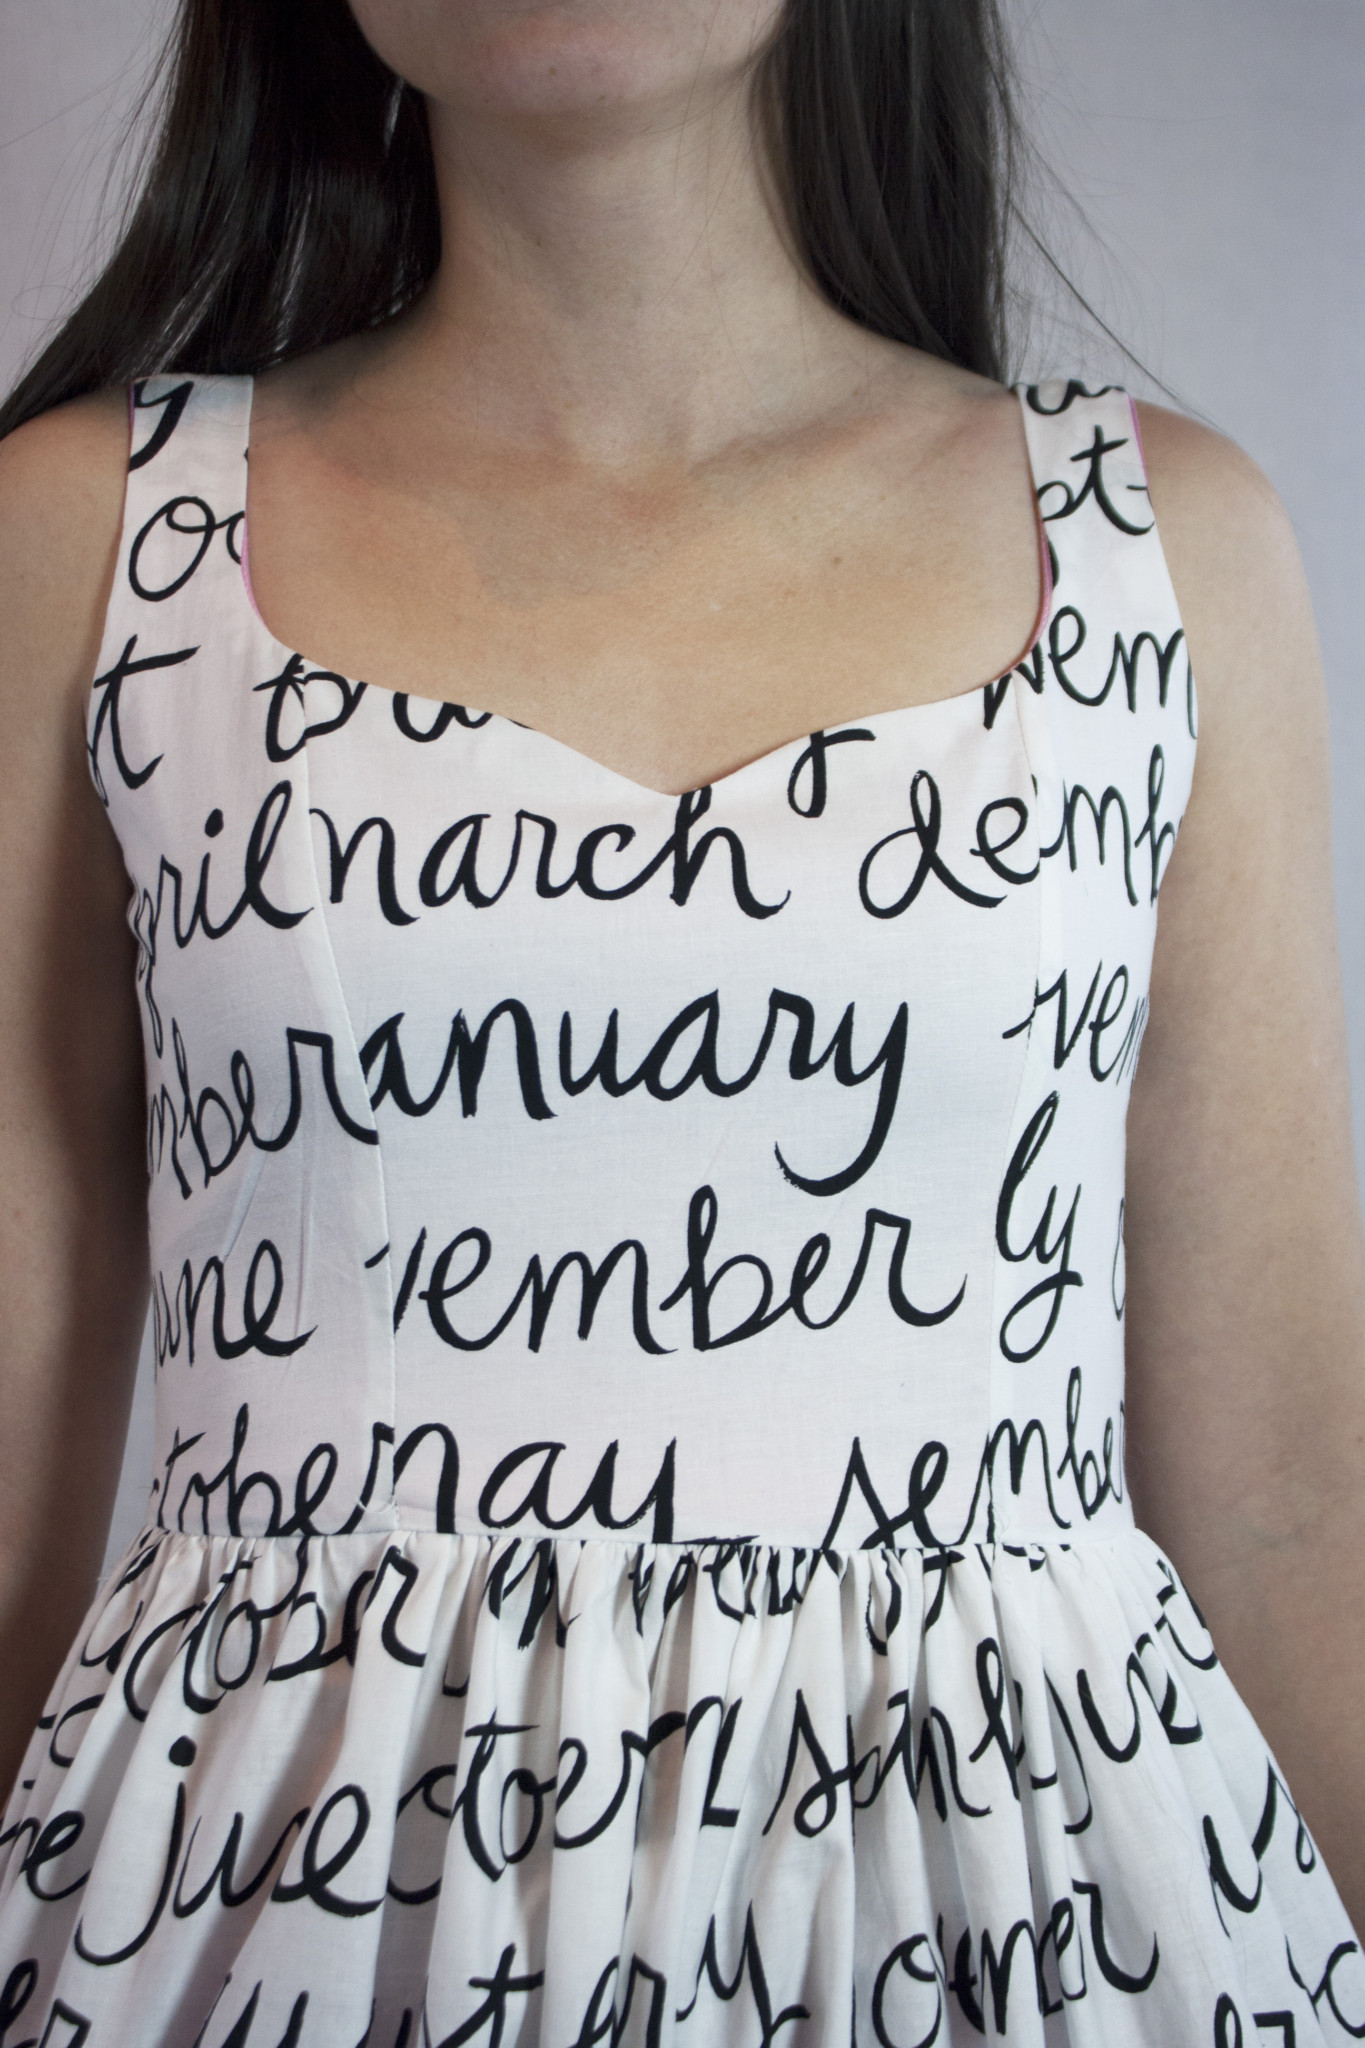
Today’s assignment is the By Hand London Kim Dress, which is a lovely dress with several options. Both options have a princess seam, and you have your choice of a scooped neckline or a sweetheat, as well as a gathered skirt or a wrap pencil skirt. I pre-ordered my pattern from By Hand London directly, as I immediately knew I was going to love it, but you can find a copy from Fabric Worm in addition to many other places.
If you’d like to see the other assignments I have made so far, you can check out my Assignment: Project Garment master post.

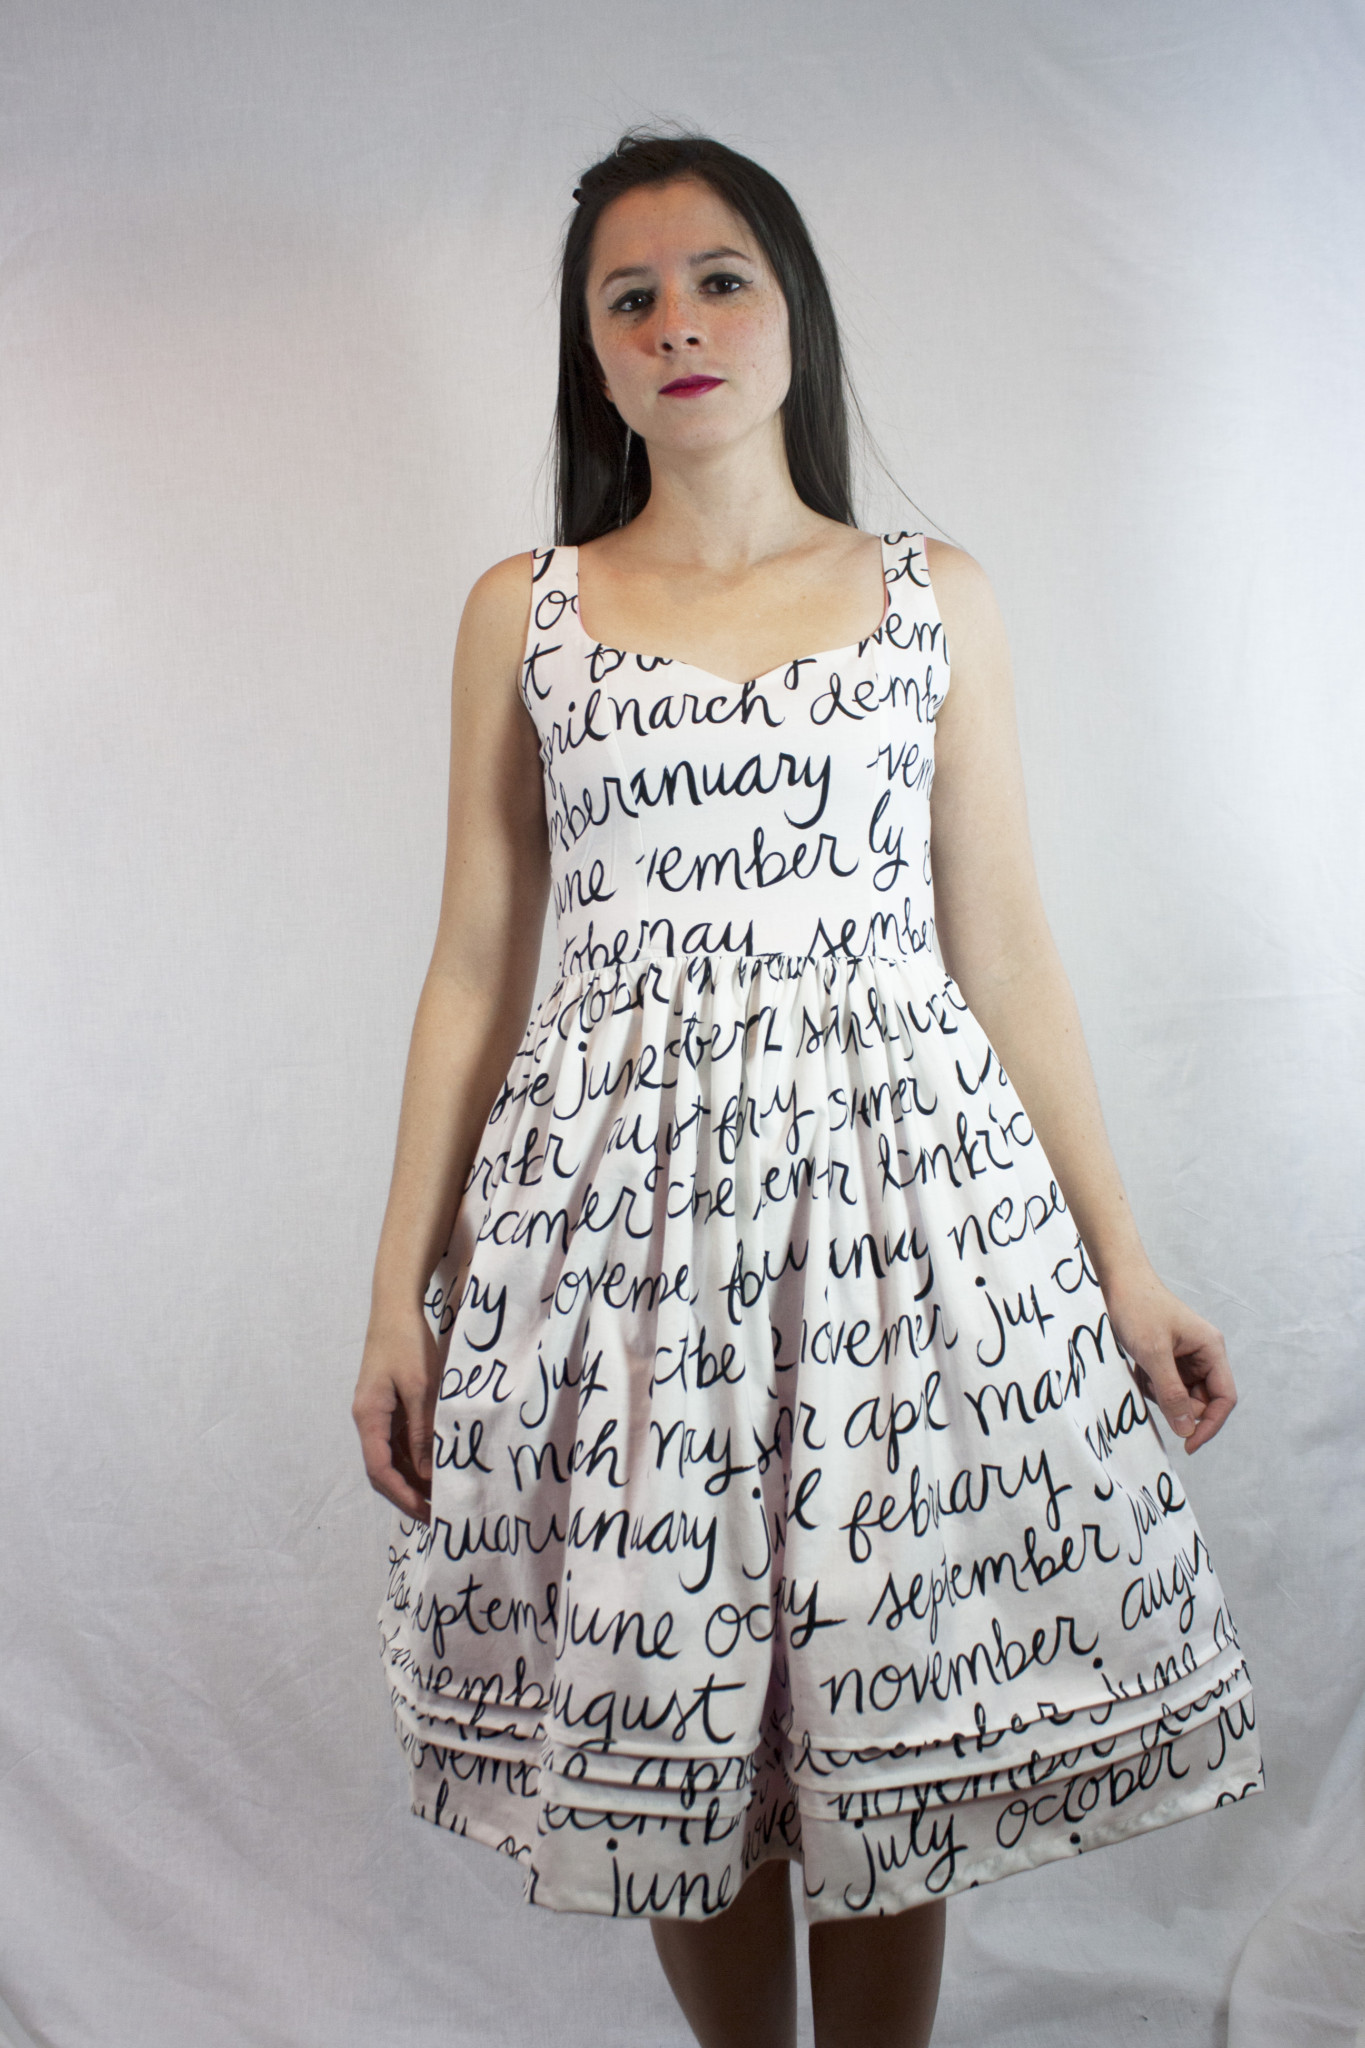
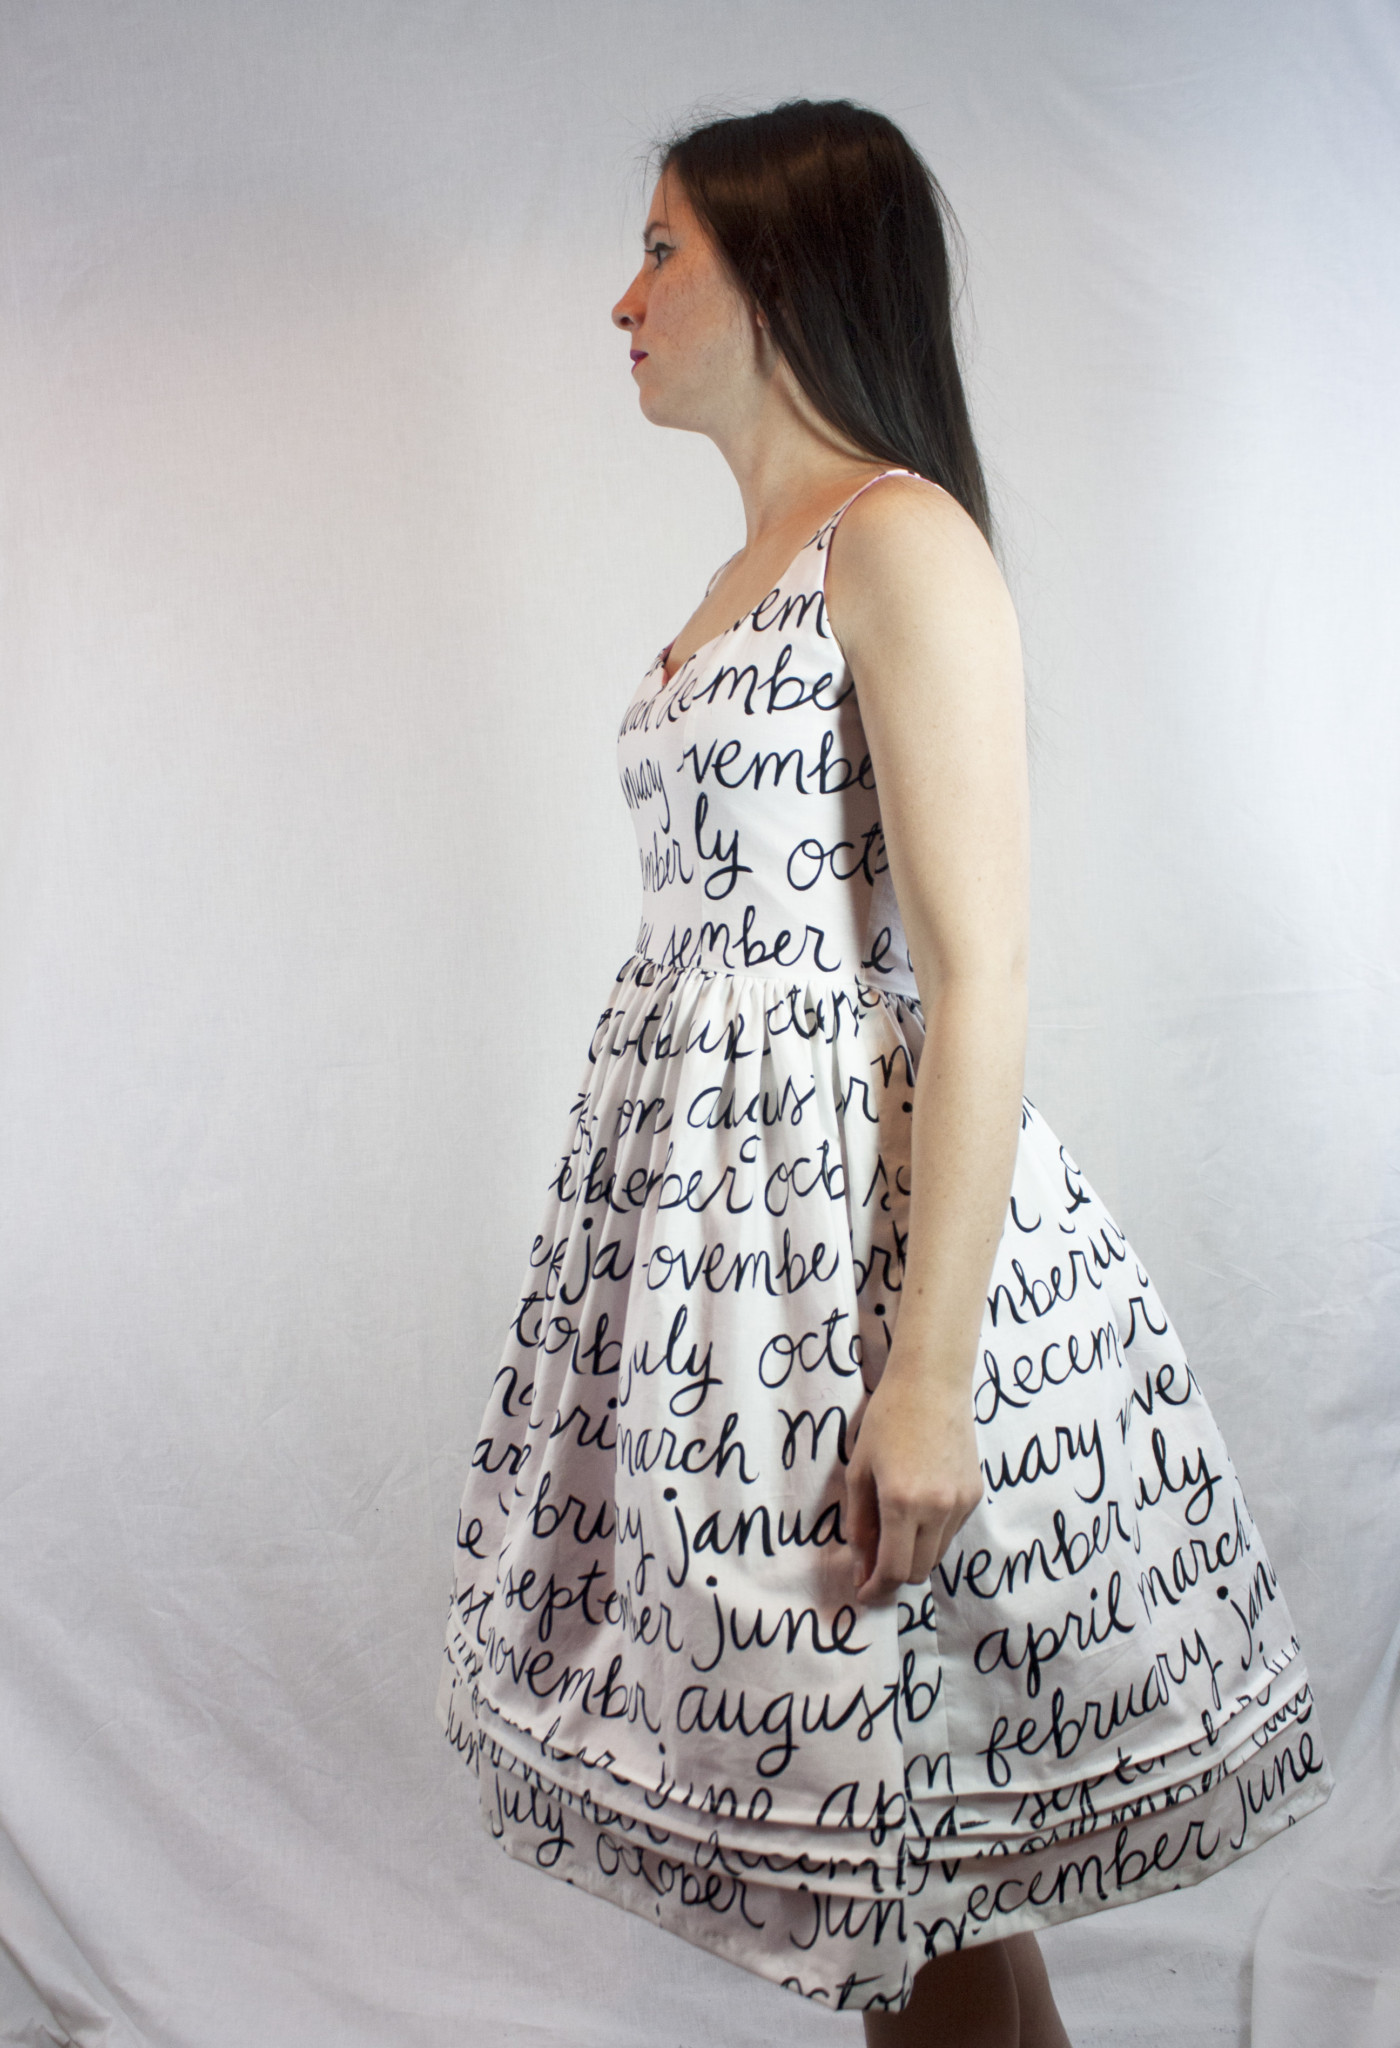
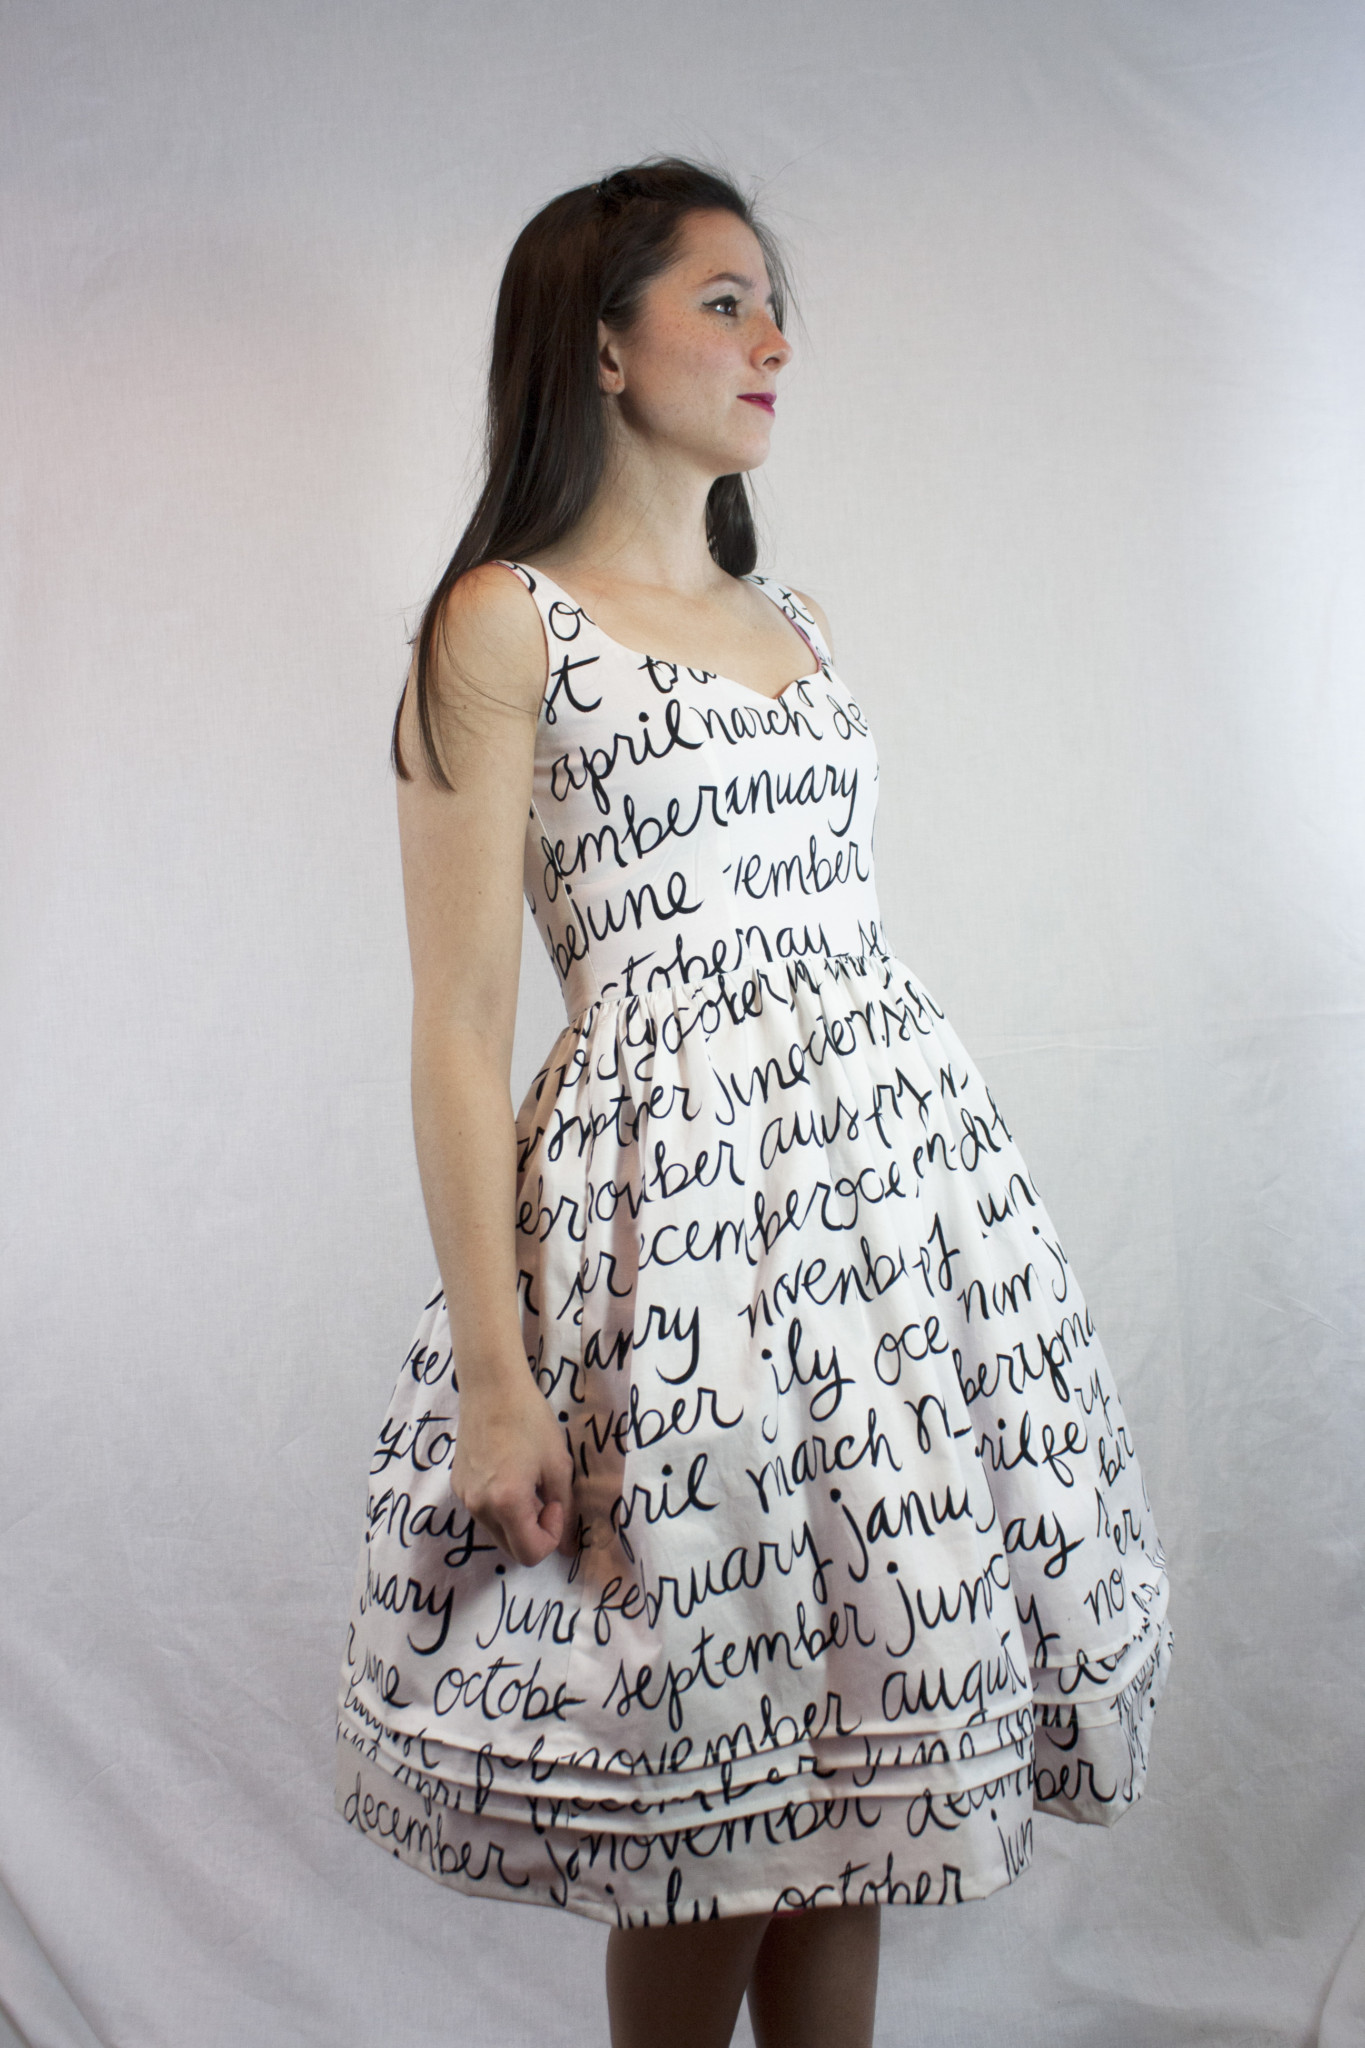
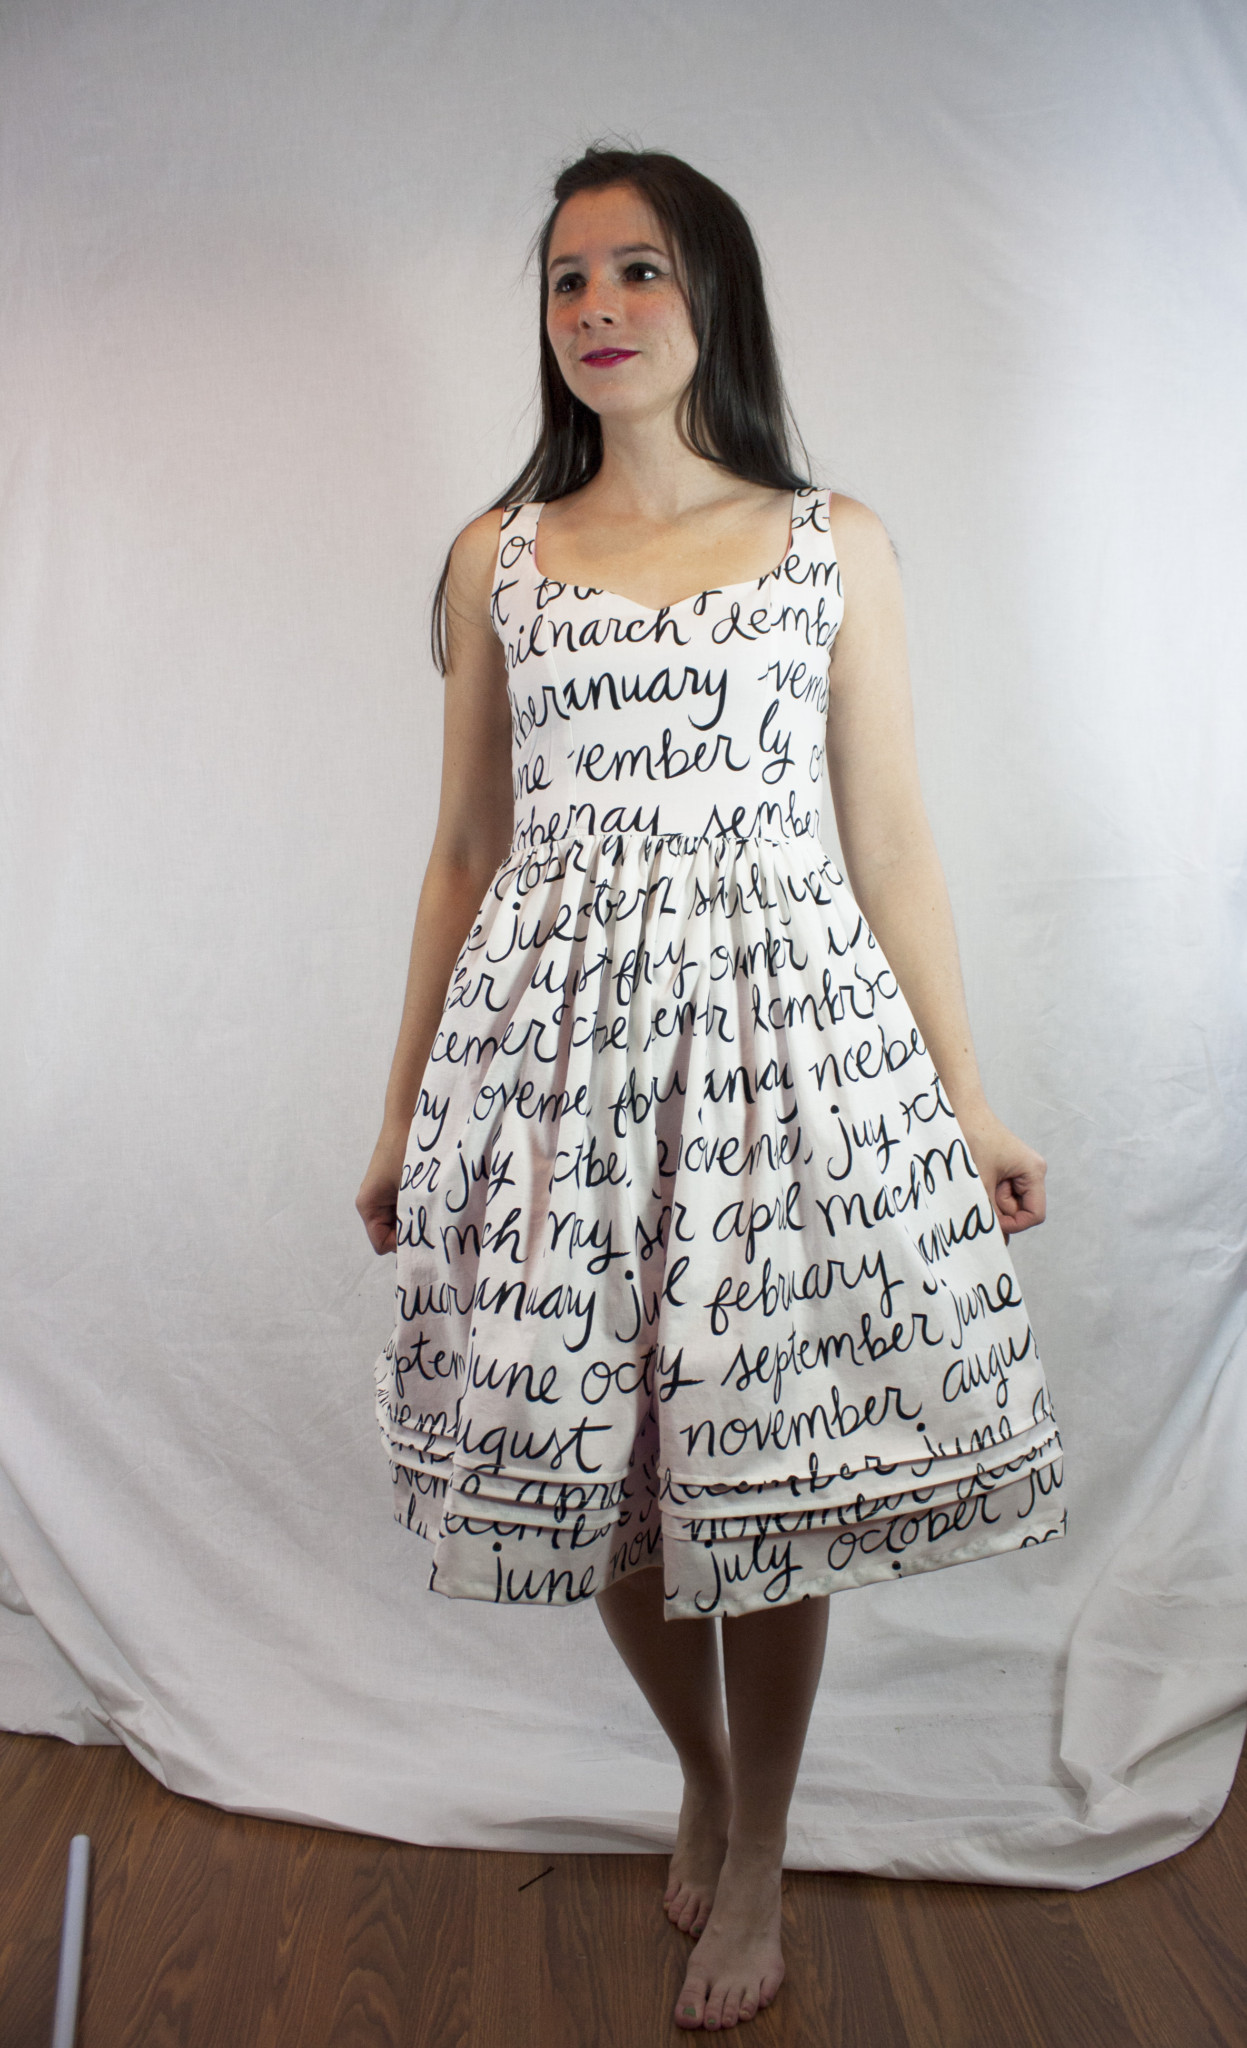
For my fabric choice for this dress, I used a text print from a Windham Fabrics line called 8 Days a Week. I got this from Sew Me a Song, among other things (they specialize in Japanese and texty, so I got a ton of other stuff). I know that working with quilting cottons is not everyone’s style, but it totally is mine. I think it’s because I guess I consider myself to be working in the quilting industry; a majority of my friends quilt (I make a few quilts a year), and so I want to use what I’m exposed to every day. I went to Vogue Fabrics in Chicago last week, and with all the garment fabrics that they carry, that store is completely lost on me. I walked out of there with a Jay McCarroll quilting cotton and a polyester fabric that I intended to use to muslin out voile garments, lol. Anyway, the huge cursive print on this fabric screamed at me that I should make a dress with it. So I did. I love it so much.

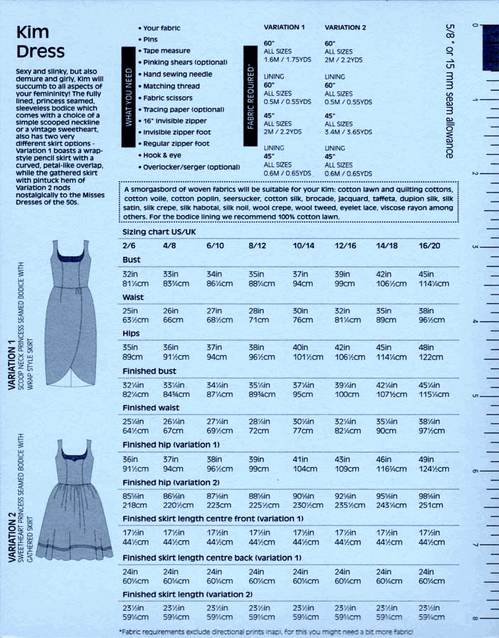
So, let’s check out the back of the pattern and get down to business. The By Hand London patterns come in a beautiful slipcase, and inside is a little folder containing the instruction booklet and tissue pieces. All very cute and fancy. My measurements are:
- High Bust – 31″
- Full Bust – 31-1/4″
- Waist – 25-1/2″
- Hips – 34-1/4″
Assuming that most patterns draft for a B-cup, my measurements put me at an A-cup (the difference between my High Bust and Full Bust measurements is 1/4″, which is less than 1″, which is an A-cup). For the By Hand London pattern, I cut the size US 2/UK 6 straight across the board.

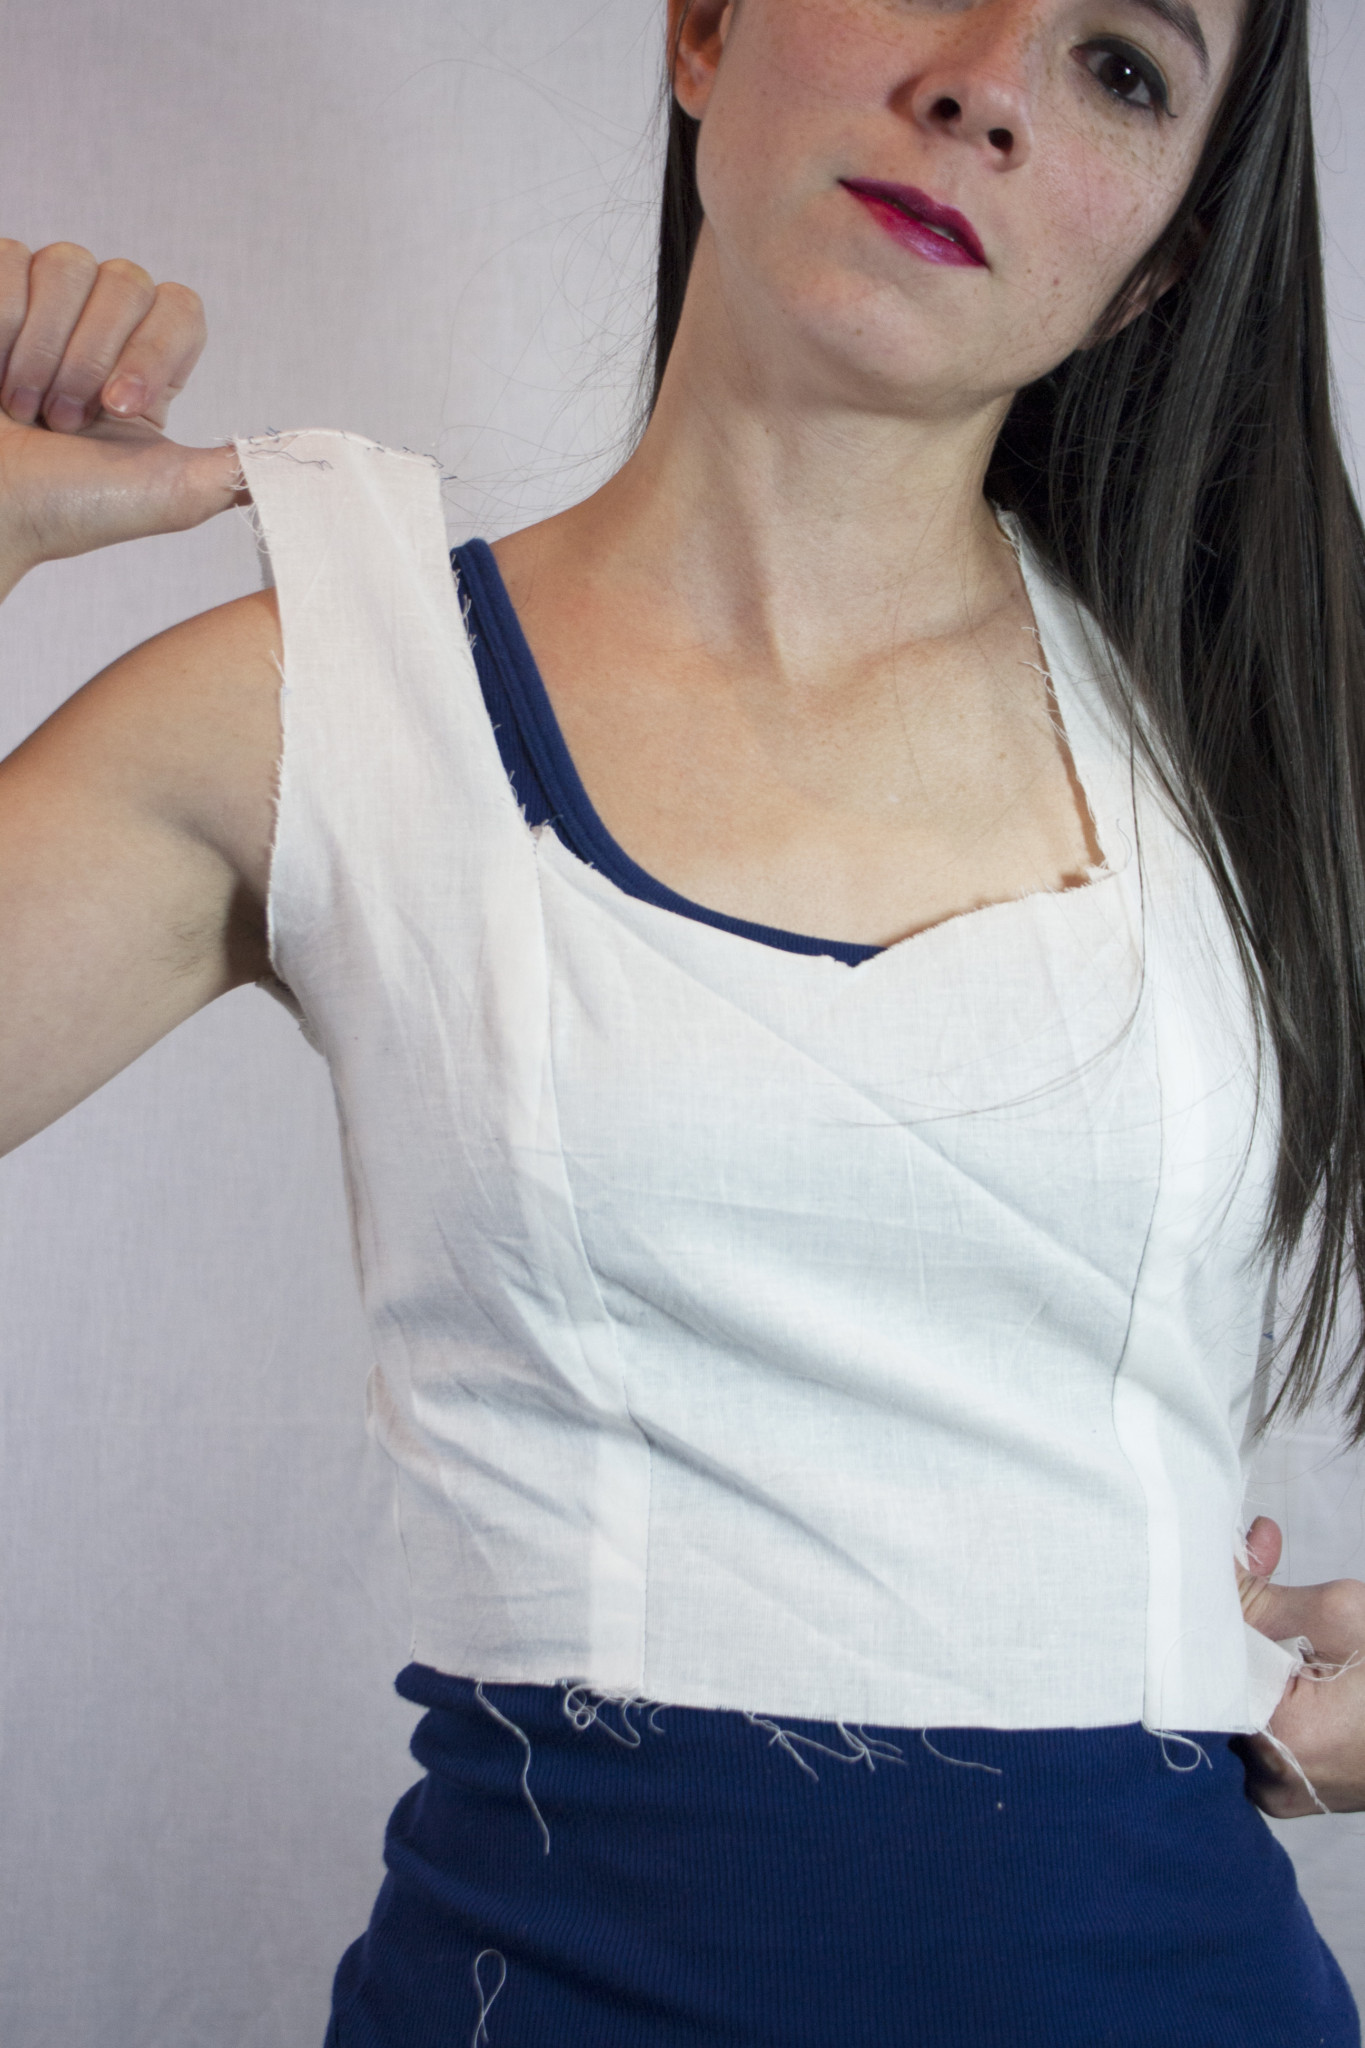
I’m going to admit that I had a heck of a time muslining this. Clearly all from my own mess. I probably spent 4 hours and 3 muslins for the bodice area. Before I even cut into the muslin fabric, I did the small bust adjustment on the pattern pieces, which is really easy for a princess seam. Once again I referred to the Adjust the Bust Craftsy class to make this adjustment. In hindsight, I think the thing that held me up was the straps. They were too long (in the end I ended up taking 1″ from the front strap and 1-1/4″ from the back strap), and because I did not make this adjustment right away, every time I put the bodice muslin on, it sat in a different place than it did the last time I tried it on, furthering my confusion about what to do next. I paid special attention to the sweetheart neckline area, because I wanted to make sure that the fabric did not gape away from my chest, and thankfully it didn’t, so no changes there. In the end, the only two things I ended up needing to do was the small bust adjustment and reducing the straps. Oi.

I used a light pink voile from Free Spirit to line the bodice. I’ve never lined a dress with voile before and it feels really soft and comfortable against my skin. I found a bunch of colors on Etsy that looked like they were priced near cost, so I got a bunch.


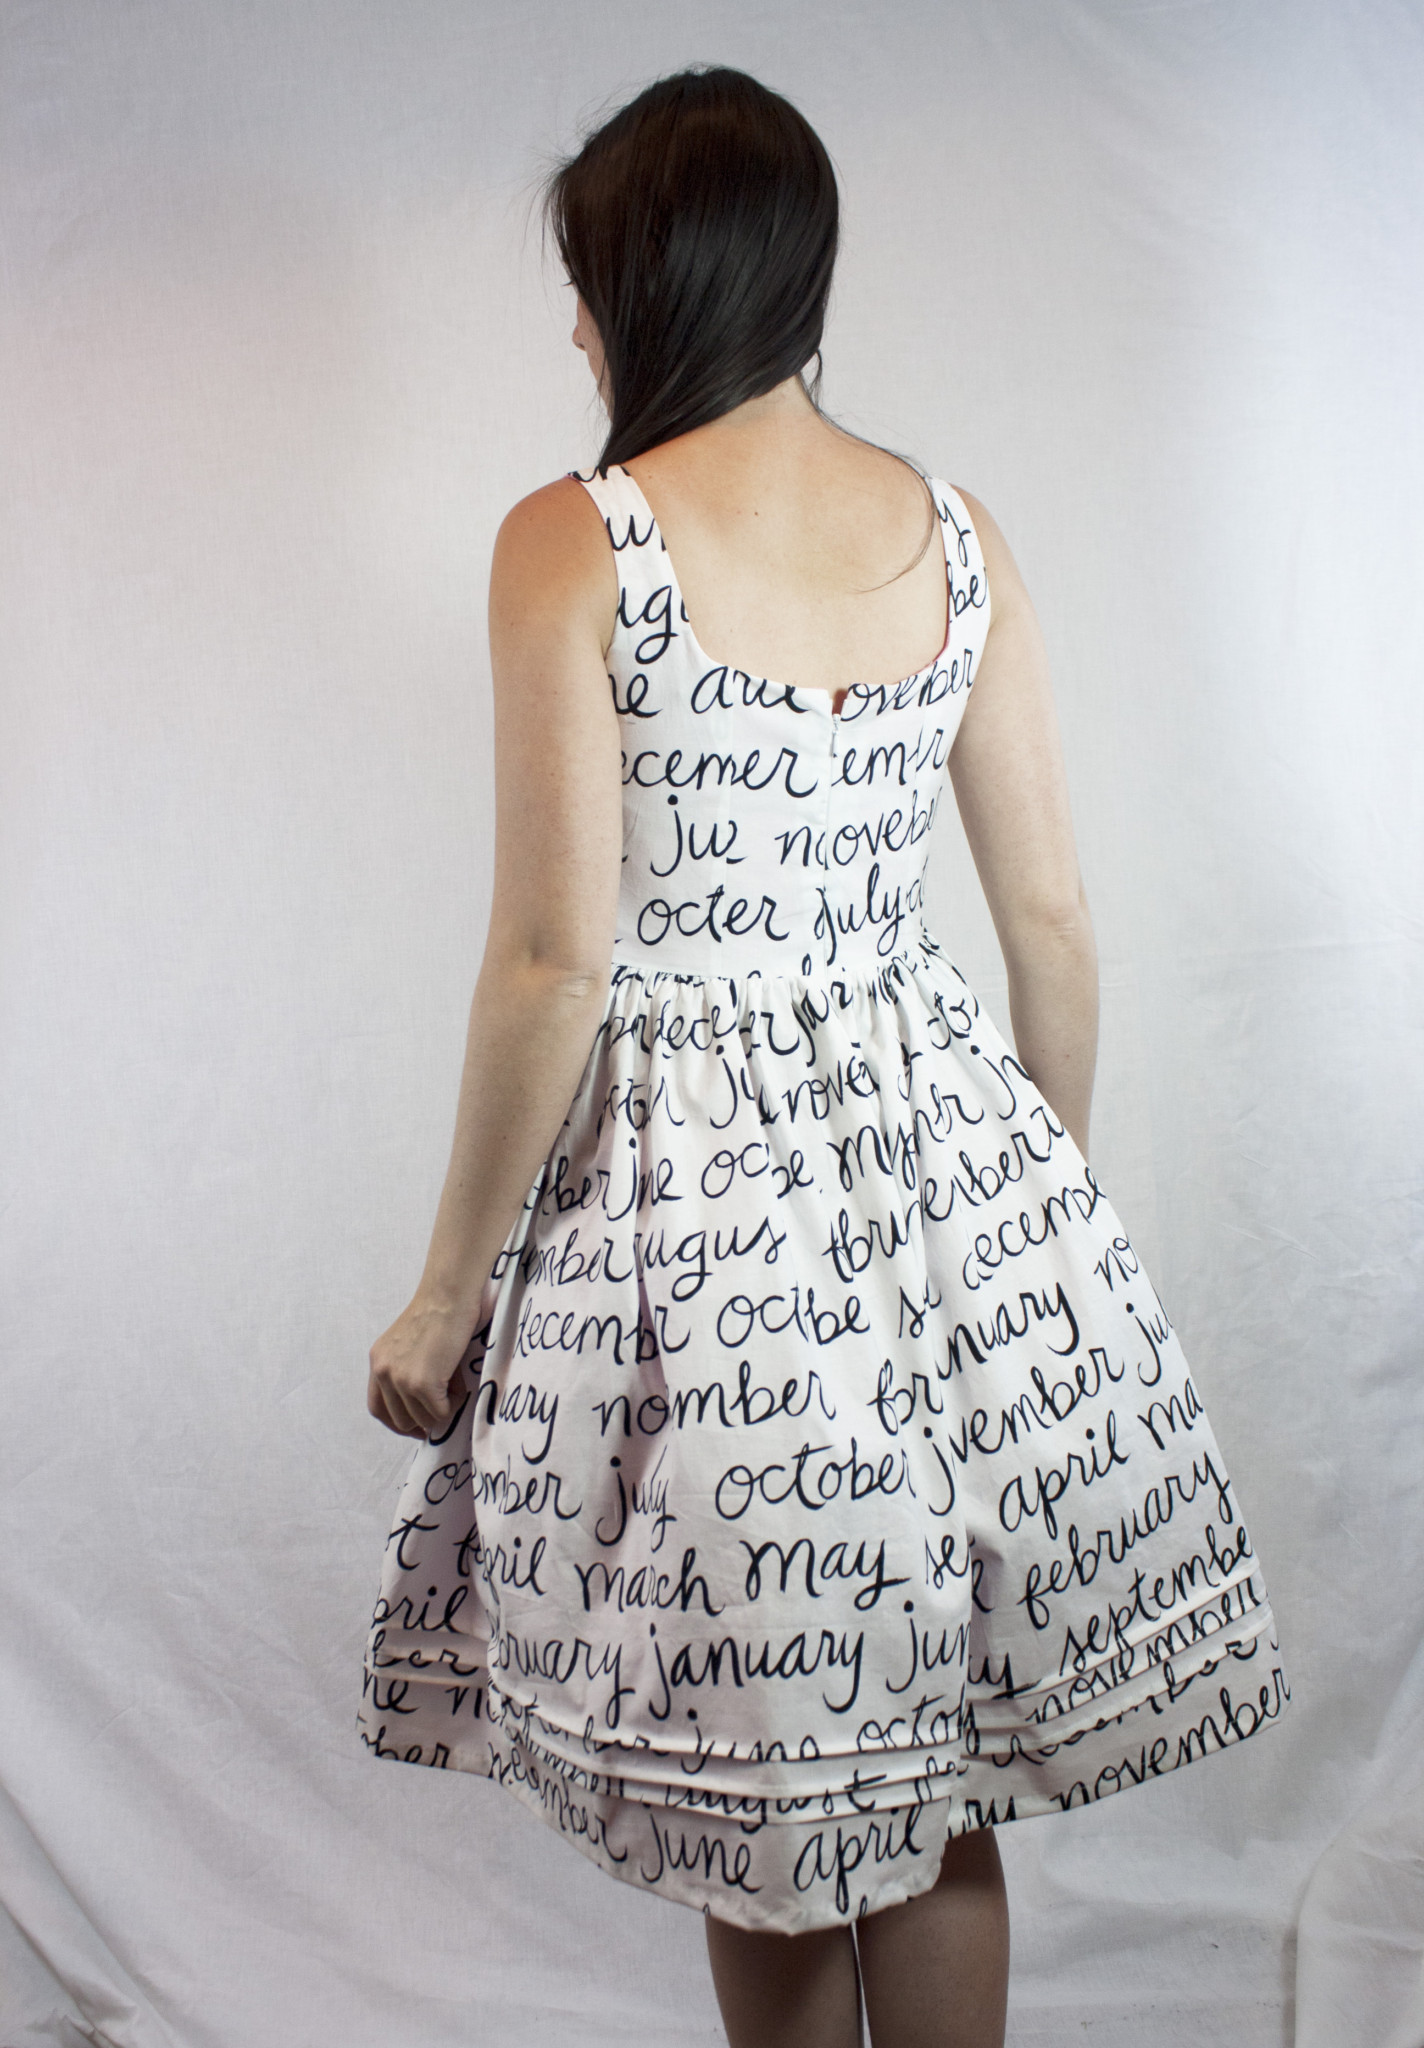
I didn’t sew in the hook and eye before I took the photos, but here’s a view of the back. I love the scoop in the back. I also love that with the style of the straps, they easily cover a bra strap.

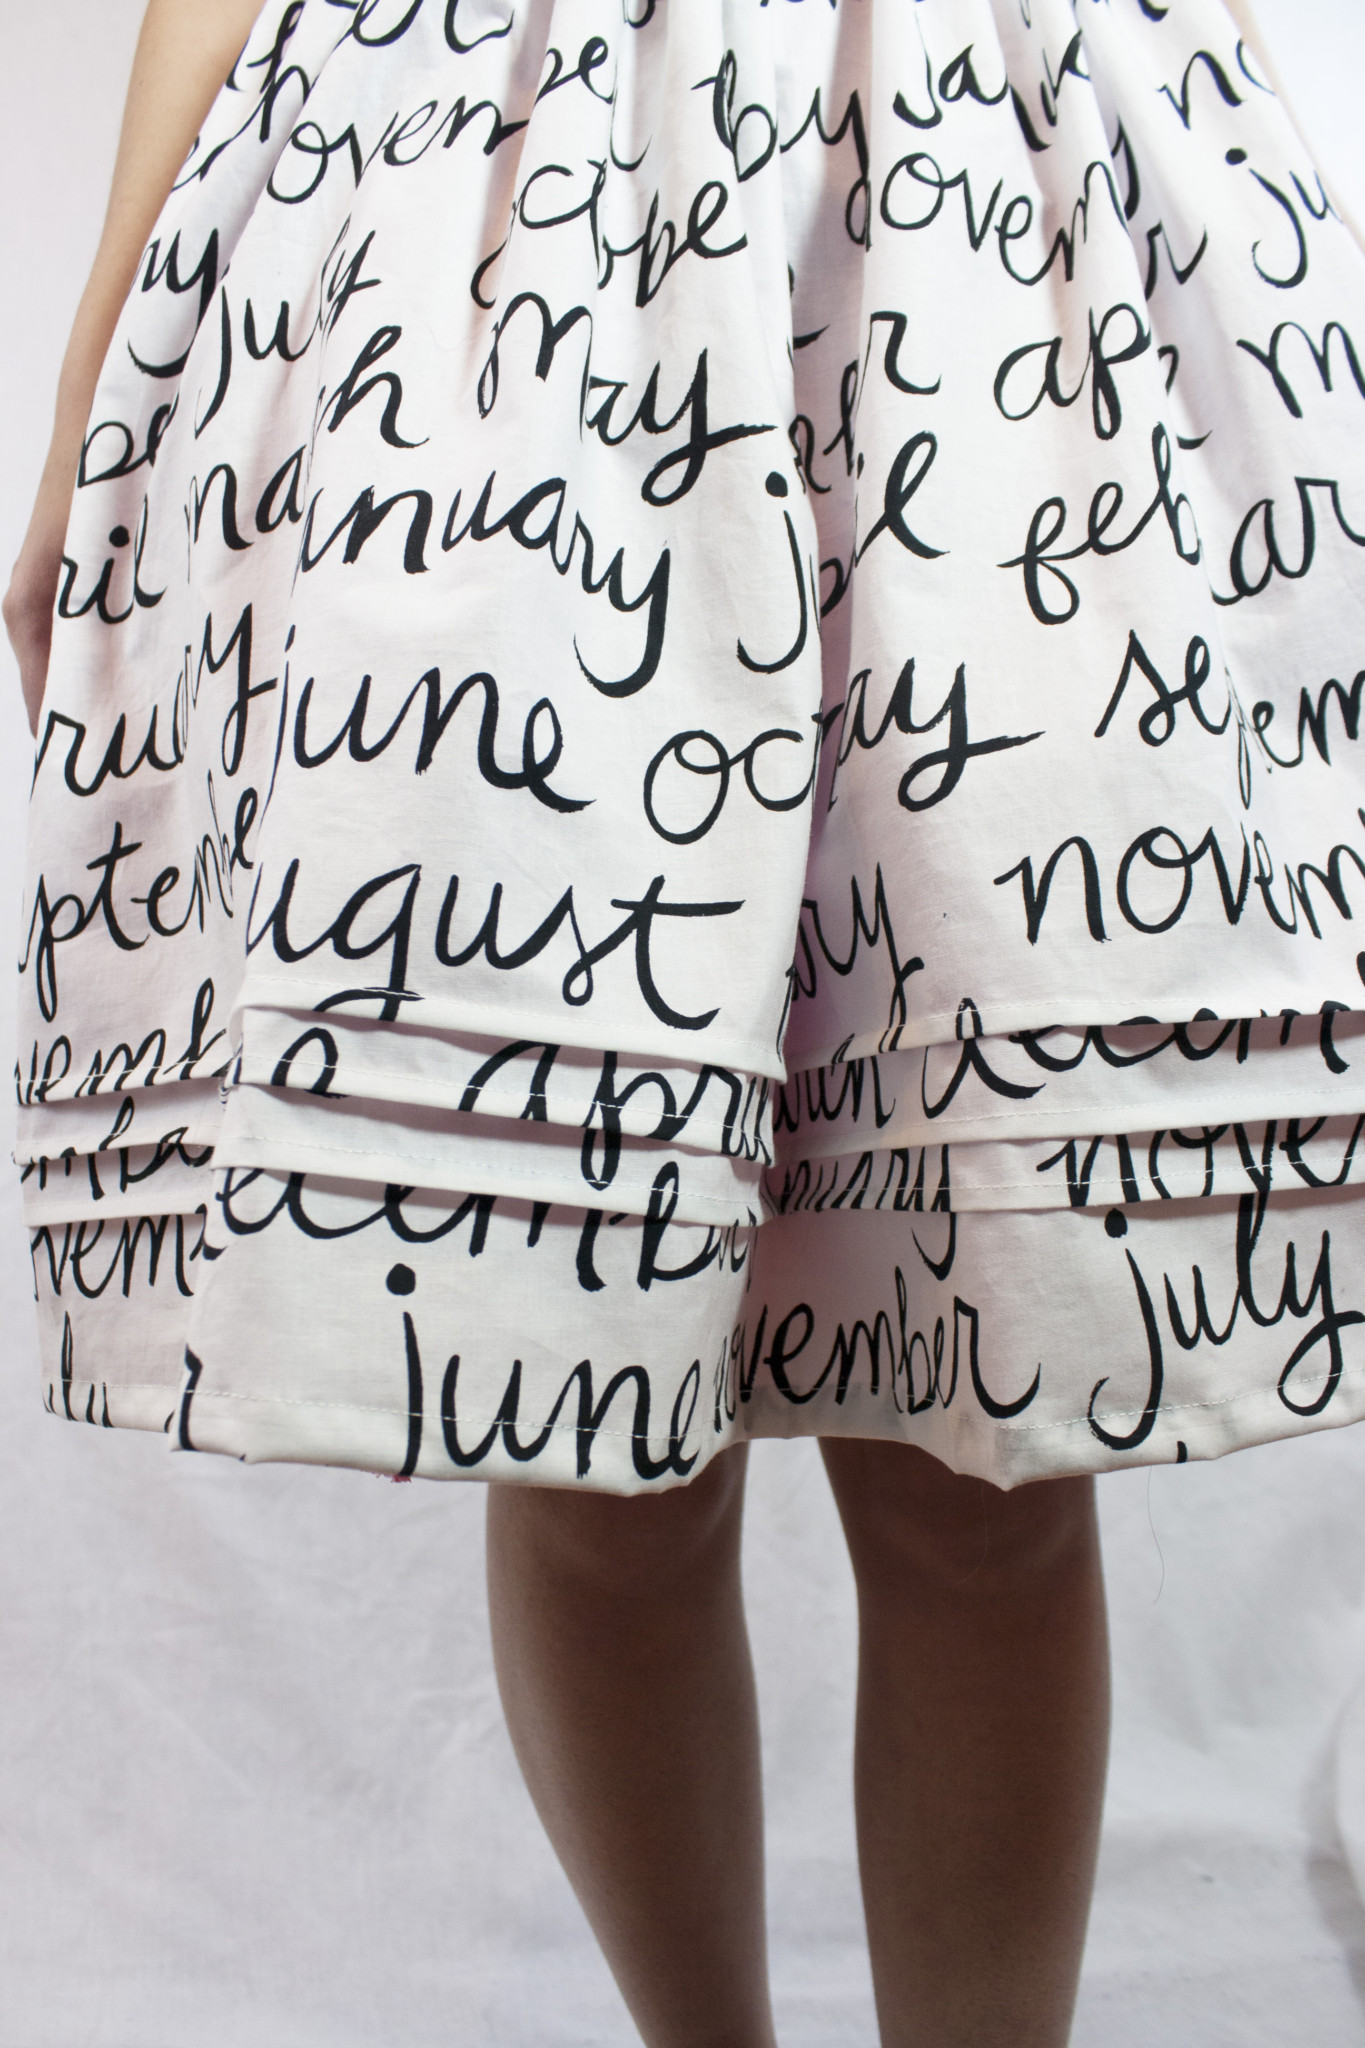
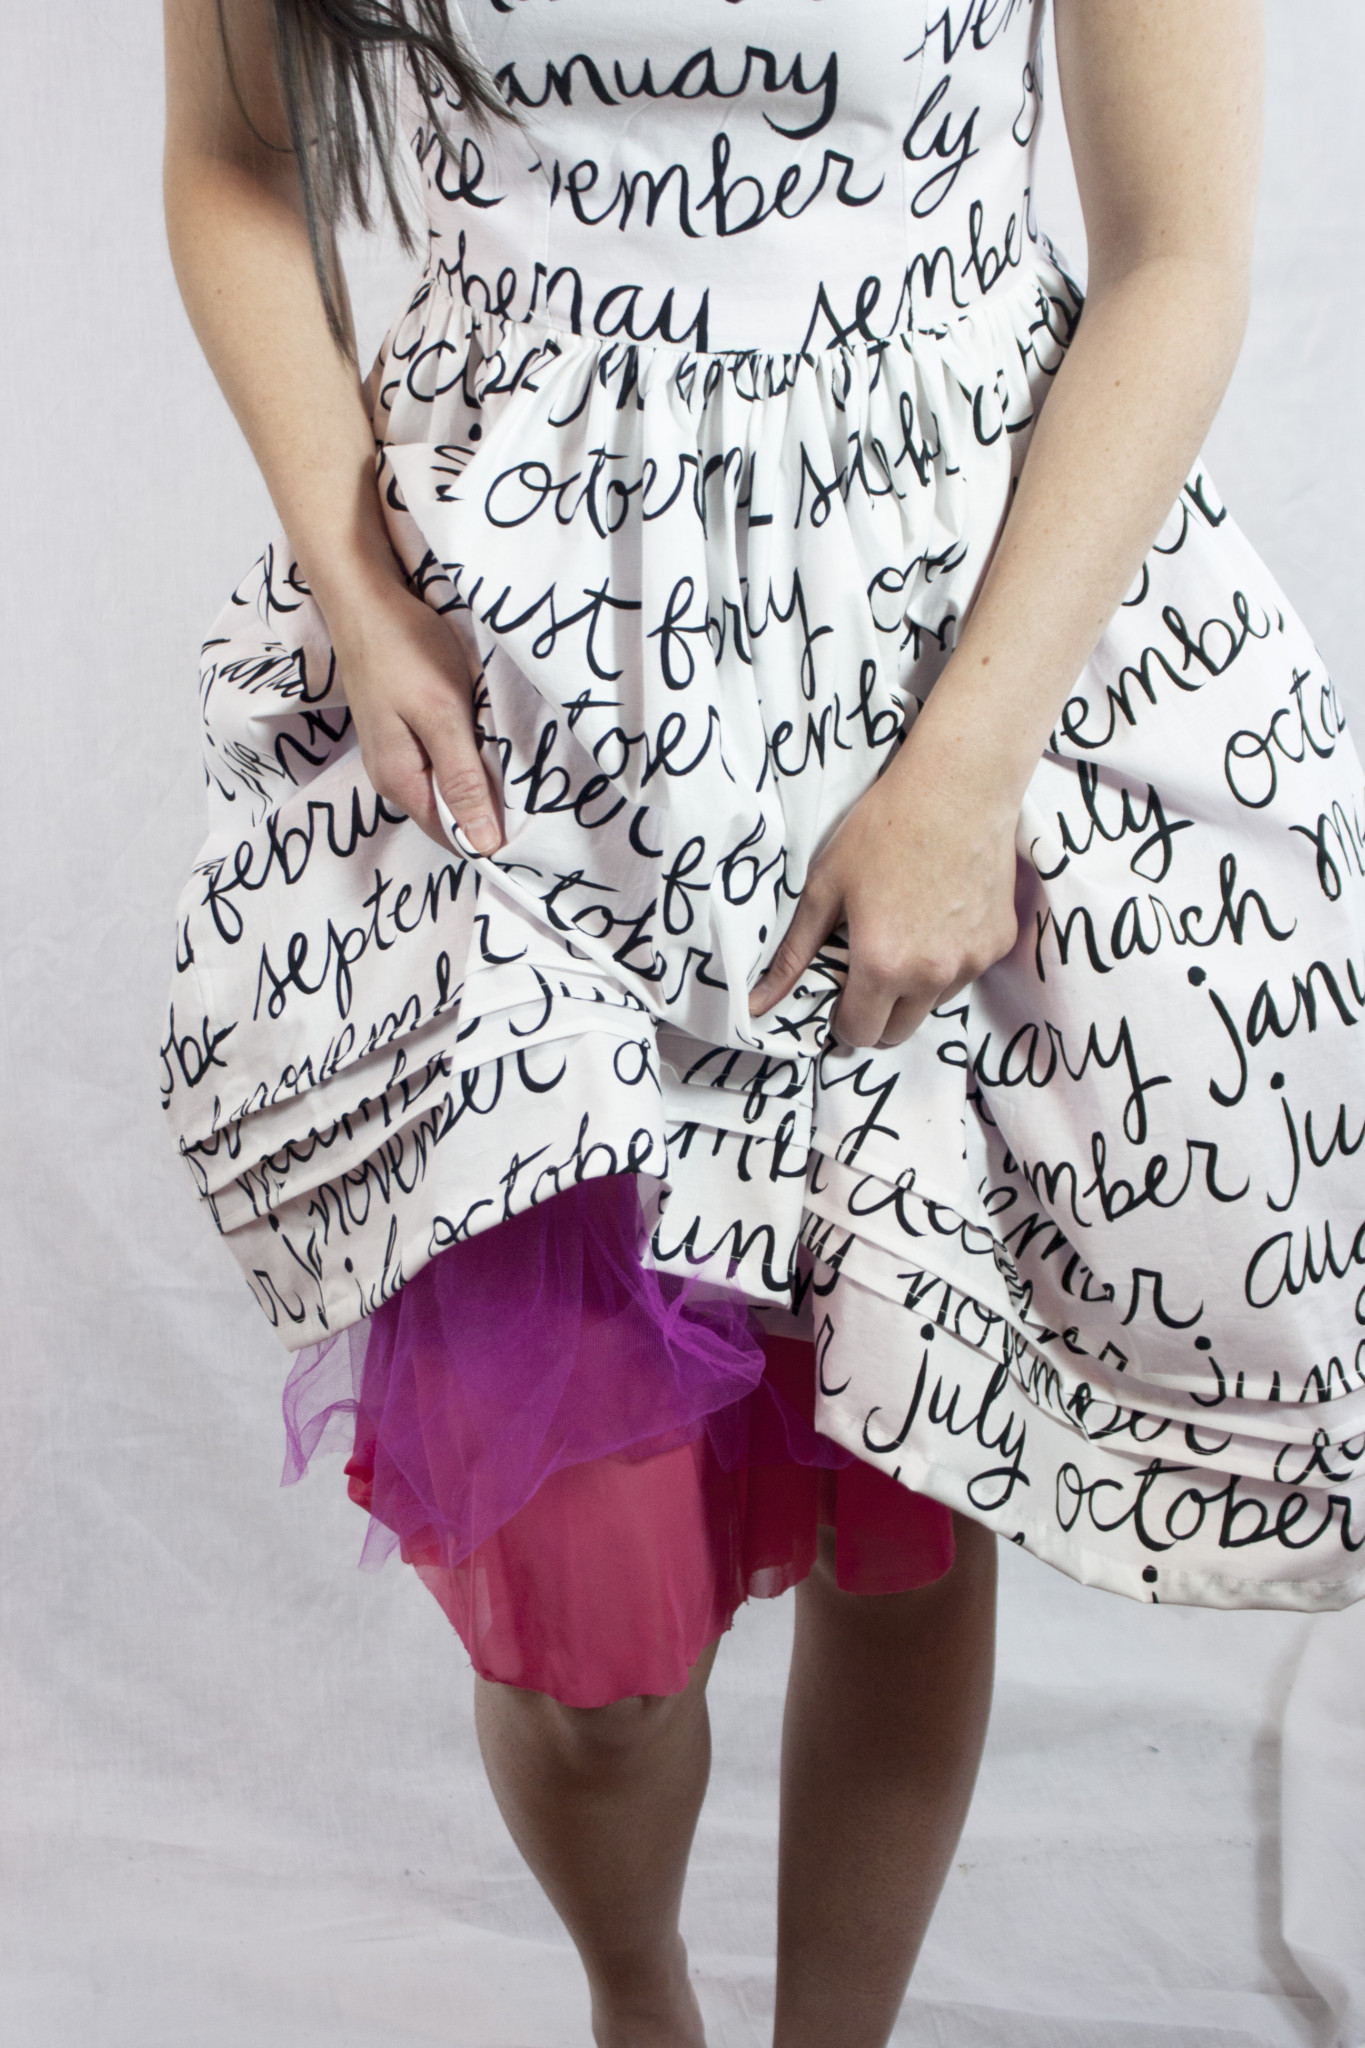
The gathered skirt has instructions for 3 pintucks, which I had not done on a skirt before. I like the pintucks on this dress, but not sure how often I would use them going forward. They were nice to try, though!

When I wore this dress for these photos, I had on my pink tutu underneath. My mom made this for me as one of my Quilt Market outfits (you can see those here). It makes the skirt look really bell-like, lol.

The pattern instructions for the By Hand London Kim Dress are well-written. I didn’t feel confused on any of the steps, and illustrations are included along the way. When you actually finish your muslin, it’s not an incredibly long sew. Since I’d sewn the bodice 4 times, I didn’t really need to look at the directions by the 4th time, haha. The bodice is assembled by basically sewing the fabric and lining right sides together along the neckline, and then along the armhole on each side. The fabric is pulled right side out starting at the back bodice, pulling through the strap, and out the other side. I thought this was pretty cool. I’m probably proudest of making this dress to date, as it’s neither tight on me, but still looks form-fitting (well, at least, I think so), and all areas of the bodice fall flat against my skin. I’m very happy that I transferred all changes to my pattern pieces traced onto Pellon Easy Pattern, as I can’t wait to make this dress again several times. I feel pretty pleased that next time I sew it I can just dig in and not worry about longish straps throwing me off.

Thanks for checking out my garment posts so far! I feel very encouraged by progress, and your sweet comments have really kept me wanting to sew more!!
The post Assignment: Kim Dress appeared first on Sew Sweetness.