
Walking foot with Guide
If you’ve ever tried stitching straight lines on a big momma quilt or larger scale project and been disappointed, let me introduce your new best friend! Meet the walking foot with guide bars. (insert rays of sunshine and cue the music)

Walking Foot with Guide Bars
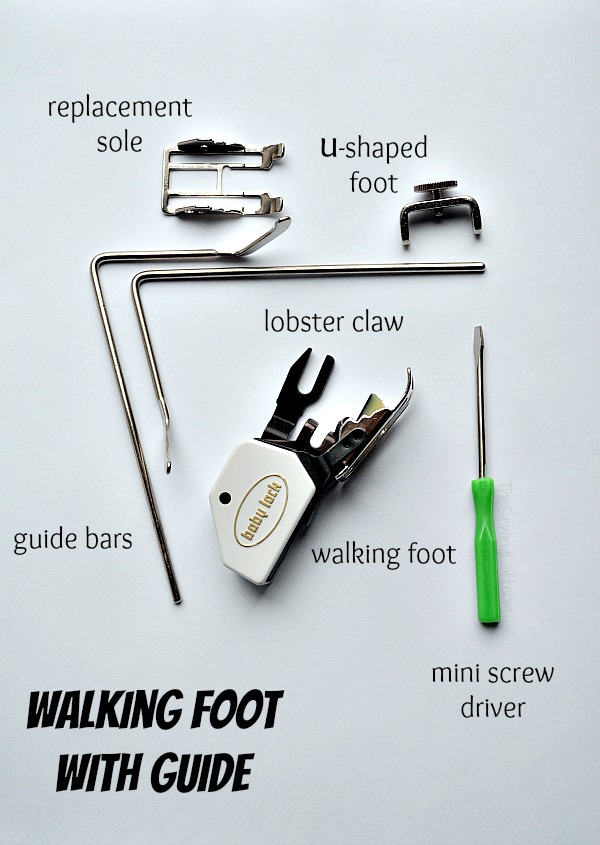
Even though the walking foot with guide bars looks like a monster piece of machinery being attached to your machine it is really simple to use. Let’s break it down and take a look at each part.

Features:
- This foot has a 1/4″ cut out on the inside sole plate. Not only does this feature provide you with a clear line of sight but you can easily aline previous seams 1/4″ away.
- The 1/4″ vertical marking on sole plate allow for easy and accurate corner pivoting.
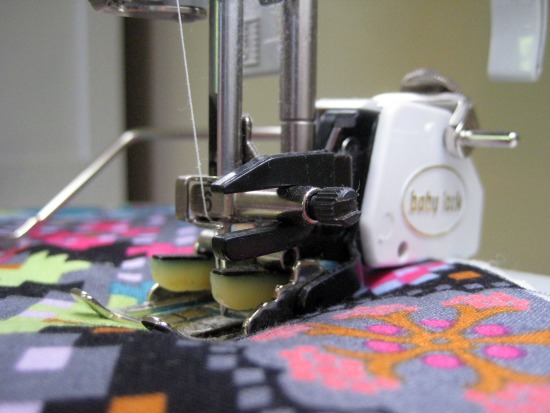
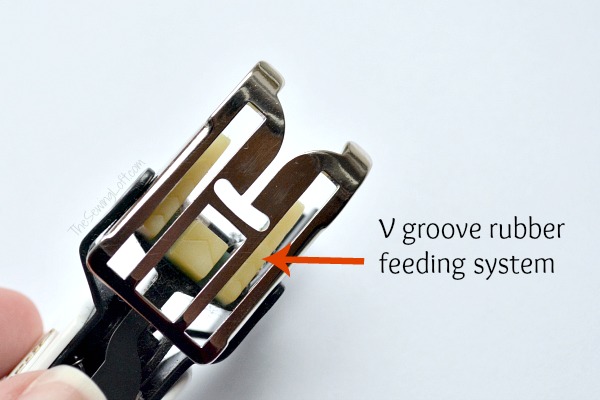
- V-groove rubber feeding system helps feed fabric evenly under the needle.
- Feed fork with plastic cover provides quiet and smooth performance.

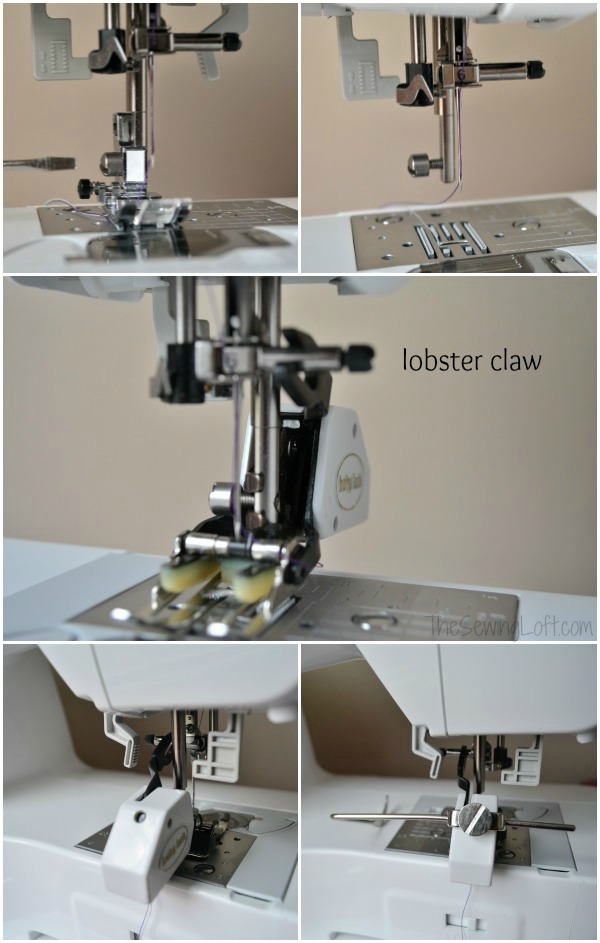
How to attach:
- To attach the walking foot simply remove your standard presser foot, the presser foot holder and the presser foot holder screw. This will leave you with just the presser bar and needle. Feel free to remove the needle if you like.
- Attach the walking foot to the presser foot to the presser bar and raise the “lobster claw” (aka lever) to slip over the needle clamp bar.
- Secure foot in place with the presser foot holder screw. Now it’s time to attach the guide bars.
- Place the U shaped bracket over the top backside of foot and line up with the holes.
- Insert seam guide bar into the U shaped piece, straight through the walking foot and out the other side. Repeat on opposite side.
- Push guide bars to correct spacing and insert large screw in place at the top back to tighten all parts in place.

Helpful Tips:
- This foot can be used for forward stitching only.
- Slow down! This foot works best at a slower setting. I would recommend no higher than a medium speed.
- Keep your eye on the bar, not the presser foot!
- It is important that the large screw is tightly attached. This will prevent the guide bars from moving.
Are you ready to see it in action? Well do I have a treat for you! I’ve partnered with BabyLock & Sew at Home to bring you a fun project that will inspire you to grab this foot and sew. Here is just a snip it of the walking foot with guide in action and an idea of what we will cover in class.
Let’s become better sewers this year by learning how special accessories like the walking foot with guide bars can showcase our talents. Come stitch with me and make this Growth Chart. You can download the pattern watch the class for free today.

Hello! Are you new to The Sewing Loft?
If so, I’m glad you stopped by and hope that something has inspired you to keep your needle moving! Don’t miss a single project and subscribe via email HERE! Bonus- free download with newsletter sign up. Another great way to connect with me is via Facebook, Pinterest, Google or Follow along with Bloglovin. I’m looking forward to getting to know you and creating together!
This post Walking foot with Guide appeared first on The Sewing Loft.