about shop patterns projects printables extras sponsorship wild olive twitter flickr pinterest subscribe

project // felt sampler quilt wall hanging

Felt Sampler Quilt

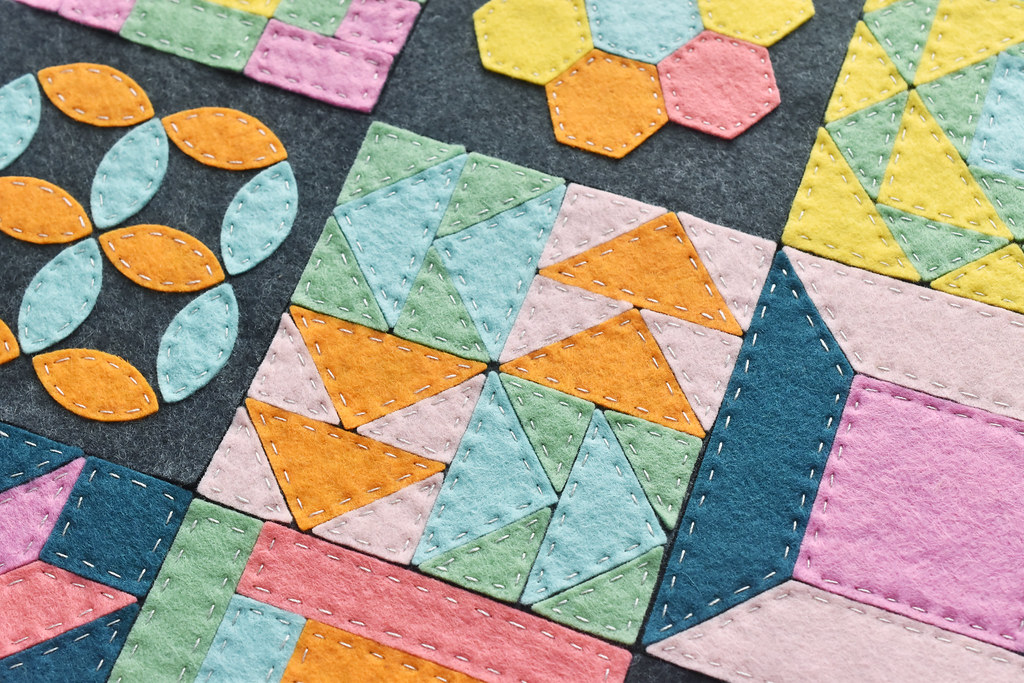
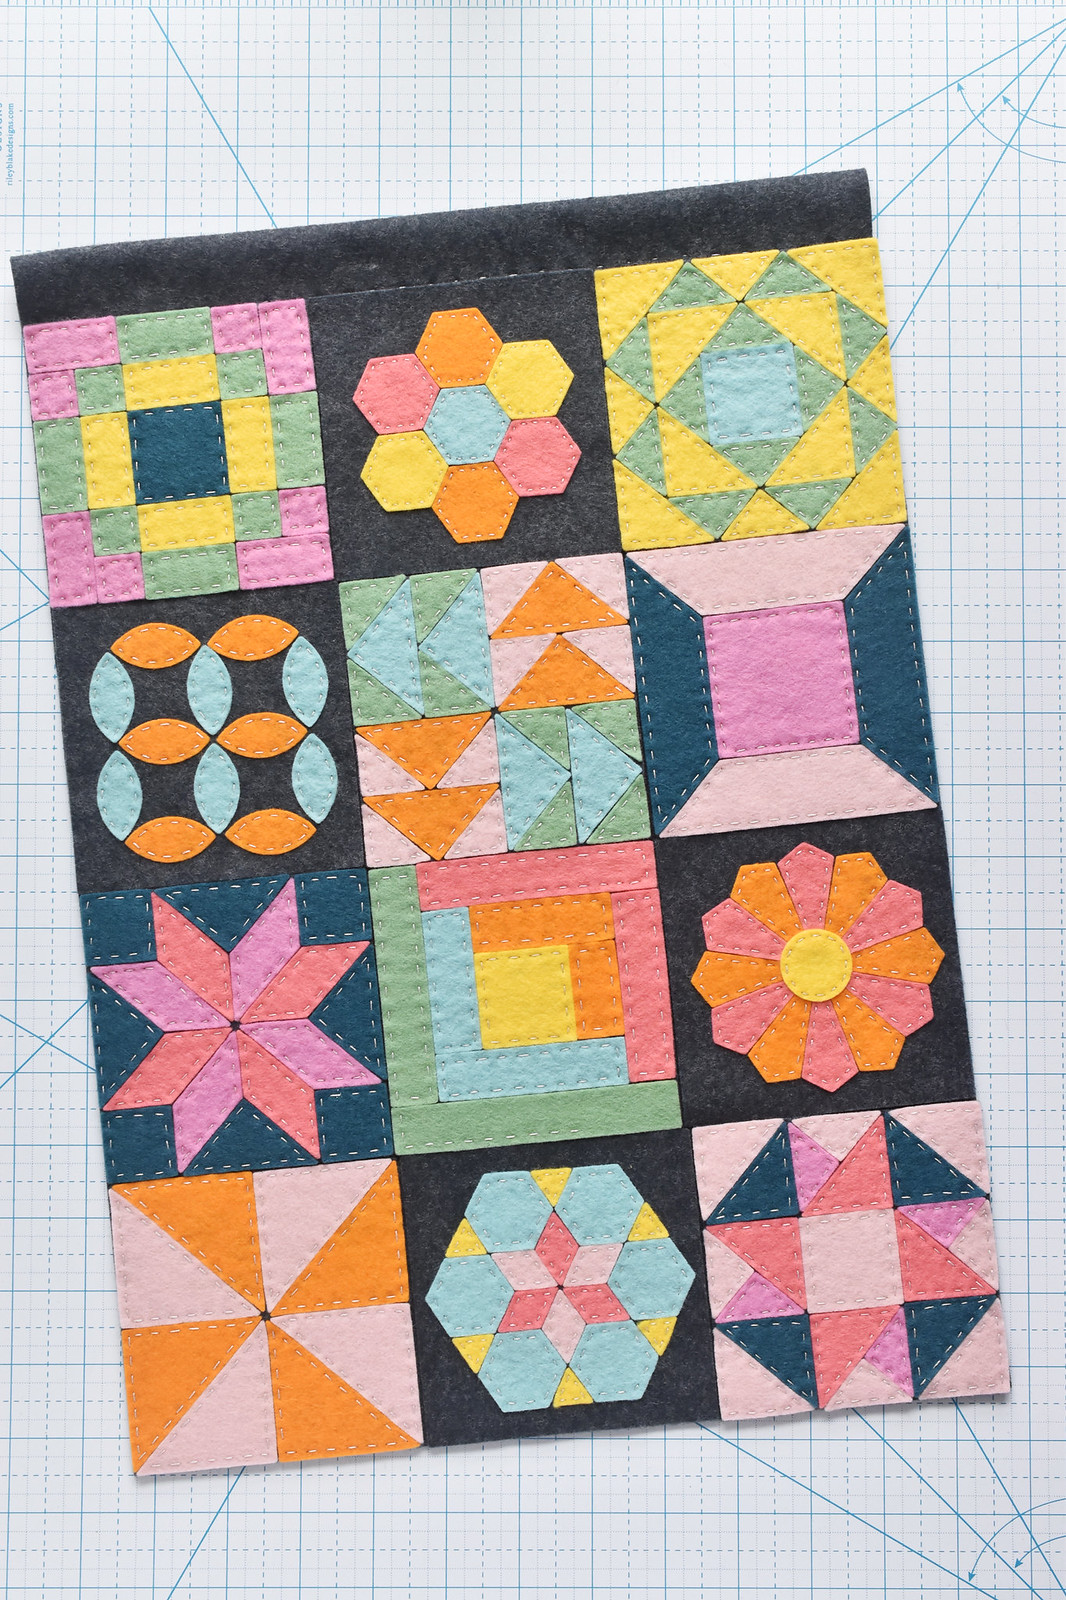
Do you love quilts like I do? Even when they aren't made in tradtional ways, I love their look. Which is why I decided to make this felt sampler mini quilt to hang on my wall! It has 12 different quilt blocks, but I never touched a sewing machine. In fact, you could make this entirely no-sew, but I think a few stitches by hand make it extra special.

Want to see the whole thing?

Note: This post contains affiliate links. If you order items I link to, I may receive compensation at no extra cost to you. Thanks for supporting my work in this way!

Felt Sampler Quilt

For my sampler quilt, I chose quilt blocks that I really like, but you can make this lots of ways. The colors will make a big difference in the overall look, but so will the blocks and placement. You could even choose to make this more like a regular quilt with only one or two different types of blocks, but just repeating them instead of making it a sampler.

And because I can't help but leave room for lots of options on any of the projects I make, there are several ways you can hang your felt mini quilt too. But we'll get to that later.

Felt Sampler Quilt

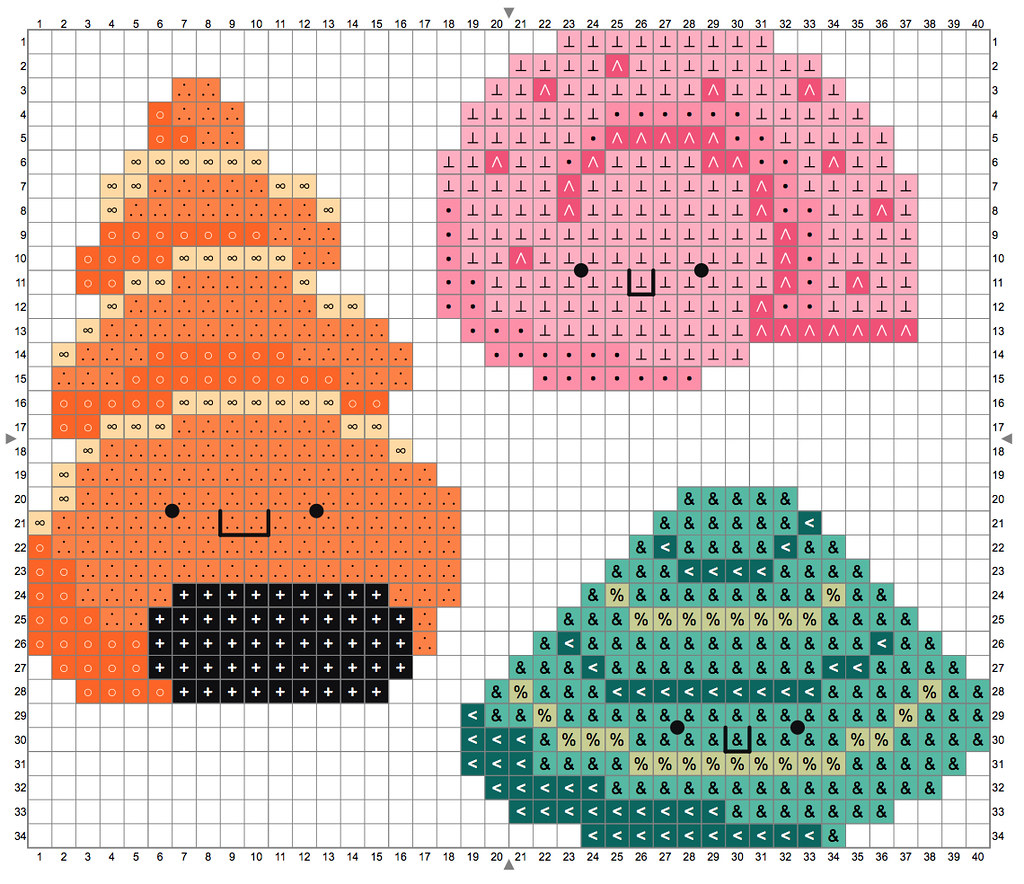
To cut out all the felt pieces for my quilt blocks, I used my three sets of Cozy Quilt Block deep-etch dies, which I designed for Benzie Design. The three sets are Sylvia, Jeanette, and Mollie, all named for my grandmas! If you aren't familiar with how these dies work, I recommend watching my YouTube video that shows the process from cutting apart the metal pieces (and when not to) all the way to rolling the felt through the manual cutting machine.


Now, here's what you need to make your own:

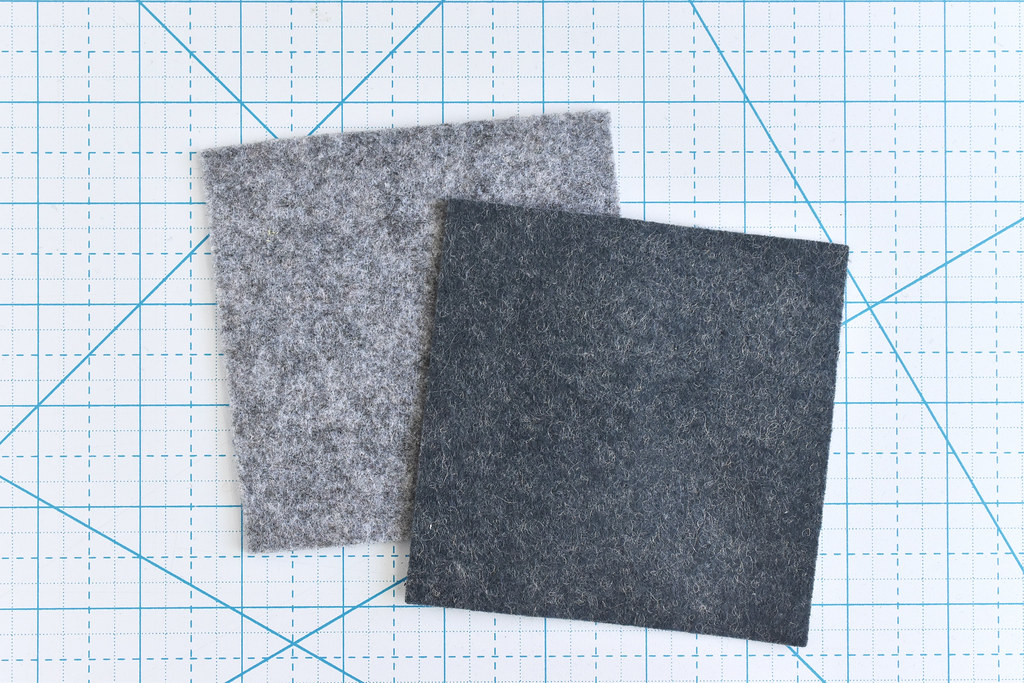
Two 12x18 sheets of felt (see notes on felt below)
Felt in various colors for the quilt blocks
Cozy Quilt Block deep-etch dies and manual cutting machine
Squares and Scallops deep-etch die OR ruler and rotary cutter Craft glue
12-wt embroidery thread/perle cotton
Needle
Scissors
Hanging clip holder OR dowel rod and string

Note: I always recommend wool or wool blend felt, and I used Benzie Design felt for this. Their 12x18 sheets are hand cut, so they may not all be exact. HOWEVER, there's a bit of wiggle room when it comes time to assemble the quilt.

Felt Sampler Quilt

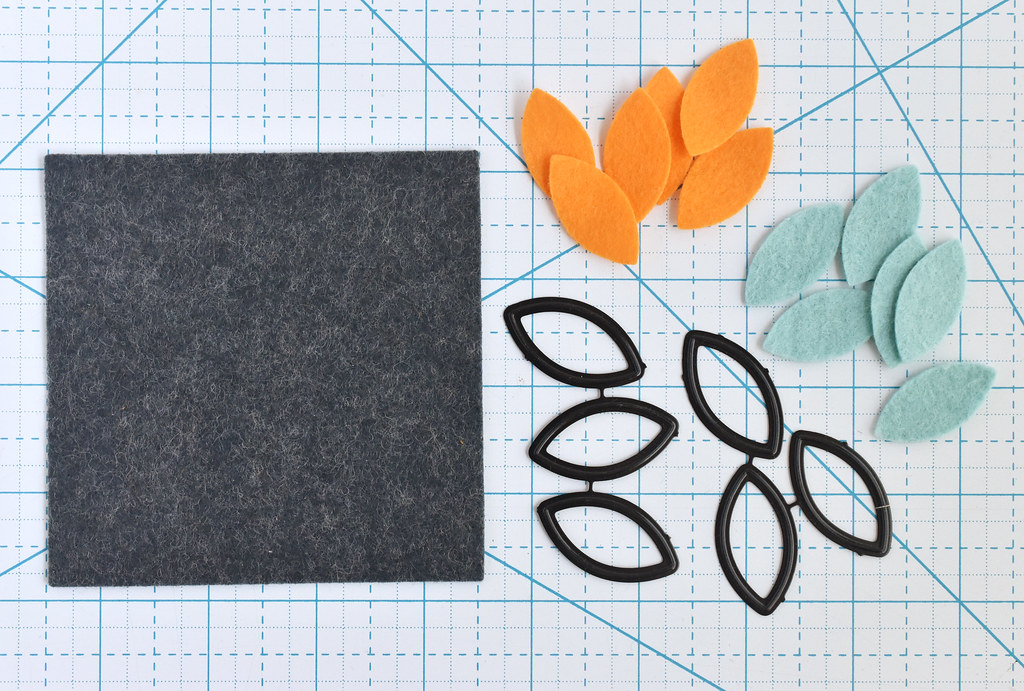
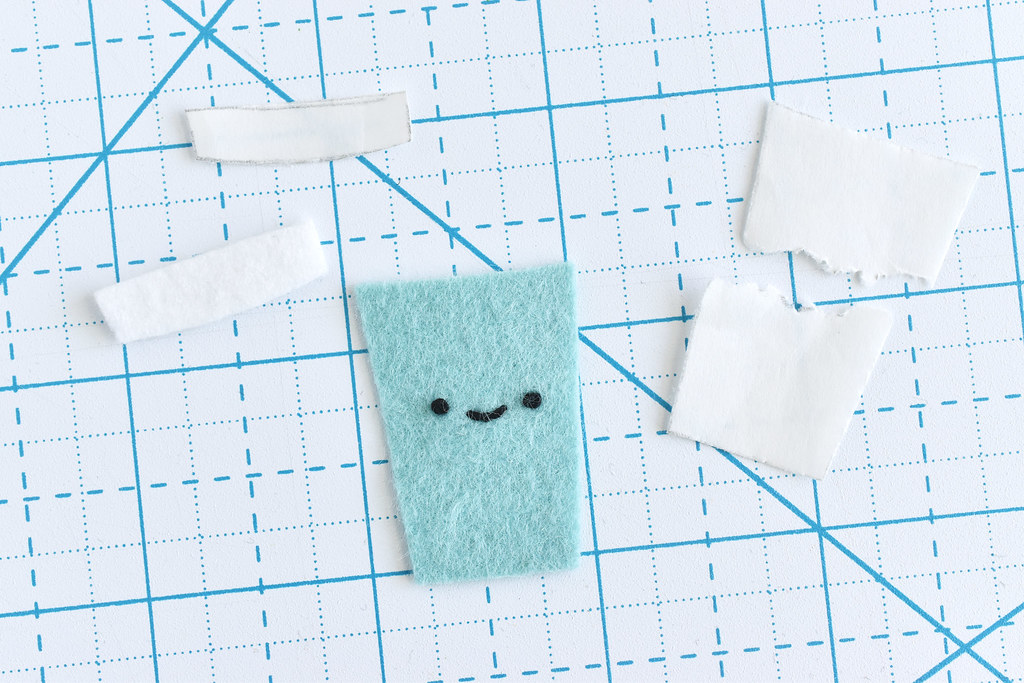
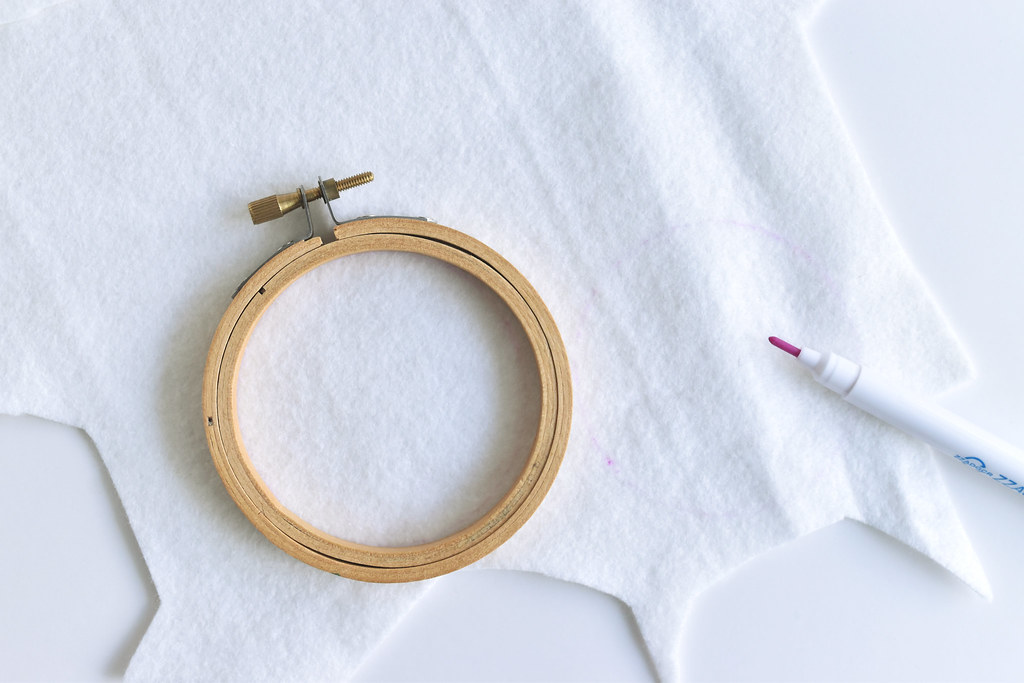
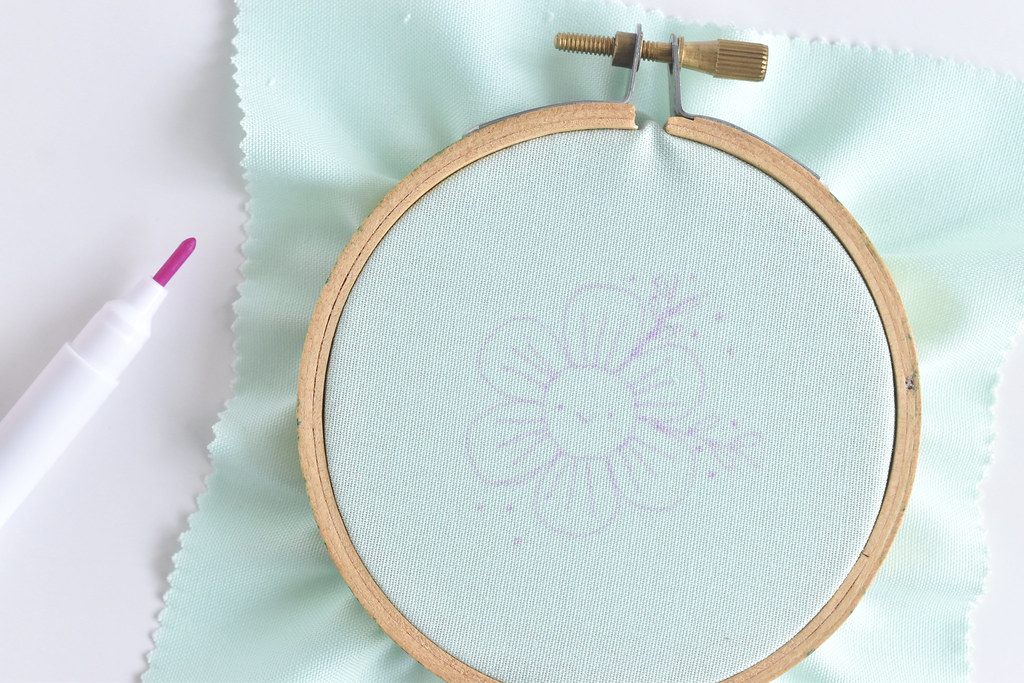
For each quilt block, cut a 4x4 inch square from one of the large felt sheets (keep the other one intact!). Use the deep-etch dies to cut out all of the felt pieces for the each block. Be sure to keep the pieces together so you can tell which block is which.

Each of the deep-etch die sets shows some inspiration for what blocks you can make with each set, but you can make even more than what is shown.

Felt Sampler Quilt

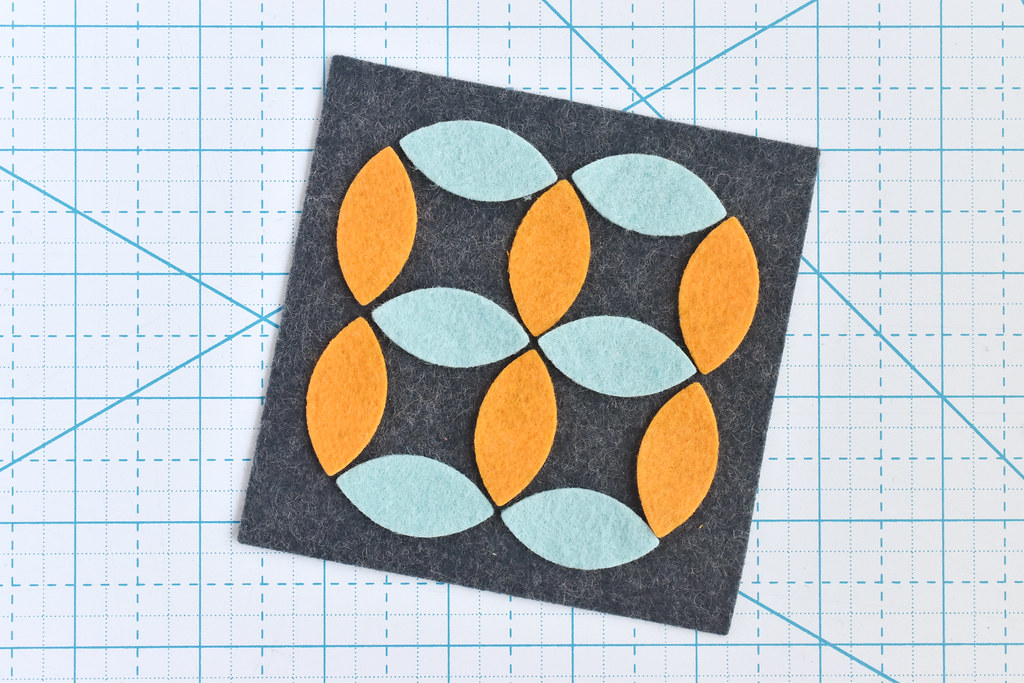
Arrange the quilt pieces on the square and use a tiny dot of glue to hold each one in place. This just keeps the pieces from moving while you stitch them down.

If you want to make your project without any stitching, you can use more glue to hold them more permanently.

Felt Sampler Quilt

You may want to try out some color arrangement on the blocks early on, even more you glue anything down. When you decide how you want everything, take a photo to remember!

Felt Sampler Quilt

To stitch down the pieces, thread your needle with 12-wt embroidery thread. You can also use several strands of regular embroidery floss.

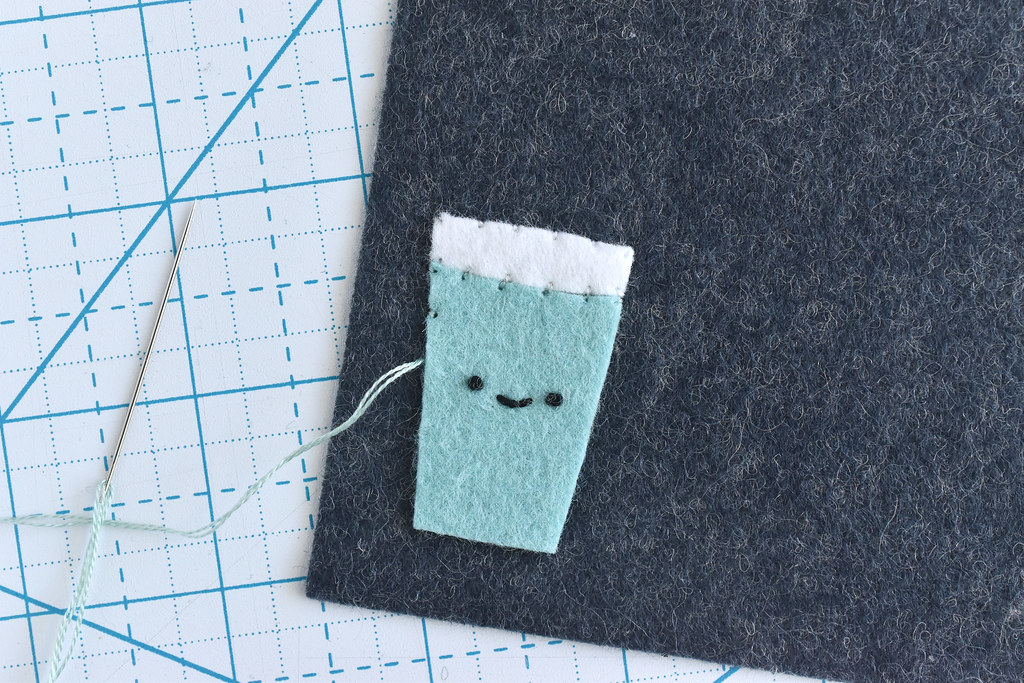
Stitch around the shapes with running stitch, spacing the stitches as evenly as possible. I went for this because I like seeing the stitches.

Felt Sampler Quilt

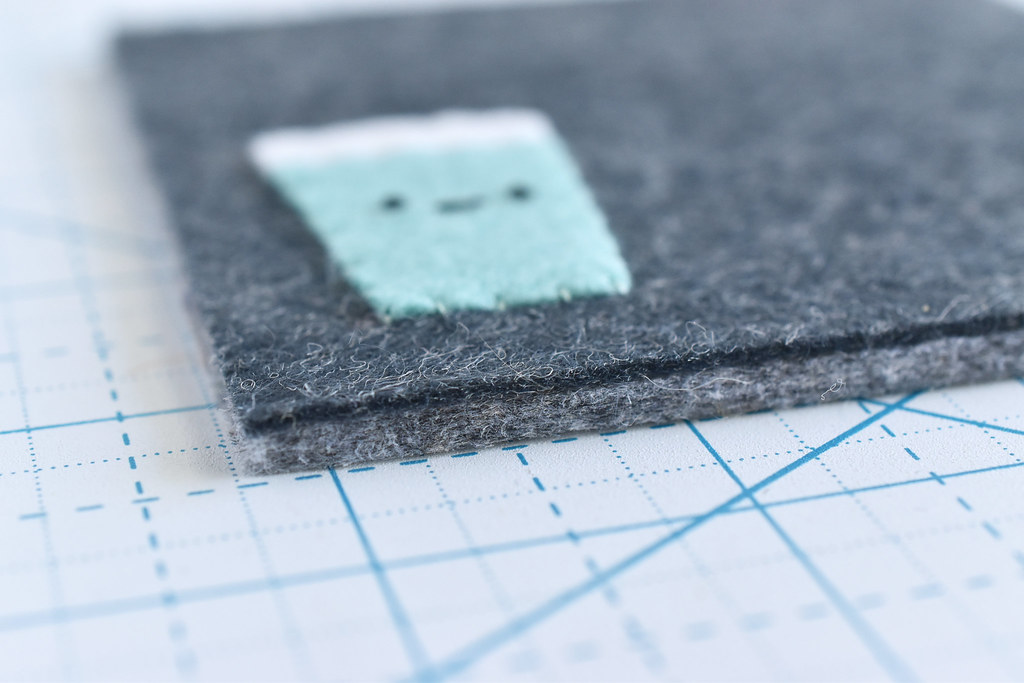
One quilt block all finished!

Now, I probably shouldn't point this out, but originally I was going to have this orange peel design turned 45 degrees, which you can see in the phone photo. I DIDN'T look at that before I started gluing and stitching, so I ended up with a different look. But I share that to say that ultimately if the pieces fit together and you like how they look, it's not wrong! Go with what you like.

Felt Sampler Quilt

Make all your blocks following the same steps. Some have pieces that fill the entire square, but some are more open like the hexagons and orange peels. Those ones won't be as thick on your finished quilt, but they all still work together.

Felt Sampler Quilt

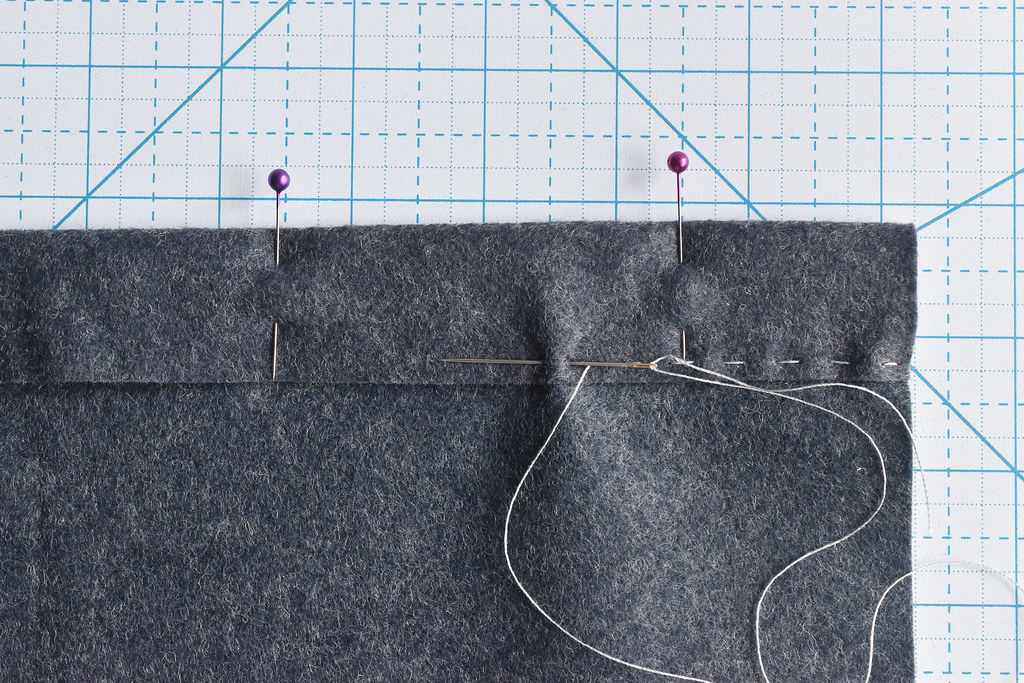
To prepare the backing that will hold all your quilt blocks, fold the top edge down about 1-1/4". Pin it in place and then stitch across the edge with running stitch. This will be the back.

This makes a little channel that you can run a dowel rod through. I did this even though I'm not using a dowel because I wanted an area that I could clip onto without attaching directly to the quilt blocks.

You could also glue this folded channel, as long as you leave room for a dowel (if you're using that).

Felt Sampler Quilt

Starting at the bottom edge, begin gluing the quilt blocks down to the backing. Make sure they are all lining up with each other and the edges. It's okay if the blocks hang off the edge of the back a bit, but you want everything to fit together nicely.

If any of the backing felt shows, you may need to trim it down with a rotary cutter and ruler. Just don't cut your quilt blocks!

Felt Sampler Quilt

And look at that! You have a felt mini quilt! This honestly makes me so happy.

Felt Sampler Quilt

To hang my quilt, I used a ring clip holder, which I received from Missouri Star Quilt Co. It just clips on to each end of the top edge.

Felt Sampler Quilt

It has all the feeling of a traditional quilt, but with colors and materials that give it a cute and modern vibe. But I also love that you could make this lots of ways and get entirely different looks. Just like any kind of quilt!

Felt Sampler Quilt

Speaking of different looks, if you go to Missouri Star Quilt Co. and search for "ring clip holder" you'll find several styles and sizes. I used the 12-inch heart for my wall hanging, but the 8-inch version would hold a mini quilt that has a 2x2 or 2x6 grid of quilt blocks. That would be cute too!

Felt Sampler Quilt

Happy stitching!

learn to embroider in a super cute way!

Super Cute Stitching Sampler If you love kawaii cute things and want to learn how to embroider, I'm here for you. In fact, I have an all-new course that's designed for beginners.

There are lots of embroidery courses and I've certainly made plenty of embroidery tutorials here on my blog and some on YouTube. But I wanted to make something that would take you from start to finish. From what materials to use all the way to how to soak, iron, and frame your stitching, all in one place.

Super Cute Intro to Embroidery is just that. It's an online class filled with videos to each you all the embroidery basics. But it's not just about learning some stitches. It's also a way to do that while making things super cute.

Super Cute Stitching Sampler

I created a special sampler pattern that allows you to practice all of the stitches and use adorable candy colors, while learning how to get ready to stitch and finish off the project. Actually, there are two version of the sampler so you can choose if you want to stitch a heart or a star in the center of your design! In the lessons you'll also learn several ways to stitch faces and add some extra cute details.

In 2+ hours of video, plus written instructions, with stitch diagrams, you'll learn:

• What supplies you'll need
• How to prepare your fabric
• Multiple ways to transfer a pattern
• How to separate strands of embroidery floss
• How to hoop your fabric
• The Basic 3 stitches I use (back stitch, scallop stitch, and French knot)
• More stitches: straight, star, running, split, stem, chain (2 ways!), lazy daisy, satin, and long-short
• A bonus stitch for making faces
• How to strip embroidery floss
• How to soak and iron your embroidery
• A simple way to frame your finished stitching
• How to add a bit of extra cuteness to embroidered faces

Super Cute Intro to Embroidery will prepare you for all kinds of embroidery, whether you're stitching my kawaii-style embroidery patterns or designs from other creators. Super Cute Stitching Sampler

My goal is to teach more people to embroider. Which is where there is a low, one-time cost for registration. And then you get full access to all the class content.

I want to make all my favorite stitching techniques accessible, enjoyable, and super cute. Even if you've never picked up an embroidery hoop and needle, YOU CAN DO THIS!

Now, if you're already an experienced embroiderer, this course may not be for you. But if you've just dabbled a bit and want to feel more confident, this will help get you there! It would also be a great class to assist you as you teach a young crafter how to embroider. It's not designed for specifically kids, but I think they would love it!

Super Cute Stitching

You can find my Super Cute Intro to Embroidery course at SuperCuteStitching.com, where you'll also find some other fun stuff. And more to come soon!

pattern // mini seashells cross stitch

Mini Shell Cross Stitch Patterns Summer time is coming which means doing some cross stitch outside in the warm weather! And when I think of summer, seashells often come to mind. That and a whole lot of tropical beach things (even if I don't really love the beach).

Now, for all those other summer things, I released a new cross stitch pattern called Summer Vibes, which you can find in my Etsy shop. It has a larger seashell in the set, but I thought it would be fun to have a few smaller patterns too.

So today I'm sharing a set of three mini shell designs. These are all on one chart and you can stitch them in a little group, or you can cross stitch them individually as you seen above. They are pretty small, so they take hardly any time to stitch!

Mini Shell Cross Stitch Patterns

I think they would be adorable on something like a sunglasses case or as a tag on your favorite beach bag.

They use only whole cross stitches, so even beginners can jump right in. The faces use a tiny bit of backstitch and French knots, so if those aren't as familiar to you, you can skip the faces. Or let this be the time you learn how to stitch them!


And if cross stitch isn't really your thing, but you're looking for a under the sea sort of embroidery design, be sure to check out my free embroidery pattern based on lyrics from The Little Mermaid's song Part of Your World!

project // star wars day blue milk coaster

Blue Milk Felt Coaster

Do you, like Luke Skywalker, enjoy drinking blue milk? It has long been a beverage of Star Wars legends, but thanks to Galaxy's Edge at Disneyland and Walt Disney World, it's real. And now you can also make your own coaster featuring a smiling felt glass of blue milk.

Star Wars Day (May the 4th) is an important holiday at my house and every year, so every year I share some kind of a Star Wars tutorial here on my blog. Sometimes I make even more patterns throughout the year, and you can find them all here. Don't worry. I'll still be here when you come back.

This year, since I've been making some Disney snacks as ornaments, I thought it would be fun to make something similar. Especially since this is a Disney parks treat. Rather than making another ornament, I made my little cup of blue milk and added it to a coaster. This way you can actually use it while drinking your blue milk.

Now you may be wondering, why would I bring this coaster with me to get a blue milk at a Disney park? The answer is of course that you don't have to. Because blue milk exists and you can get it at your local American grocery store.

Personally, I'll be using my coaster with my coffee or water, even if that isn't very Star Wars-y. Milk of any shade isn't really my thing. But making things is! So let's do that.

Blue Milk Felt Coaster

You will need:

Standard wool or wool blend felt (at least a 4x4 inch square, plus scraps)
3mm thick felt
Embroidery floss
Ruler
Pencil
Freezer paper
Iron
Scissors
Needle
Craft glue

DOWNLOAD THE BLUE MILK PATTERN PDF

Blue Milk Felt Coaster

Cut a 4x4 inch square of felt for the top of your coaster and a matching 4x4 square of the thick felt for the bottom of the coaster.

Blue Milk Felt Coaster

Trace the blue milk pieces onto freezer paper and iron them onto the small felt pieces. Embroider the face with three strands of black embroidery floss.

I used white for the top and blue for the bottom, but green milk is also a thing, so go with what you like. You could also use this pattern to have chocolate milk or other beverages. Oh, and the face is optional, as always, but I think it's super cute!

Blue Milk Felt Coaster

Cut out the two pieces and peel off the paper. Carefully tear it away from around the face stitching.

Blue Milk Felt Coaster

Stitch the pieces onto the top coaster square with two strands of matching embroidery floss and whip stitch. You can see how I do it in this video.

Blue Milk Felt Coaster

Apply a thin layer of craft glue over the back of the felt square, making sure you get it pretty close to the edges and corners.

Blue Milk Felt Coaster

Press the top square onto the thicker bottom square of felt. Smooth it out and make sure that the edges are all even. Let the glue dry.

Blue Milk Felt Coaster

Pour yourself a tall glass of blue milk or grab your favorite Star Wars mug and enjoy using your new coaster. It's better than using the force to avoid rings on your coffee table! By the way, the size of this happy little felt applique is also the same size as the felt ornaments I've been making with other Disney snacks this year. That means you can use this to make an ornament OR that you can use those appliques to make coasters or other fun things! Blue Milk Felt Coaster

Happy Star Wars Day, and May the Fourth be with you!

project // embroidered macaron ornament

Macaron Flower Ornament

Have you seen those adorable macaron zip pouches? This is inspired by those, but without the zip pouch part. It's an embroidered macaron ornament with a sweet flower for Mother's Day!

Now, I want to acknowledge that I have been on an ornament-making kick this year. And I know that some folks are probably wondering why. Or maybe what in the world are you supposed to do with all these when it's not even Christmas. All I can say is that I love making them because they are small and fun little things to make and give as gifts. That's the why.

As for what to do with them, I just like finding places to hang them or display them. You can put them on a little branch in a vase. Display them on your wall alongside other small art pieces. Maybe even hang them from your rearview mirror! Ultimately, they are just fun. But also, you can use any or all of the ornaments patterns I share to get a headstart on holiday gifts. Just sayin'.

Macaron Flower Ornament

If you're also wondering what makes this a "macaron" ornament when it looks like a circle with a flower on it, take a look at it from the side. The front and back are domed like a French macaron. The middle of the ornament has trim that's kind of like the edges or filling of the tasty treat.

To make this, you'll need the little macaron forms that Zakka Workshop makes. Mine came from Missouri Star Quilt Co., where you can purchase a pack of four discs without the zippers designed for making a macaron pouch. But I do want to point out that you could use my flower embroidery pattern on one of the zip pouches.

But if you're looking for simple, let's make an ornament!

Macaron Flower Ornament

One last thing before I list all the materials. I mentioned Missouri Star Quilt Co., and the fabric and macaron discs for this were provided for me by them. They also are offering 20% off orders of $50+ when you use this link. (affiliate link) Here's what you need:

Quilting fabric (I used Kona's color of the year, plus MSQ's Quilt Town)
Embroidery floss
Felt
2" Macaron discs
Perle cotton and tiny crochet hook -OR- Small trim
Embroidery marking pen
3-inch Embroidery hoop
Needle
Scissors
Quick-drying glue

DOWNLOAD THE FLOWER EMBROIDERY PATTERN

Macaron Flower Ornament

Trace the inside of the embroidery hoop onto felt two times and cut out the circles.

Macaron Flower Ornament

Trace the embroidery pattern onto your fabric for the front of the ornament.

I've recently been loving having pre-cut packs of solid colored fabric to use for embroidery. It's super handy! And while this time I got a pack of all one color (I'll be using the rest for another project), the multicolor packs are great for giving you lots of color options without needing to buy a ton of fabric.

Macaron Flower Ornament

Place one of the felt circles behind the embroidery hoop. You'll embroider through the fabric and the felt. This makes the embroidery look nicer when it's wrapped around the disc.

Macaron Flower Ornament

Embroider the pattern. I used three strands for everything. For stitches, it's mostly back stitch with some French knots for the eyes, tiny flowers and the center ring. Plus some lazy daisies, a few straight stitches on the petals, and a scallop stitch mouth.

Remove the pattern markings. Because I used a pen than vanishes over time, I just let it do its thing. If you need to soak it, remember that the felt will take longer to dry!

Macaron Flower Ornament

For the back of the ornament, place the second felt circle on the wrong side of your fabric and cut out a circle that's about 1/4" larger than the felt. Err on the side of cutting it larger than smaller. Place the disc domed side down on the felt.

Follow this same process to cut out the embroidered circle for the front.

Macaron Flower Ornament

Use embroidery floss or perle cotton to sew around the edge of the fabric with running stitch. It's best to keep the stitches under 1/4" long. Mine were probably 3/16".

Macaron Flower Ornament

Pull the thread to gather the fabric tight onto the back and secure it with a knot.

Macaron Flower Ornament

Repeat the process for the second half of the ornament.

Macaron Flower Ornament

If you're using small trim, you can skip this step, but I made the trim with a crochet hook.

To do this, make a crocheted chain of perle cotton that's about 12 inches long or a little longer. I used a 2mm hook.

Macaron Flower Ornament

Fold the trim in half and glue the two ends of the trim so they will be inside the macaron with the rest of the trim coming out from the bottom.

Add more glue around the inside and place the second half of the macaron on top. Press the halves together and let them dry.

Macaron Flower Ornament

For the best coverage, have the two sides of the trim cross to the opposite side. This covers the little gap that you see otherwise.

Macaron Flower Ornament

Run a tiny line of glue around the seam of the macaron.

Macaron Flower Ornament

Bring the trim up to the top of the macaron, pressing it into the glue. Add an extra dot of glue at the top, and once again cross the trim. This forms the hanger and covers all the edges.

Let the glue dry thoroughly before hanging the ornament or wrapping as a gift.

Macaron Flower Ornament

I just think this is adorable and a fun little decoration to make and share. It would even make a sweet gift topper! Perhaps on a box of real macarons?

To customize it more, you can also skip the print on the back and use another piece of solid fabric. Embroider "MOM" or a name to make something truly unique.

Macaron Flower Ornament

On the edible kind of macarons, they have what is known as "ruffled feet". The trim on my ornament is kind of like a ruffled foot, but the edge of a stack of pre-cut charm squares has an even better texture! (It can be a bit messy though...IYKYK!)

Macaron Flower Ornament