
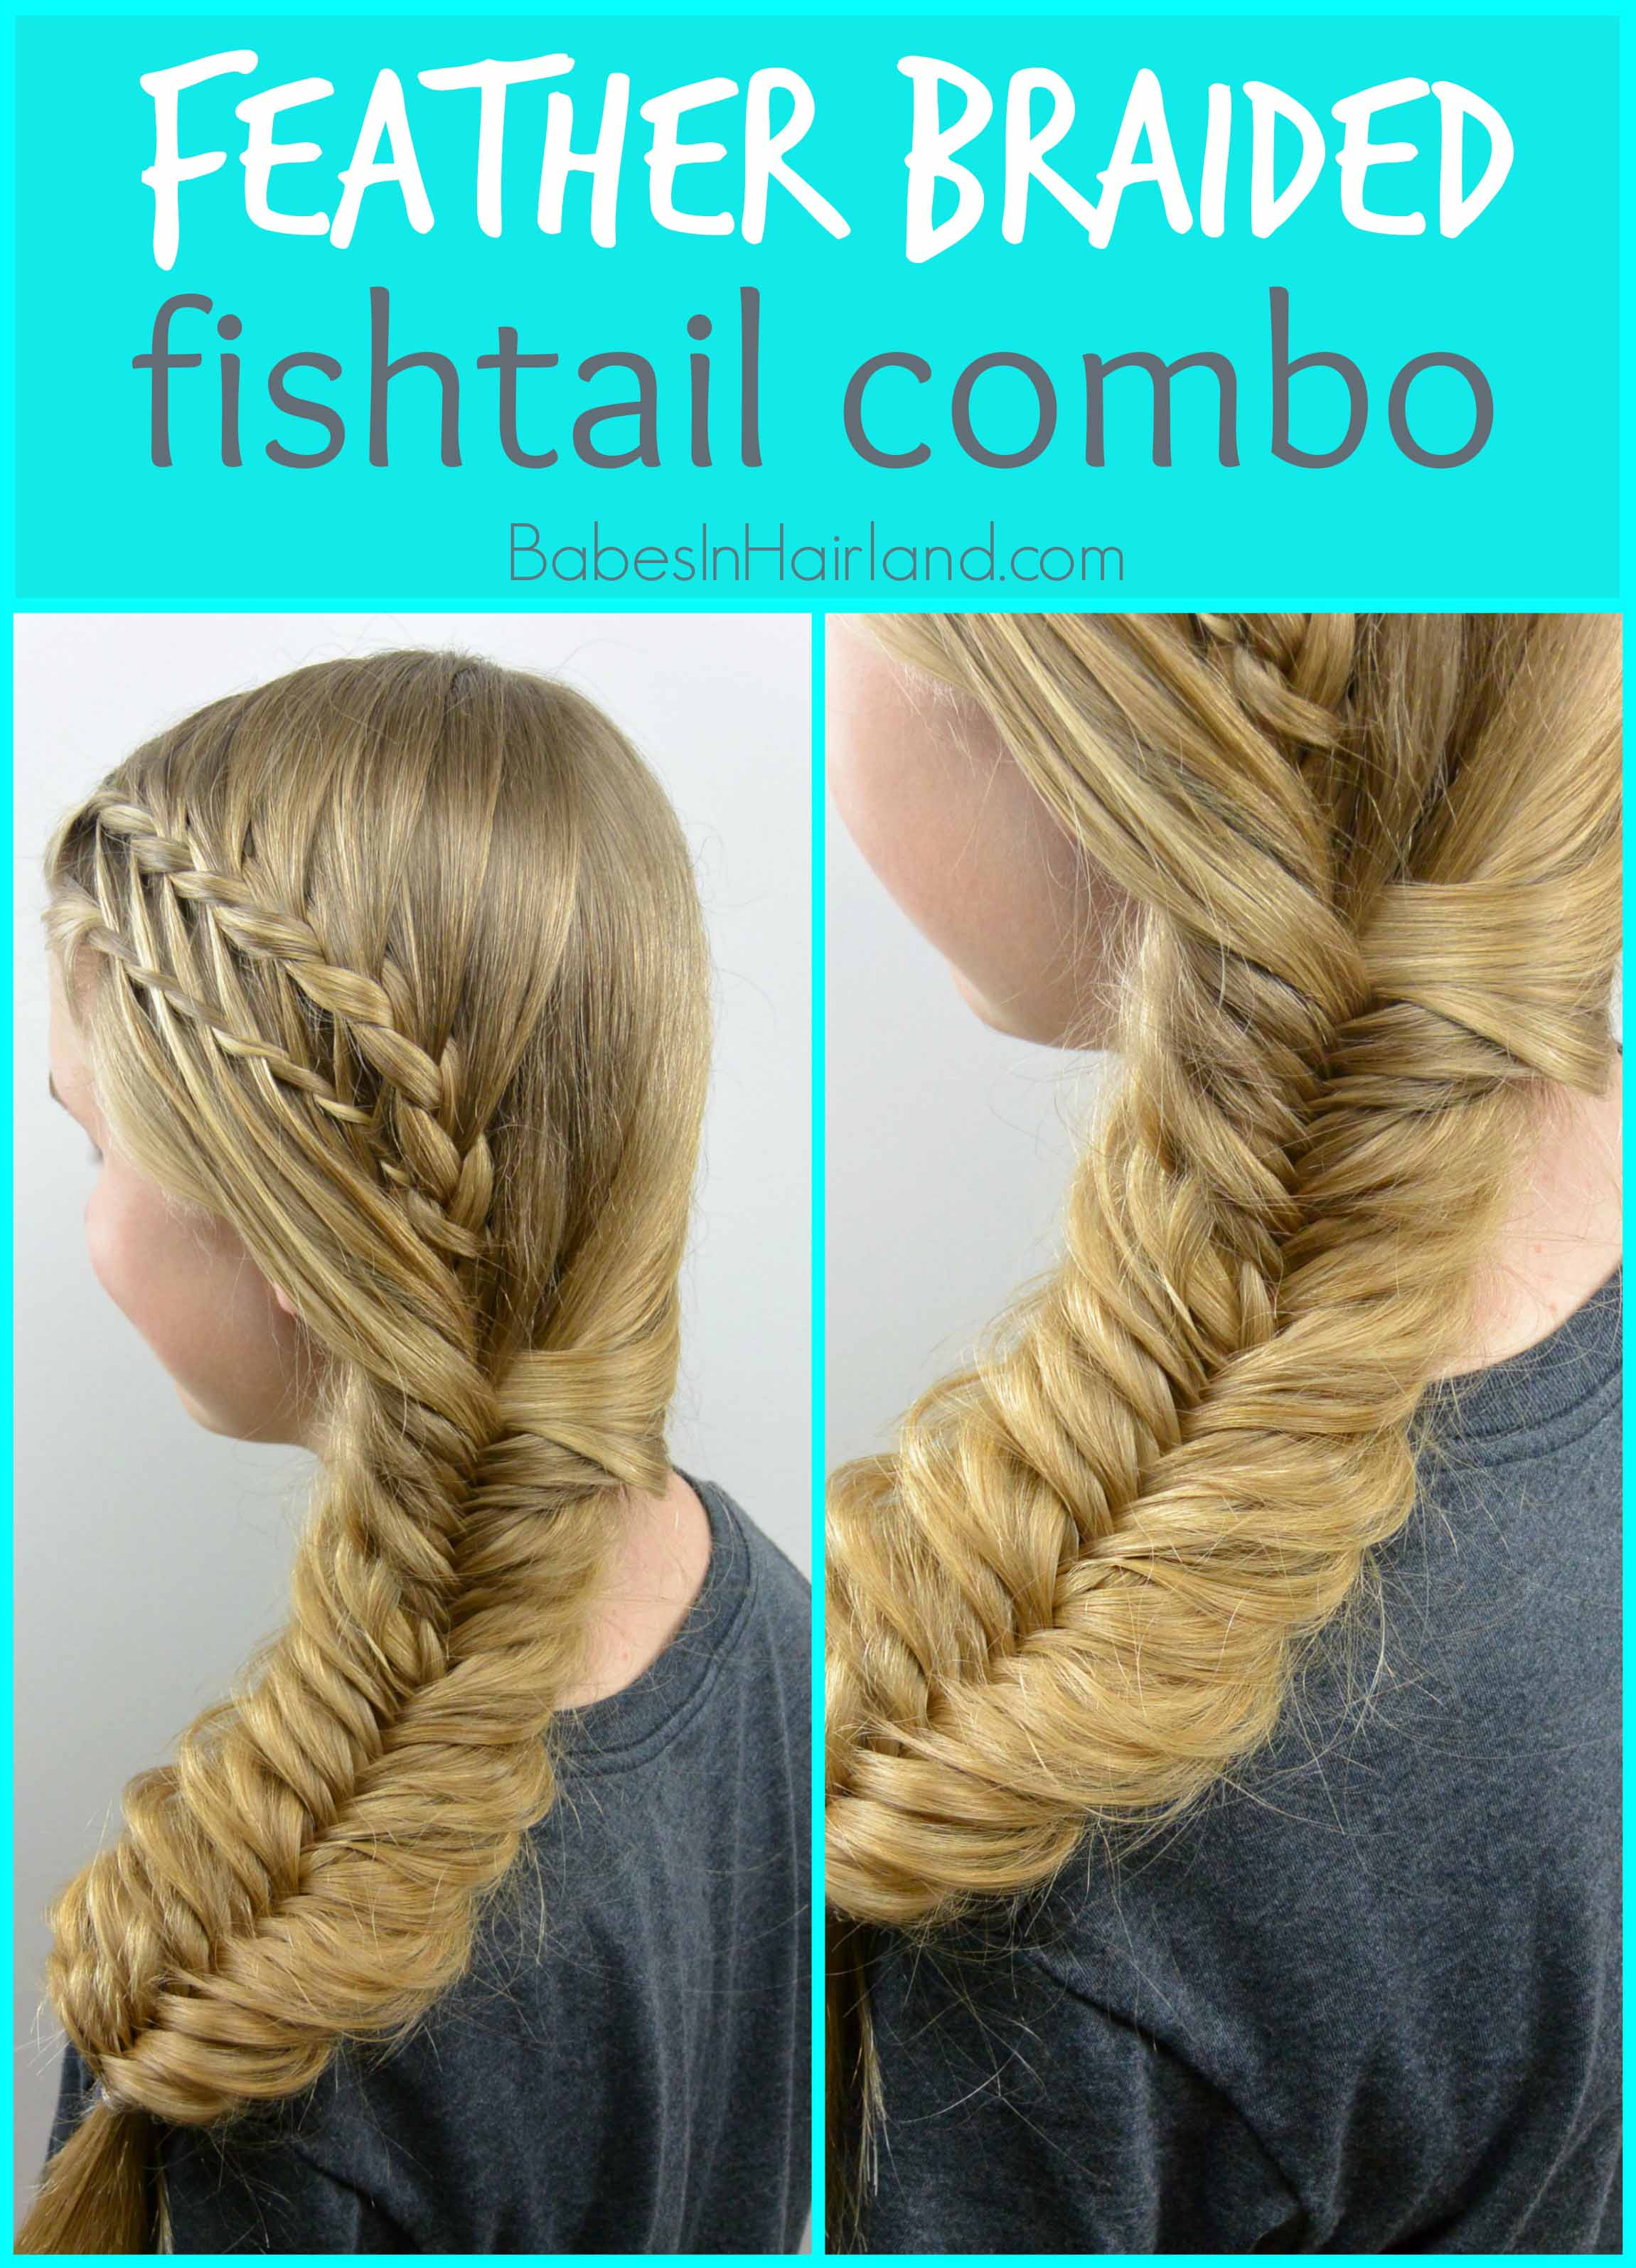
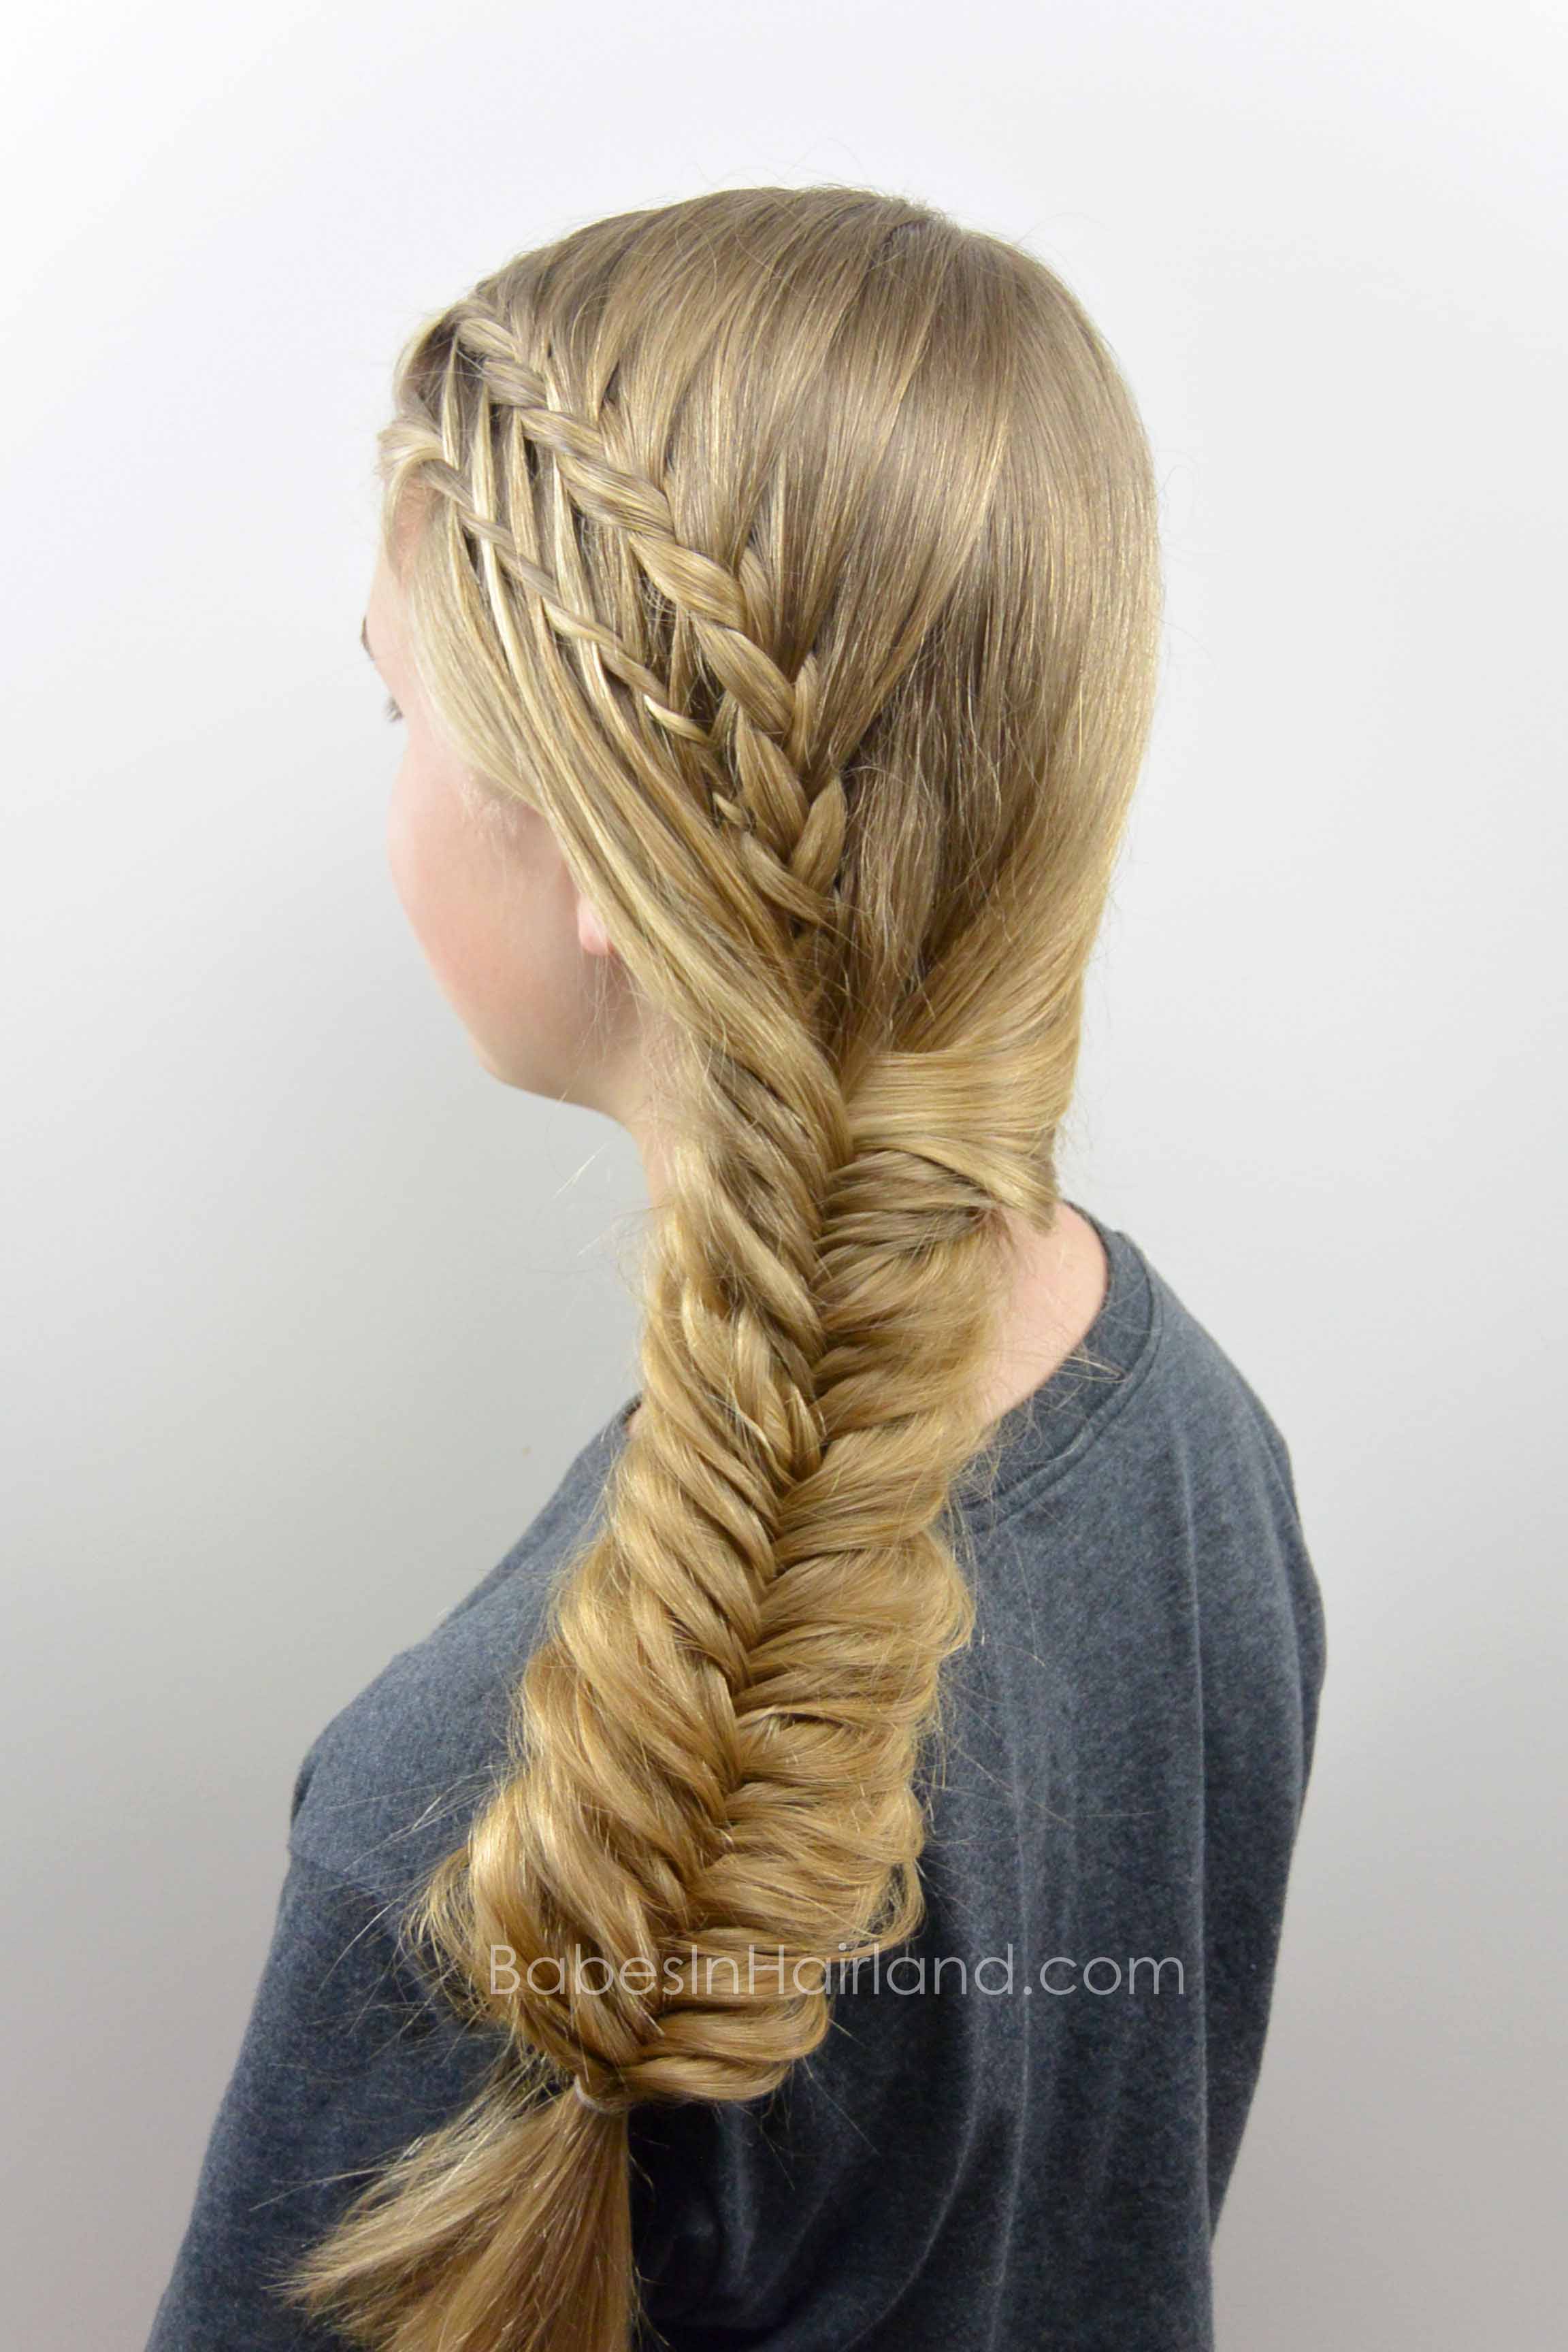
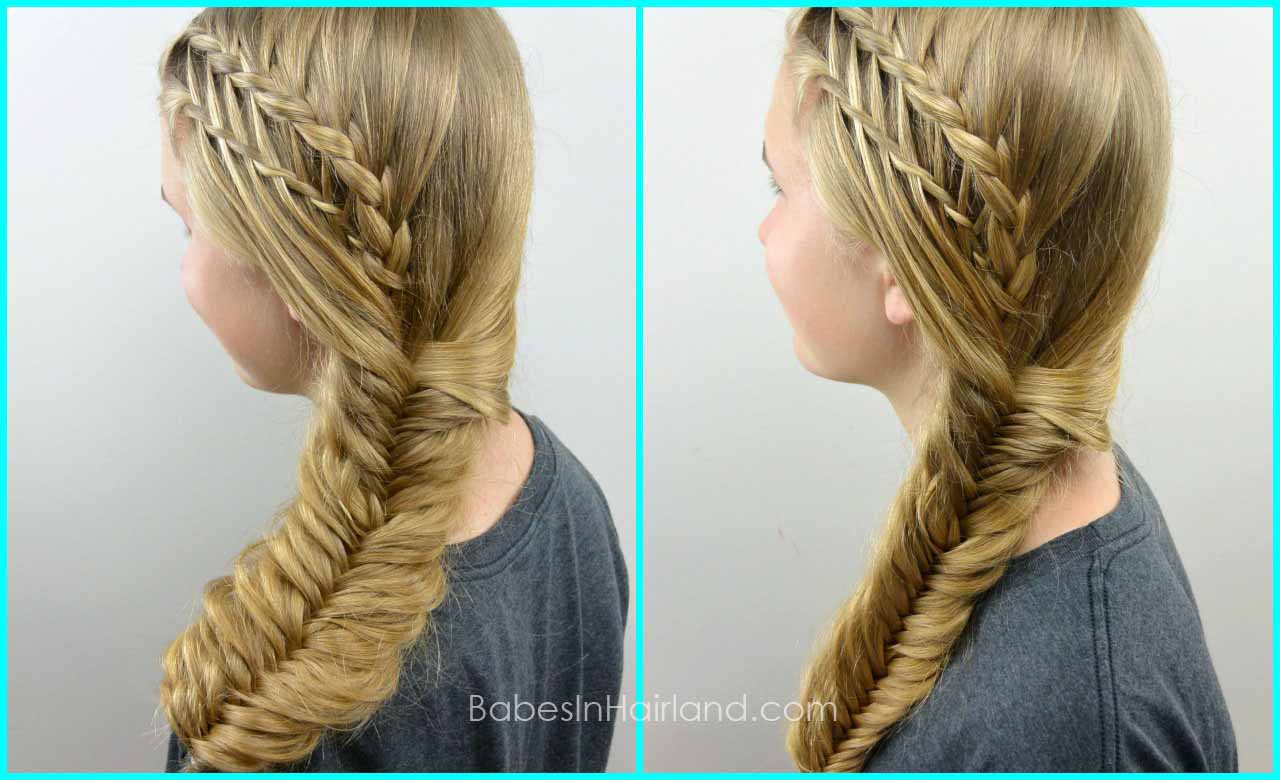
Feather Braided Fishtail Combo
Today’s gorgeous style is a combination of a few of our most re-pinned hairstyles from the past. It is similar to the Feather Braided Waterfall Twist style, and is combined like our Half French Braid into a Fishtail Braid style. We loved both of those styles, and so it’s no surprise that we love this one just as much! The great thing about this style, is if you’re doing it on a younger girl, you can keep the fishtail tight and neat, and if it’s on a teenager or older, pancake the braid as much as desired for a messier look.

Here’s our video showing how we did it, and the step-by-step instructions follow:
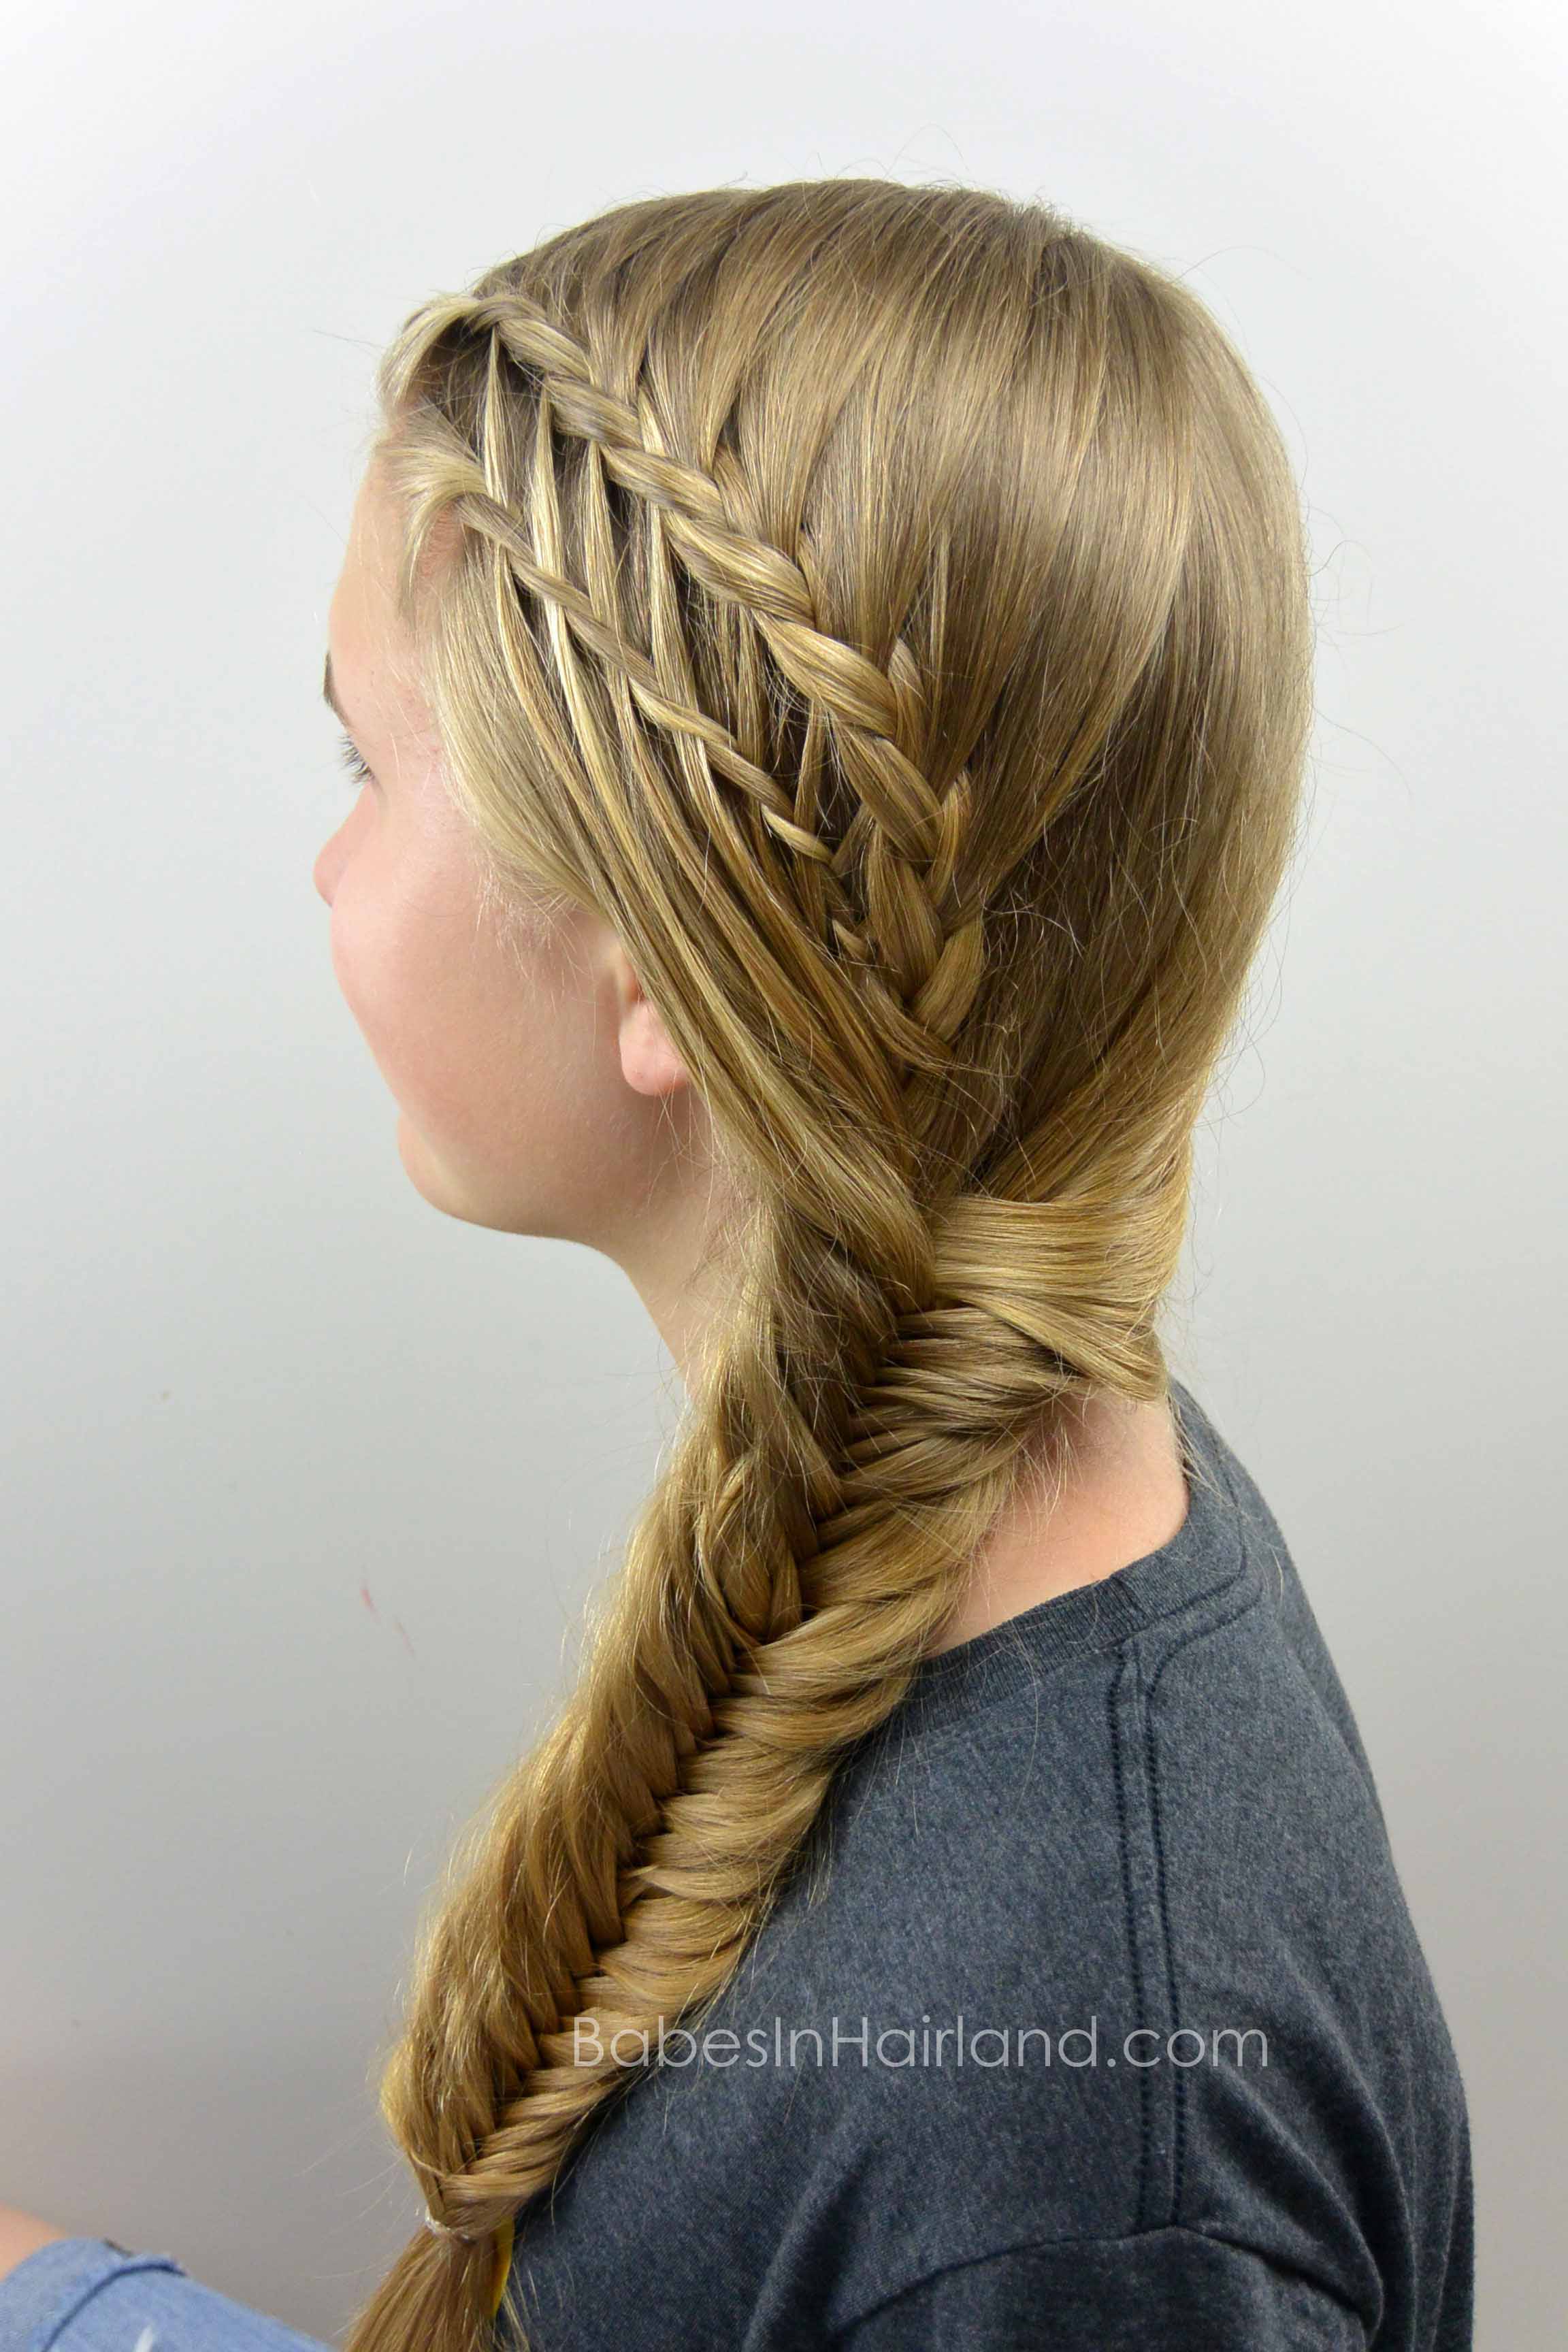
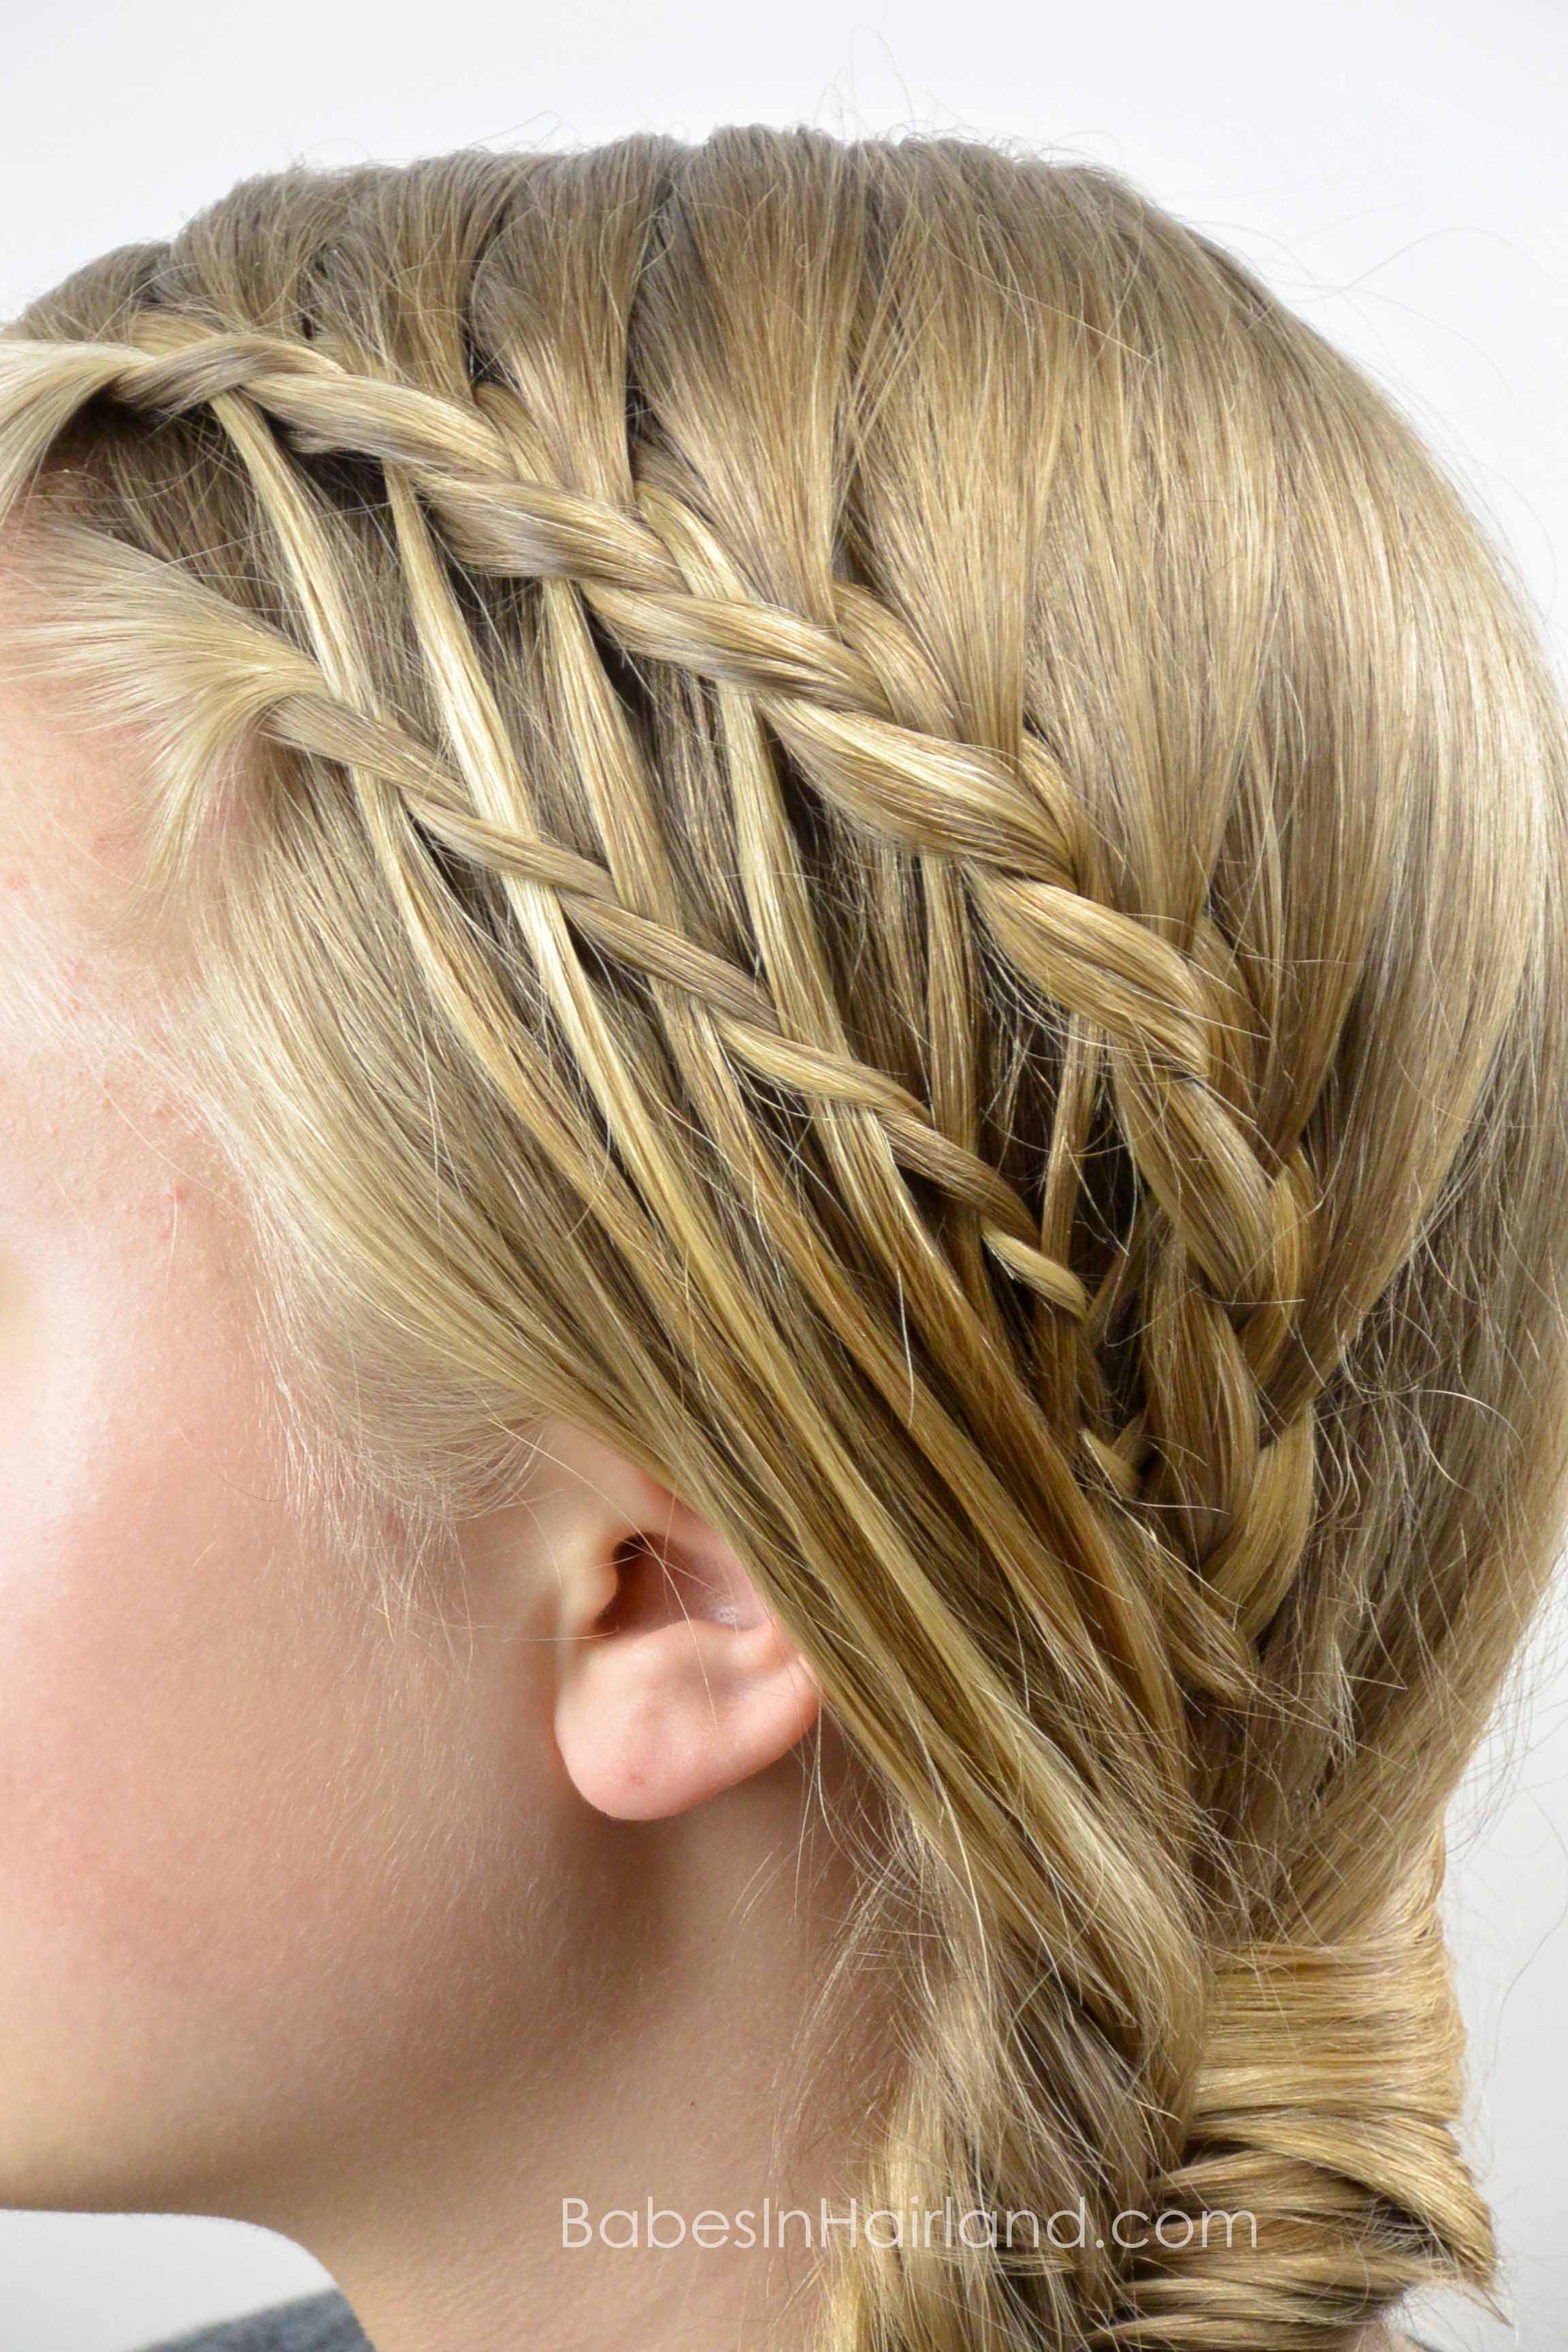
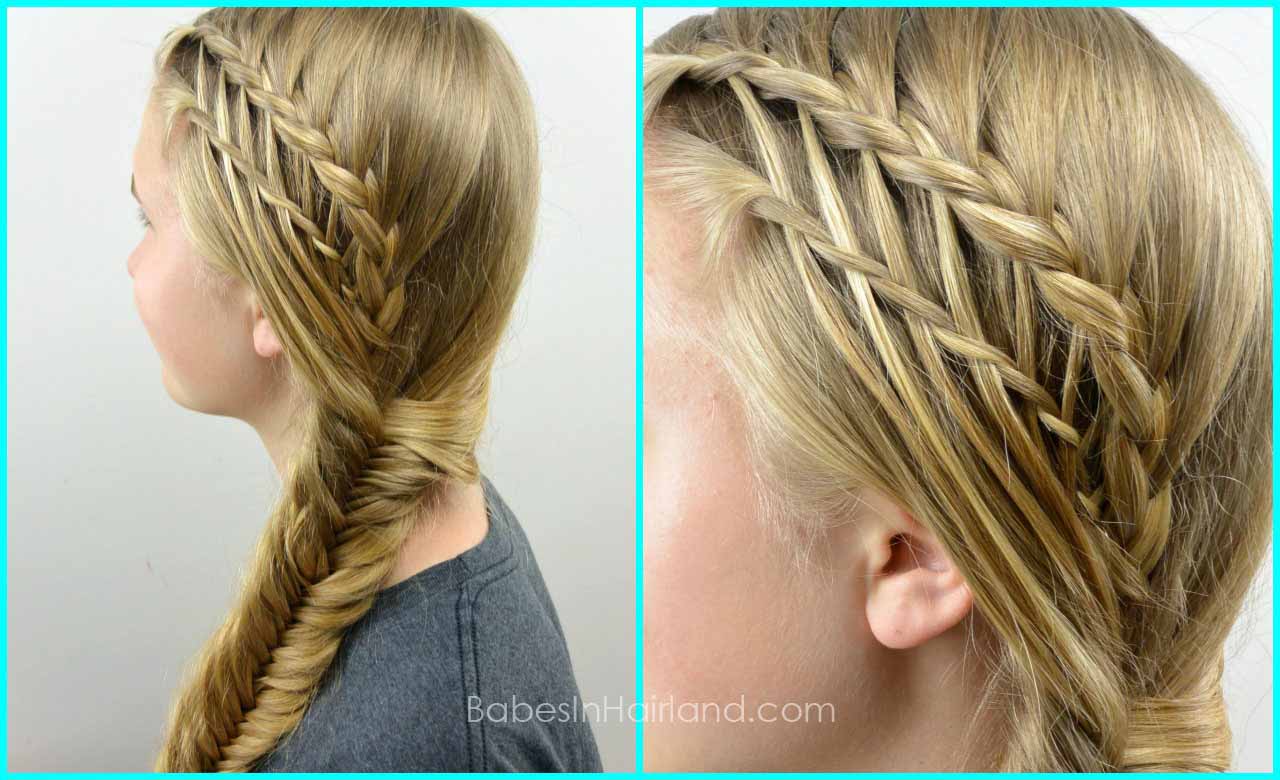
Step 1 – Make an off-center part on the right side of the head back to the crown
Step 2 – Section out a small amount of hair to the left of the part and begin a regular braid
Step 3 – After 1 rotation of the braid, cross the right section of the braid over the middle & then add hair to it
You will be creating a lace braid, or half French braid. You only add hair to the one side of the braid.
Step 4 – Cross the left section of the braid over the middle
Step 5 – With the piece that is now hanging down, pull out a small amount of hair to create a feather
Step 6 – Then cross the top right section back over the middle and add hair to it
Step 7 – Cross the left or bottom section over to the middle again
Step 8 – Remove a small amount of hair again from the section that is now hanging down to create another feather
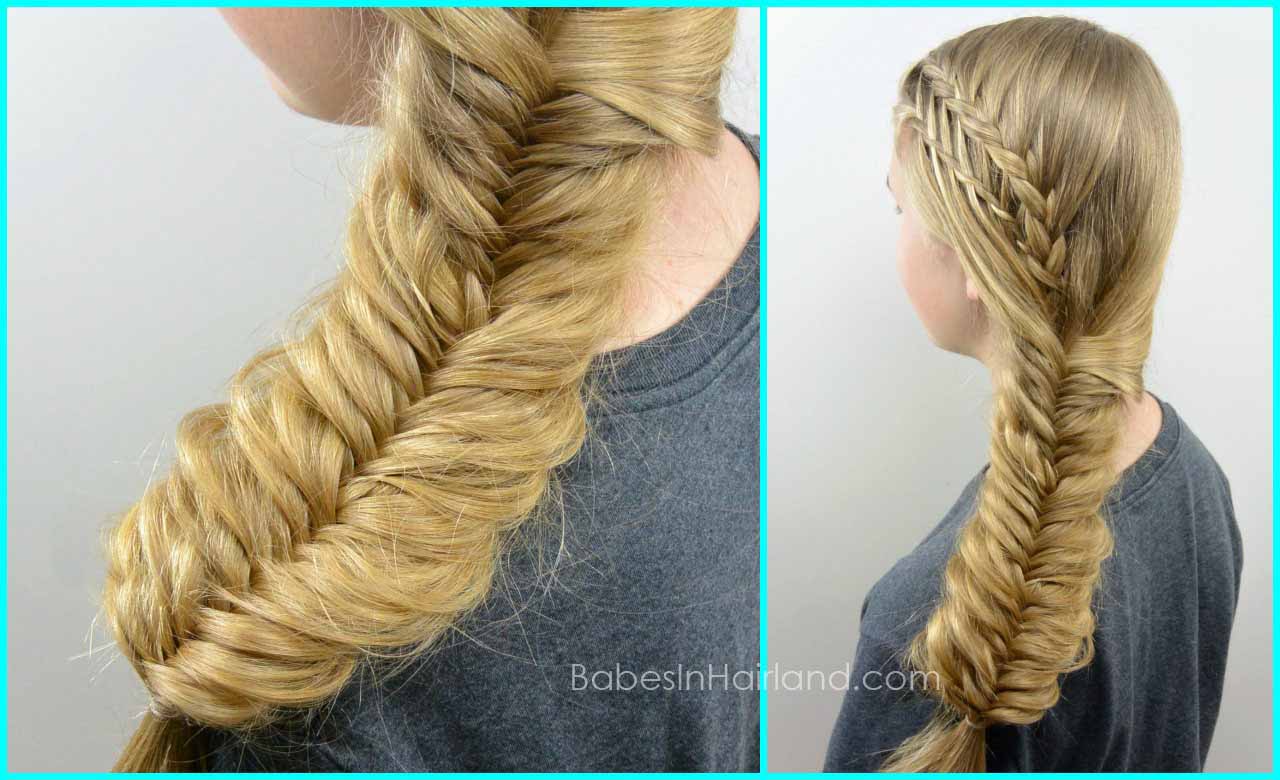
Step 9 – Repeat the above process until you have braided just back past the crown
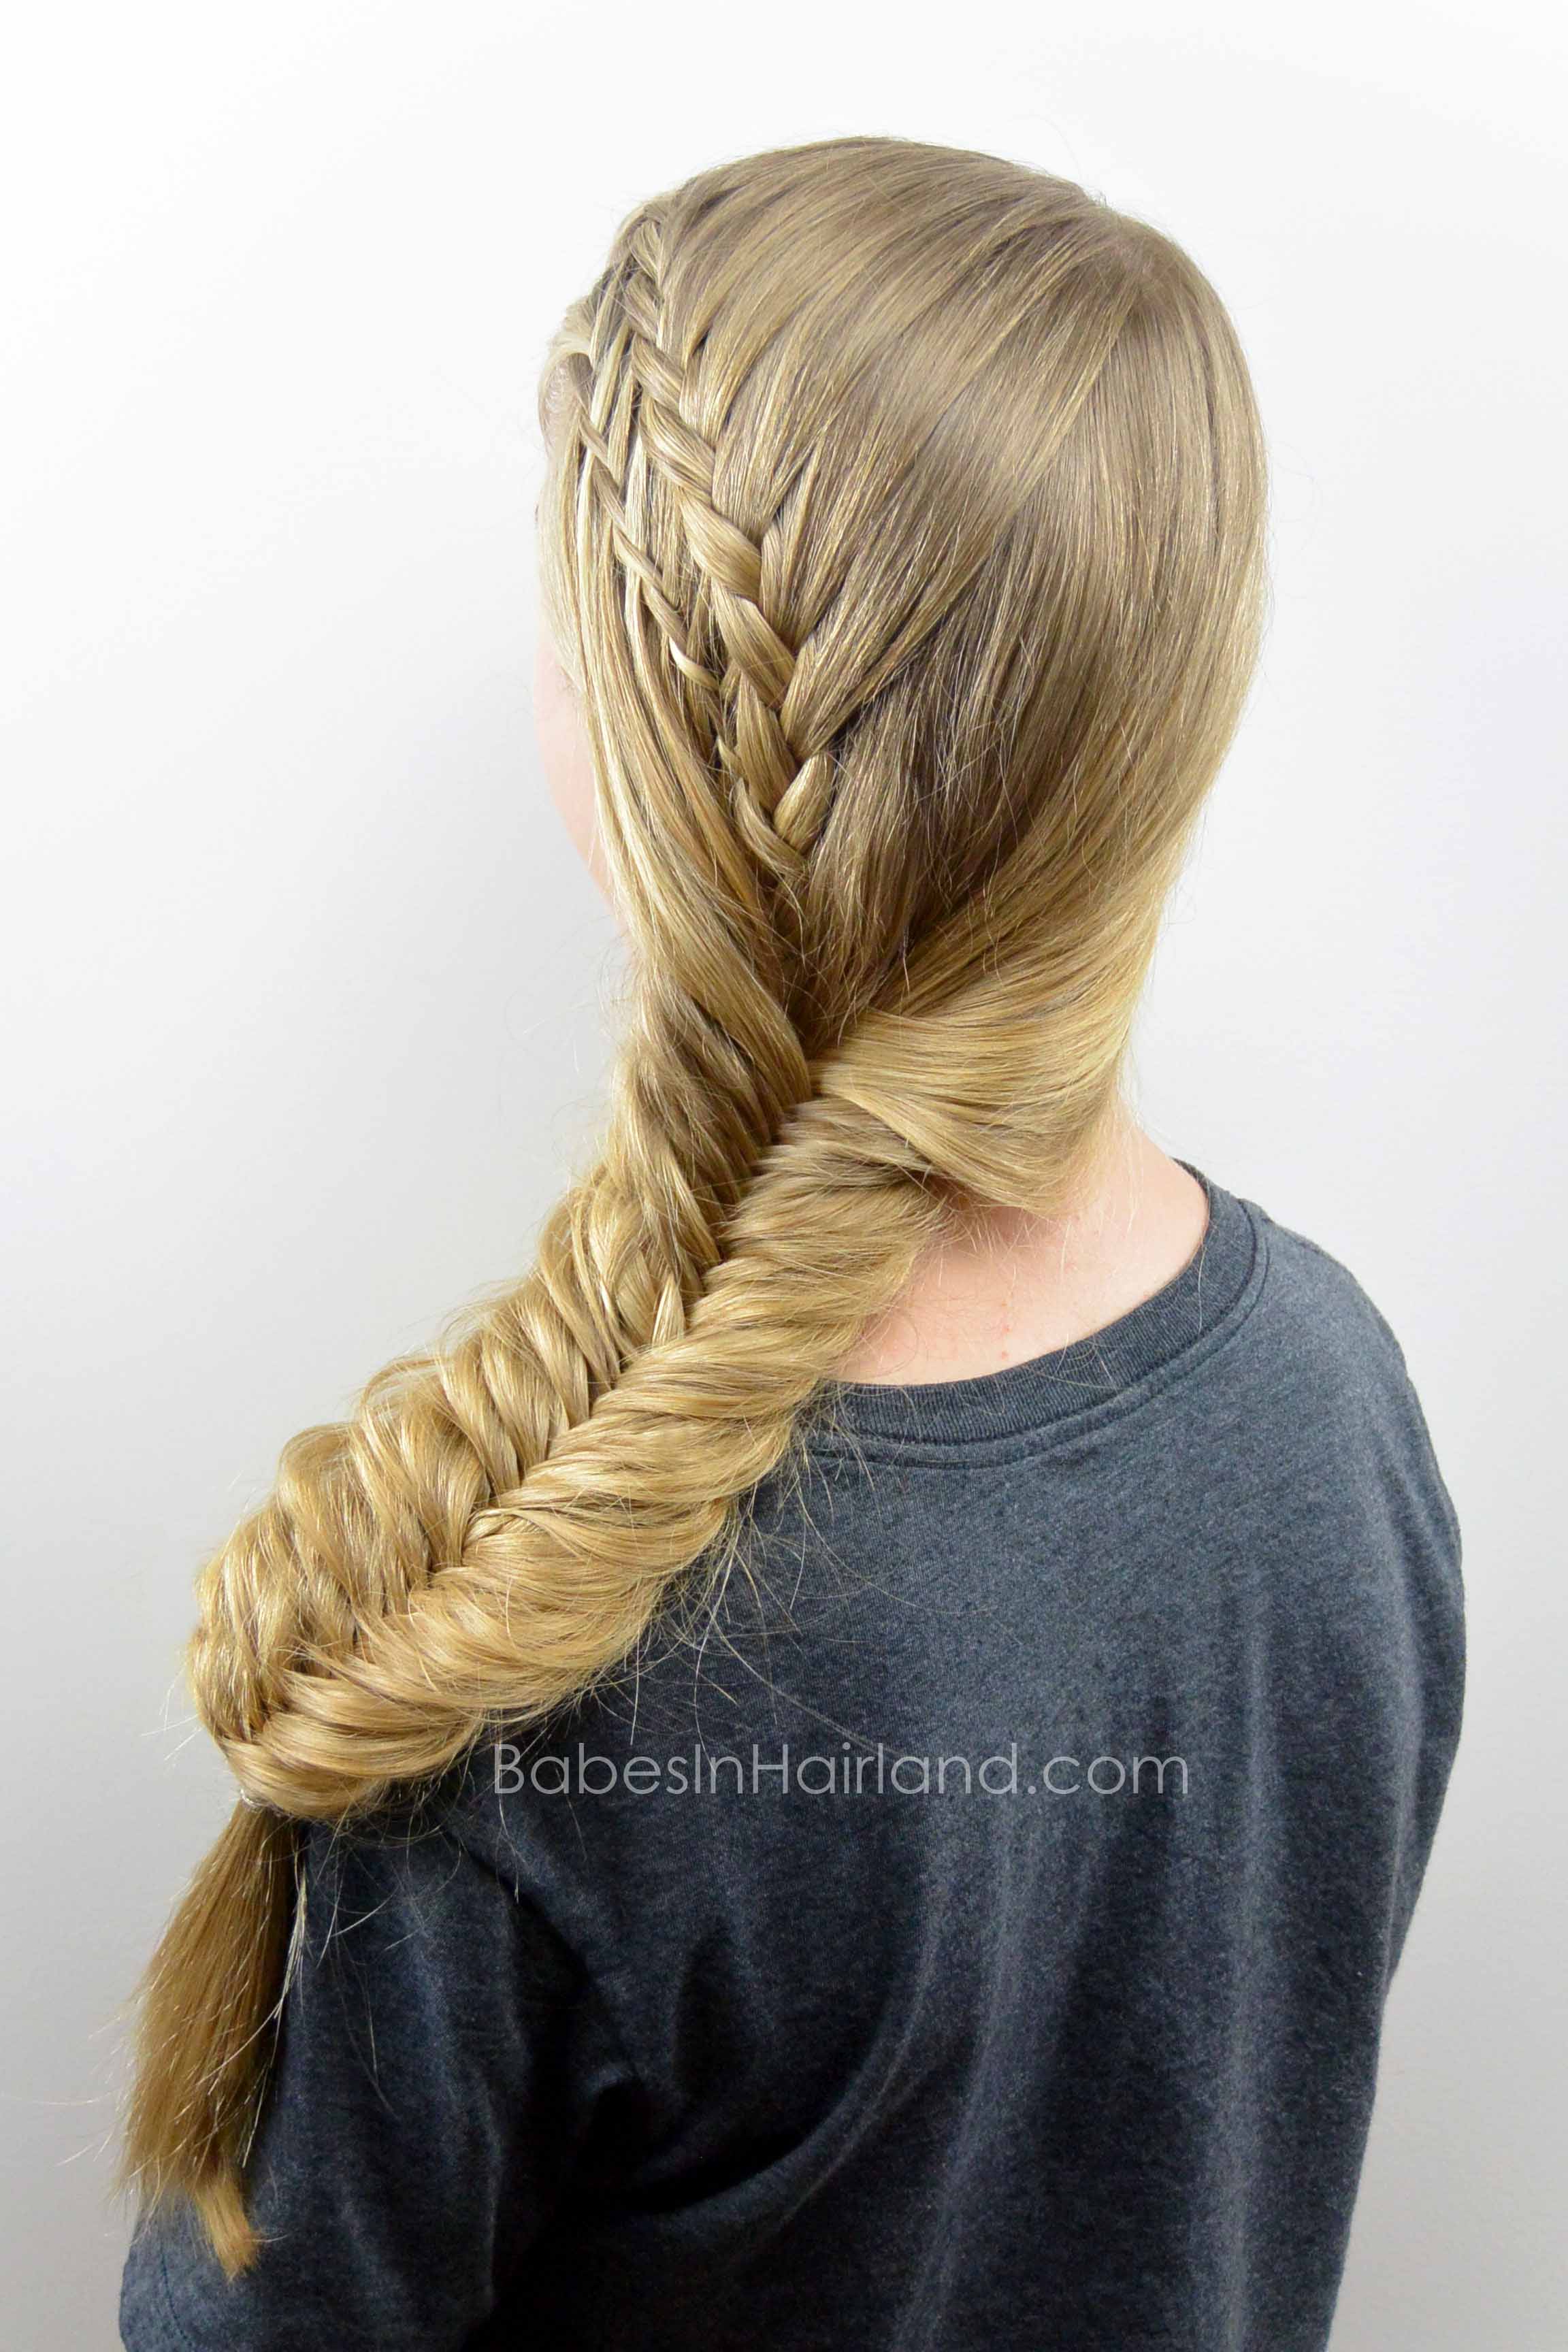
Step 10 – Stop adding hair & feathering the braid and create a regular 3 strand braid down to the end of the hair & temporarily secure the end
Step 11 – Near the temple, just below the braid, section off a small amount of hair and divide it in half
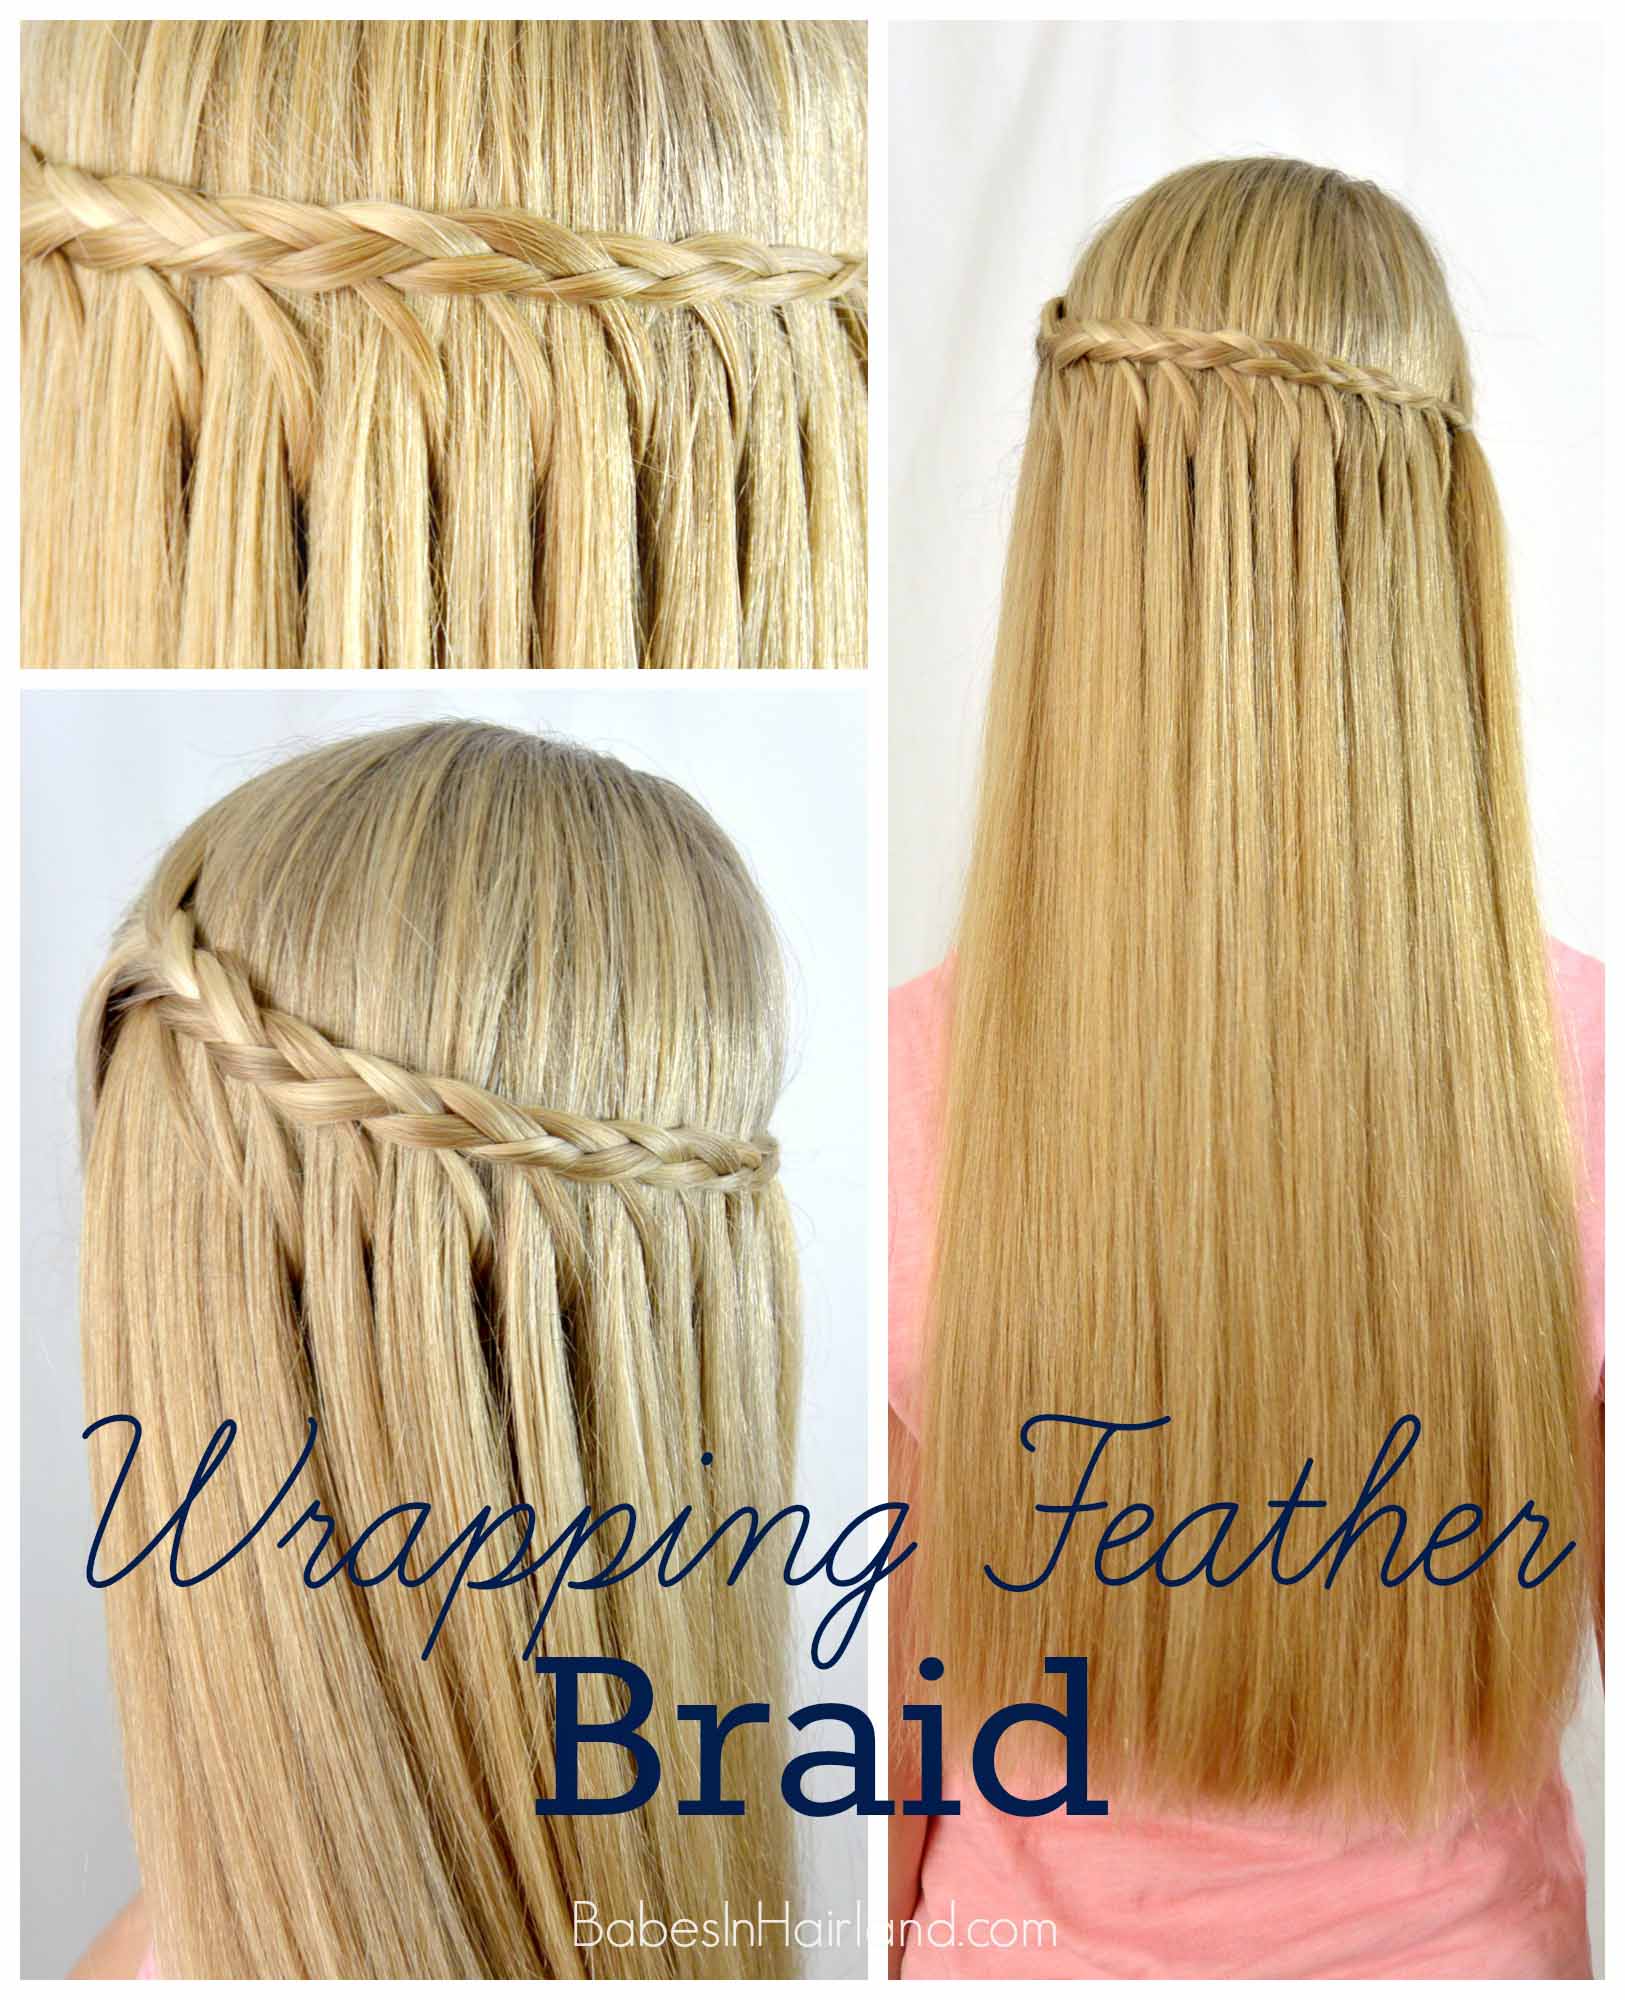
Step 12 – Cross the bottom section over the top and lay the first “feather” from the above braid over it to start creating a waterfall braid
If you need help to create this water fall twist. You can see a bit better how we did a waterfall twist in THIS post.
Step 13 – Continue the waterfall twist until you can no longer add feathers to it
Step 14 – With the remaining 2 pieces of hair from the twist, braid them around the end of the braid from Step 10. It will be an uneven 3 strand braid.
Step 15 – Gather remaining hair and sweep to the left side of the head to begin a fishtail braid
If you need a reminder on how to create a fishtail/fishbone braid, you can watch our fishbone braid video HERE.
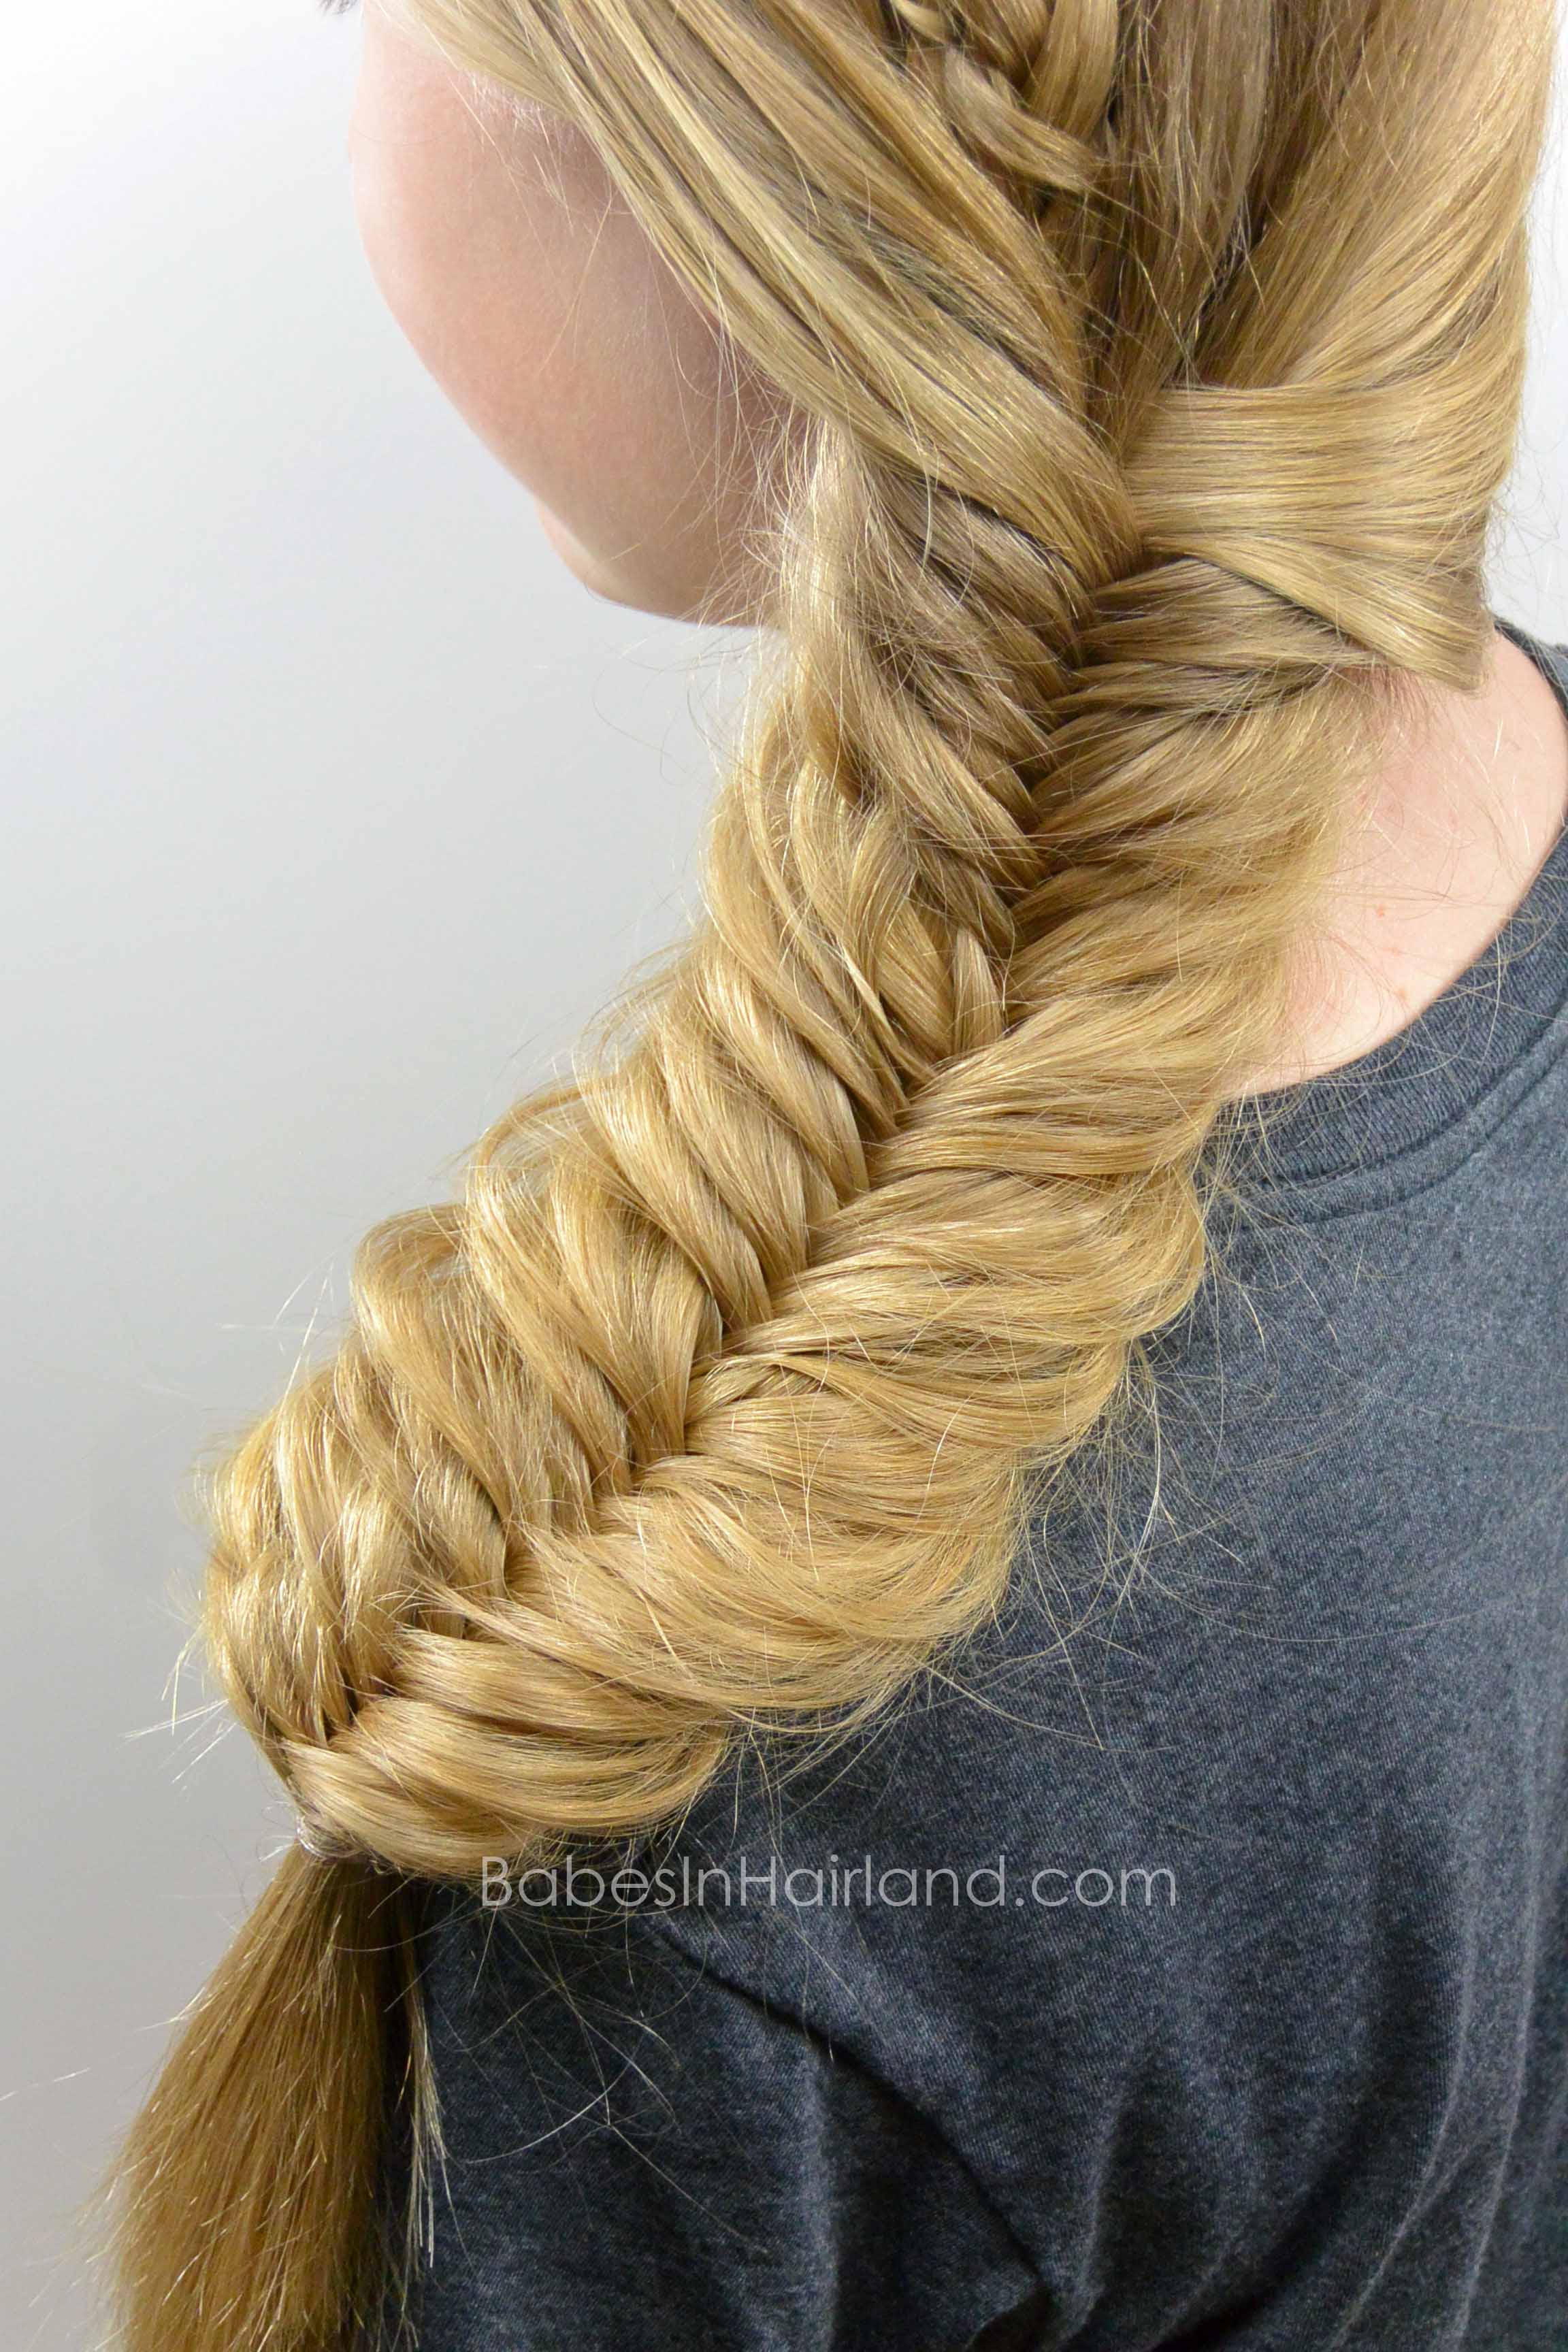
Step 16 – Create a fishtail braid with the rest of the hair and secure the end with an elastic
Step 17 – If desired, gently pull on edges of the fishtail braid to make it wider and “pancaked.”
FINISHED!
This is how it looks after we finished the video – we didn’t pancake it very much, and of course, that is totally optional, so you could leave the fishtail braid even tighter than this:

Then once we were done filming, I continued to pull on the edges of her braid to make it even wider and flatter. She loved it!


If you love feather braids, be sure to check out all our feather braid tutorials HERE. We’ve also got a bunch of styles with fishtail braids HERE. Below are a few of our favorites!


Please leave us a comment and let us know what you think! Do you like the messier or tighter look to a fishtail braid? And please don’t forget to share using the social media buttons below! Have a great day!