
Affordable Board & Batton
Y’all are the best. The best of the best. Thank you so much for all your sweet responses to my sister’s bathroom post. It is always a little exhilarating to reveal a makeover because you never know if everyone else will love it as much as you do. Ya know? And it’s especially fun to try out new products….of course they won’t be the perfect fit for everyone out there….nothing ever is….but in the case of my sister’s bathroom, the wall treatment we did was so perfect for the space!
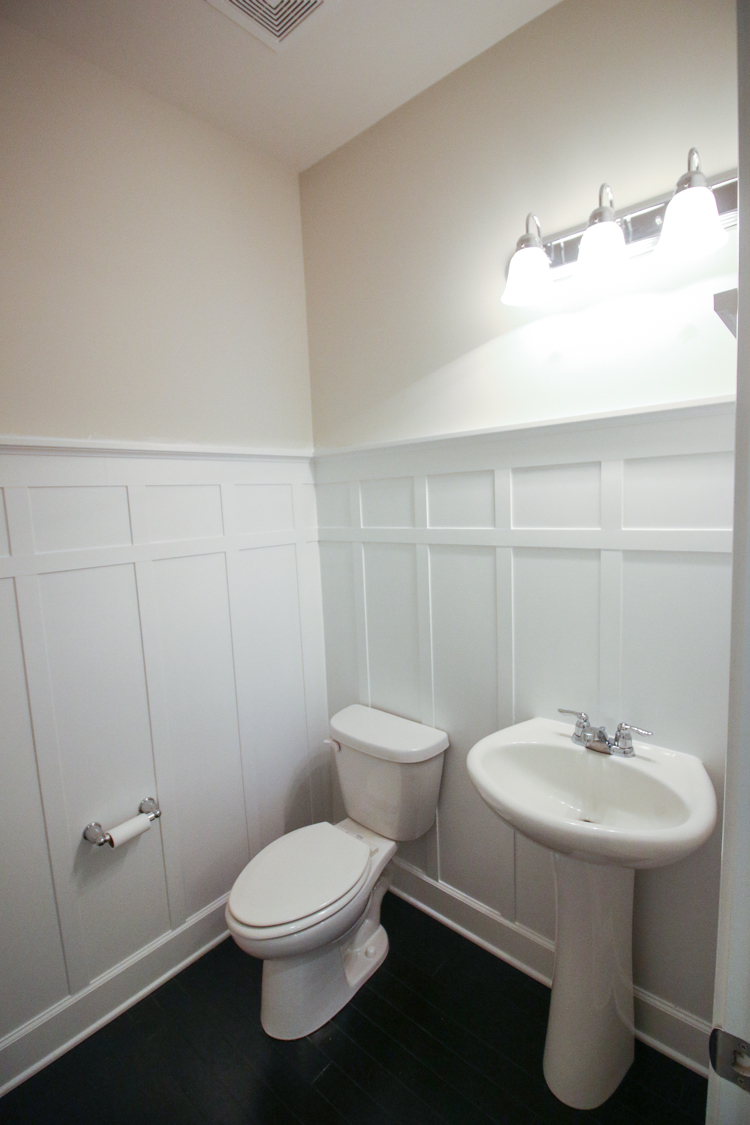
Speaking of wall treatment, this week I shared how we did the peel and stick tiles on the upper half and today I wanna share the bottom half – our very affordable board and batton. It was a simple look that took us about six hours to install….but you could probably shave off that in half….we just had eight kids running around who diverted our attention
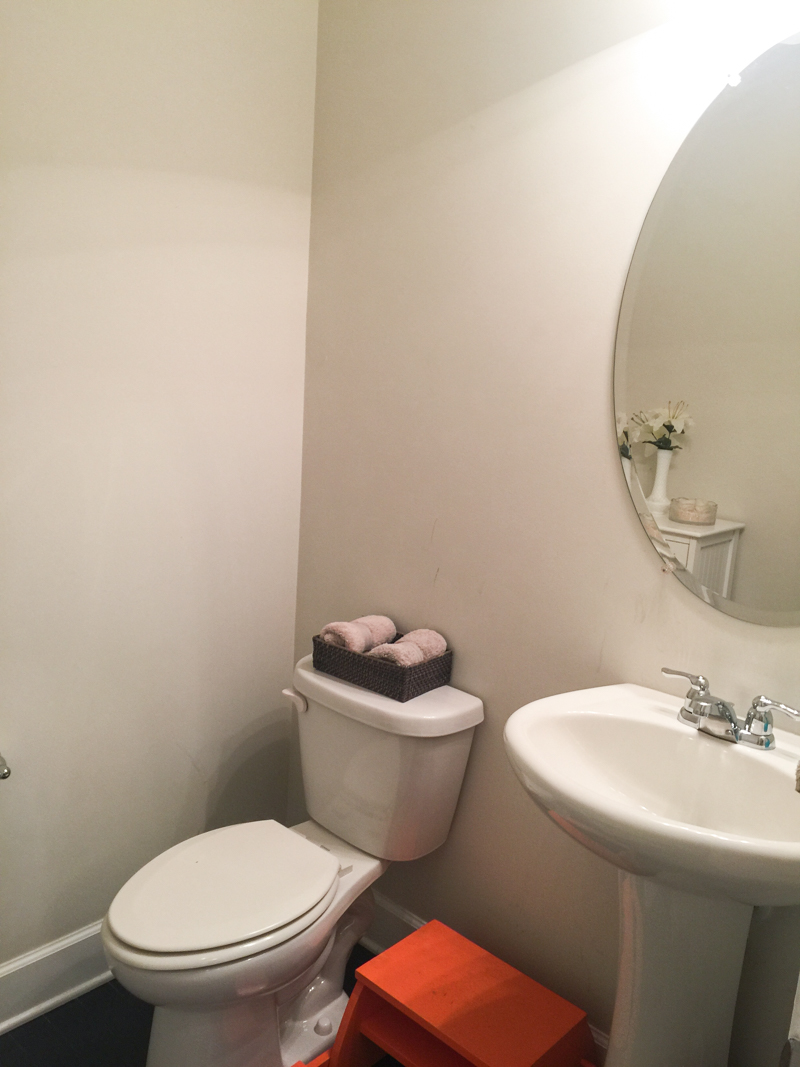
So let me introduce you to the bathroom. This is a small powder room in her first floor….a true half bath that is tucked away with no natural light and a small 6′ by 6′ footprint. The ceilings are very high in here – ten feet! – and that enabled us to make the eye go up and make the room feel more spacious with a wall treatment.

Since this room is the closest to the playroom, we didn’t want to install the Smart Tiles at the bottom where the kids could pick at them or play ‘Zoya the Destroya”…so our plan included putting up a white wall treatment on the bottom two-thirds and leaving the upper part of the wall for the contrast. I tried to talk her into doing a horizontal planking at the bottom (think shiplap) but she wanted a more traditional look with the board and batton.

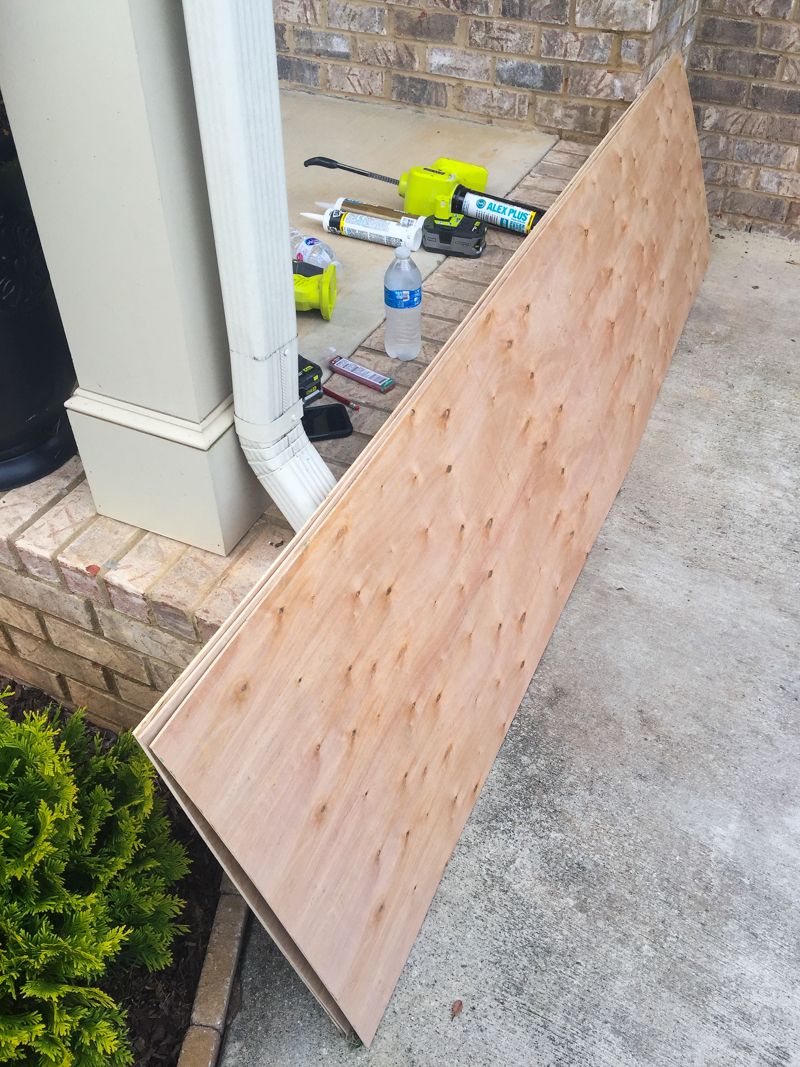
To start this project, my sister picked up a 4ft by 8ft underlayment board at the home improvement store. They cut it down for her there (FOR FREE!!) into three parts so that she could fit it in her minivan

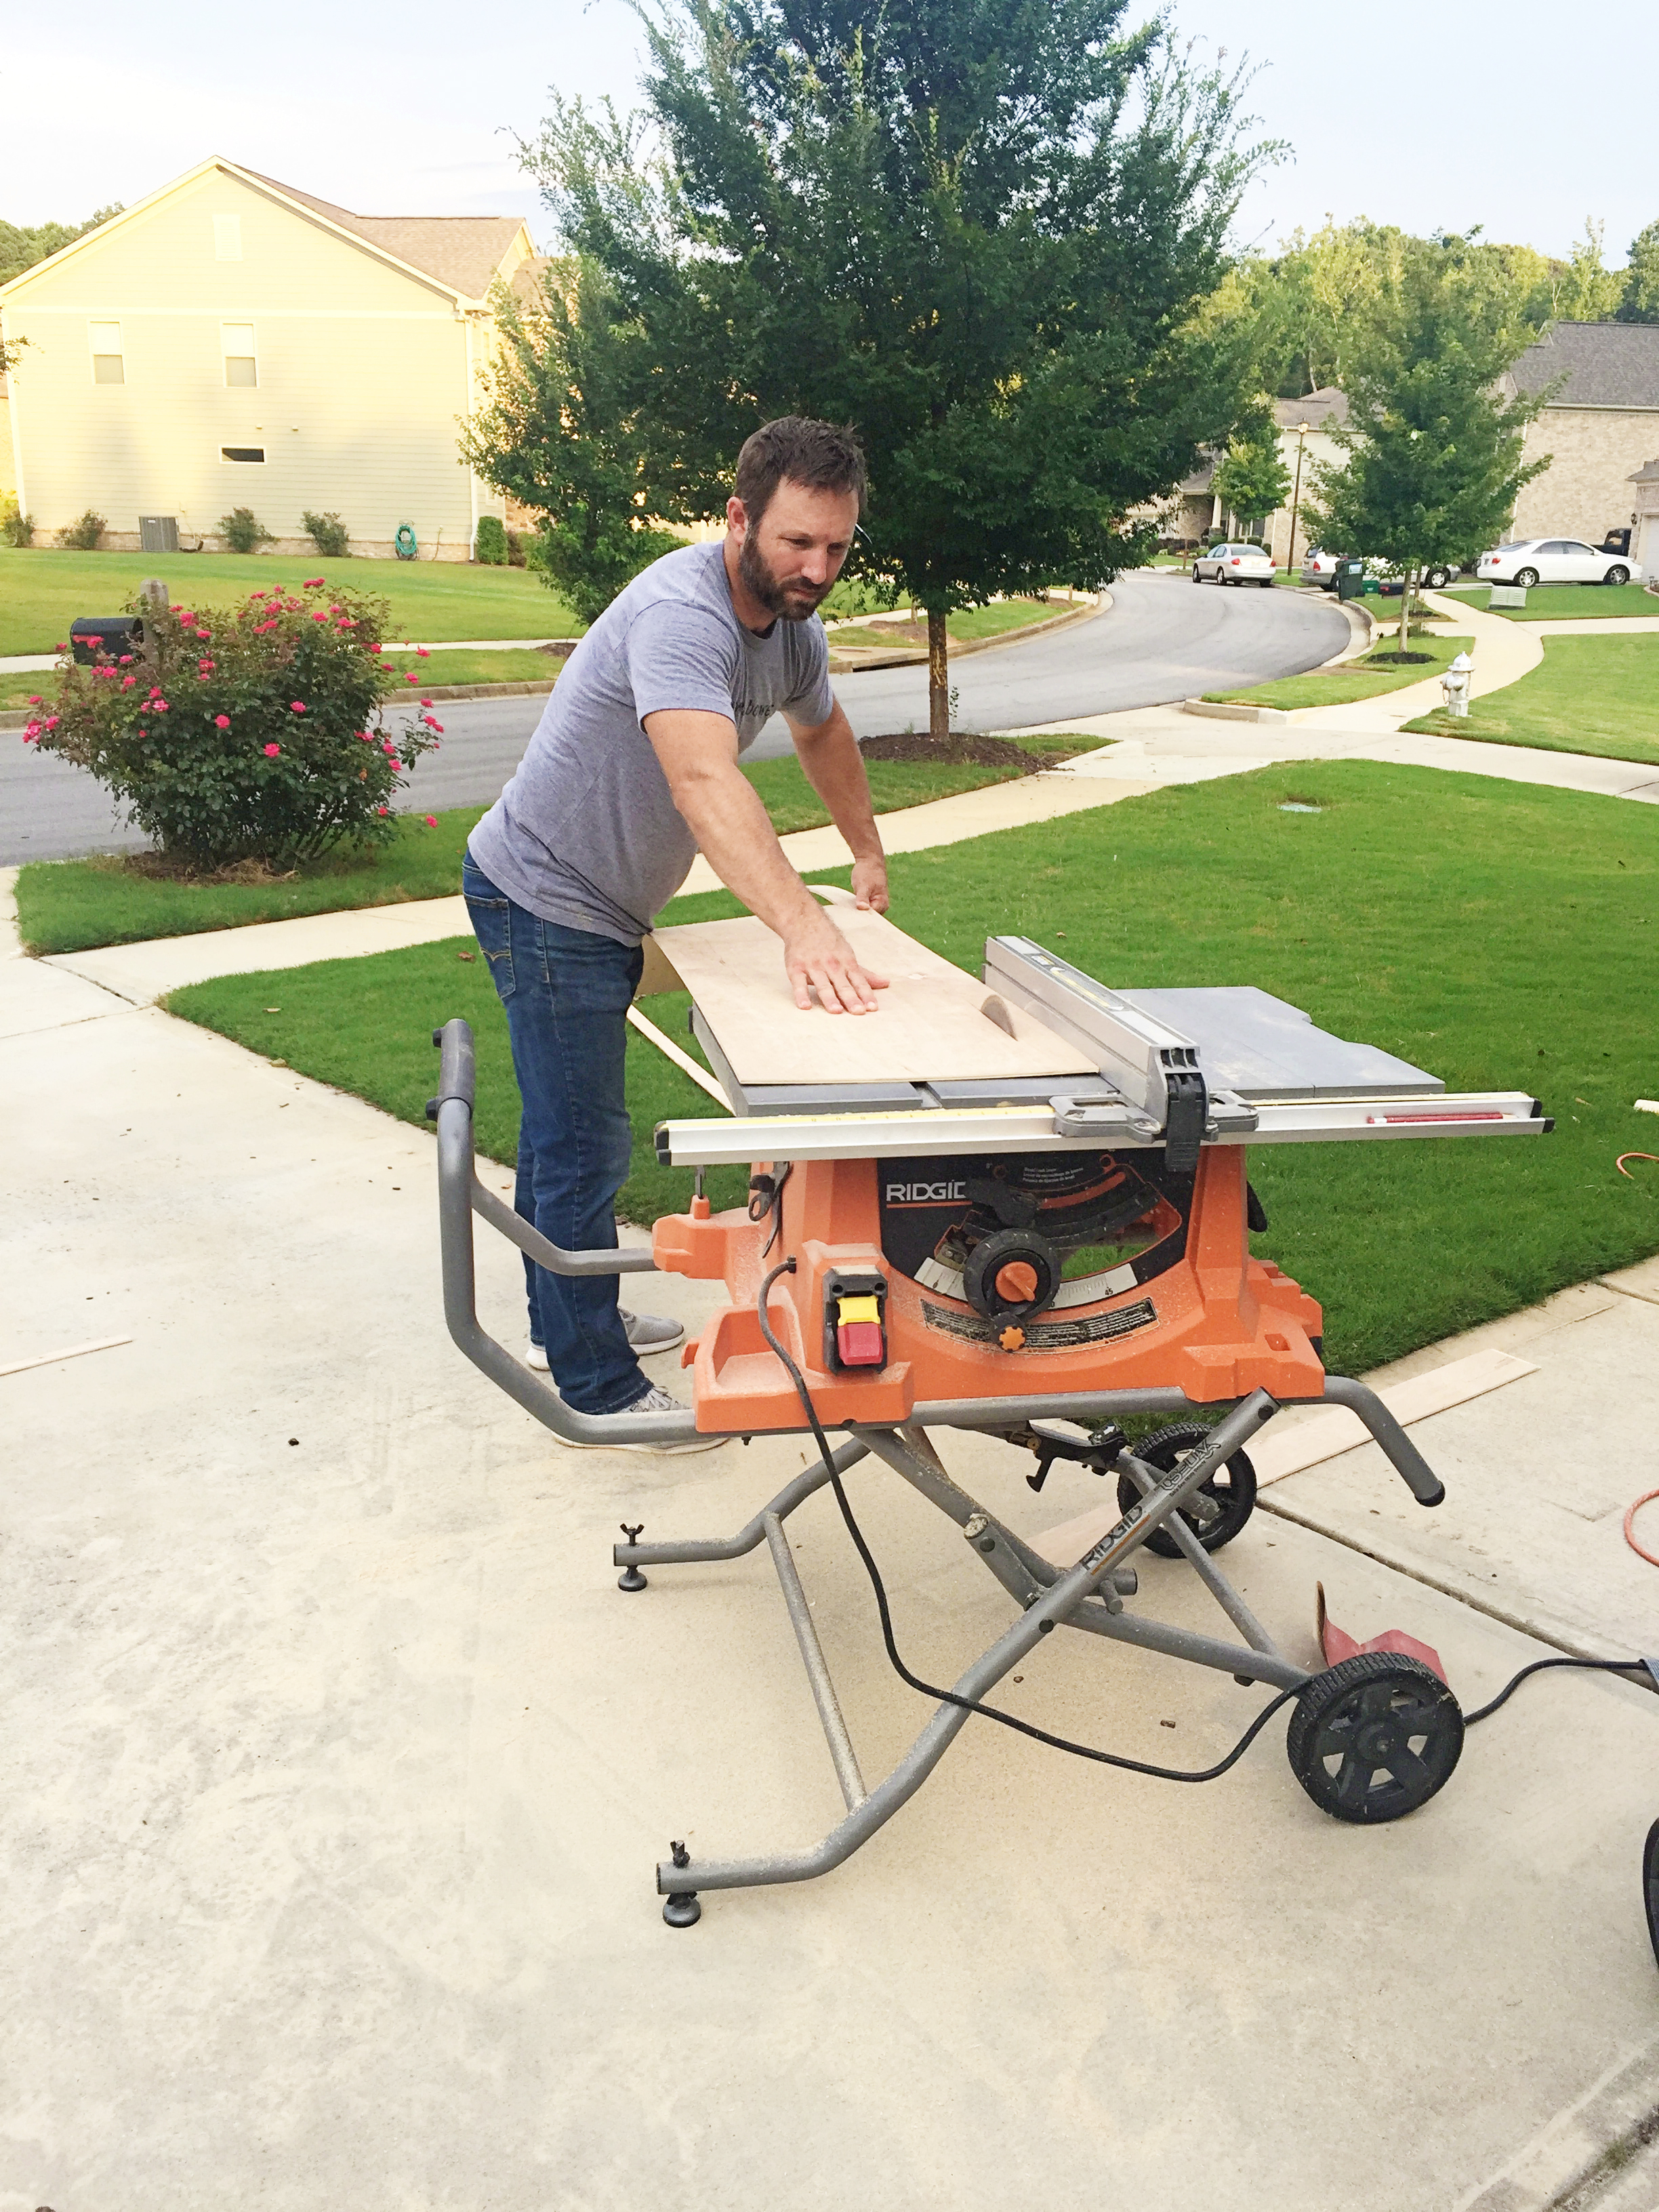
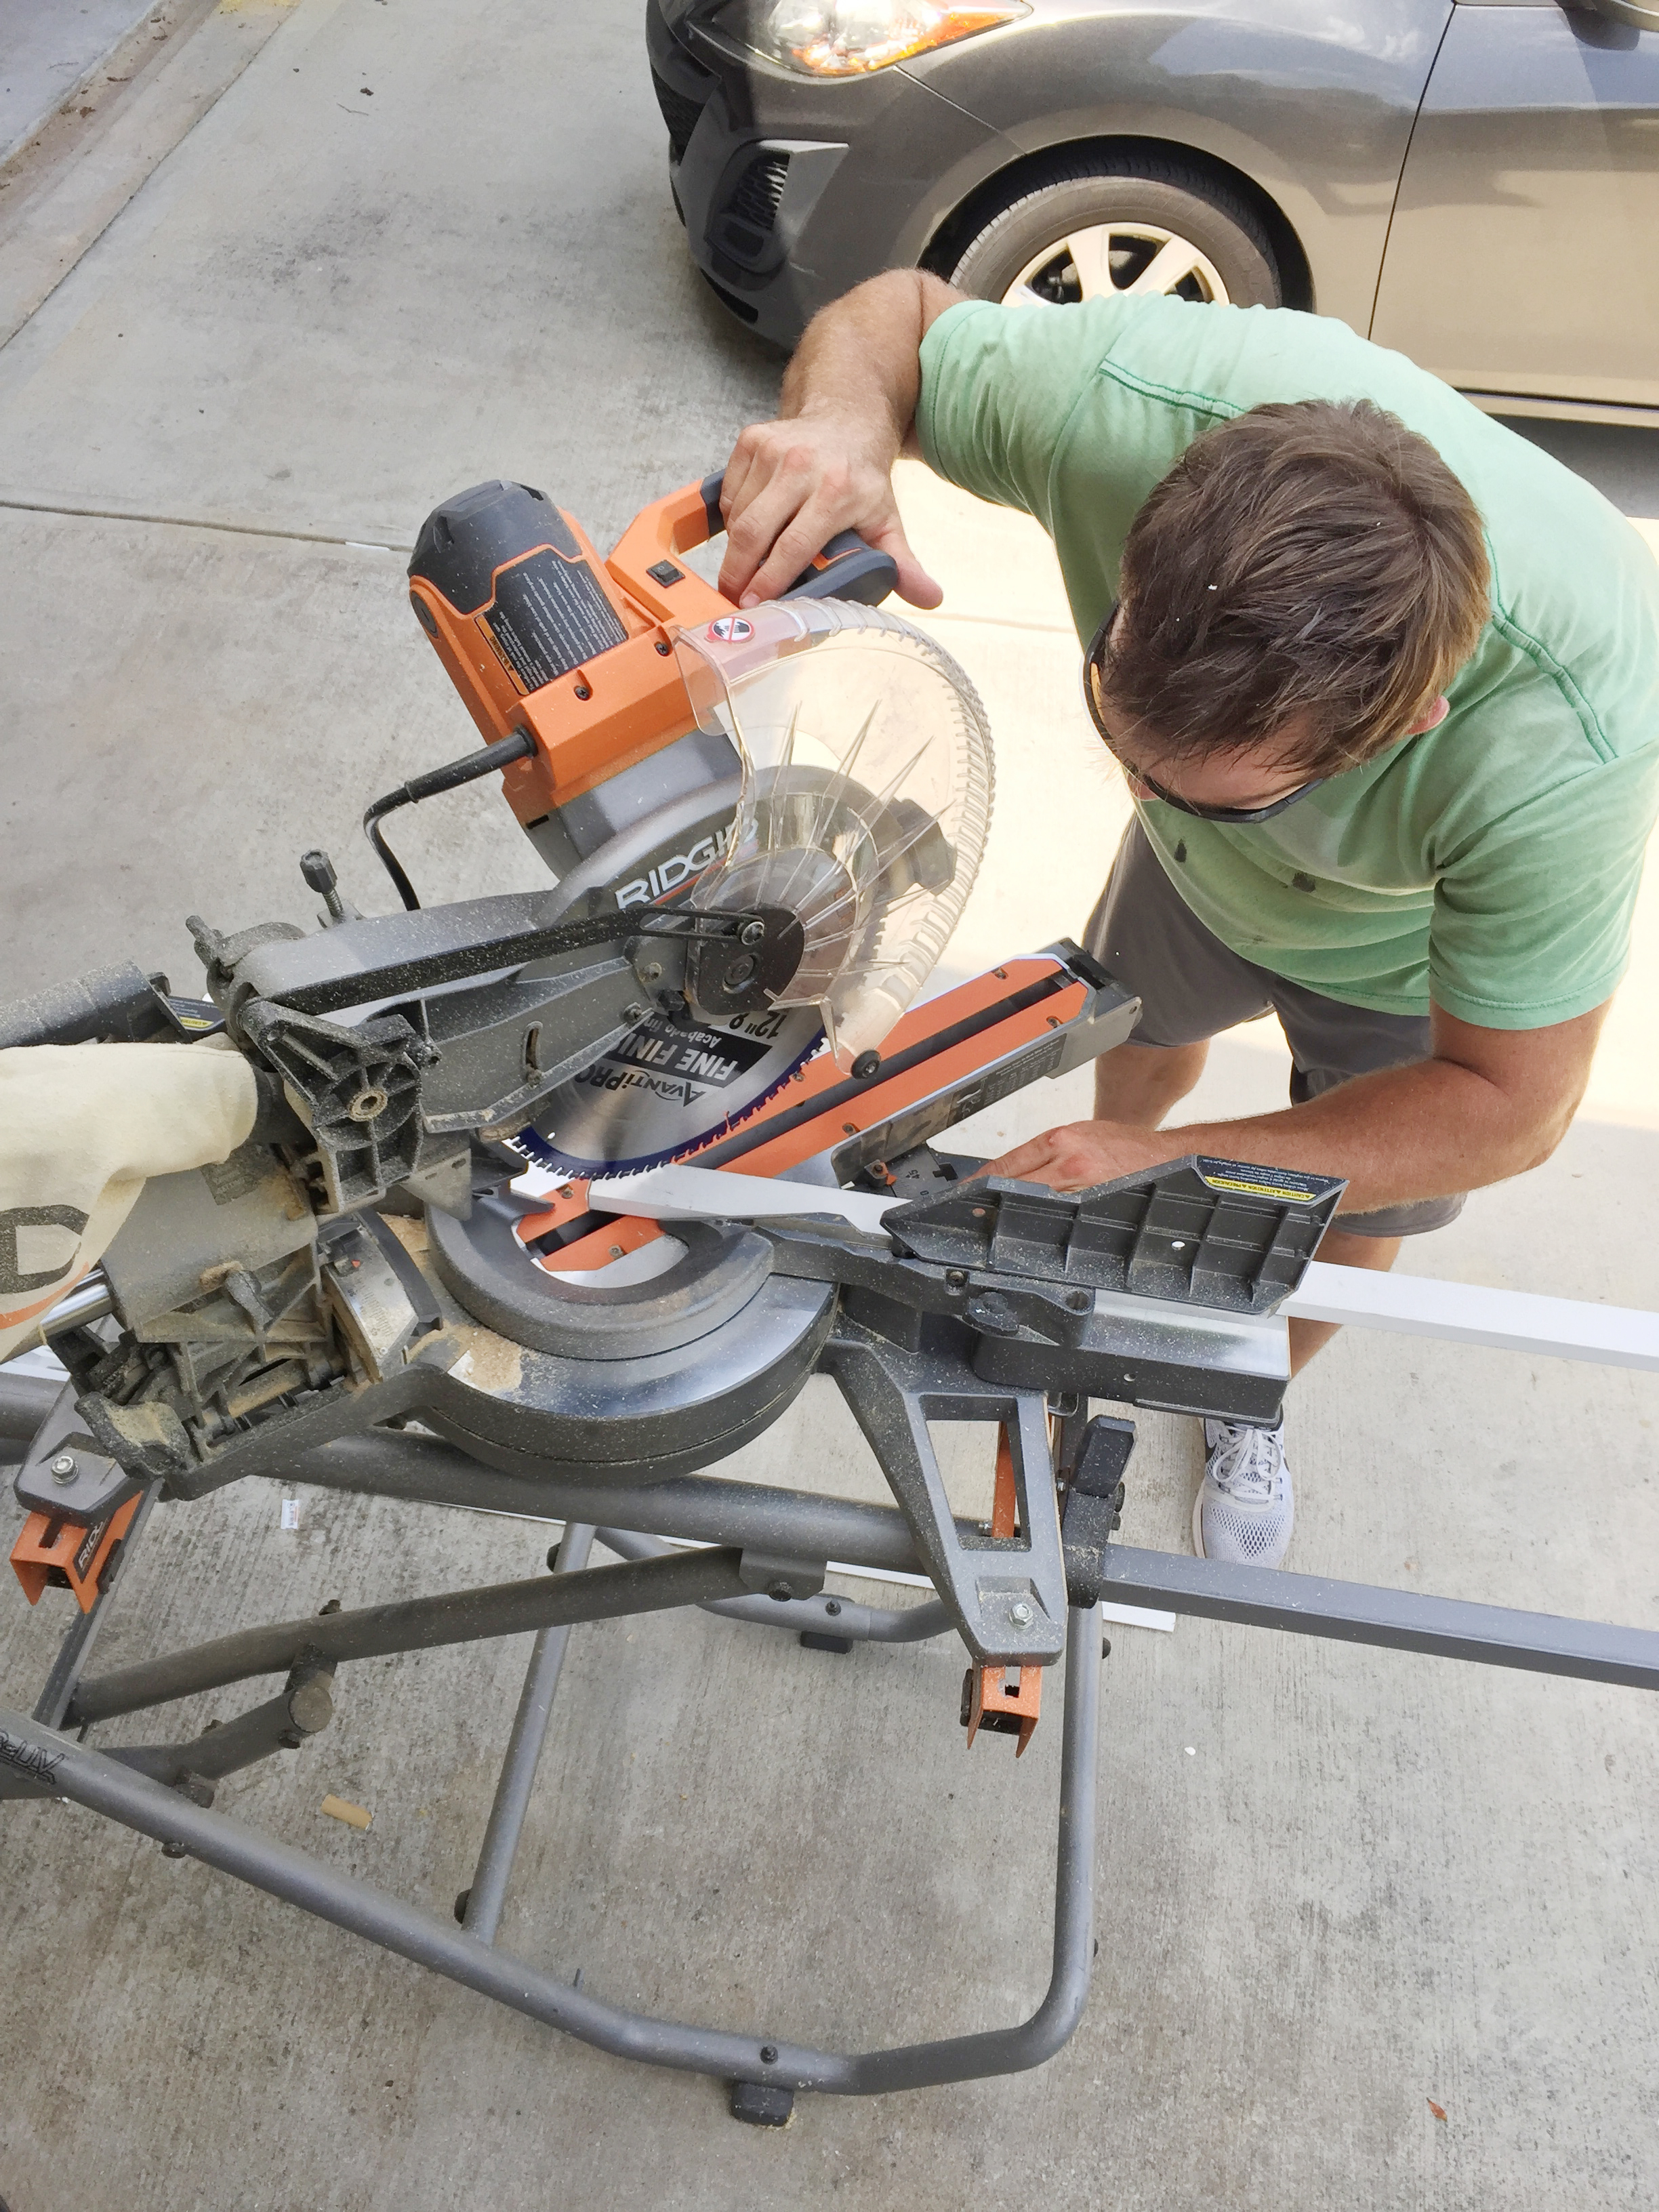
When we got to her house, Jeremy ripped it down into 2″ strips for the vertical pieces. Note the lack of eye protection. Let’s publicly shame him for that one.

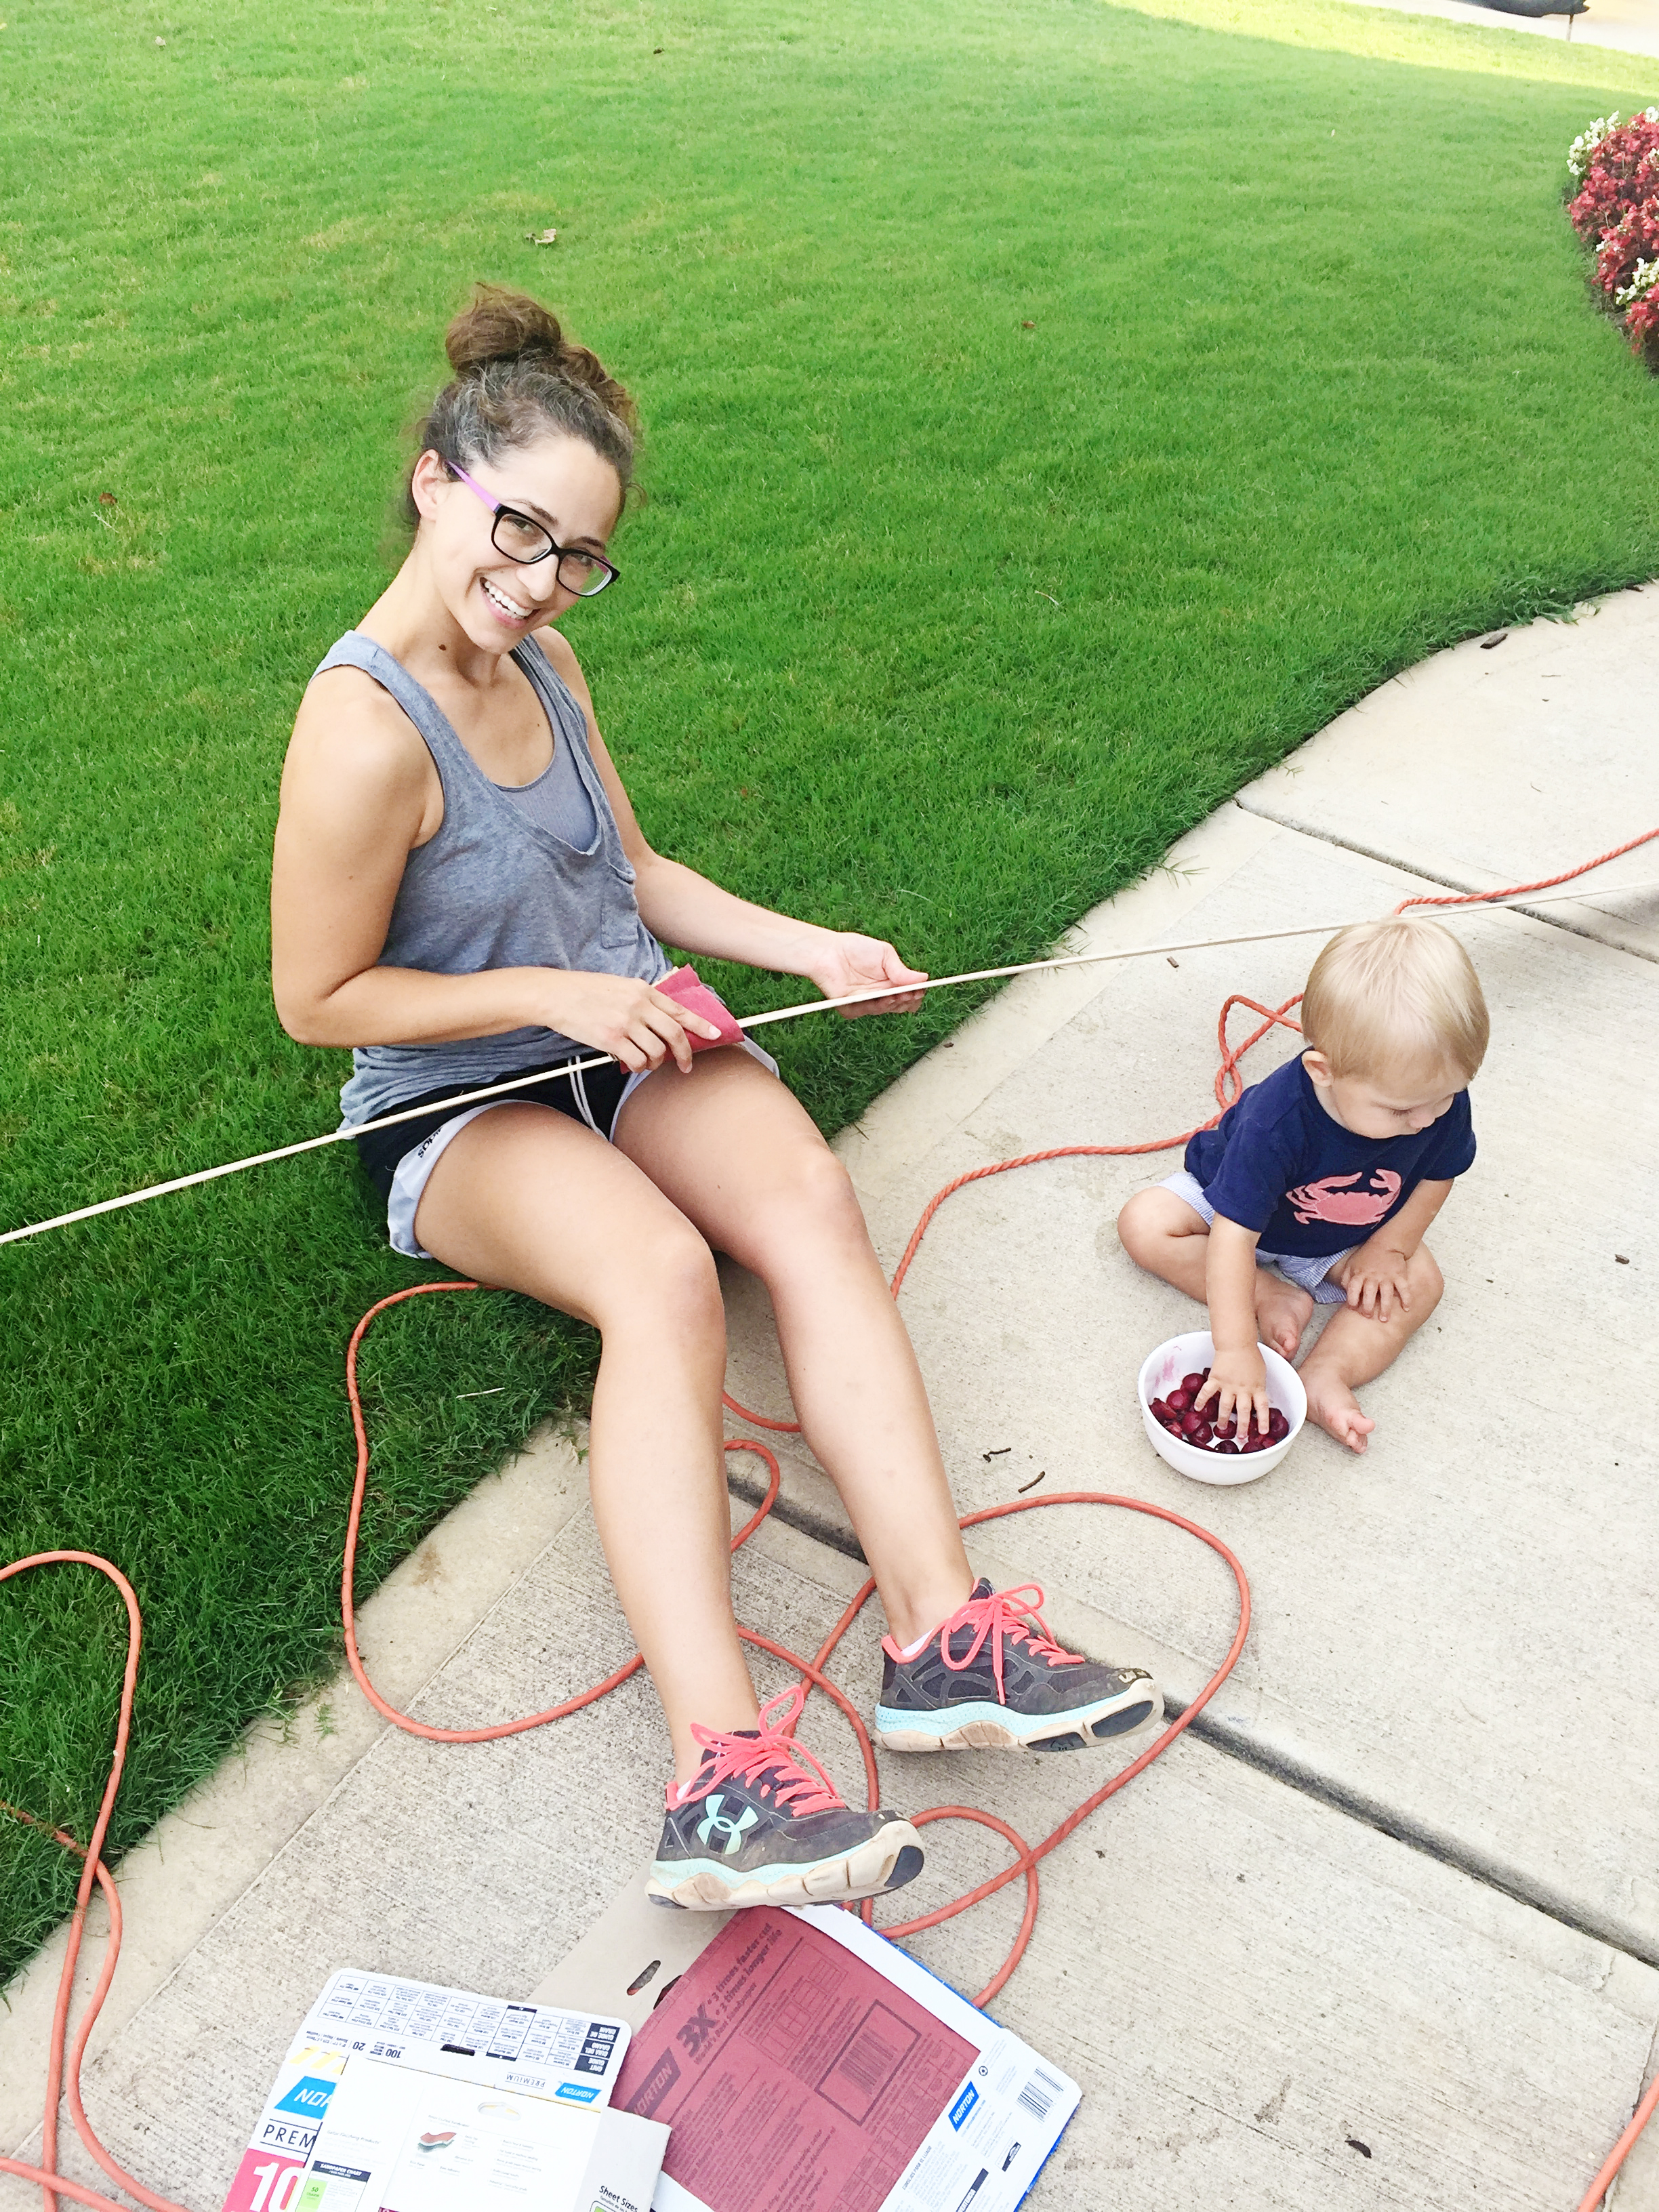
Once the vertical pieces were done, I took some really pretty pictures of them in the grass…because the grass was looking extra lush that day

Lori was on sanding duty….because she was able to sit on the ground. I’m actually not joking here…I was still pregnant and there wasn’t coming back from ground level Katie.

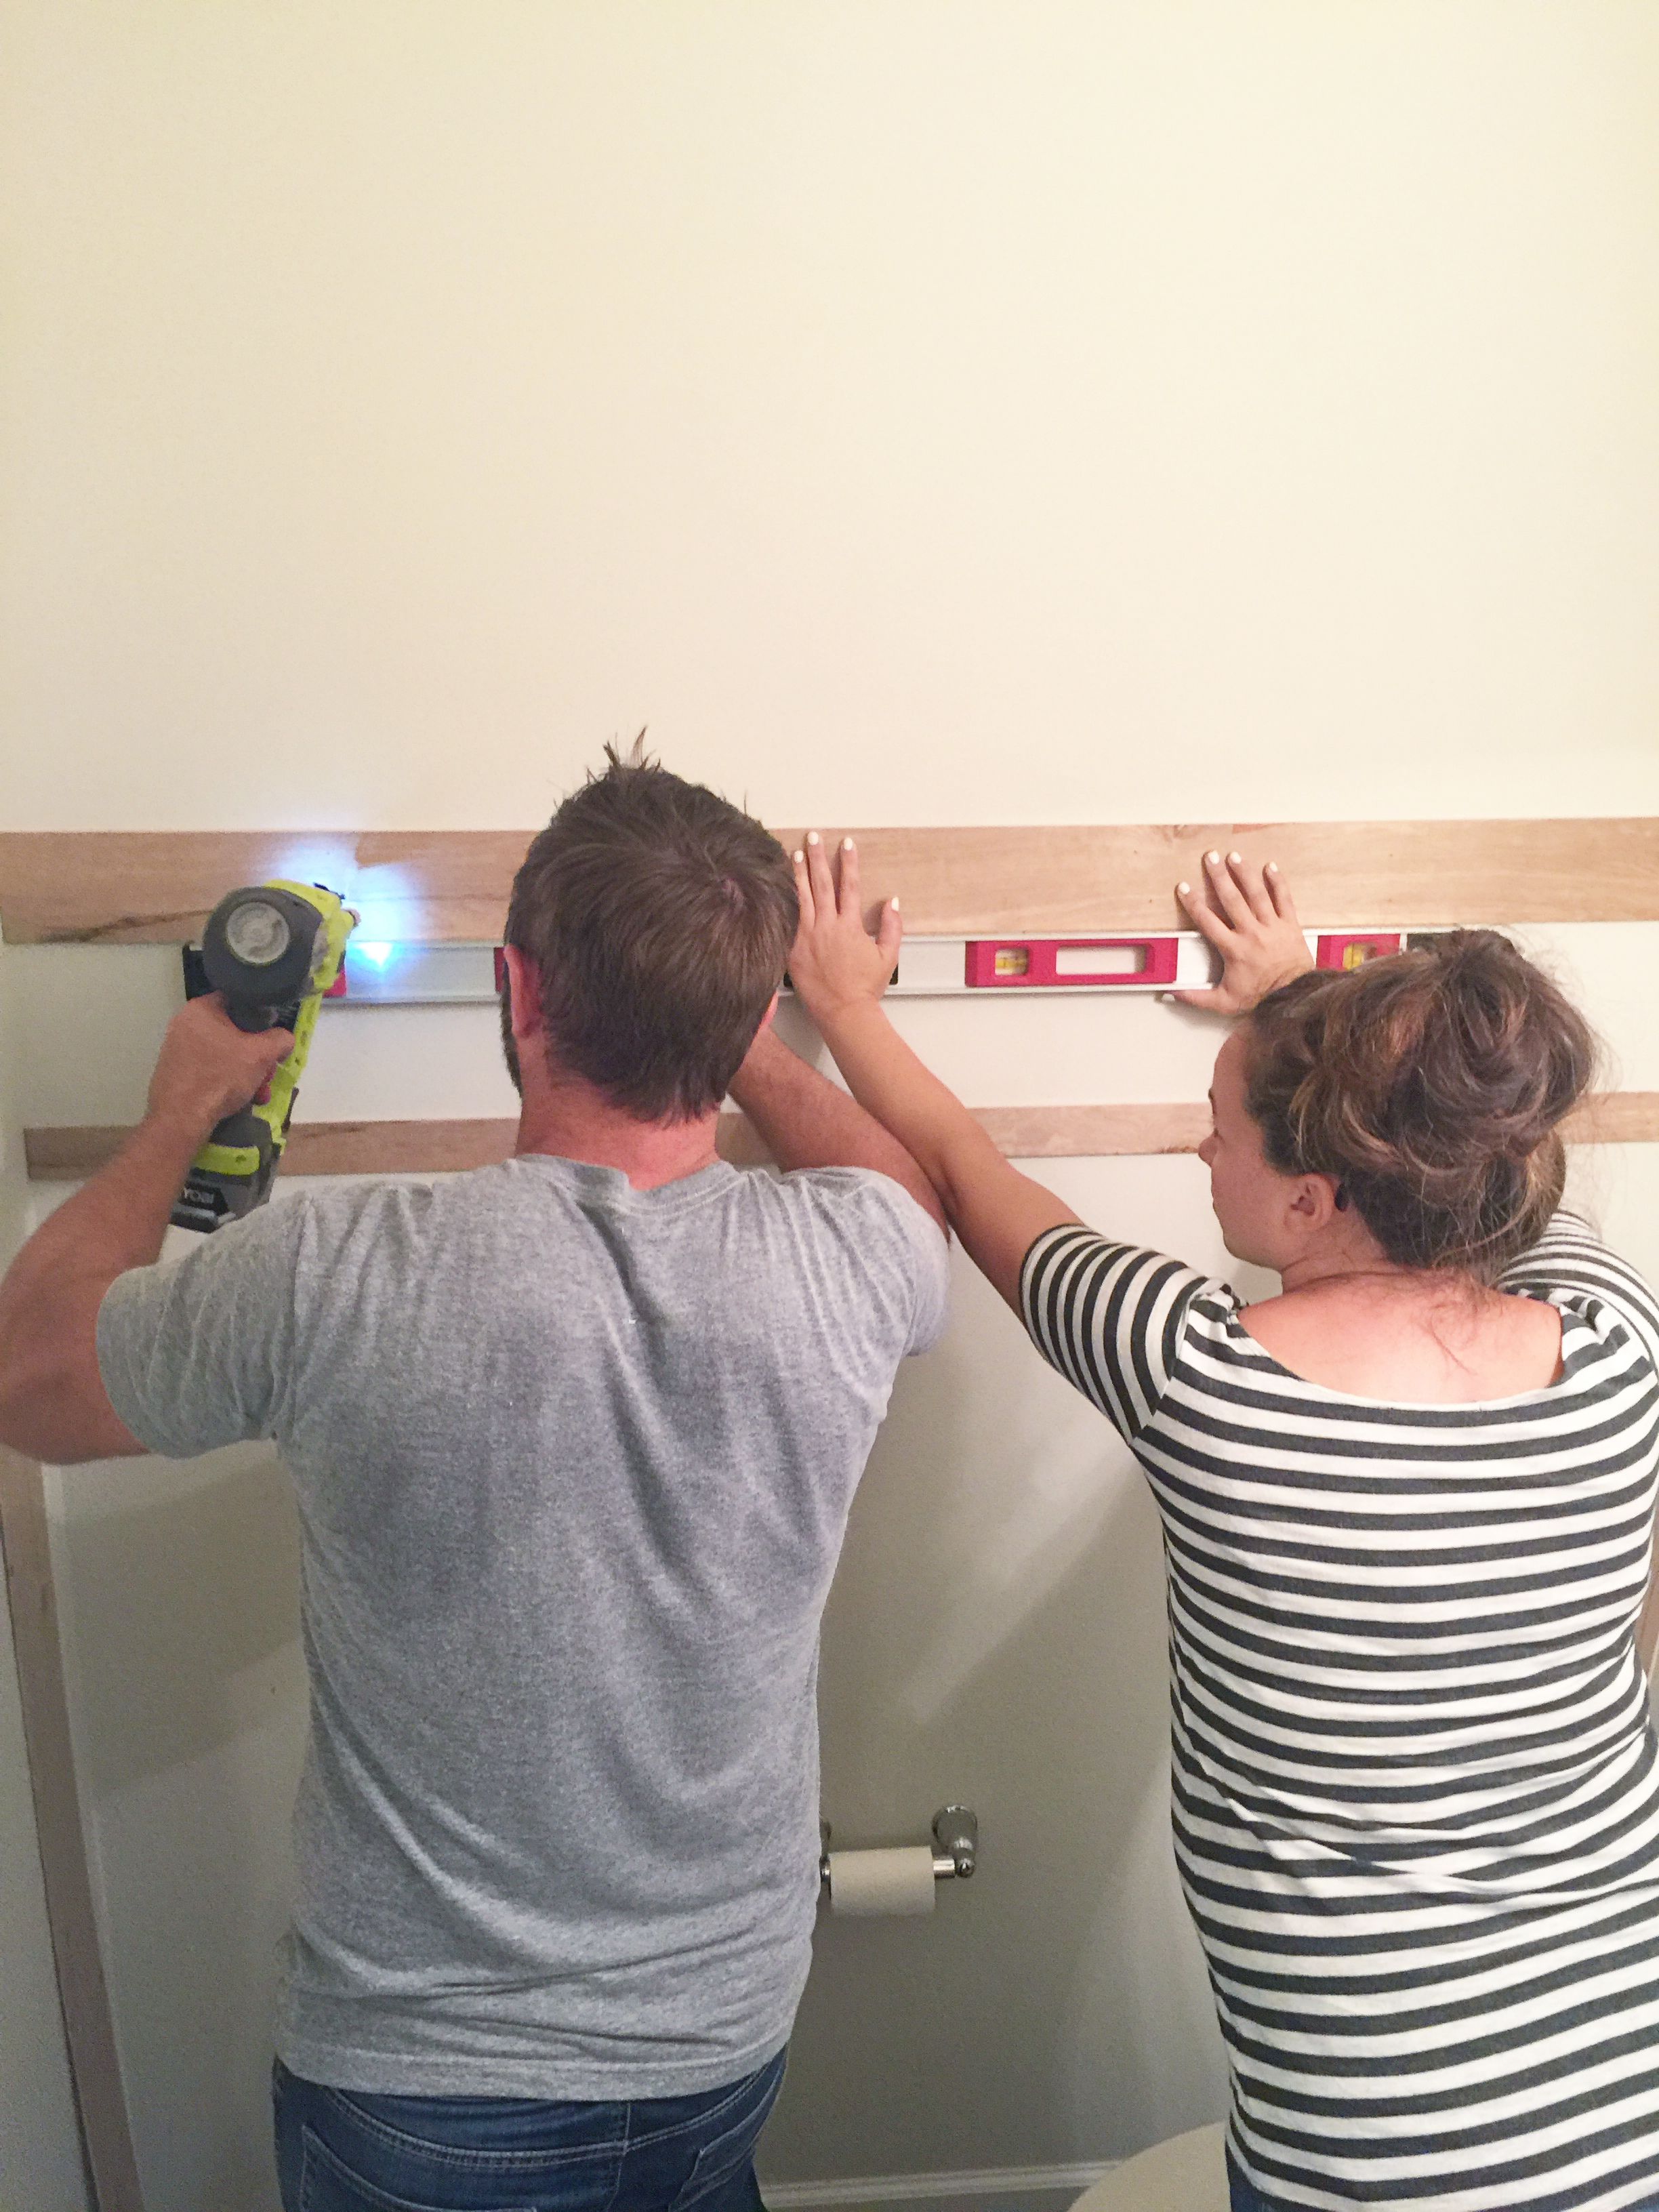
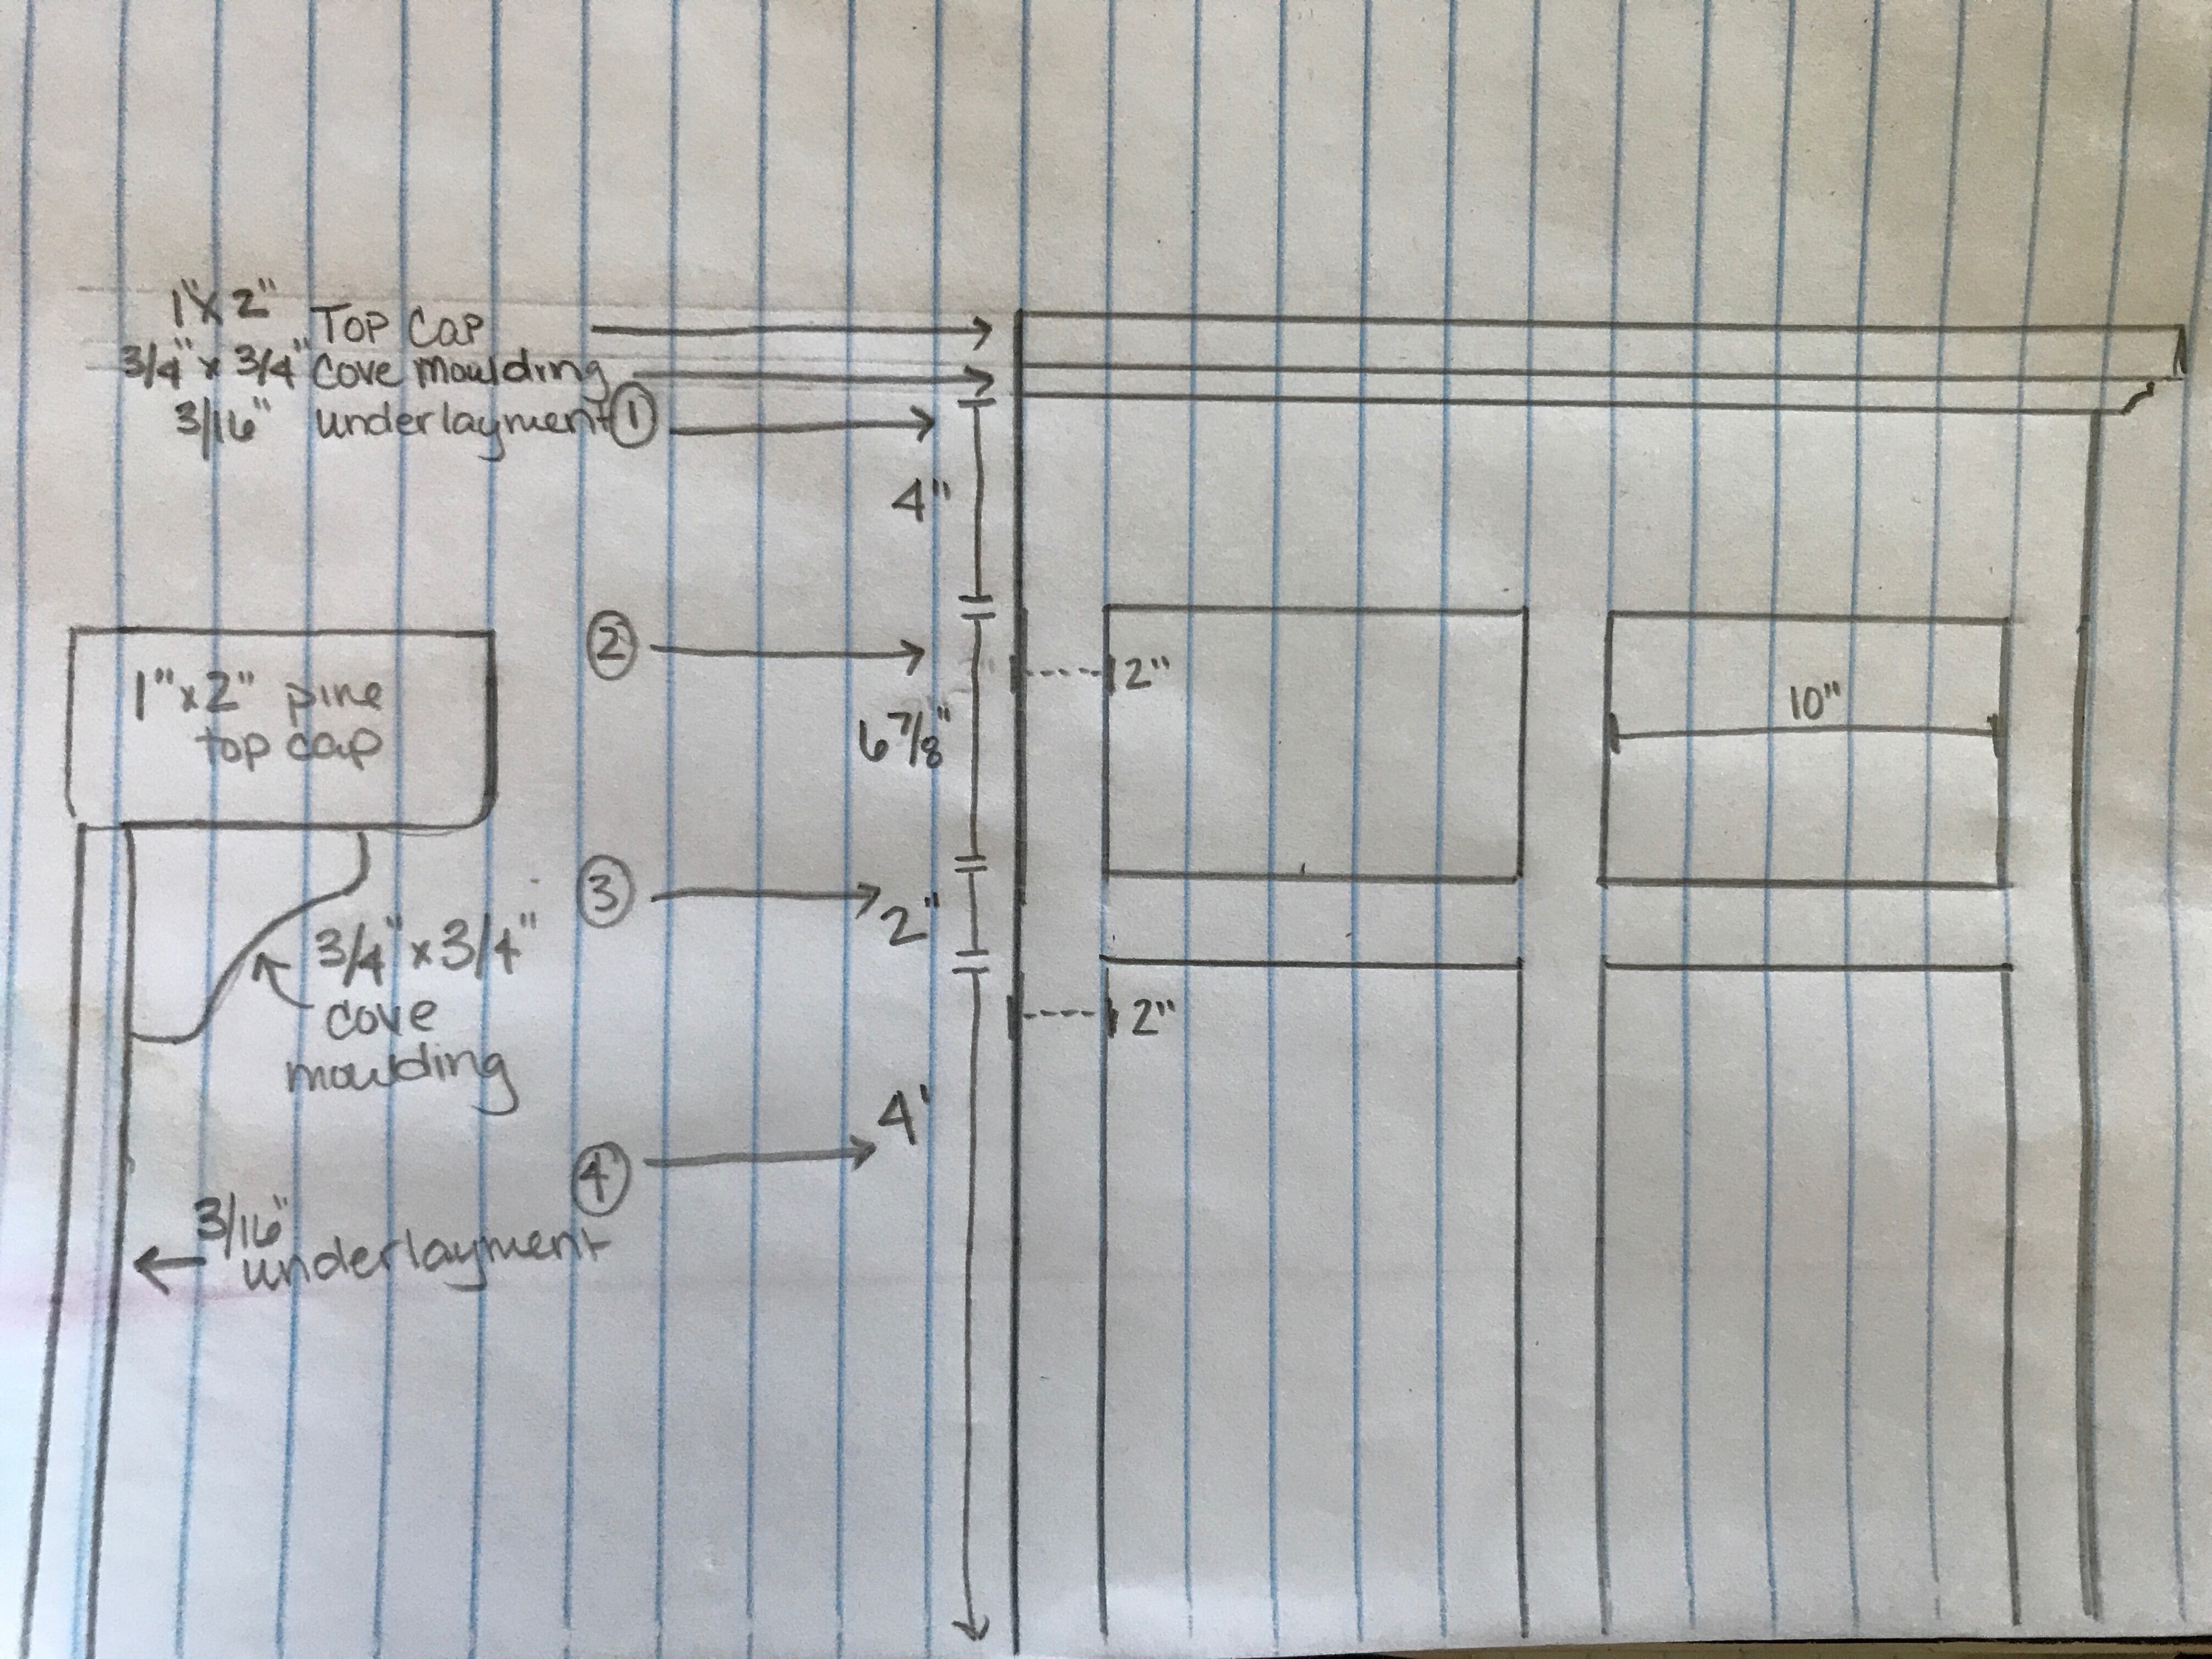
The first two boards you need are two horizontal boards. Jeremy also ripped these – a 4 3/4″ board for the top horizontal piece and a 2″ board for the bottom horizontal piece. These were the most important to install correctly. The rest were cut to fit….but these two horizontal pieces needed to be level all the way around the room.

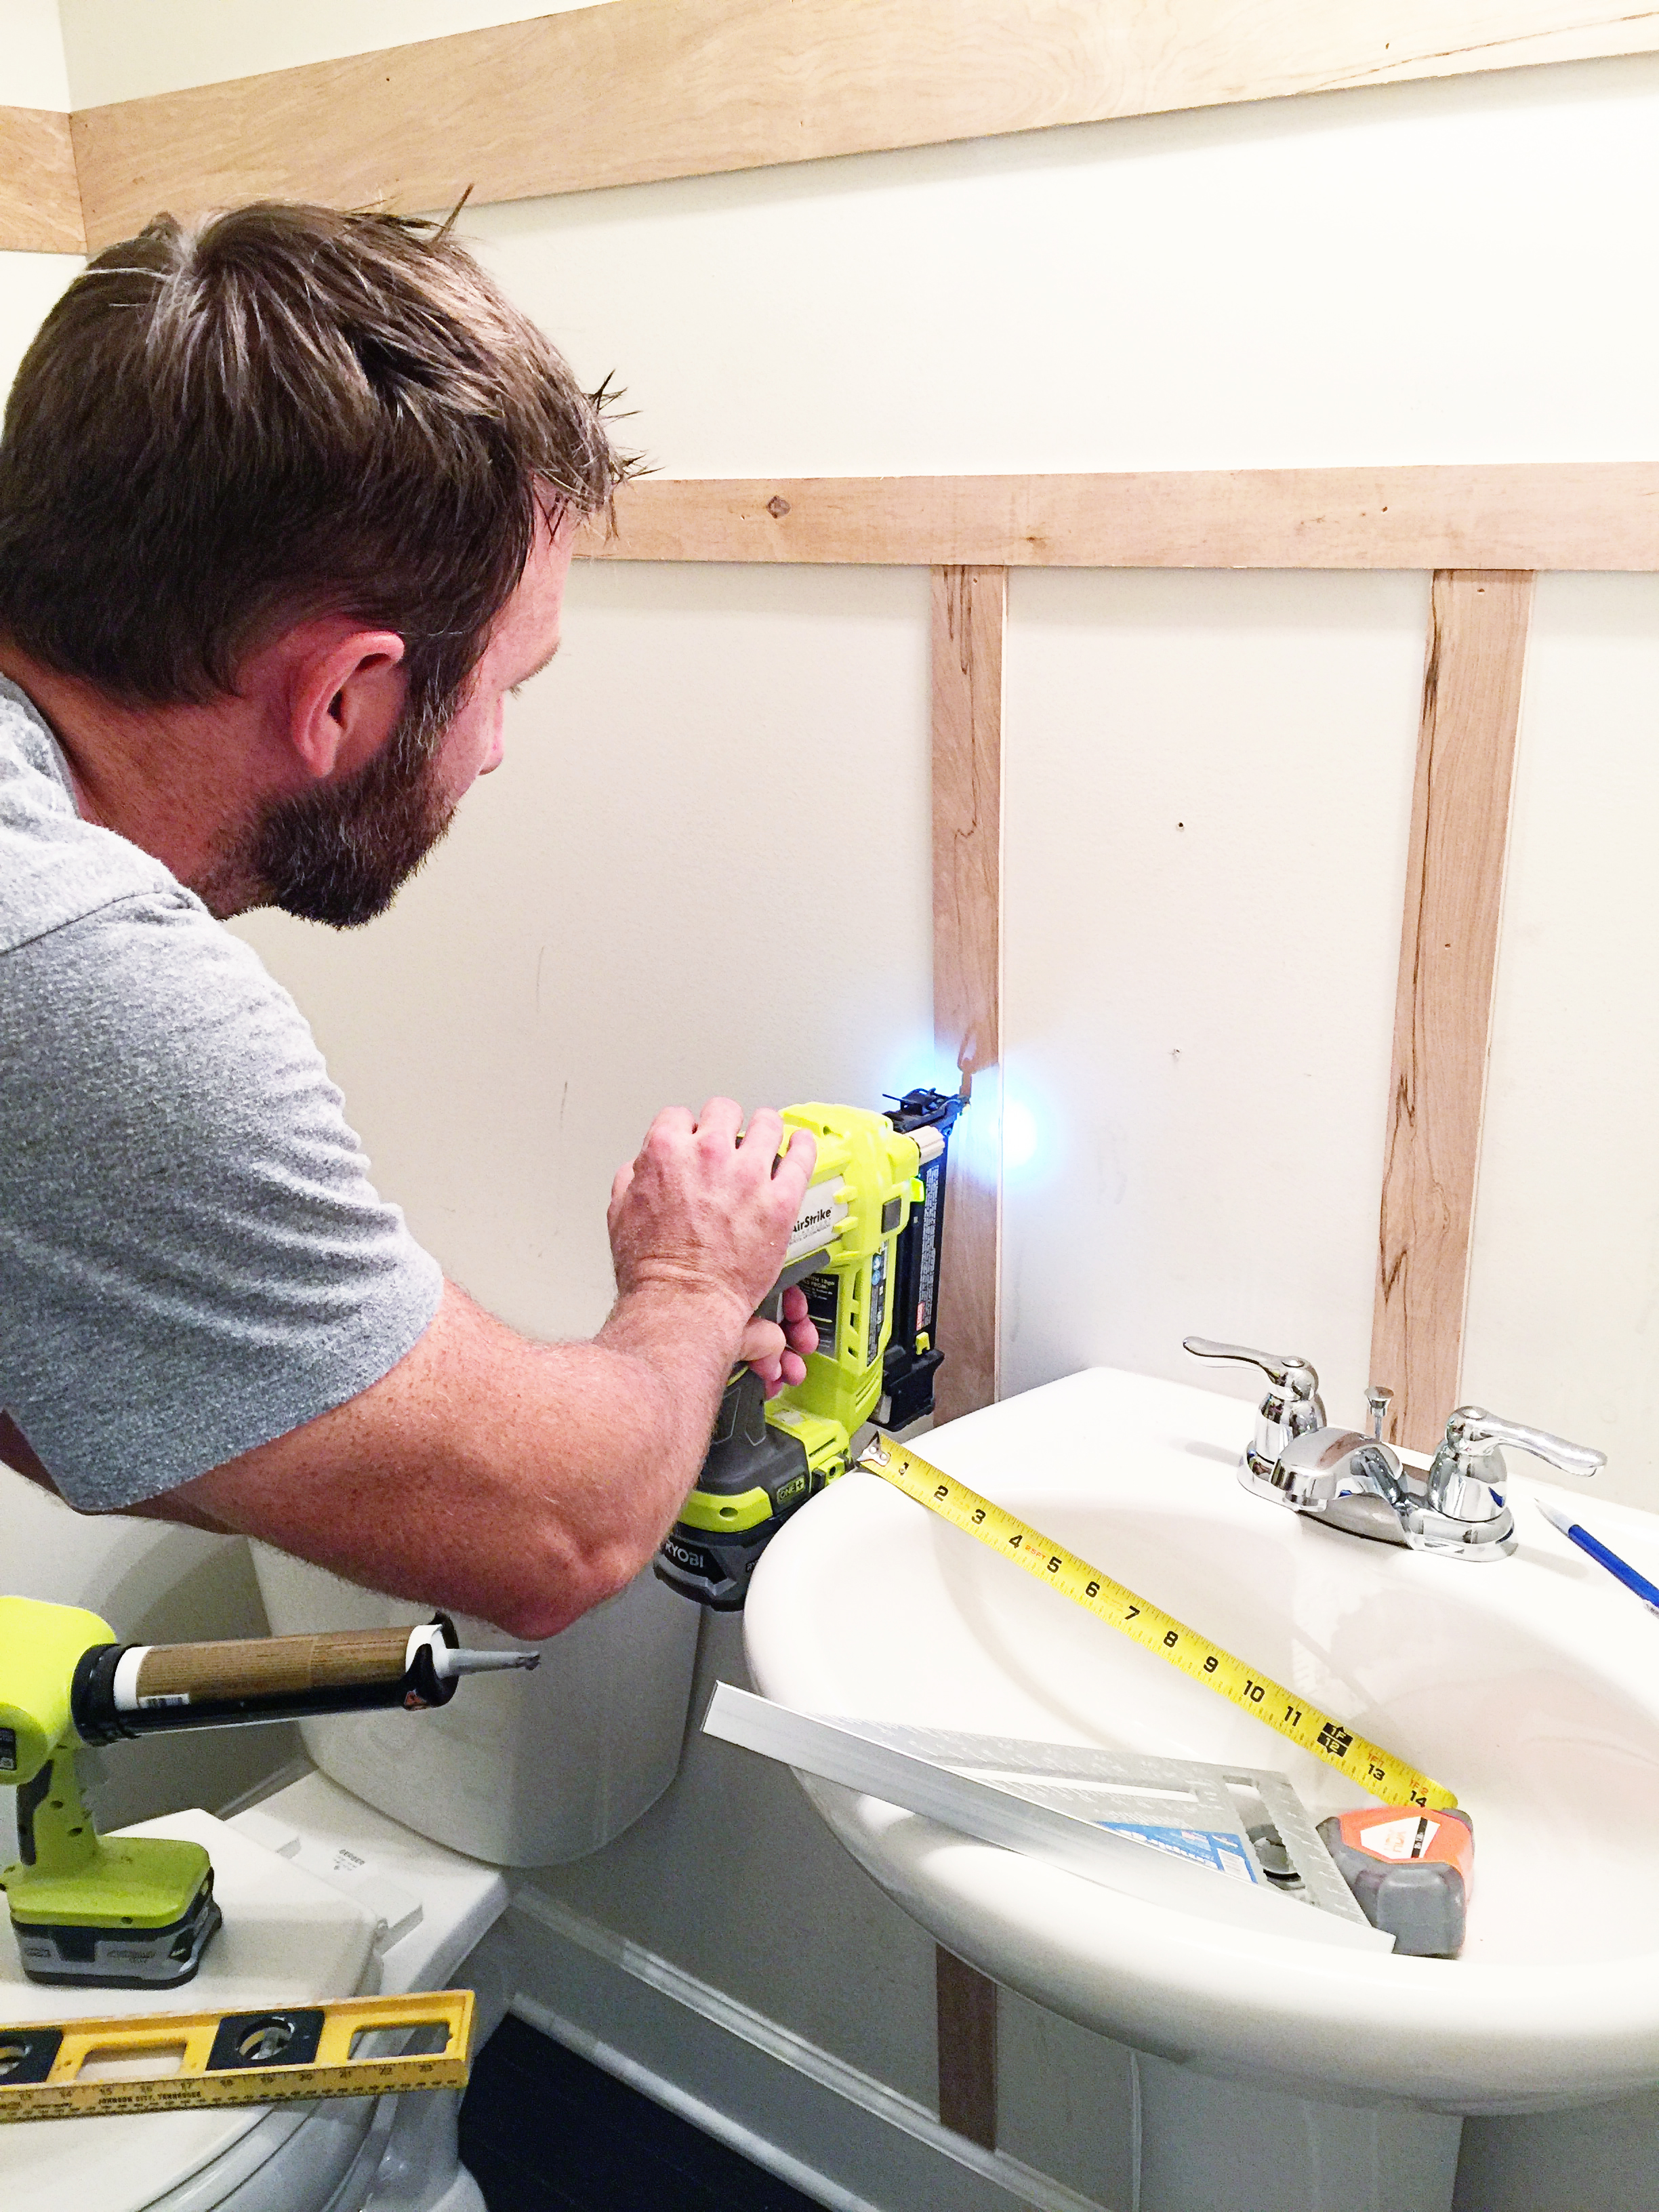
In order to hang them, we used construction adhesive and brad nails to attach it directly to the drywall.

The bottom horizontal board was hung 4′ from the floor molding and then we left a gap almost 7″ from there to the top board.

We did those two boards first because we didn’t know if the floor was level and hanging it straight at eye level allows us to cut all the vertical pieces individually and still have a straight line. Nobody will ever notice if the vertical boards are different lengths but you will DEFINITELY notice if that top board is crooked.
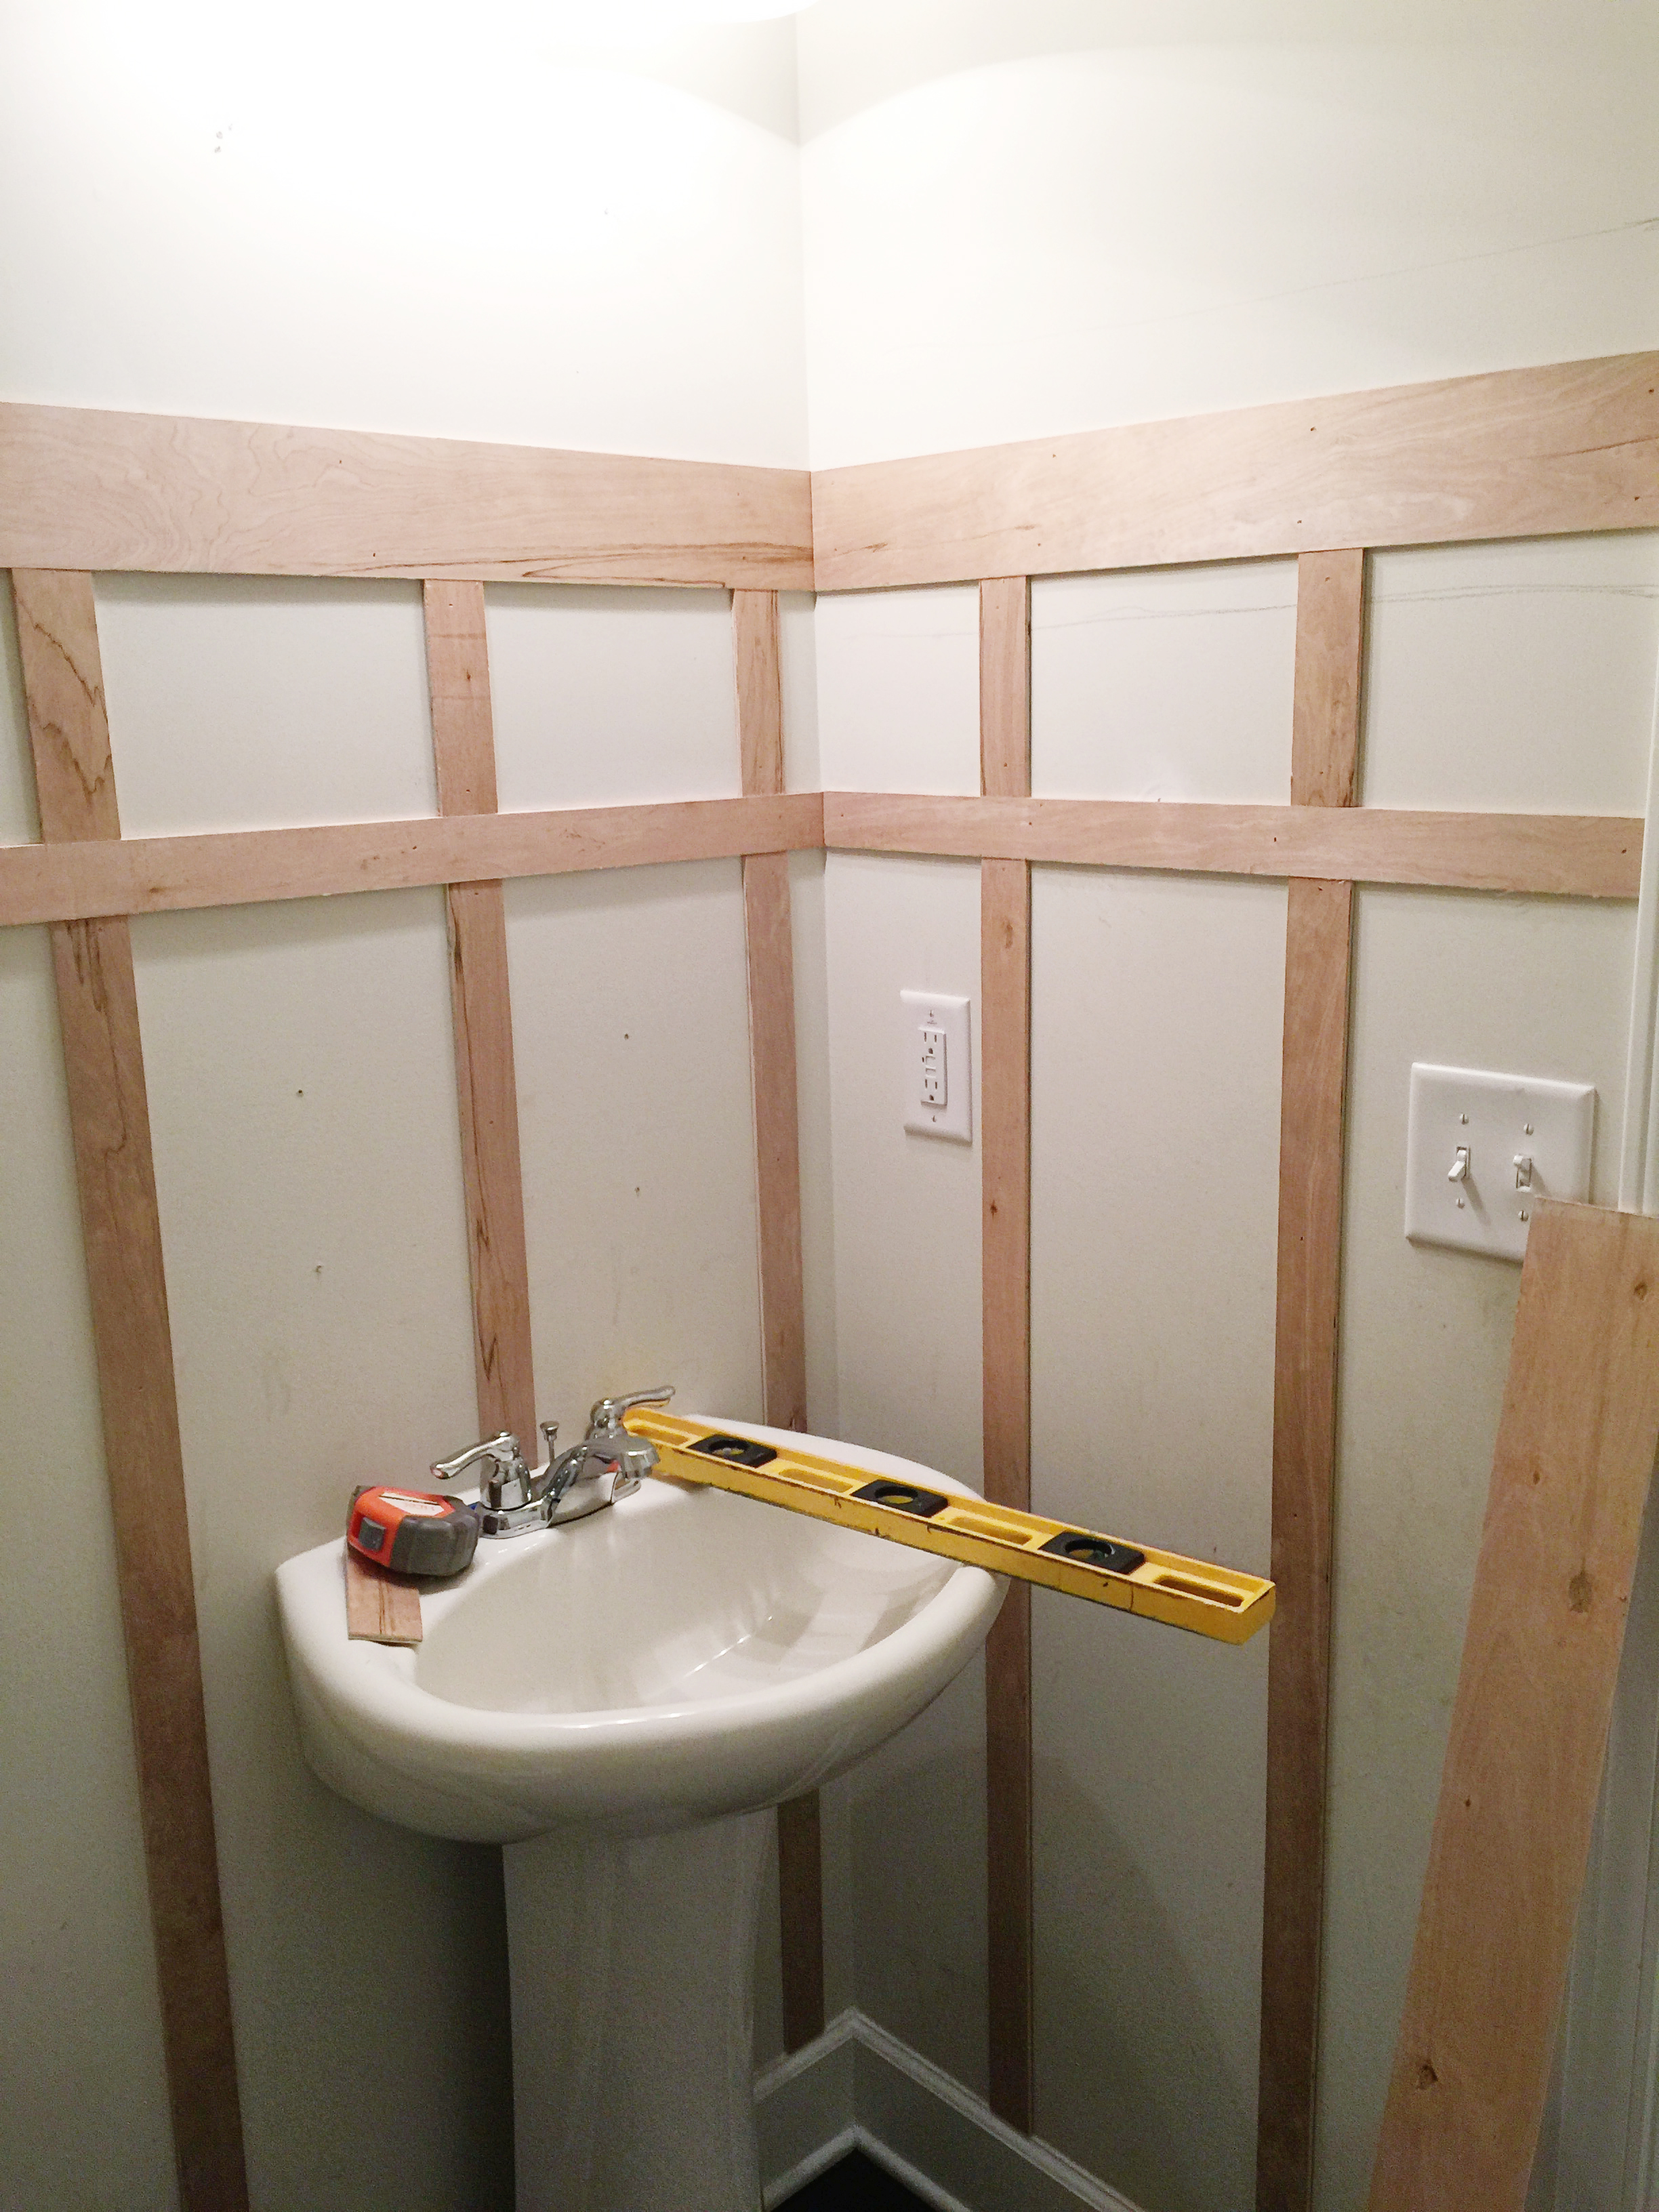
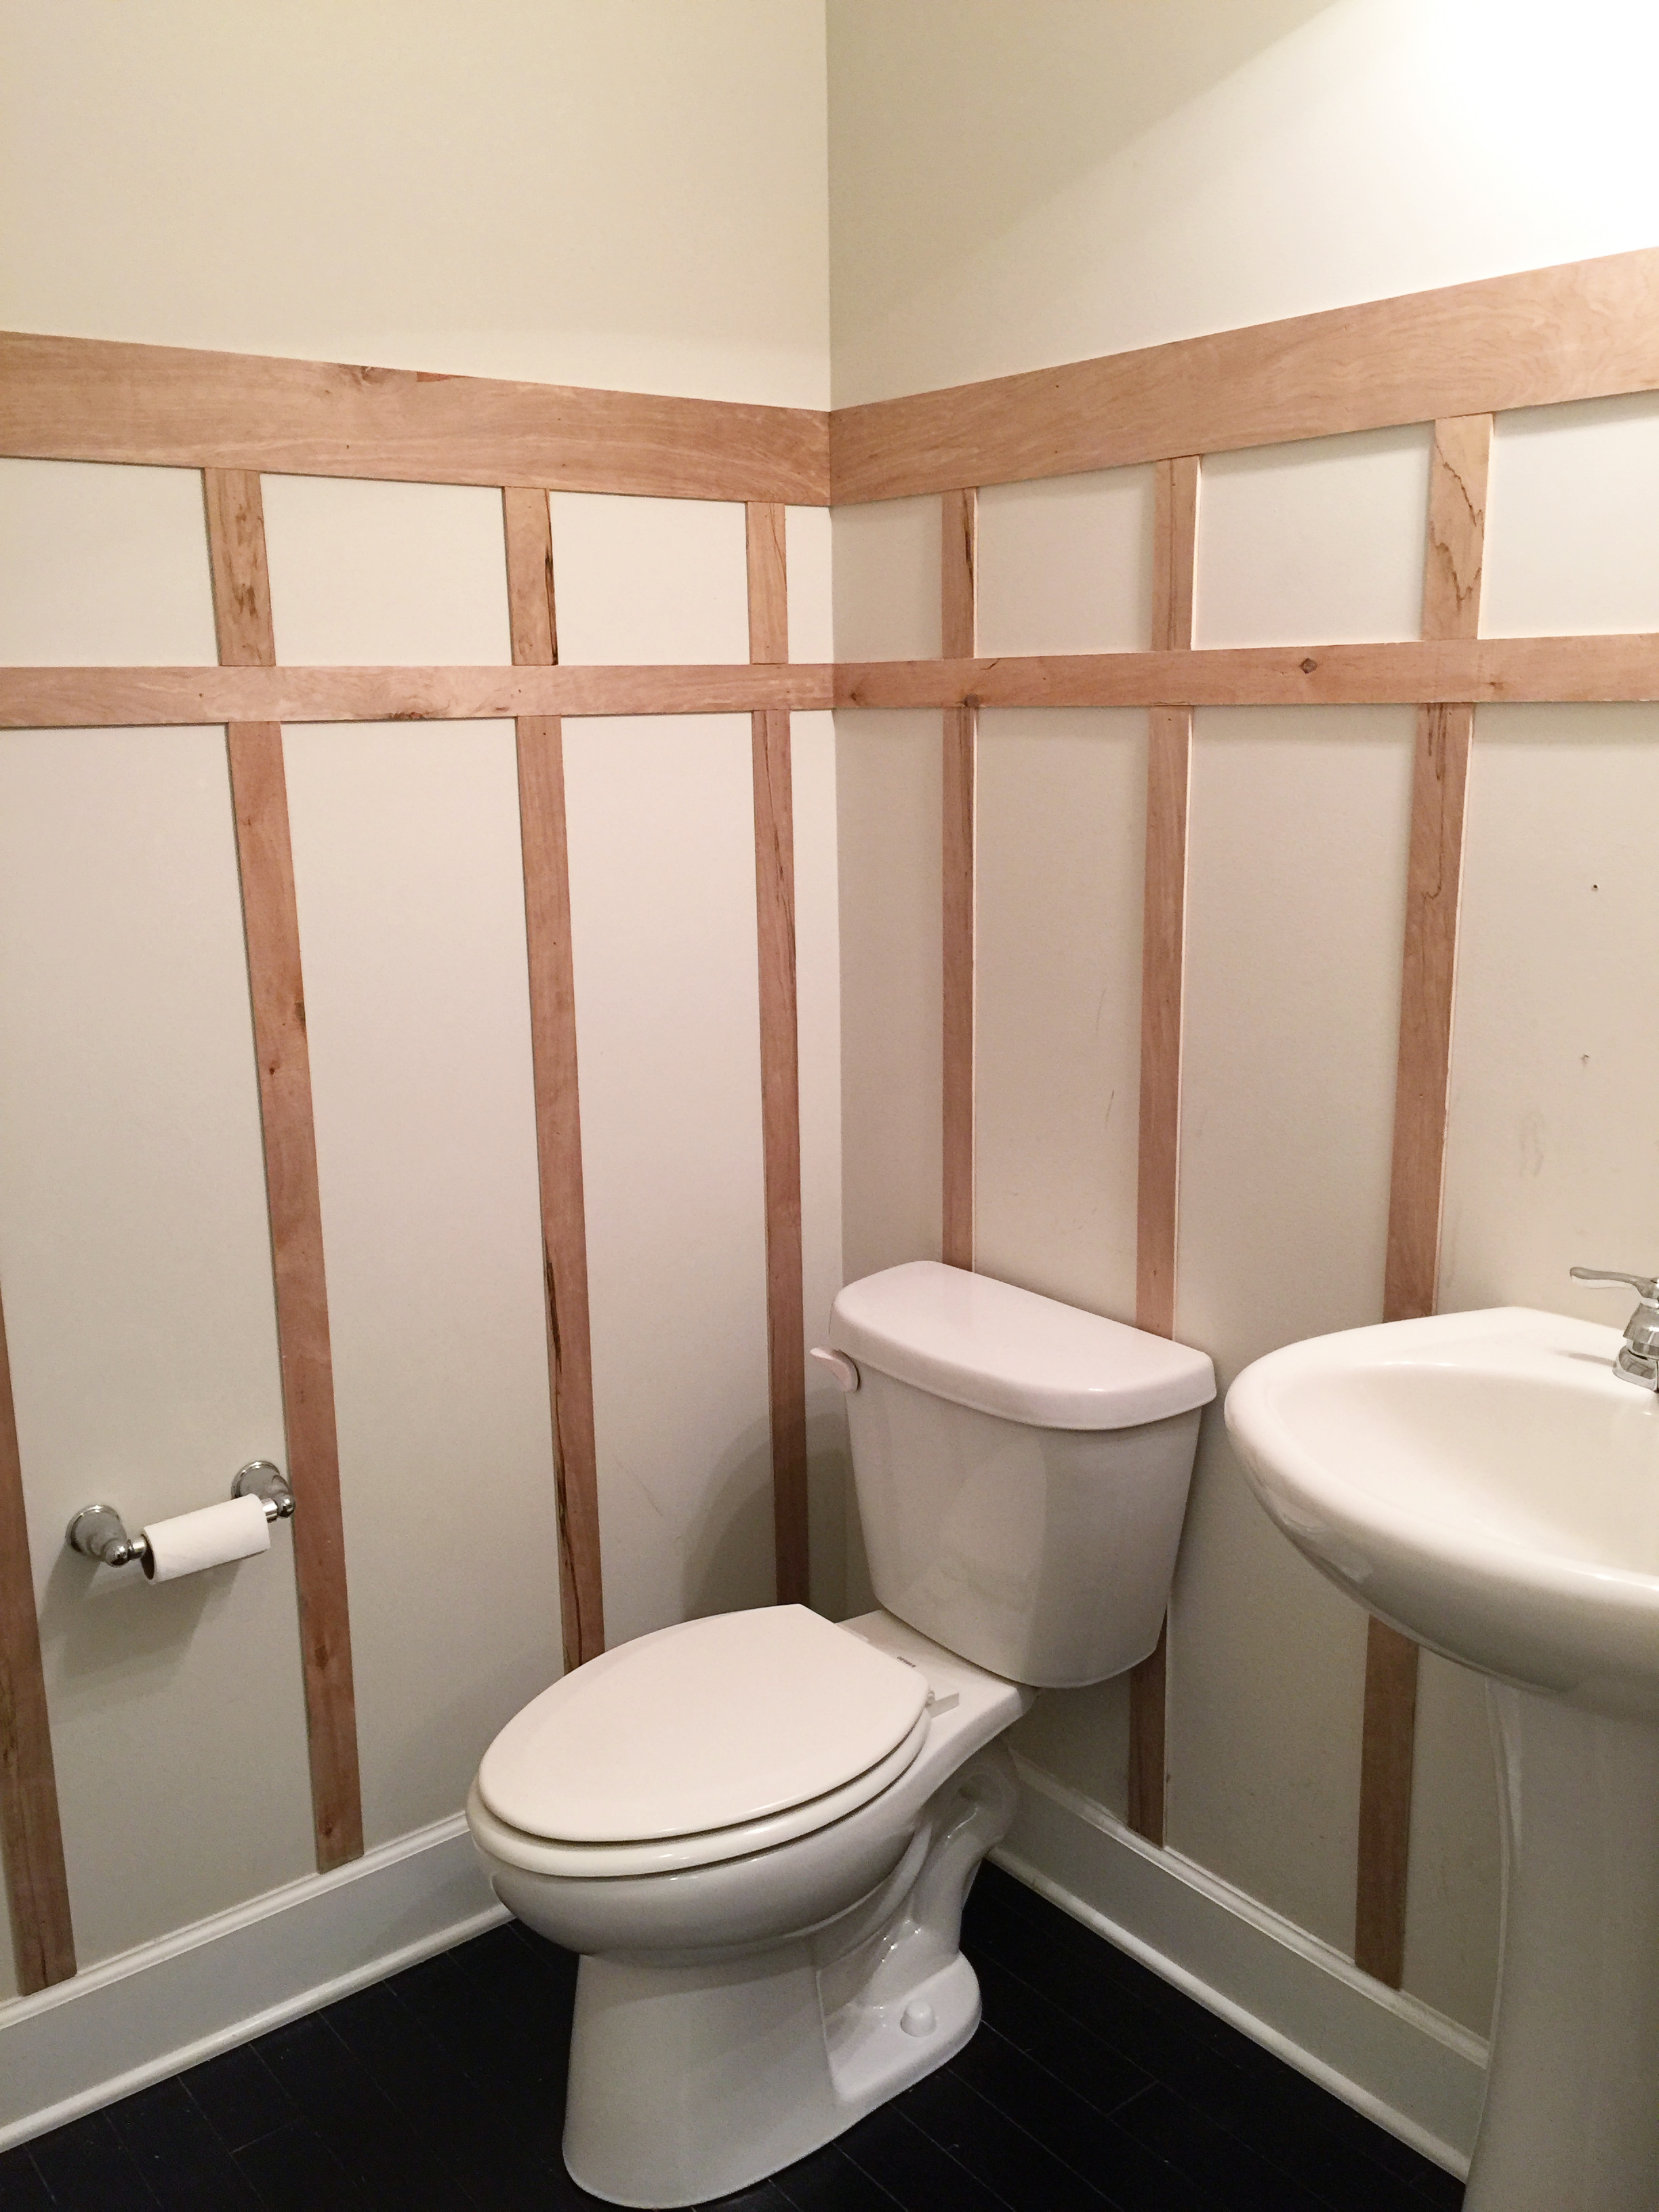
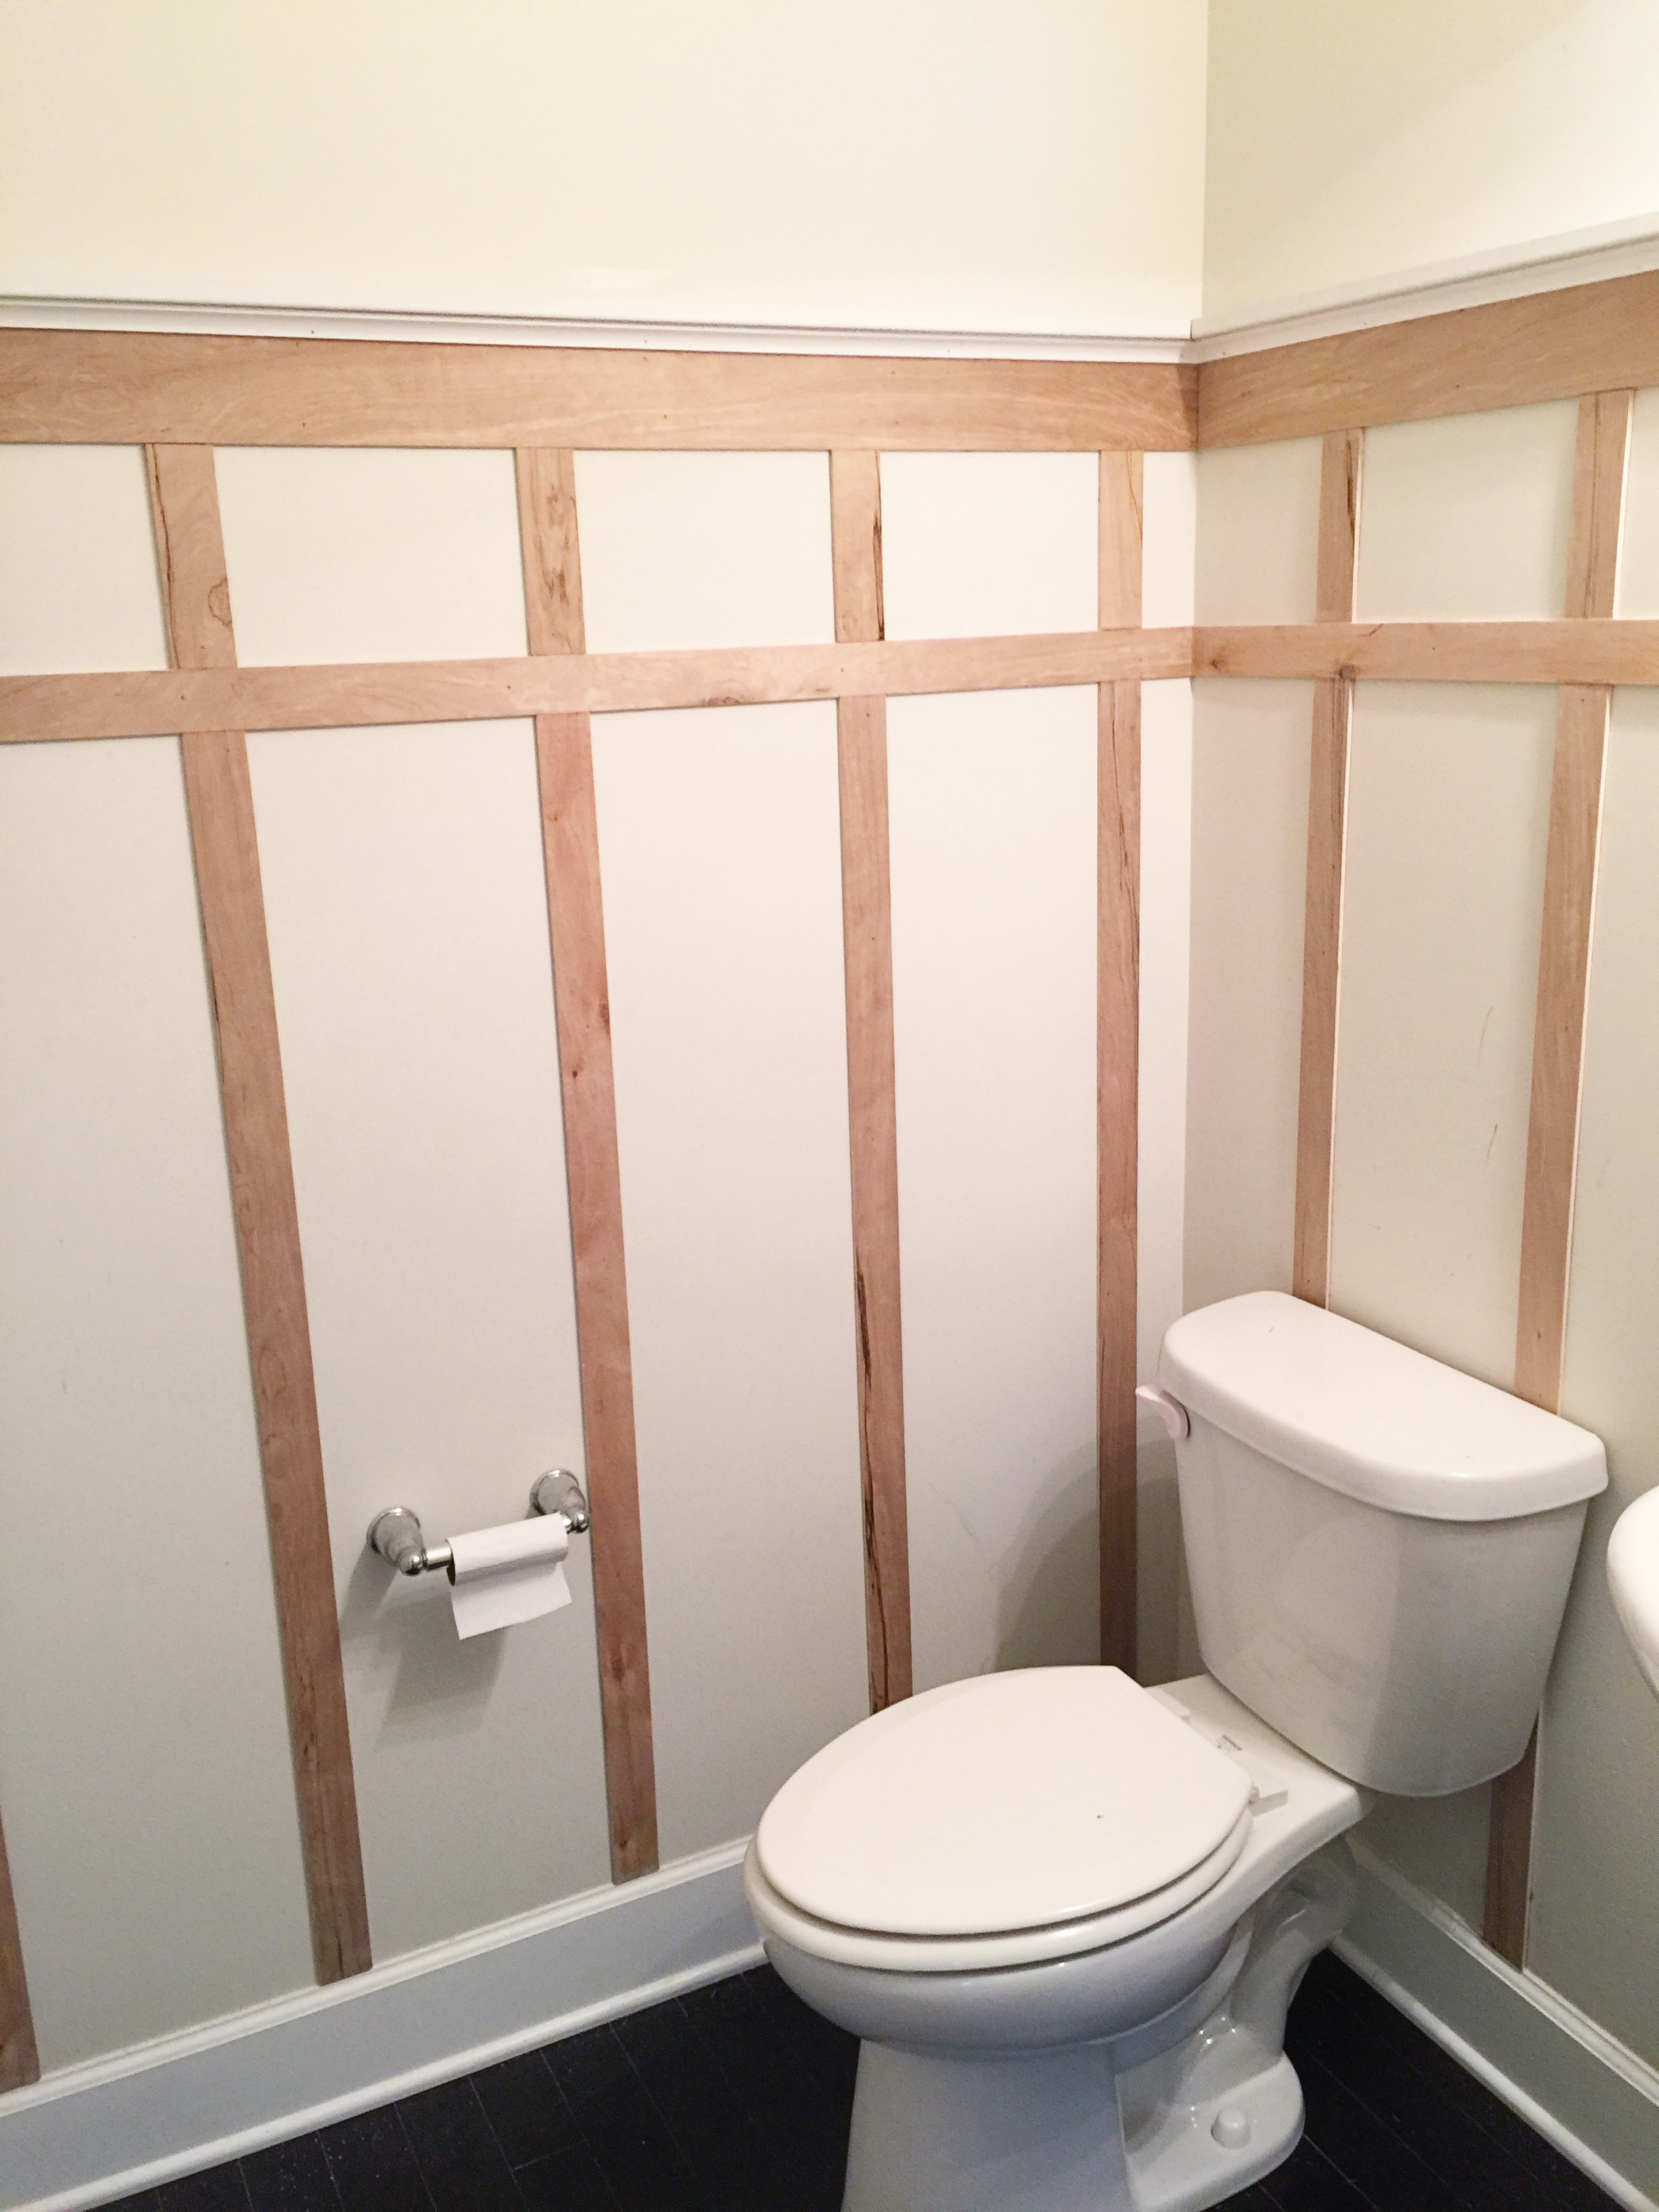
Then came time for the verticals….we measured and cut to length and installed them every ten inches. The way we decided were to start was based on the sink. We definitely wanted one of the verticals to split the sink directly in half.

Then on the adjoining wall we decided to put the verticals so that they didn’t interfere with the electrical switches or outlet. If you don’t have that problem, just measure the rest of the wall to the corner (ours was about 2″) and then add 8″ to get the location of the next vertical on the neighboring wall.


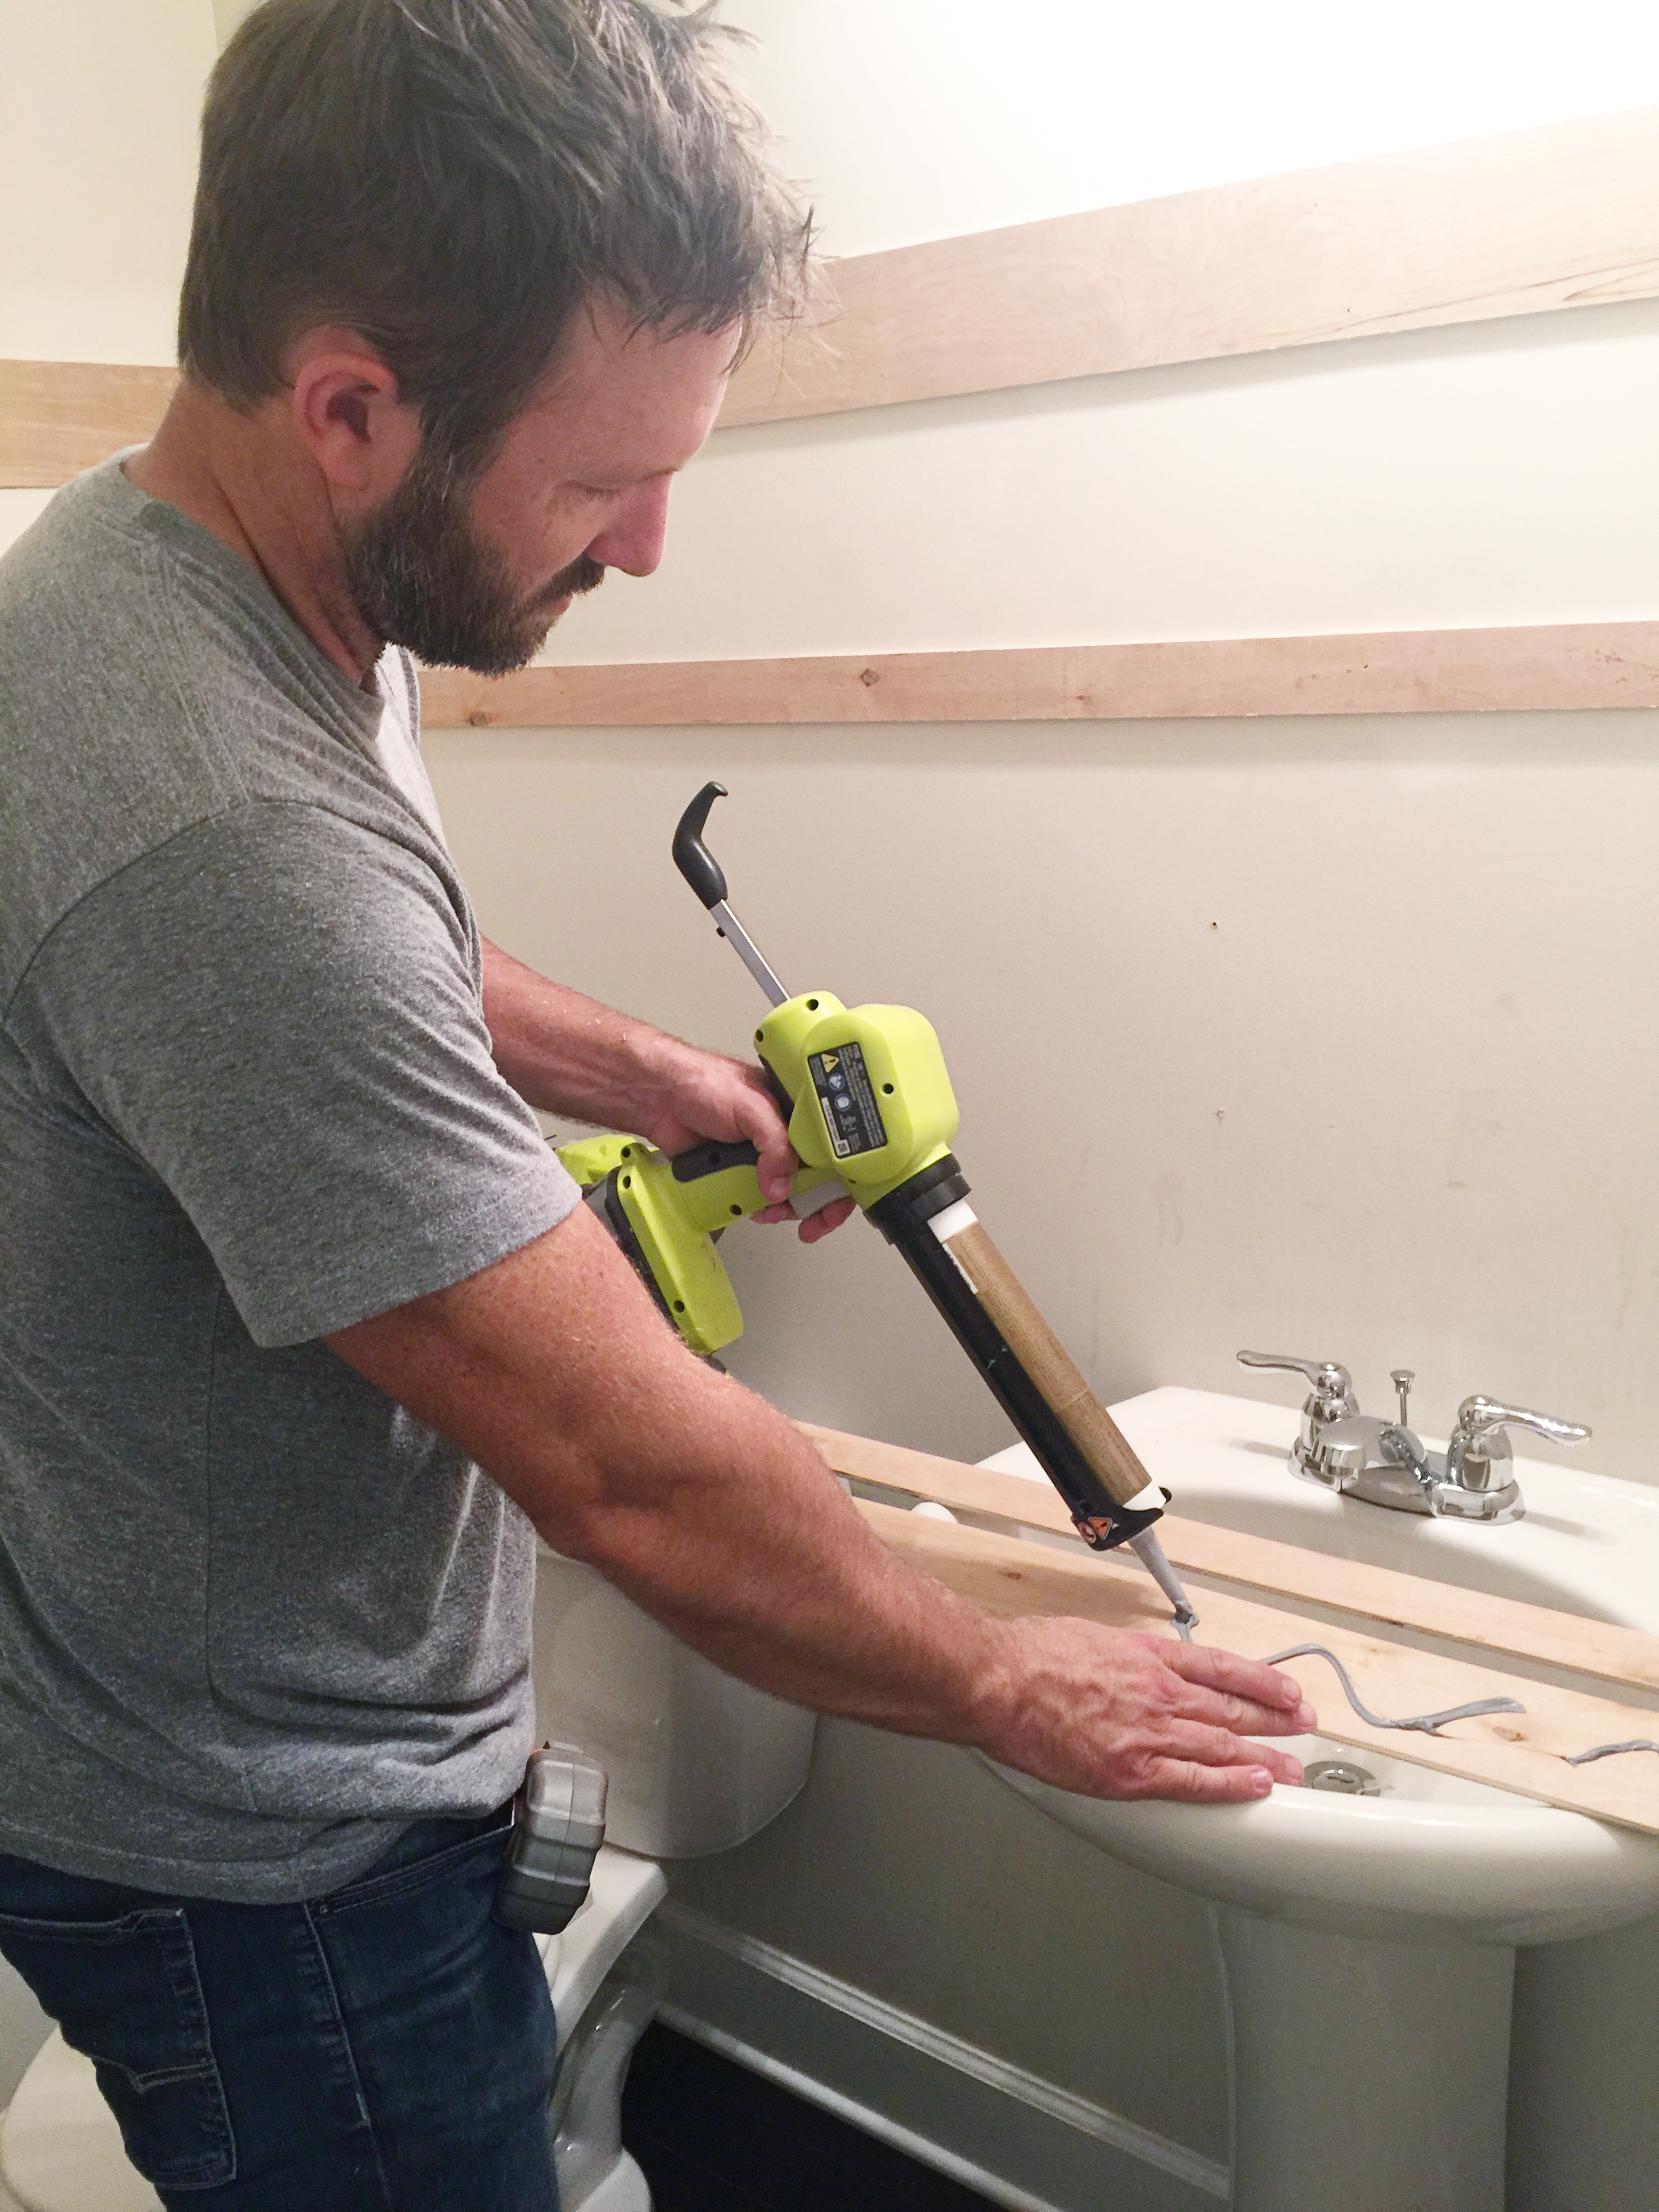
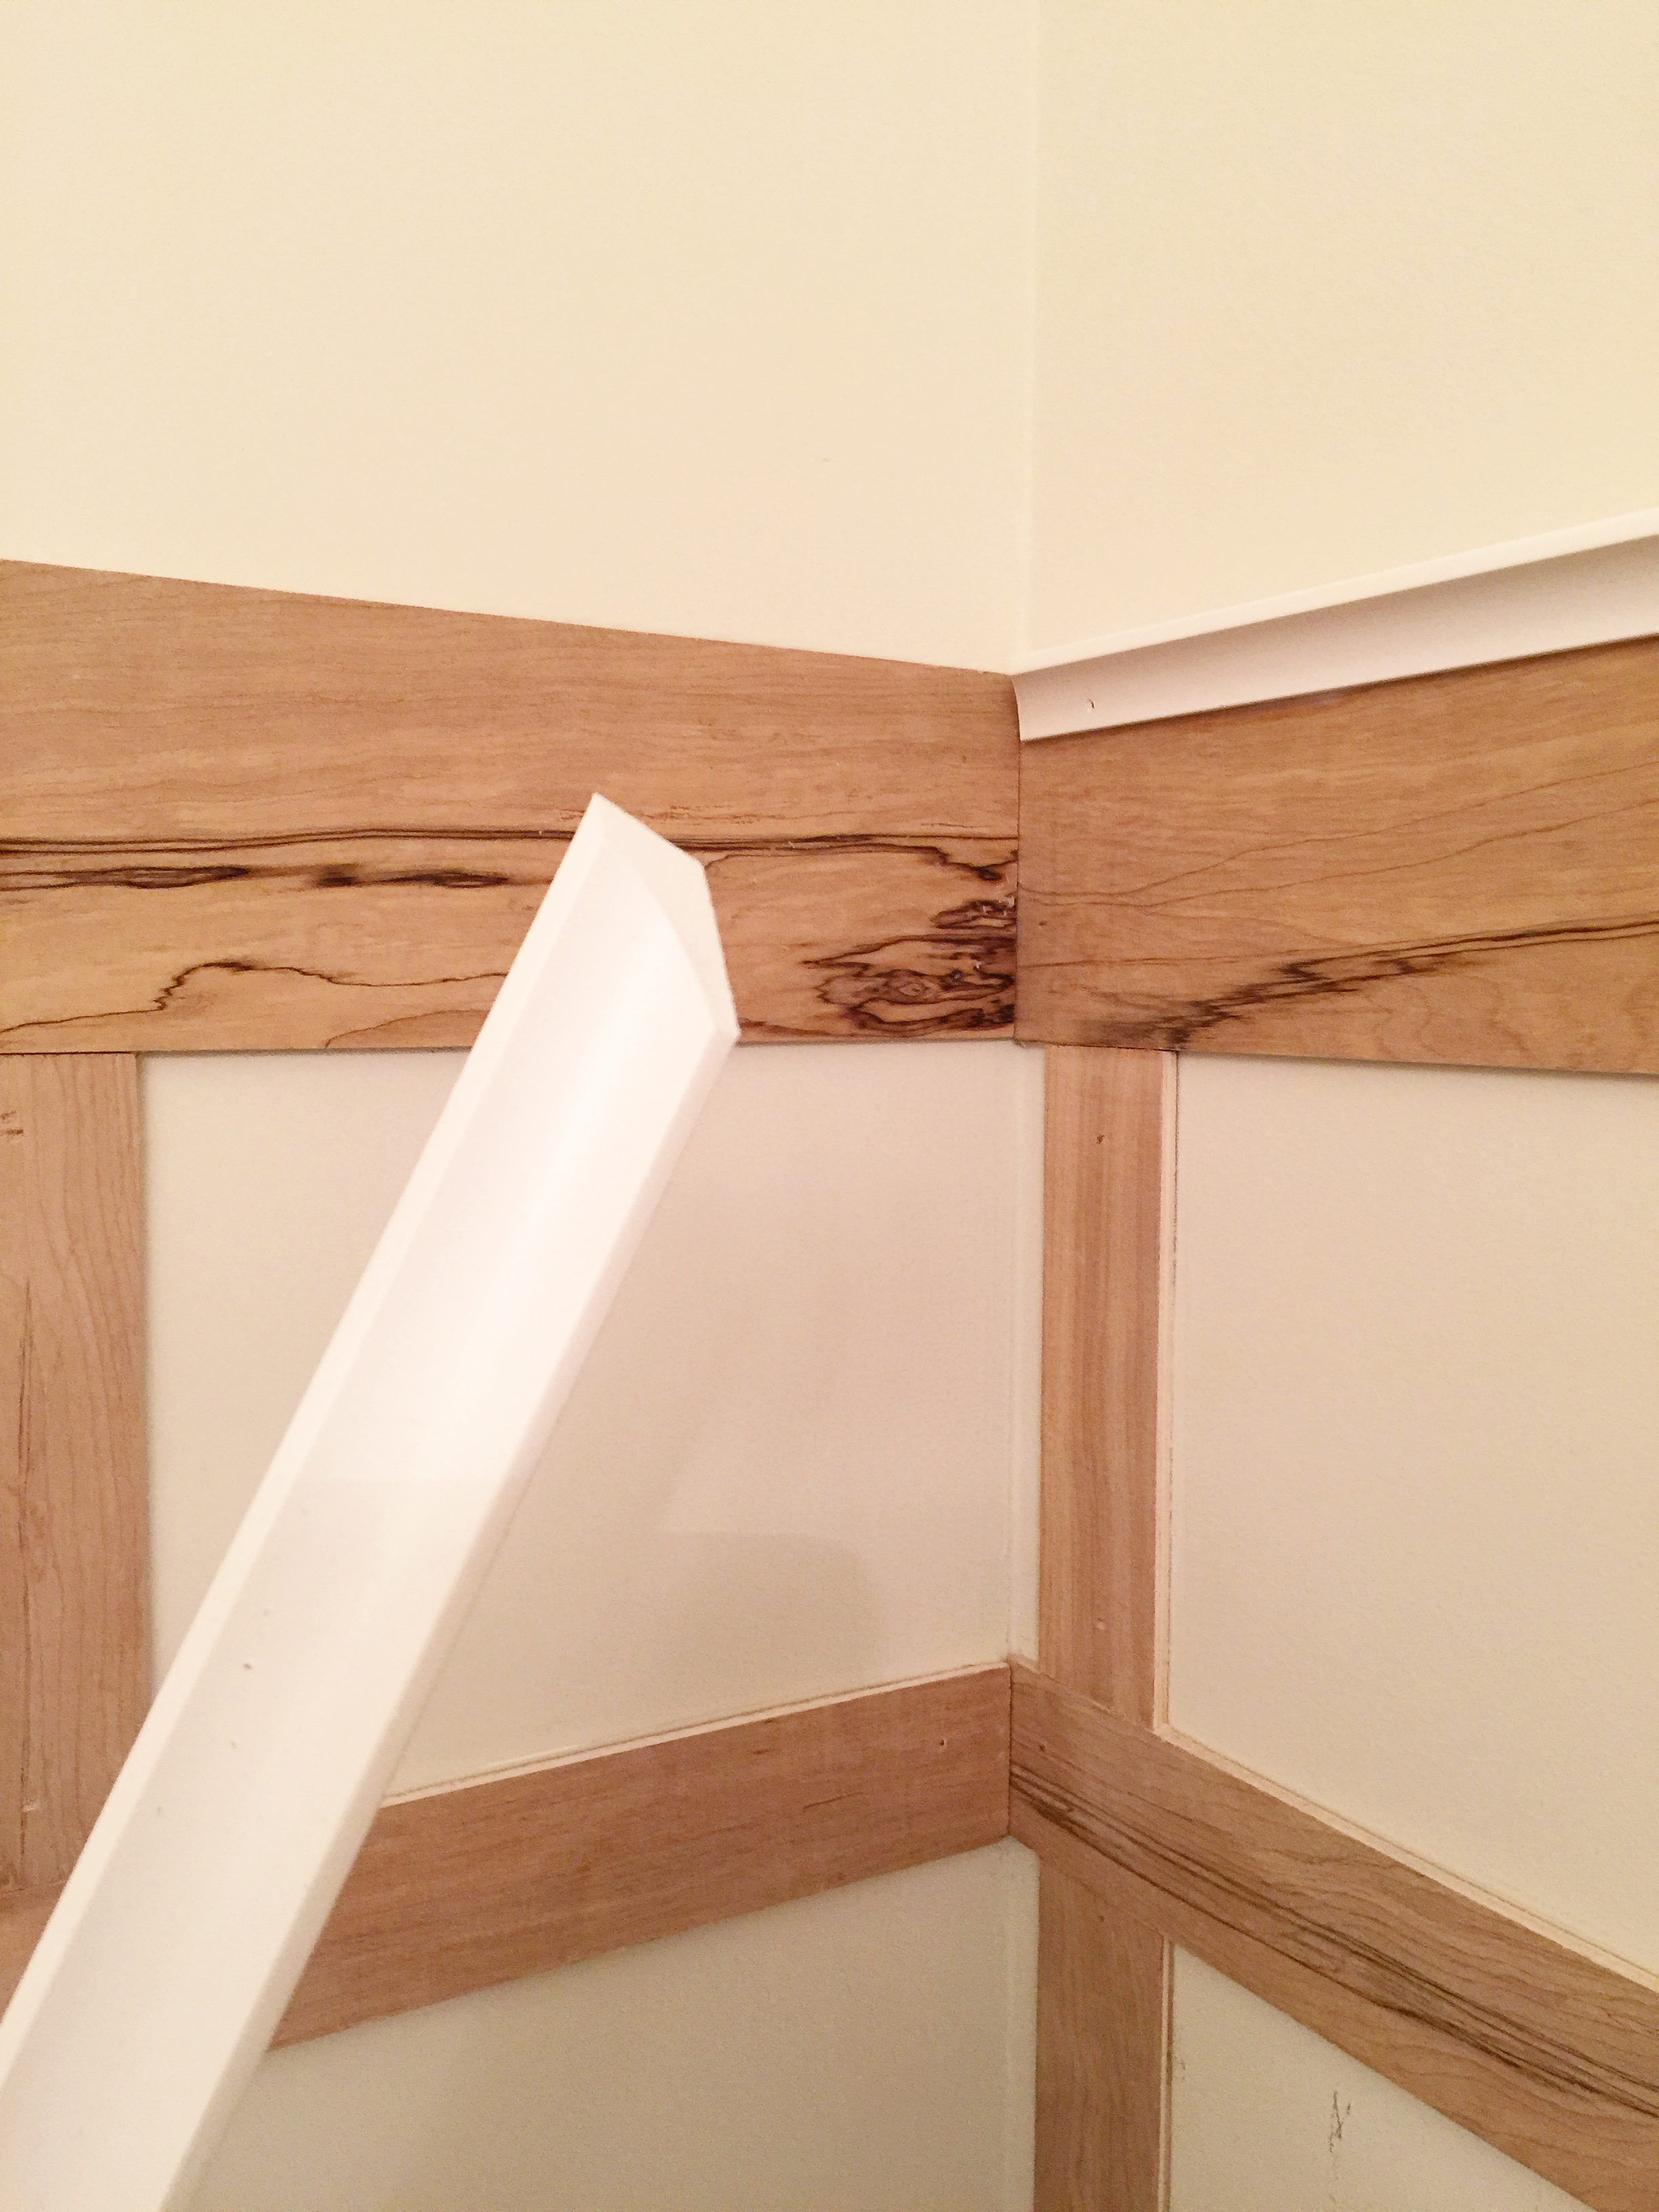
Then came time to make the top ledge. We used two different boards for this – cove molding and then a 1×2″. The cove molding is cut to length (make sure to miter those corners)…

And installed directly over the top underlayment board. Again – we used adhesive and brad nails to make sure it stuck.

The trickiest part is cutting the 1×2 because these prefinished ones have a curved edge and a sharp edge….we wanted the curved edge on the bottom when installed so that meant cutting the miter that way. It’s not complicated….


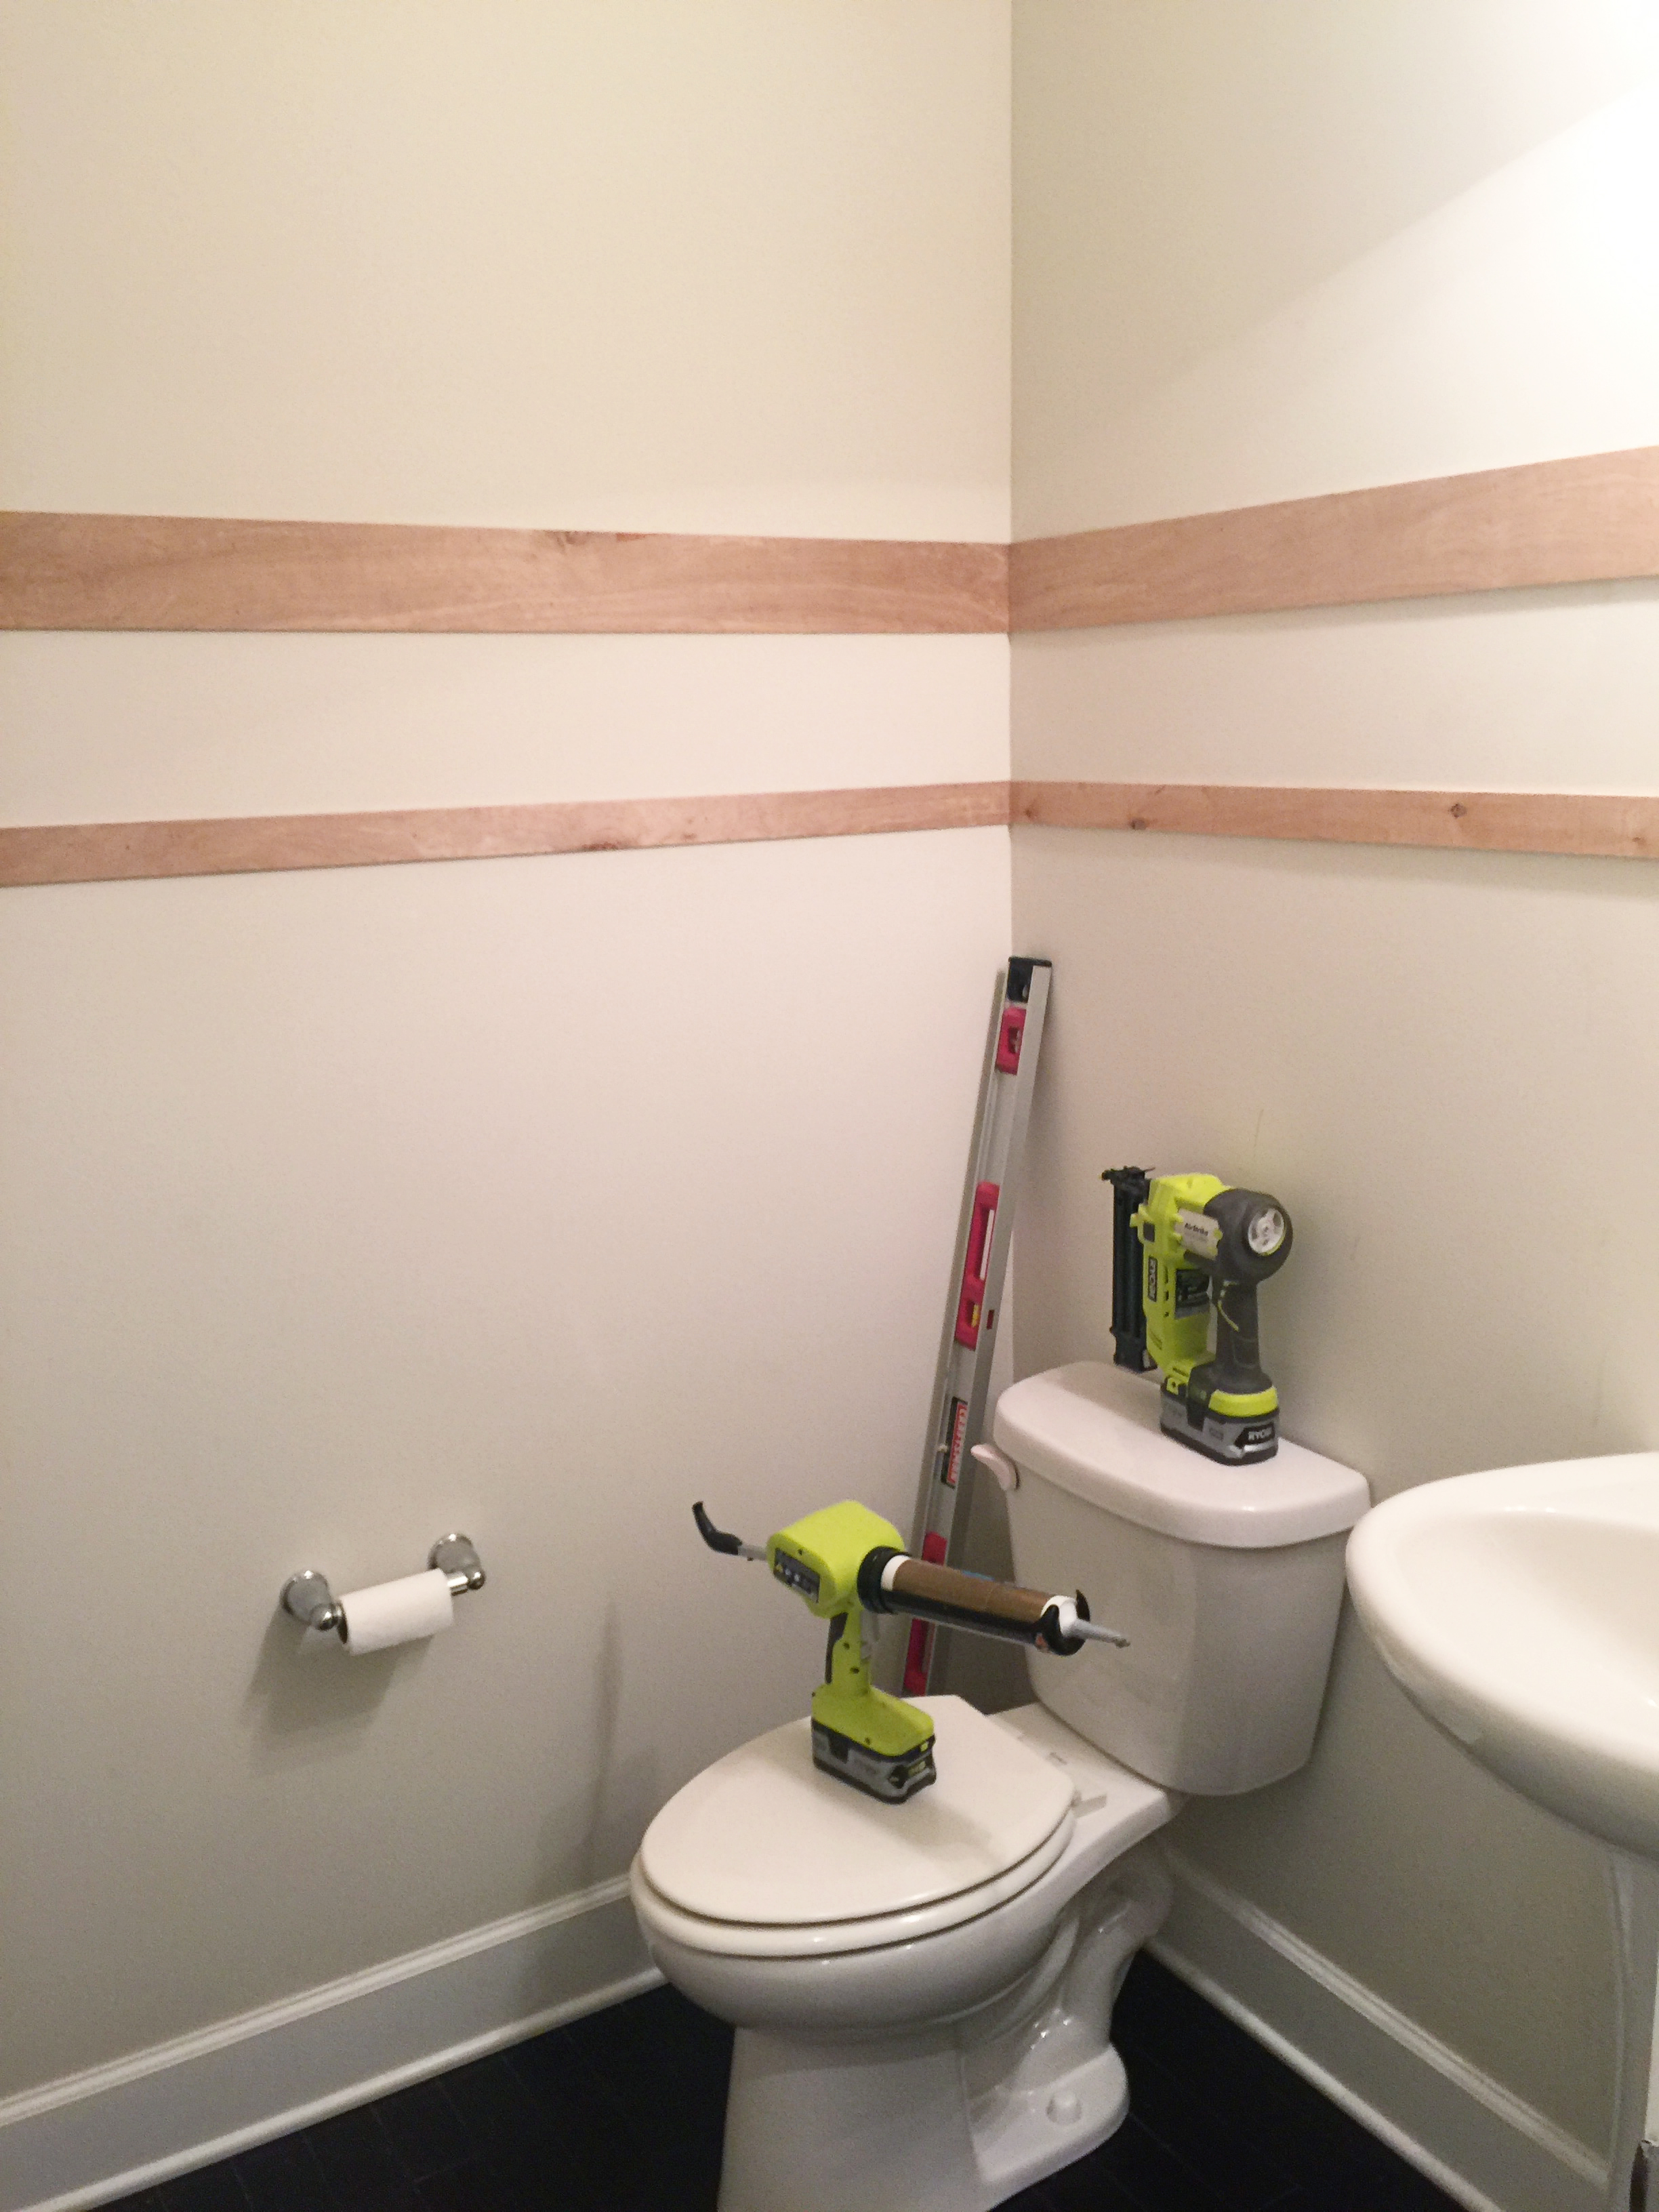
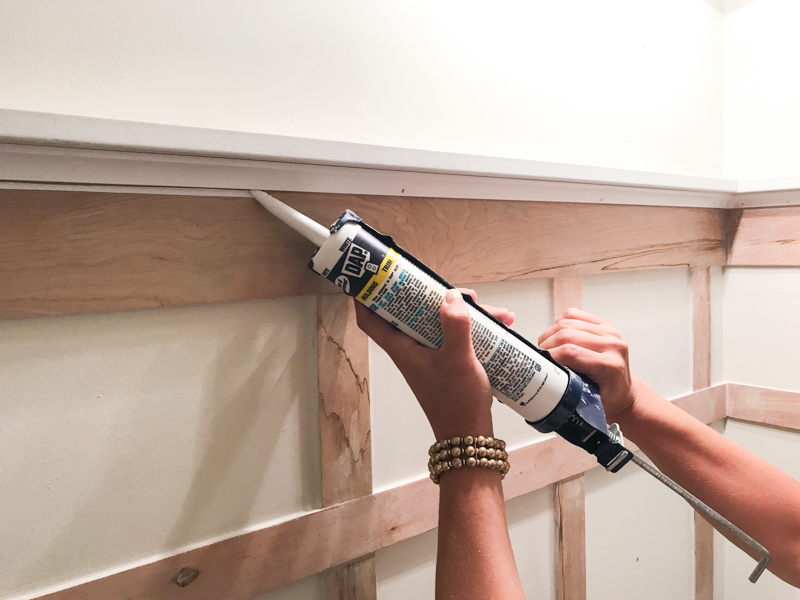
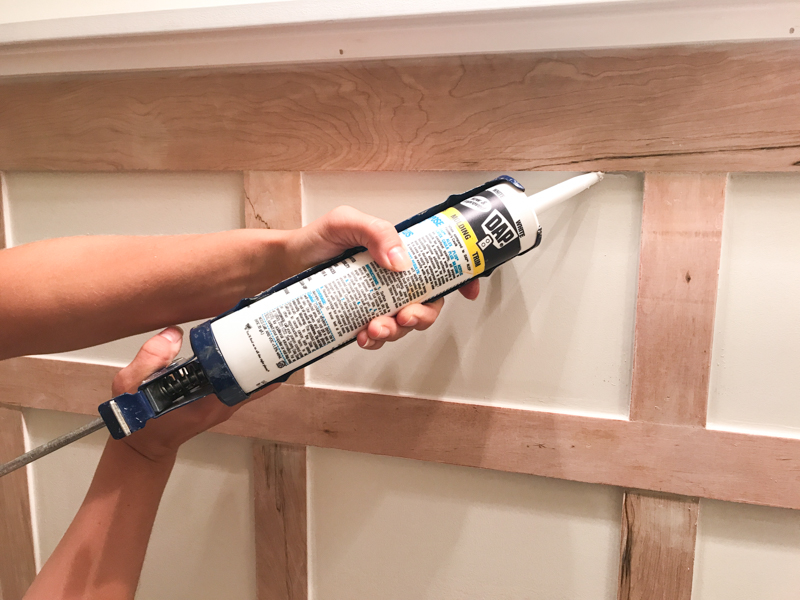
You gotta make sure to caulk everywhere the boards met the wall and met each other and where all the brad nails were.
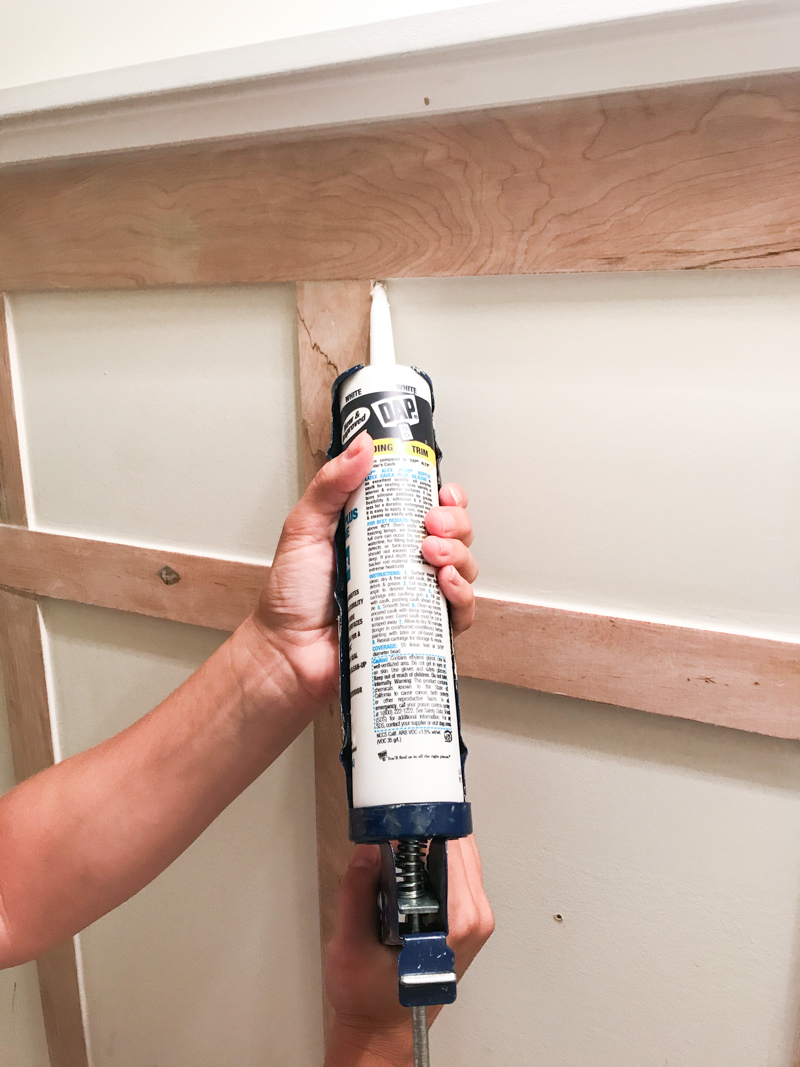

And then after all that caulking….because dude that is A LOT OF CAULKING….she painted it the same white color as the rest of her house trim.

Overall – this project was VERY affordable. Here is the budget breakdown if you didn’t have all the supplies (it cost us a little less because we already had the paint and adhesive)….
- (1) underfloor layment – 4’x8′ – $16.93
- (4) cove molding – 3/4″x 3/4″ x 8′ – $5.12 ($20.48)
- (4) 1×2’s – 1″x 2″ x 8′ – $2.98 ($11.92)
- (1) DAP molding and trim caulk – $2.28
- (1) quart white semi gloss paint – $10
- (2) DAP Dynagrip Heavy duty adhesive – $4.48 each
So for a grand total – $70.57

And the finished result is BEAUTIFUL! Now granted, this project might cost a little more if you have textured walls (it’s not a super popular thing here in Georgia) so we don’t, but if you do, just buy more pieces of underfloor layment and attach those to the wall first before attaching everything else….and make sure your seams are going to end up under your vertical pieces
And for more info, you can thank my sister for this very detailed drawing of all the measurements

Happy DIYing y’all! And if you tackle this in your own space, I’d love to see a picture! Just tag me @bowerpowerblog on Insta!
The post Affordable Board & Batton appeared first on Bower Power.