
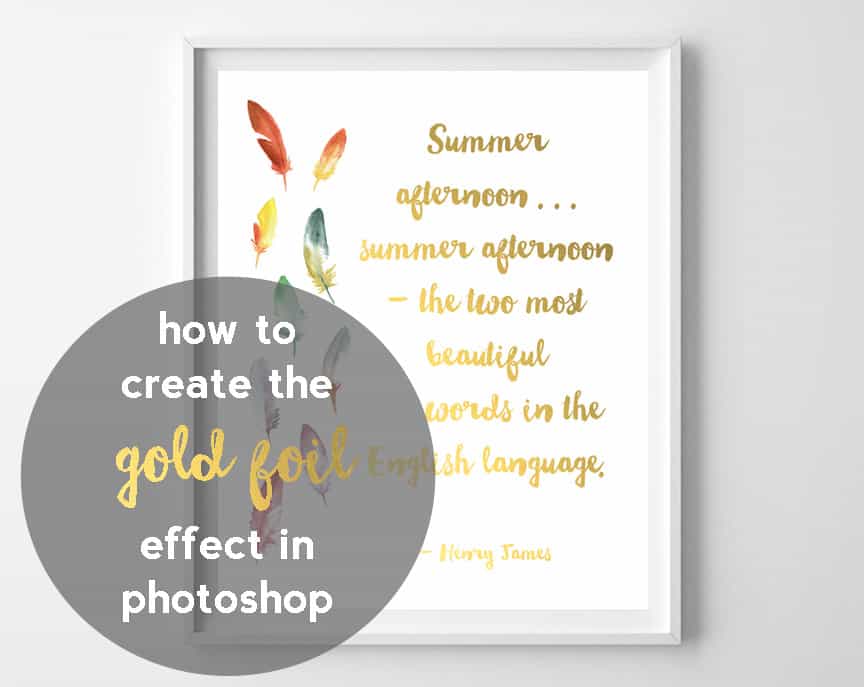
how to create a gold foil effect {a tutorial}

If I had to choose the one question I get asked the most, in regards to my blog/Etsy shop, it’s this: “how do you get that faux gold effect in your prints/graphics?”
Honestly, it’s easy, so today, I’m sharing with you how to create a faux gold foil effect in Photoshop!
I’m actually going to use Photoshop Elements for this, but the technique should apply no matter what version of Photoshop or Elements you have.
To do this, you’ll need gold foil digital paper, Photoshop, and some text that you would like to add the foil effect to. Let’s get started!
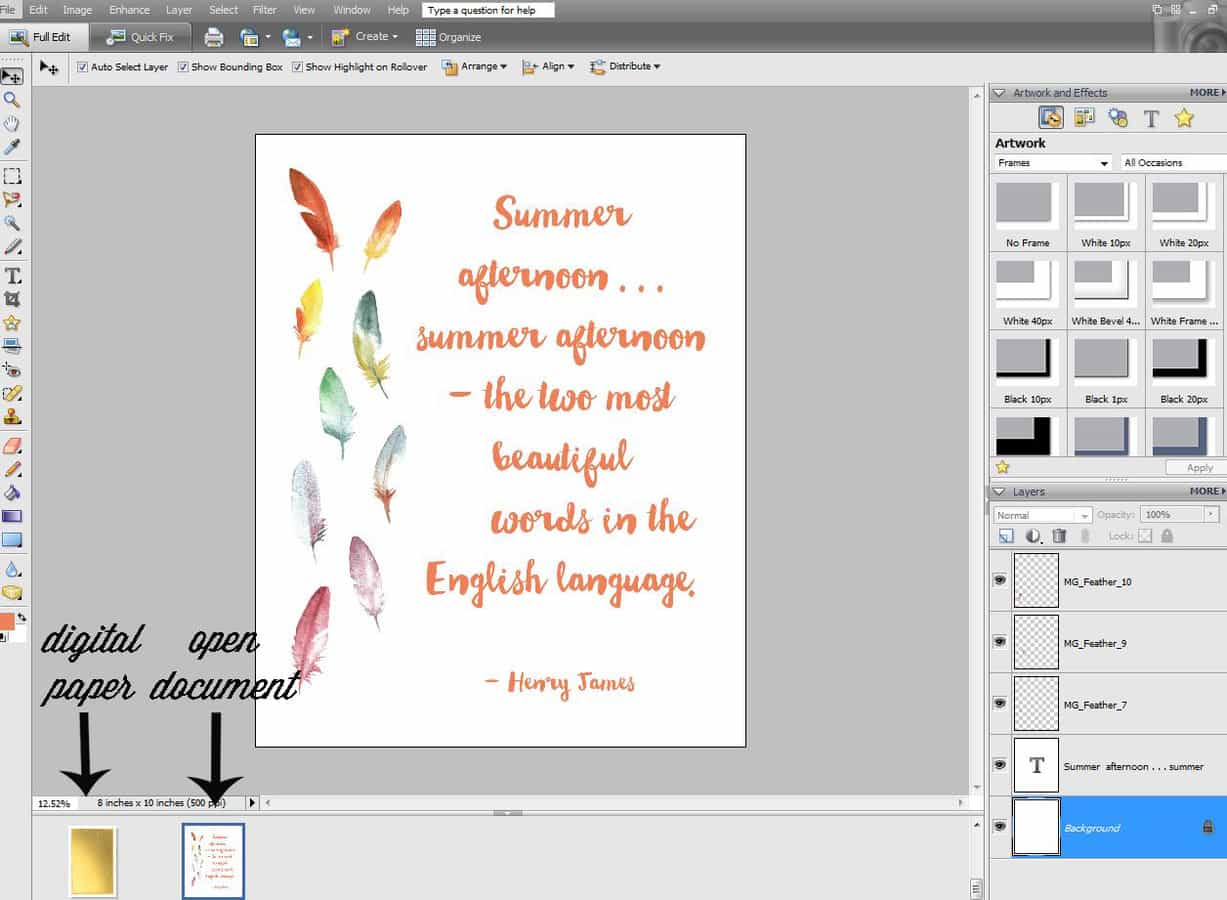
In Photoshop, open your gold foil digital paper, and create the text you’d like to foil. Here’s a screenshot of Elements program…


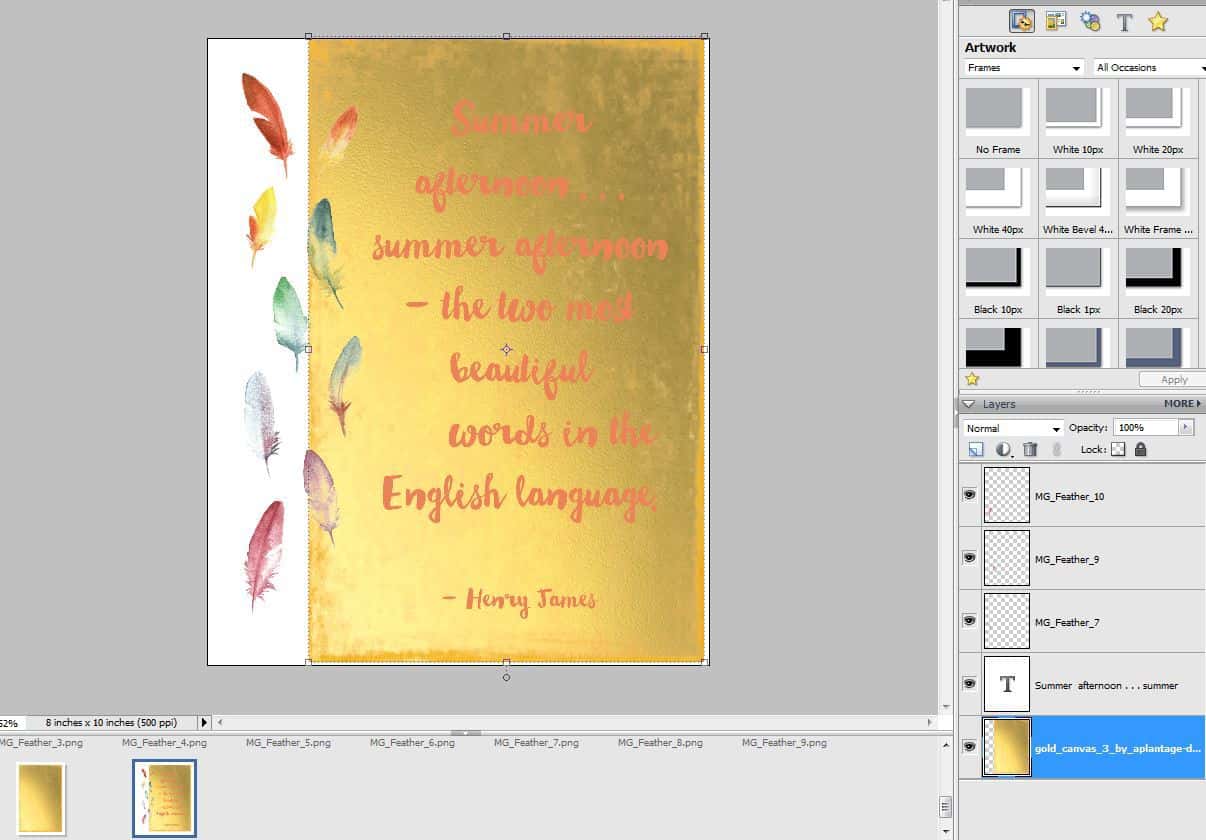
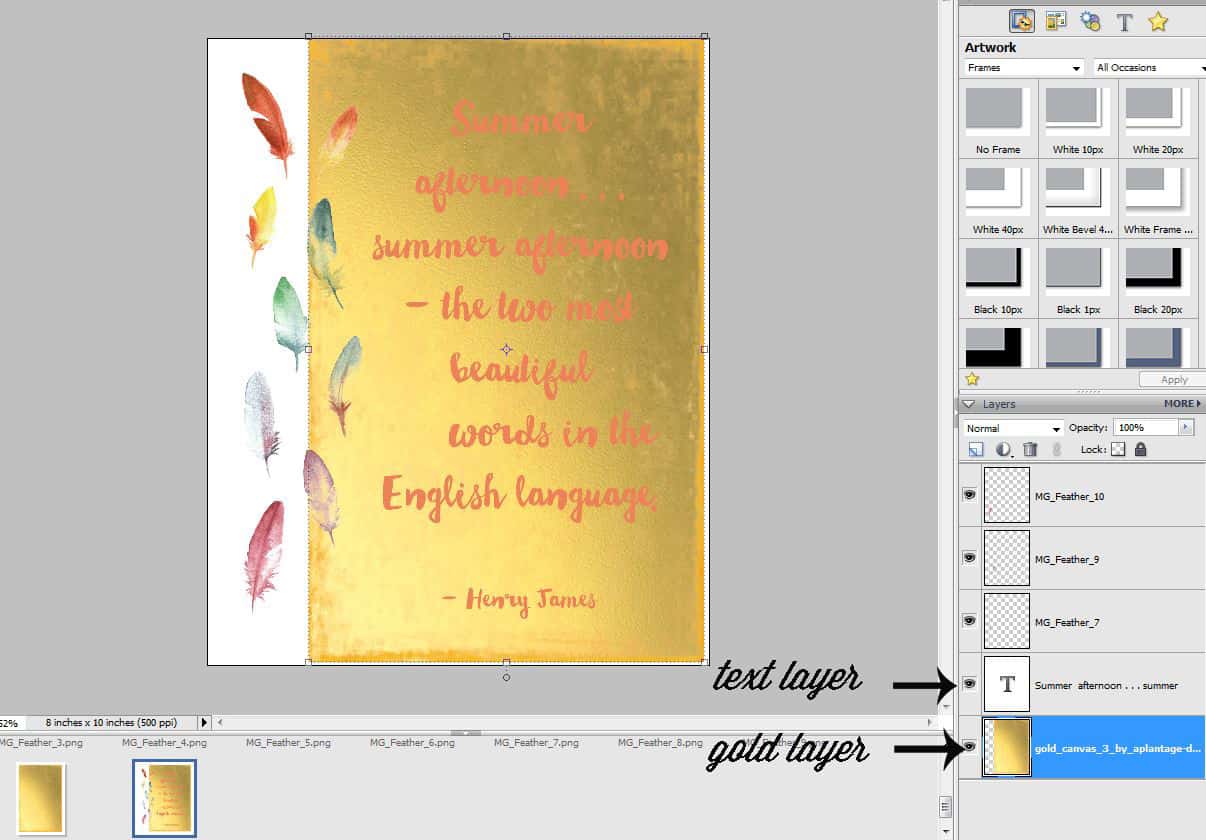
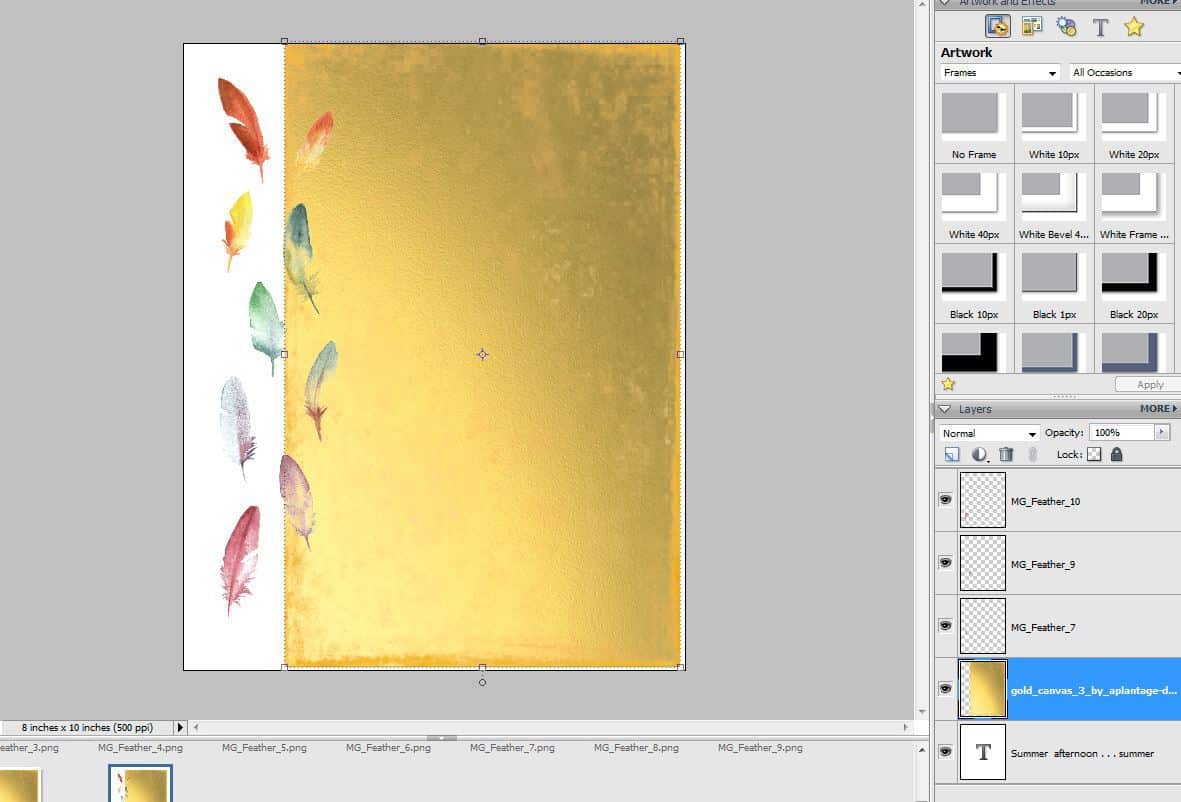
Make sure your gold foil is covering your words completely.
Now, you’ll want to pay attention to the order of your layers. Take a look below at the two layers. Notice how the text layer is above the gold foil layer (which is why you can see the words). Now, switch them. Drag the gold layer so that it’s above the text layer…

Like so…
Notice that the gold layer is above the text layer (which is why you can no longer see the text, just the foil).

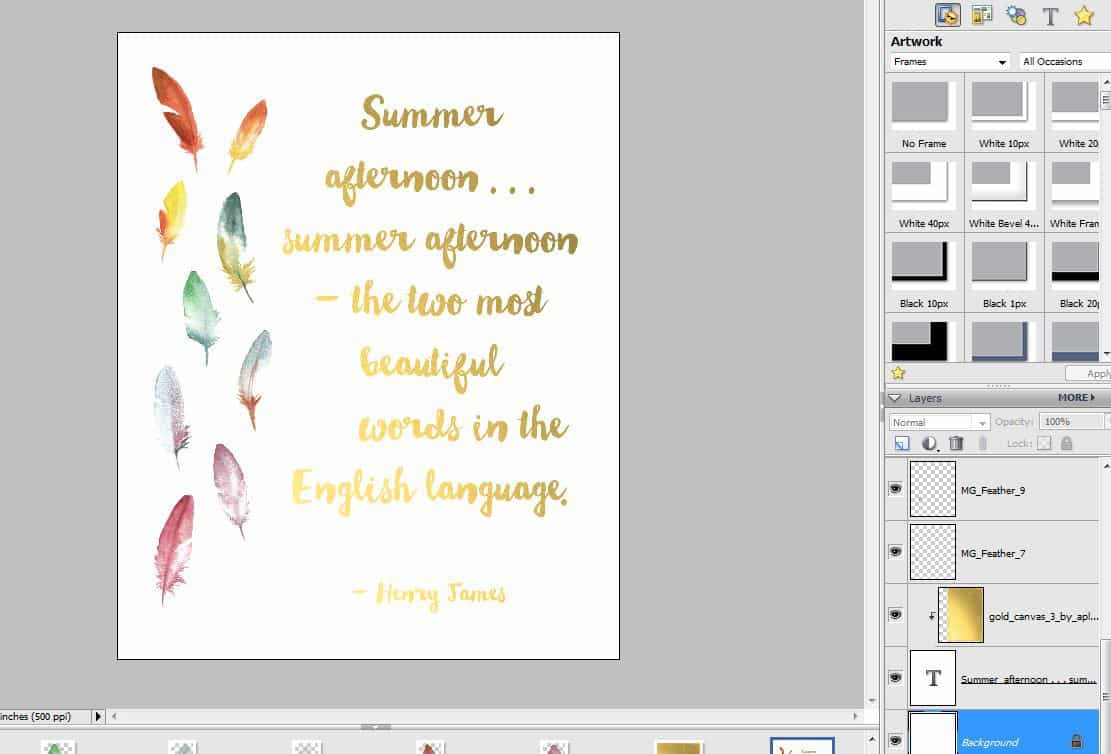
Now, it’s just a matter of combining them.
It’s easier to tell you than to show you this step. What you’ll want to do is hold down the ALT key with your left hand, and take your mouse and place it in between the gold layer and the text layer.


And you’re done! I can’t promise this’ll work for every version of Photoshop out there, but hopefully it’ll work for you and you’ll be able to add a bit of glam to your own graphics and prints.
Thanks for reading!


