
Kitchen painting, by way of attic insulation
It took 2 years and 8 months of living with a disgusting kitchen color to finally DO SOMETHING ABOUT IT.
You never saw proper photos of our kitchen before, because I was embarrassed over the paint color. I would literally apologize to new guests about it. Wait, you saw me stand against one of the walls when I posted my Emery dress a year ago, and I even apologized for the color in that post! I filled it with cute vintage kitchen items and I still was too embarrassed to photograph it.
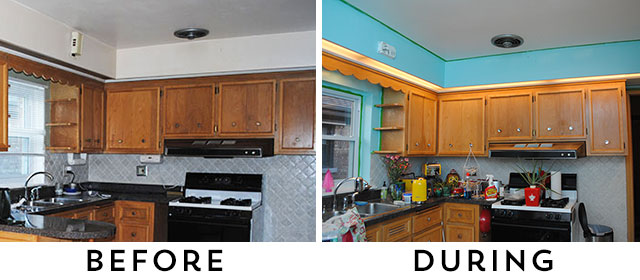
You can see the gross green that we let ourselves live with for nearly three years, in a photo I shared in my first kitchen post. Trust me, it was more green and more drab in person. And while you can’t really tell, the beige on the soffit and below the chair rail has a pink undertone. Gray green and pink beige, which both made the grayish back splash look even more drab. It was a one-two punch of blah.

The previous owner was a nice elderly woman who raised two kids in this house, but she certainly didn’t have my taste in paint color and finish. Every single room in the house was semi-gloss. Every. room. And every color was ugly. It all seemed to have either a grayish or pinkish undertone, too. Unless it was actually painted pink, which one bedroom and the hallway were.
We were lazy farts and did nothing about the kitchen color for nearly three years. For a long time I even refused to put anything up on the walls, figuring it would spur us on to paint. I don’t know why, but it didn’t. Lazy farts, like I said. Really, we have no excuse, especially considering how much we loathed that color.
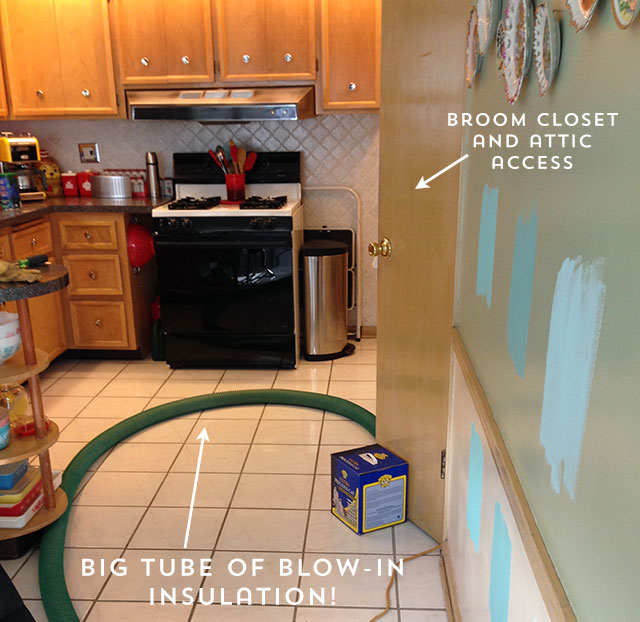
Then my dad came in December to help blow in a massive amount of cellulose insulation into the attic. Since you access the attic through the broom closet in the kitchen, and we were making a mess anyway, to me it seemed like the perfect time to buckle down and paint!

Blowing in cellulose insulation isn’t that big of a deal as we all learned, nor was it actually that messy inside the house, until the point that my insulation-covered dad had to get back down out of the attic into the kitchen.
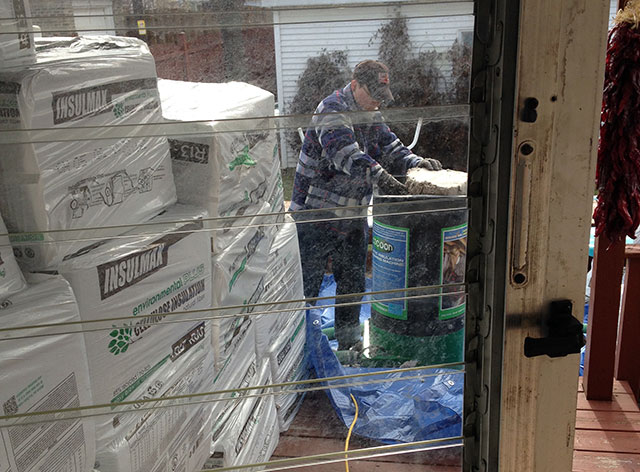
And it was plenty messy out on the deck, where Mel had the labor-intensive job of adding the insulation to the hopper. The tube from the hopper just came into the house via the back door, straight through the kitchen and up into the attic via the broom closet. We locked our cat Dinah in another room during all this, and our dog Pia mostly hovered around me wondering what all the noise and ordeal was.


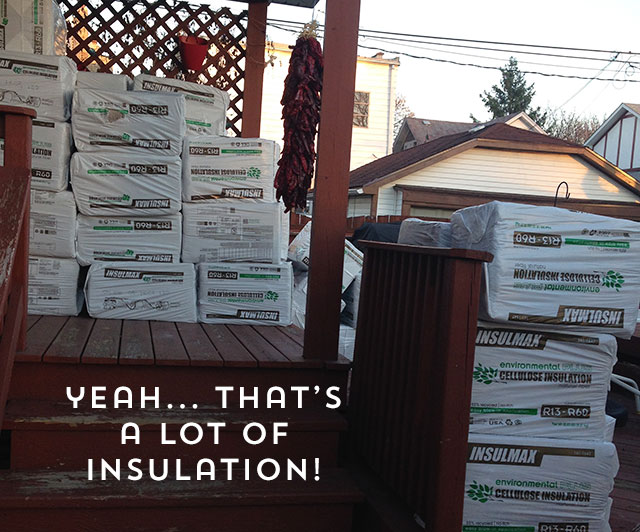
Beforehand, my dad did all the research, including recommended level of insulation for our climate. All said and done, we brought our attic up to around R60 (which will probably only mean something to you if you’ve ever had insulation put in). It’s a far cry from the piddly amount of insulation that was up there before, which wasn’t even a few inches deep. Now it’s something like 15″ deep or so.
Want to know what that much insulation looks like piled up on our deck?

I had the easiest job—I was working during the day, but just had to occasionally turn back on breakers after they tripped them, until we finally put my dad’s 500 watt halogen work lamp on a different breaker, and put the insulation hopper on the 20-amp breaker for the washing machine. So there were a few phone calls between my dad up in the attic and me telling him the status of things. I think in total it all only took about 4 hours. And we should see a nice improvement in the heating and cooling costs as a result!
While we were planning the details on the insulation project and a few other fix-its my dad was helping out with, I made a pit stop in the paint department at Home Depot to get samples for the kitchen. And then stared and stared and flip-flopped about them for the next few days! Below is the four samples. It’s the same color above and below the chair rail, for reference. I did that because even in this bad photo, you can see the lighting is a little different above and below.

For over a decade I’ve wanted an aqua painted kitchen with red accessories. I made many of the red accessories (and a few aqua) happen back in our condo, but we never painted the kitchen there because it was a galley style and had so little actual wall space that it just never felt like it was worth bothering! So I knew from the second we bought the house that this would be my aqua kitchen! (Um, nearly three years later.)
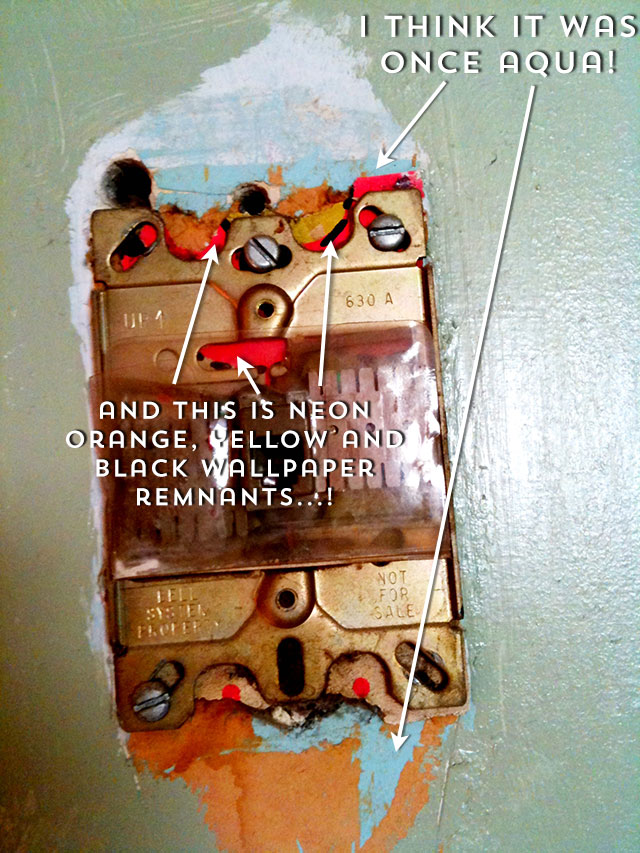
The fun thing is that I’m pretty sure our kitchen was aqua at some point in its life! Under a phone jack in the kitchen, we found some insanely psychedelic wallpaper remnants and behind that, aqua paint. Who knows when it was from!

I had a really hard time selecting just the right paint color. Our house, much as I love it, is kind of a dark little box that doesn’t get a lot of natural light in most rooms. The eat-in dining area has a south-facing picture window that’s great during the day if it’s sunny, but the lighting in the kitchen is fluorescent lights recessed in the soffit, so nighttime lighting isn’t very becoming. I knew if we went too dark it would shrink the space, plus we’d run the risk of the paint on the soffit looking darker than the rest of the room when the lights were on, which I thought would look weird.
So I waffled and waffled, and walked around carrying aqua things in my hand, comparing it to paint samples. Seriously, I really did!

What we ended up selecting was a color called Aqua Spray by Behr. And by “we” I mean me, because my dad and Mel both left the final say to me. There was even a phone call to my mom who of course couldn’t see any of this, but that didn’t stop me from asking her opinion. Her reminder not to go too dark kept me from picking the color that was technically the best aqua match, instead picking a shade a touch lighter.
I should mention here that it’s not like we needed my dad in town to paint. I really just wanted his help to move the fridge since he was going to be there anyway, and I was at the “I HAVE HAD ENOUGH OF THIS GREEN!” breaking point, anyway. But he’s far too professional to be around a painting job without patching holes, sanding and patching spots of wall you didn’t even notice were lumpy or cracked, and helping out with everything.
Here he is below, working on the tiny back door foyer. The door you see a bit of is the back door—to its left is the door to the den, and opposite of the back door is the door to the basement. Like I said, tiny foyer.
Feel free to laugh at the amount of crap piled on our poor dinette table during all of this. Also, this gives you a much better idea of what that green looked like when it wasn’t bright daylight.

With three of us working, painting went lickety split. I practically did a dance when we covered the last disgusting spot of green! Because as soon as we started painting it, I knew I absolutely picked the right color, even after only the first coat!

When Mel and I paint, Mel rolls and I’m the one who cuts in. We kept to that routine, and my dad some of both. Here’s my only painting tip: if you’re like me and wear vintage specs, don’t paint in them, no matter how much you’re tempted. I never do it because carved and sometimes rhinestone-filled frames do not play well with paint.

The painting went swimmingly. How much better does that soffit look already, below?! The side-by-side comparison still impresses me, even with all the crap out on the counters while we painted.

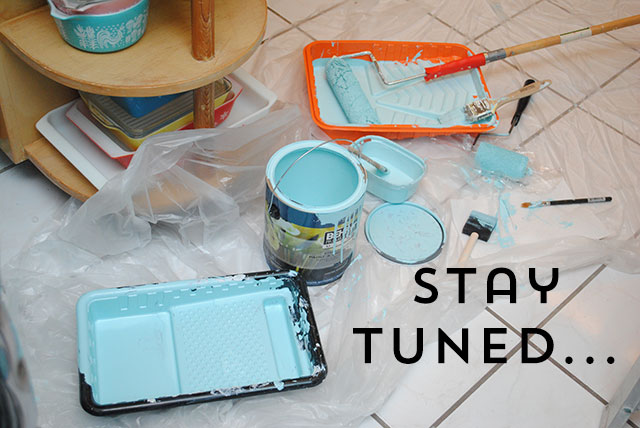
I’m going to save the paint reveal for next week, where you’ll get a full look at our little kitchen. Suffice it to say that one small paint job and a few new blinds has been a HUGE improvement!
