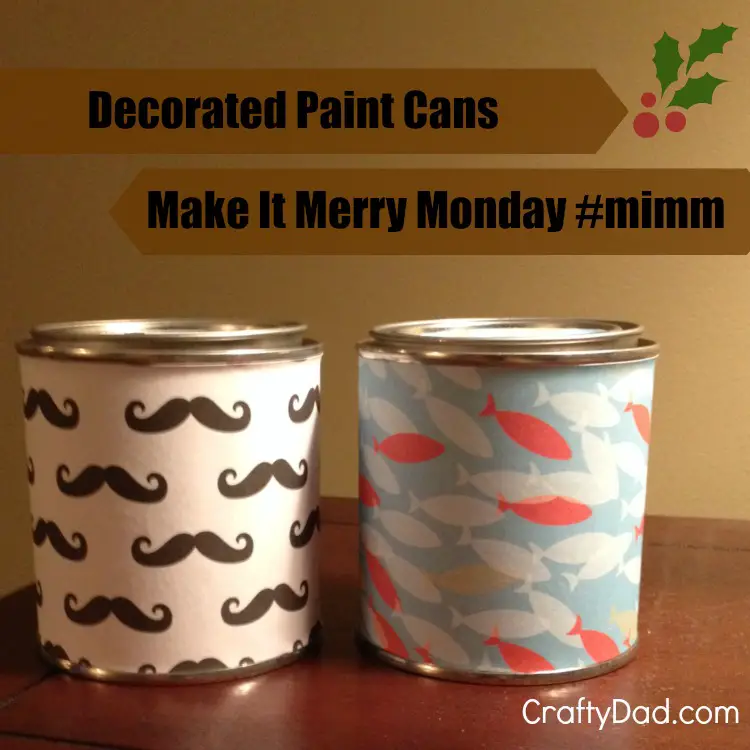
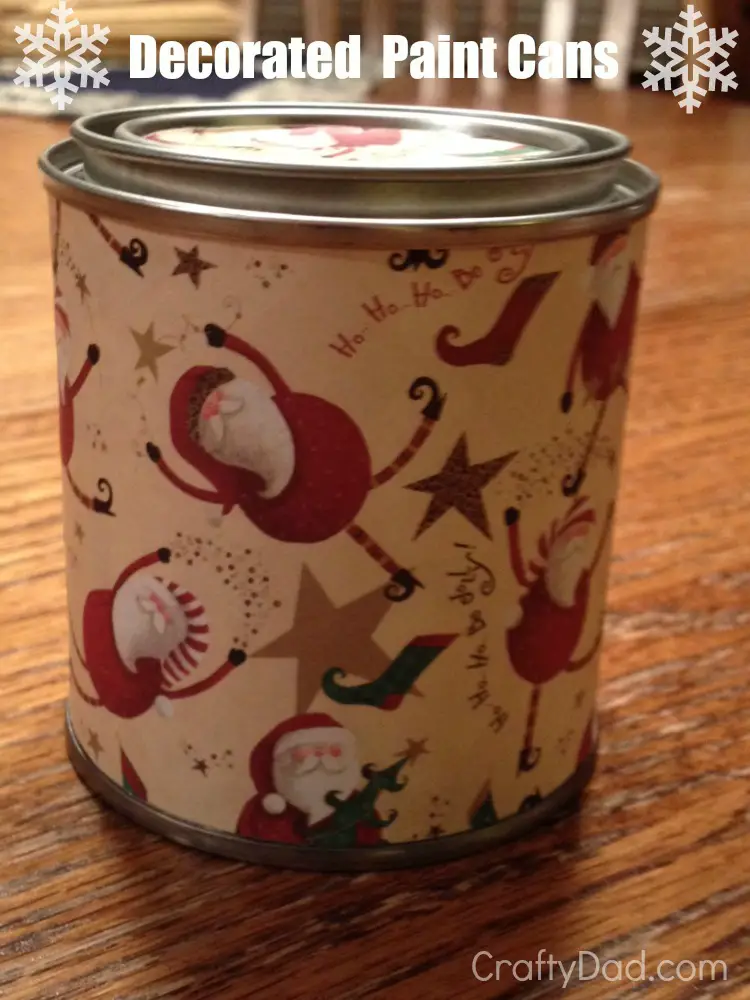
Make It Merry Monday – Project One – Decorated Paint Cans

Welcome to Week No. 1 of Make It Merry Monday
You’re welcome to craft-along as we spend each Monday for the next five Mondays making a kid-friendly craft. Each project will be Holiday-themed, but use your imagination — you can apply these for pretty much ANY season or occasion.
Today we’re going to transform a metal, half-pint paint can into something special.
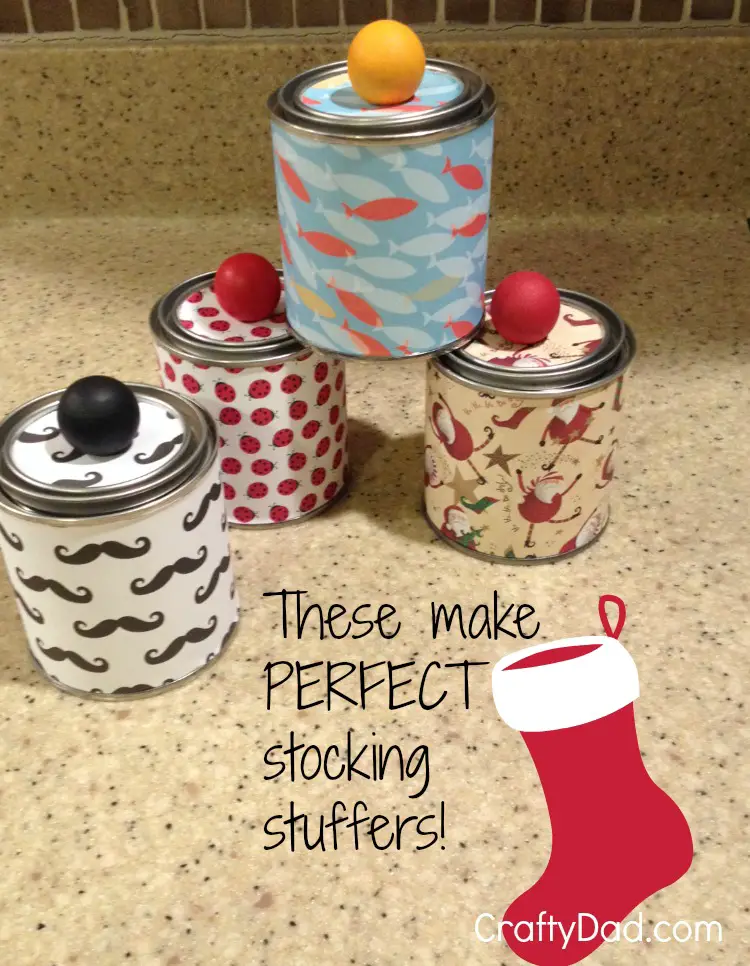
These would be perfect for stocking stuffers! You can tuck in a $20 bill and make Christmas a very joyous day for someone!
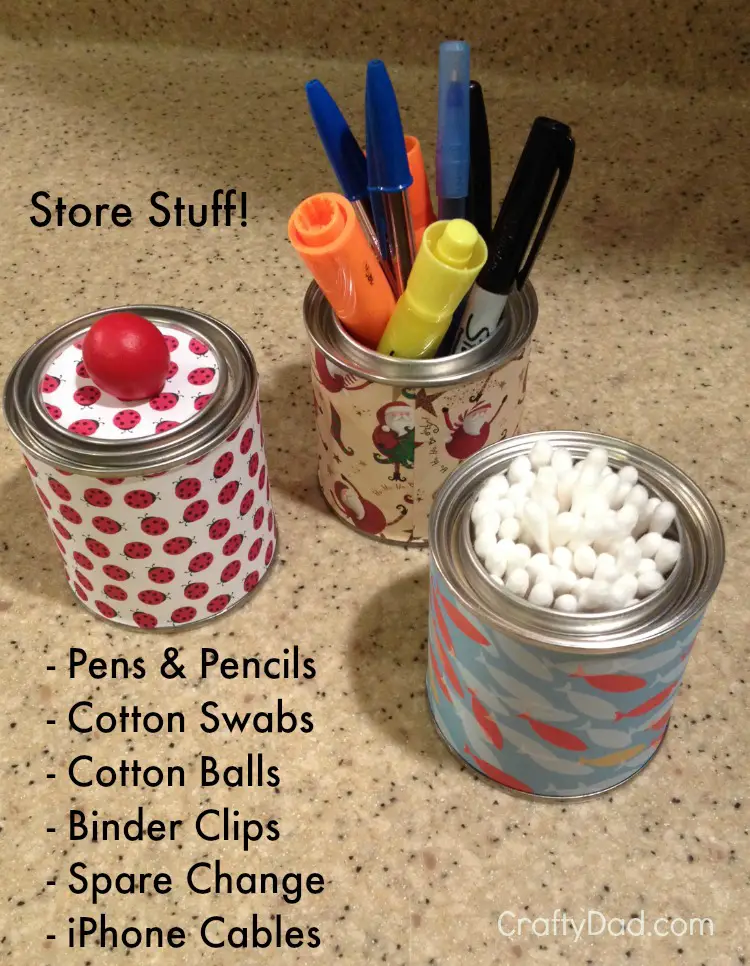
Once the Holidays are over, these decorated cans can be used for all sorts of things:
- a pencil cup
- spare change storage
- a place to keep paper clips or small binder clips
- a great storage container for ear-buds or your iPhone charger (do you misplace yours as much as I do?)
- you can put cotton swabs or cotton balls in them

Let’s Make Some Decorated Paint Cans!
I’ll start this project by saying that you should be able to find all the materials you’ll need at your local arts and crafts store. If you have trouble finding the paint cans (or don’t want to buy a case of them like I did — and spent over $70!) then send me an email and I’ll send you a PayPal invoice for a kit. I have several cans left and I’m offering ‘kits’ if you’re interested.
The ” project kit” includes FIVE half-pint cans and (pre-drilled) lids; FIVE wooden knobs for the top, and FIVE screws to attach the knob to the paint can’s lid. I’ll send you enough materials to make FIVE cans for $18.00 (Priority Mail shipping included )to U.S. destinations only)). (Doing the math, that’s just $3.60 for each can!) Remember: if you choose to buy a project kit, I’ll even drill the hole in the lid for you. This will save you time and perhaps some aggravation. (You’re welcome.) : )The What
- 1 half-pint paint can (and lid)
- 1 12×12 inch piece of scrapbook paper (your choice of color or pattern)
- 1 one-inch wooden doll head (for the knob on top of the paint can lid)
- small foam paint brush
- a paper cutter
- A circle-cutting machine (Cricut, or an EK Tools Circle Punch, 2-Inch


The How (I know — there are lots of steps, but this goes really fast. And you’ll be a pro in just a few minutes!)
- If you purchased your half-pint cans from U-Line like I did, then you’ll need to cut a piece of scrapbook paper measuring 2-3/4 inches x 9 inches. Use a scrap piece of paper before you cut into your fancy paper. (You know the rule: “measure twice, cut once”.)
- If the 2-3/4 x 9 inch size works for you, then you’ll automatically have a 2-3/4 x 3 inch piece of paper that you can use for the lid of the paint can. Sweet, huh?
- I used my Cricut

Step back and admire your work. But not for long! There are tons of scrapbook paper choices out there. You’ll want to make one of these for all the kids on your Holiday List!
Not only can you make these for the Holidays, but you could make them for party favor containers — birthdays, bridal and baby showers, Valentine party cans, Easter treats, Halloween favors, etc.


(Disclaimer: This post contains affiliate links. If you click on an affiliate link and purchase a product, I receive a commission.)
The post Make It Merry Monday – Project One – Decorated Paint Cans appeared first on Crafty Dad.