
DIY Wood Burned Picture Frame

I've been wanting to try wood burning for the longest time. Every so often, I like to try new crafting methods to see what I can make, and this one was at the top of my to-do list. This month, Michael's challenged us to make a handmade gift for a friend or family member, so I took that as a sign that I needed a wood burner stat, so I picked up a wood picture frame and wood burner and sat down to make something (hopefully) awesome for my parents.
As someone who hasn't drawn anything more than a stick figure since high school, I was a little intimidated by the thought of permanently burning something into a piece of wood that my parents would have to look at forever (or at least when we visit and they have to dig it out of the closet.) After trying out a few simple designs on a piece of scrap wood though, I was hooked. It was way easier than I expected and the result was a really fun chevron-burned frame that I know my parents will love!

Moral of the story? If you're scared of wood burning, don't be. I can barely draw a stick figure, but I still managed to make this awesome frame without burning a finger - and that in itself is a Christmas miracle.
So let's make a wood burned frame!

SUPPLIES: a wood burning tool, unfinished wooden picture frame, photo, wood stain or paint (I used watered down acrylic paint by Martha Stewart), pencil, ruler, scrap wood -optional but highly recommended if you've never tried wood burning before, sealant.

If you've never tried wood burning, I recommend getting a piece of scrap wood and practicing first instead of jumping in and hoping for the best. You'll learn that different woods burn differently, and you can change the look and texture of the lines by bearing down on the wood burning pen differently. Practice until you're comfortable!

ONE: for a similar chevron design like I did, use your pencil and ruler to draw lines on your frame. I didn't make them symmetrical. I was going for a rough, sketchy look.

TWO: following the directions on your wood burning pen, heat it up and use a steady hand to trace over your drawn lines.
THREE: after your main lines are burned, draw chevron lines with your pencil and ruler


FIVE: stain with wood stain or, as I did, water down some paint and paint on with a paintbrush. Let dry.


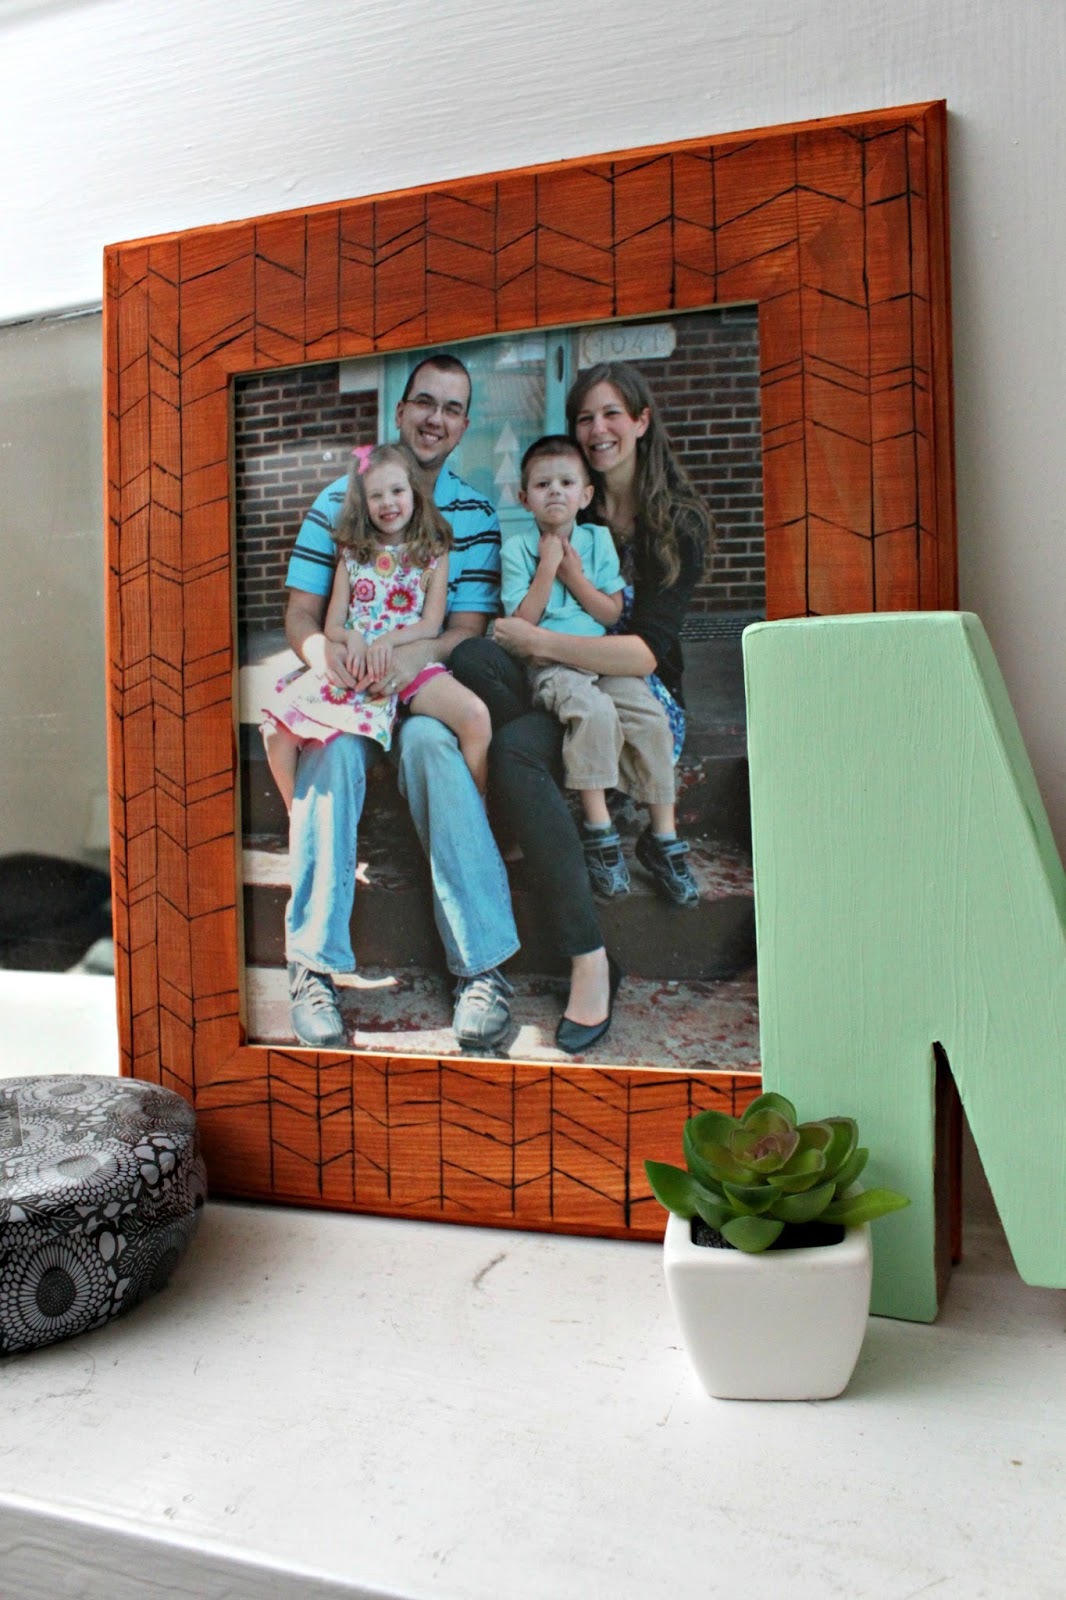
After my frame was finished, I went to Target and had an 8x10 of my family printed up and put it in the frame. I can't get over Connor's face...the kid does NOT like having his picture taken! We actually had to have a pep talk about smiling for his school pictures this year, not that it helped any.

For the finishing touches, I picked up some bell ornaments, wood Christmas tags, and red twine from Michael's to wrap up my handmade gift.

I wrapped it simply in kraft paper, and tied the twine around it with the ornaments attached. For a special touch, I decided to also wood burn the tag. The pack came with 12, so I'm excited to make more for the other gifts I'm wrapping.


And that's it! A beautiful handmade gift that I know will get a LOT of use at my parents' house, especially as the grand kids grow over the years.

I hope you enjoyed my handmade gift and wrapping! Check out the other amazing handmade gifts from the Michael's Makers below to get you inspired for the holidays.

More posts from Shannon