Wire Your Own Pendant Lighting - Cheap, Easy, & Fun!
Bare bones pendant lighting - the vintage style with just a cord and bulb - is SUPER trendy right now. Use an Edison bulb, and it's steampunk. Use a fancy silvered bulb or globe and it's modern/industrial chic.
Simple as these light are, though, they're still super pricey in stores. The more steampunky styles average over a hundred dollars each, which isn't too bad if you just want one, but what if you want several?
Well, never fear, crafty decorators! I AM HERE TO HELP.
So for our bedroom lights I was inspired by these beauties over on Etsy:

Mod Orange Bare Bulb Pendant, $75
Awww YEAH.
Ok, so orange wasn't going to work in our room, but I love the colored fabric cord and shiny socket. (And there are several other bright colors at the shop; hit that link up there to see.)
Trouble was, I wanted a cluster of 3 pendants for each side of the bed, and 6 pendants would total over $450. Ouch.
So after a lot of research and some super simple assembly, I was able to make two pendant bunches like this for just $115:

That's just over $19 per pendant, for those of you without a calculator handy, as opposed to $75 (or much more) for a store-bought pendant. Suh-WEET!
And that's with me splurging on the extra nice sockets, too. There are options for assembling your own that would cost as little as $12 each pendant, if not less. SERIOUSLY.
Here's what you need:
First, head over to Snake Head Vintage to drool over all the different options for cloth-covered wire and sockets. After a fair bit of research, I decided that was the best site for getting everything you need - wire, sockets, and ceiling canopies - in one place. (And no, they're not giving me anything to say that.)
You might find cheaper options if you want to piecemeal it - especially for the sockets, which I've seen for as little as $2 each - but the convenience of ordering everything in one spot won me over. Plus the cheap sockets LOOK cheap, so if your pendants are hanging at eye-level, I advise springing for the nicer ones.
Here are all the different finishes you can get for your sockets at Snake Head:

COPPER!!! AAIEEE!! (Seriously, I have to find a reason to make more pendant lights, you guys.) (For these fixtures I used brushed silver, though, in case you were wondering.)
If you're going to make a swag pendant that plugs into the wall, then you'll need a keyed socket like these. (Meaning they have a knob on the side to turn them on/off.) If you're going to hardwire your lights into the ceiling and use a wall switch, though, then get the keyless sockets. (Unless you like the look of the knobs, of course - they won't hurt anything. I just wanted mine to look more streamlined.) Both styles are about the same price; a little less than $9 each.
For the wire, you're going to want their two-wire twisted variety, which is fabric-covered and comes in a bunch of nice colors:

All of their wire is sold by the foot, so you can get the exact amount you need. (I bought 5 feet per pendant, and ended up with almost a foot extra each - but always err on the side of extra.)
If you're plugging your lamp into the wall, you'll also need - surprise! - a plug. For hard-wiring you can skip that, though.
And lastly, you'll probably want a ceiling canopy - aka, this thing:

The canopies at Snake Head come in 8 different finishes, and only cost $4.50 each. SOLD.
The pre-drilled center hole in their canopies is JUST large enough to squeeze three twisted wires through. If you plan on using more wire than that, you'll need to drill out the center to make it larger.
Ok, so you've got your materials. Now what?
The pre-drilled center hole in their canopies is JUST large enough to squeeze three twisted wires through. If you plan on using more wire than that, you'll need to drill out the center to make it larger.
Ok, so you've got your materials. Now what?

Fresh out of the package. Isn't it preeeetty?
I know assembling your own lighting is intimidating, so I'm going to walk you through it - and trust me, it's very, very simple. All you need for tools are a pair of wire snips/strippers and a screwdriver. You can do this.
Ready?
Ok, start by removing the base of your socket. For the styles like mine, that ring in the middle untwists. For cheaper sockets, the bottom just pops off.
Once the bottom of your socket is off, the metal sheath easily slides off the guts of your socket, leaving you with this:

There are two screws on the side or base of your socket. You need to attach the two strands of your wire, one to each side, as you see I've already done here.
The fabric on the wire slides up easily, so no need to cut that; just scrunch it up, strip off the plastic coating on the wire about an inch or so, bend the copper wire into a U shape, hook that over the screw, and tighten the screw down with your screwdriver. (It doesn't matter which wire you attach to which side with this style, since you'll be using a vintage-style non-polarized plug - if you use a plug at all.)
THAT'S IT.
If you're still feeling iffy, here's a handy video tutorial I found, with the relevent bits being between :50 and 2:40
He's using one of the less expensive style sockets here, which is why the bottom just pops off and the screws are on the bottom. He also adds an "underwriters knot," which I didn't use, and I honestly don't know if it's necessary or not with my style socket. It can't hurt, though, if you want to add it.
(Update: Sounds like it's a good idea to add that knot for strain relief, so do go ahead & add it!)
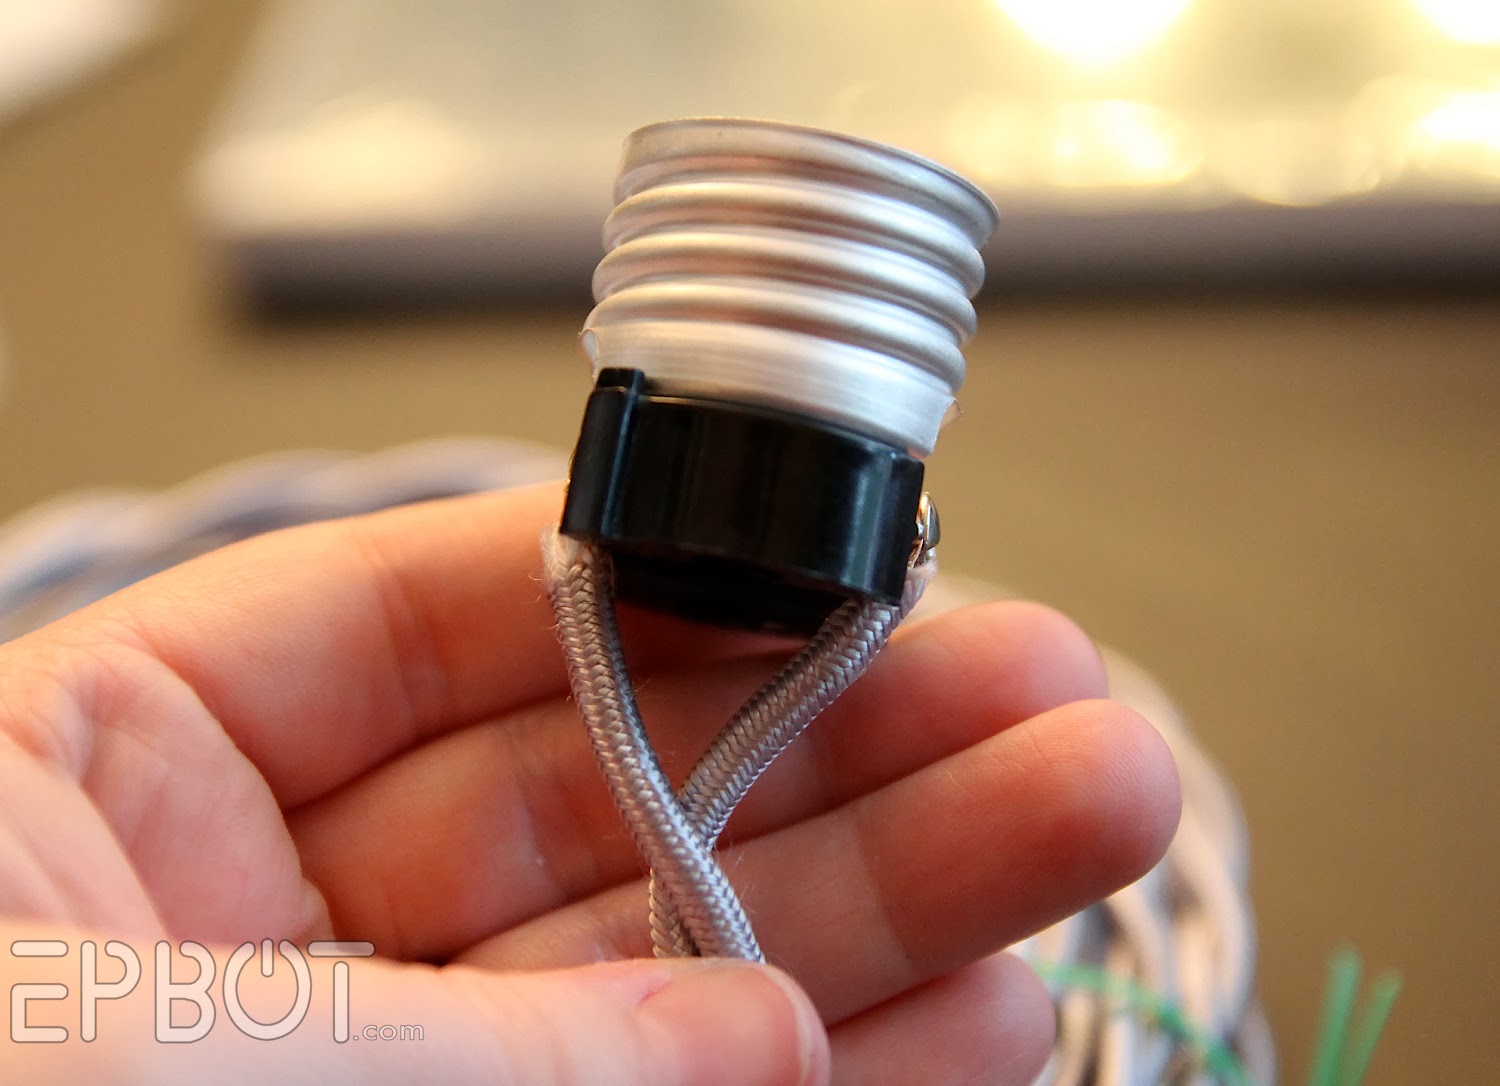
Here's another angle of my socket with the wire attached on both sides:

Oh, and learn from my mistakes: make sure you slide the bottom half of your socket cover onto the wire before you attach the socket. (How many times did I make that mistake? SO NOT TELLING.)
After the wires are attached, just slide the base of the socket back up the wire, nestling these guts inside it, and slide the top sheath back on over the top, securing the two together with the twist ring. (Or snapping them back together, if that's the style socket you're using.) Oh, and do not remove the cardboard sleeve inside - I know it looks odd up-close, but it's an essential insulator, and is never meant to be removed. If you look closely at your lamps around the house, you'll see most of them have the same sleeve - although some styles use plastic instead.
Once it's all assembled again, tighten the small screw at the base of your socket where the wire goes in; that will help hold the weight and keep the wires from twisting. Don't tighten it much unless you have a plastic guard there, though; you don't want to risk piercing your wire.

See the little screw at the top of the socket? That one.
Adding a wall plug is equally simple; the end half of that video up there includes the instructions, if you need them.
However, if you're wiring these into the ceiling - or ideally having someone else do it - then your pendant lights ARE DONE. All that's left is finding some fun bulbs!
Speaking of which, I originally planned to use silver-dipped bulbs like these:

They're only about $2.80 each over at 1,000 Bulbs, but I never got around to ordering any. The globes I have in now look pretty sweet as-is, anyway.
Oh, and we loosely looped our wires into a knot to bunch them together, but you could also get creative with hanging your pendants at different heights:

You can see the rest of our room here, if you haven't already.
Really, given all the different metal finishes and cord colors and bulb styles out there, the options are almost endless. So have fun creating your own custom pendants!
Disclaimer: I am not an electrician, and what I've shared here is almost literally the full extent of my electrical knowledge. So please have a qualified electrician install your lighting. John has installed hundreds of light fixtures over the years (he was a licensed handyman when we were painters just for that purpose), so he handled installing ours.
If you're just plugging your light in to the wall, though, you should be fine. Just don't plug your new light in and then immediately leave for a 2-week vacation or something, k? :)
If you still have questions, check out Snake Head's FAQ page, or feel free to ask in the comments below, and I'll do my best to find the answers for you.
I hope this was helpful, guys! Be sure to share pictures if and when you make some custom pendants of your own!
Oh, and here's a handy graphic for your Pinning pleasure:

More posts from