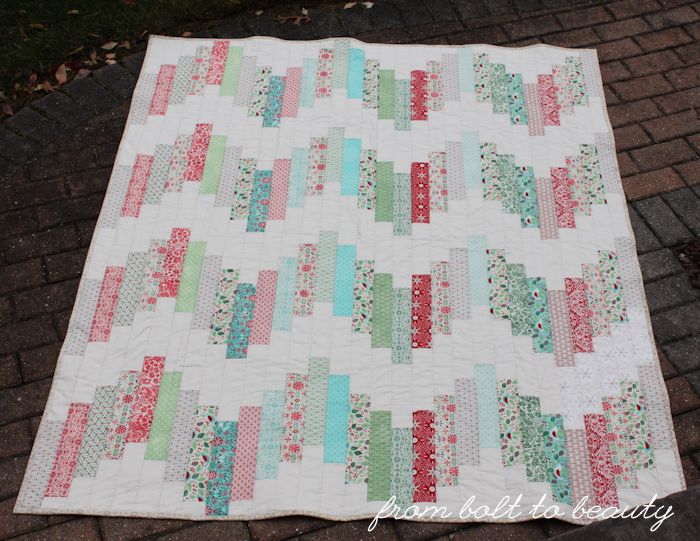
Tutorial: Ridiculously Easy Jelly Roll Quilt

Fabric Requirements
29 patterned jelly roll strips (I used pieces from Basic Grey’s 25th and Pine line and Evergreen line)
1⅔ yards of solid fabric or 24 solid jelly roll strips for the background
½ yard of fabric for the binding
3½ yards of fabric for the backing
64” x 76” piece of batting (this provides approximately 3” of overhang on each side)
Thread to match
Finished size: approximately 58” x 70”
All seams are ¼”.
Cutting instructions presume 40” of usable fabric after selvages are removed.
Cutting
Cut each patterned jelly roll strip into 4 rectangles that are 10½” x 2½”, for a total of 116 rectangles.
If you’re using yardage for the background, cut (24) 2½” width-of-fabric (WOF) strips. Then subcut those 24 strips or your 24 solid jelly roll strips into rectangles. To maximize your fabric:
Cut 19 WOF strips into 8” x 2½” rectangles. Each strip yields 5 rectangles, for a total of 95.
Cut 2 WOF strips each into (6) 6” x 2½” rectangles and (1) 4” x 2½” rectangle. Cut 1 WOF strip into (2) 6” x 2½” rectangles and (7) 4” x 2½” rectangles. You will have a total of (14) 6” x 2½” rectangles and (9) 4” x 2½” rectangles.
Cut 1 WOF strip into (5) 4” x 2½” rectangles. Combined with the rectangles from the previous step, you will now have (14) 4” x 2½” rectangles.
Cut 1 WOF strip into (14) 2” x 2½” rectangles.
Sewing the Base Strips
Sew 87 of the 95 solid 8” x 2½” rectangles with the 116 patterned 10½” x 2½” rectangles to create 29 strips that look like the picture below. Press seams open.

Laying out and Completing the Strips
Determine the order in which you want to lay out these strips in your quilt, and sew the remaining rectangles as illustrated below. Press seams open.

A: 8” x 2½” solid rectangle on the top; none on the bottom
B: 6” x 2½” solid rectangle on the top; 2” x 2½” solid rectangle on the bottom
C: 4” x 2½” solid rectangle on the top; 4” x 2½” solid rectangle on the bottom
D: 2” x 2½” solid rectangle on the top; 6” x 2½” solid rectangle on the bottom
E: none on the top; 8” x 2½” solid rectangle on the bottom
Before you sew the completed columns together, cut ½” off the bottom of each A and ½” off the top of each E. (Trust me on this; it accounts for the fact that those columns have one fewer seam than the others.)
Sew the columns together, pressing the seams as you prefer. (Since I planned on stitching in the ditch, I pressed all my seams to one side.)
Finishing the Quilt
To make the backing, cut your 3½ yards of backing fabric into two rectangles: 63” x WOF. Sew them along the long side and trim to approximately 58” x 70”. Quilt, bind, and enjoy your quilt!