PLYWOOD FLOORS
We are laying plywood floors in our family room because we had to rip up the awful stained carpet in that room and ANYTHING would have been an improvement.
I didn't want carpet again. All of our first floor is wood except the family room and guest bedroom.
We couldn't afford real wood floors plus the added cost of installation so we did our research and found some great tutorials on laying plywood flooring that look absolutely beautiful!
We did our weekly (feels like daily) run to our friendly neighborhood Lowe's Home Improvement Warehouse. We really do have some of the nicest, most helpful people working at our Lowe's. It's a pleasure to go in there and spend our children's inheritance!!
This is what we bought:
SUPPLIES
foam board insulation (4x8) 10.91
piece of plywood for saw guide 12.62
piece of 1x4x8 for saw guide 4.86
Liquid Nails Subfloor glue (13 x $3.17 41.21
nail gun and compressor (rented $60/day for two days) 120.00
nails 15.00
Minwax Wood Conditioner (2 x $11.37) 22.74
Minwax Red Mahogany stain (3 x $7.77) 23.31
Varathane Water-based polyurethane (4 x $46.14) 184.56
respirator masks 10.97
knee pads 9.98
staining sponges (2 x $2.65) 5.30
rags 1.98
sandpaper 8.00
shoe molding (8 x $3.12) 24.96
transition trim (3 x $16.61) 49.83
We went to a local lumber yard to find a better grade of plywood.
12 sheets of 3/4" 4x8 AC plywood $550.00
TOTAL: $1096.23
STEP #1 The first thing we had to do was to build a saw guide for our circular saw. I told you we're new at this didn't I? The LOML did his research and found this website on how to build your own saw guide contraption.

STEP #2
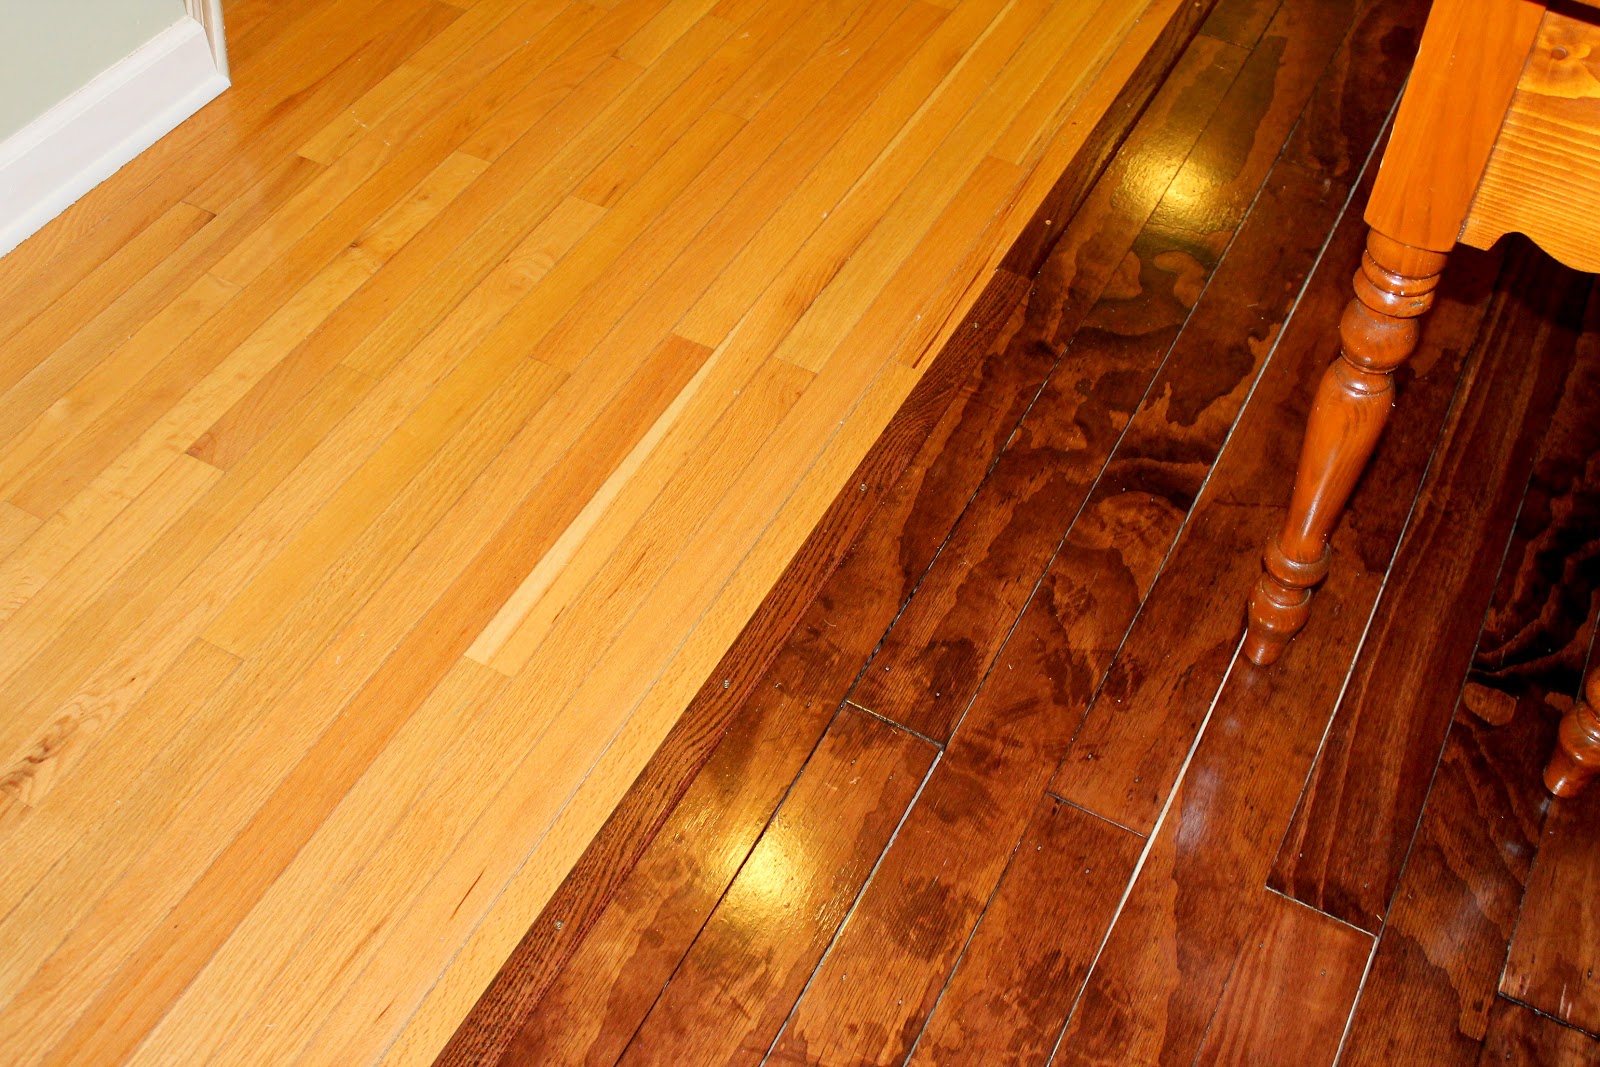
I practiced staining on a piece of wood that the saw wanted to eat instead of cut. I used Minwax Red Mahogany.

The conditioner I used is Minwax Wood Conditioner. I decided I like the color with the conditioner applied first. It is more evenly stained and you can see more of the red which I like.
STEP #3
The LOML ripped (I learned a new term today) the plywood into 132-4x8 boards.

STEP #4
The LOML practiced working with this manly machine ~ the scary nail gun with compressor. He looks so sexy just standing next to it! This machine is very loud and scary to me. I asked him if I should leave the room to protect myself from flying nails (and they are really big nails). He laughed!

STEP #5
We wanted to waste as little wood as possible so we got to work using all the high school math that we said we would never use and came up with this pattern to lay the slats.

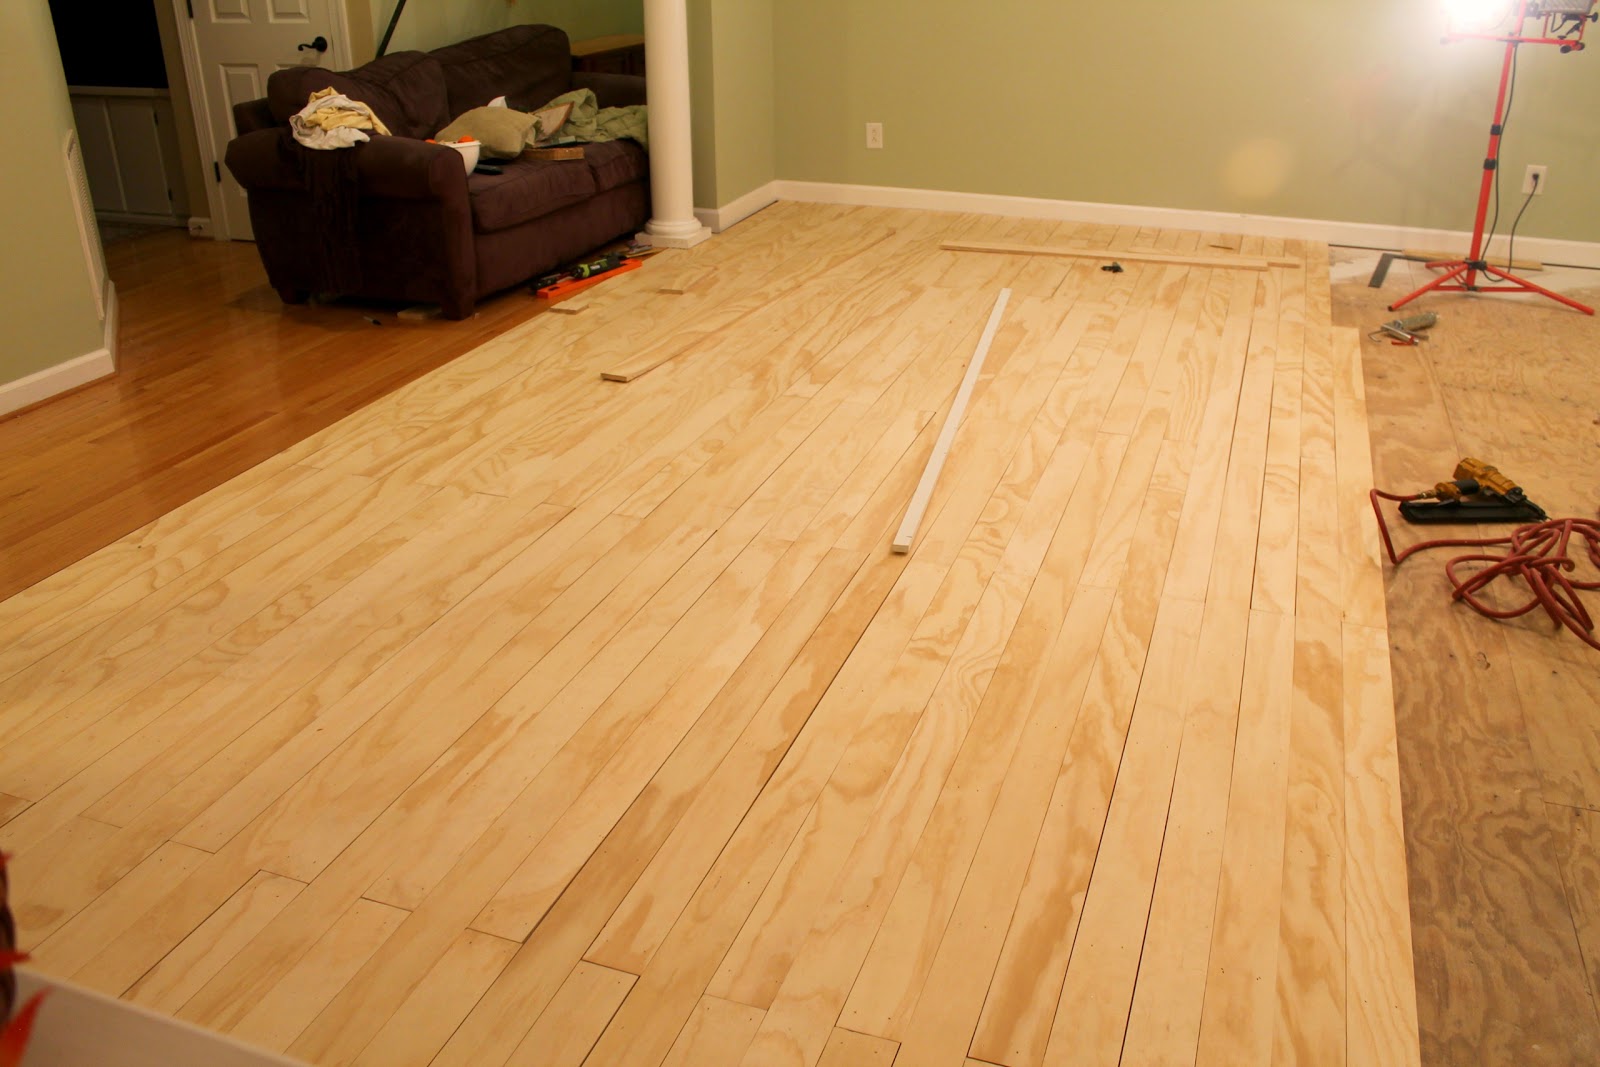
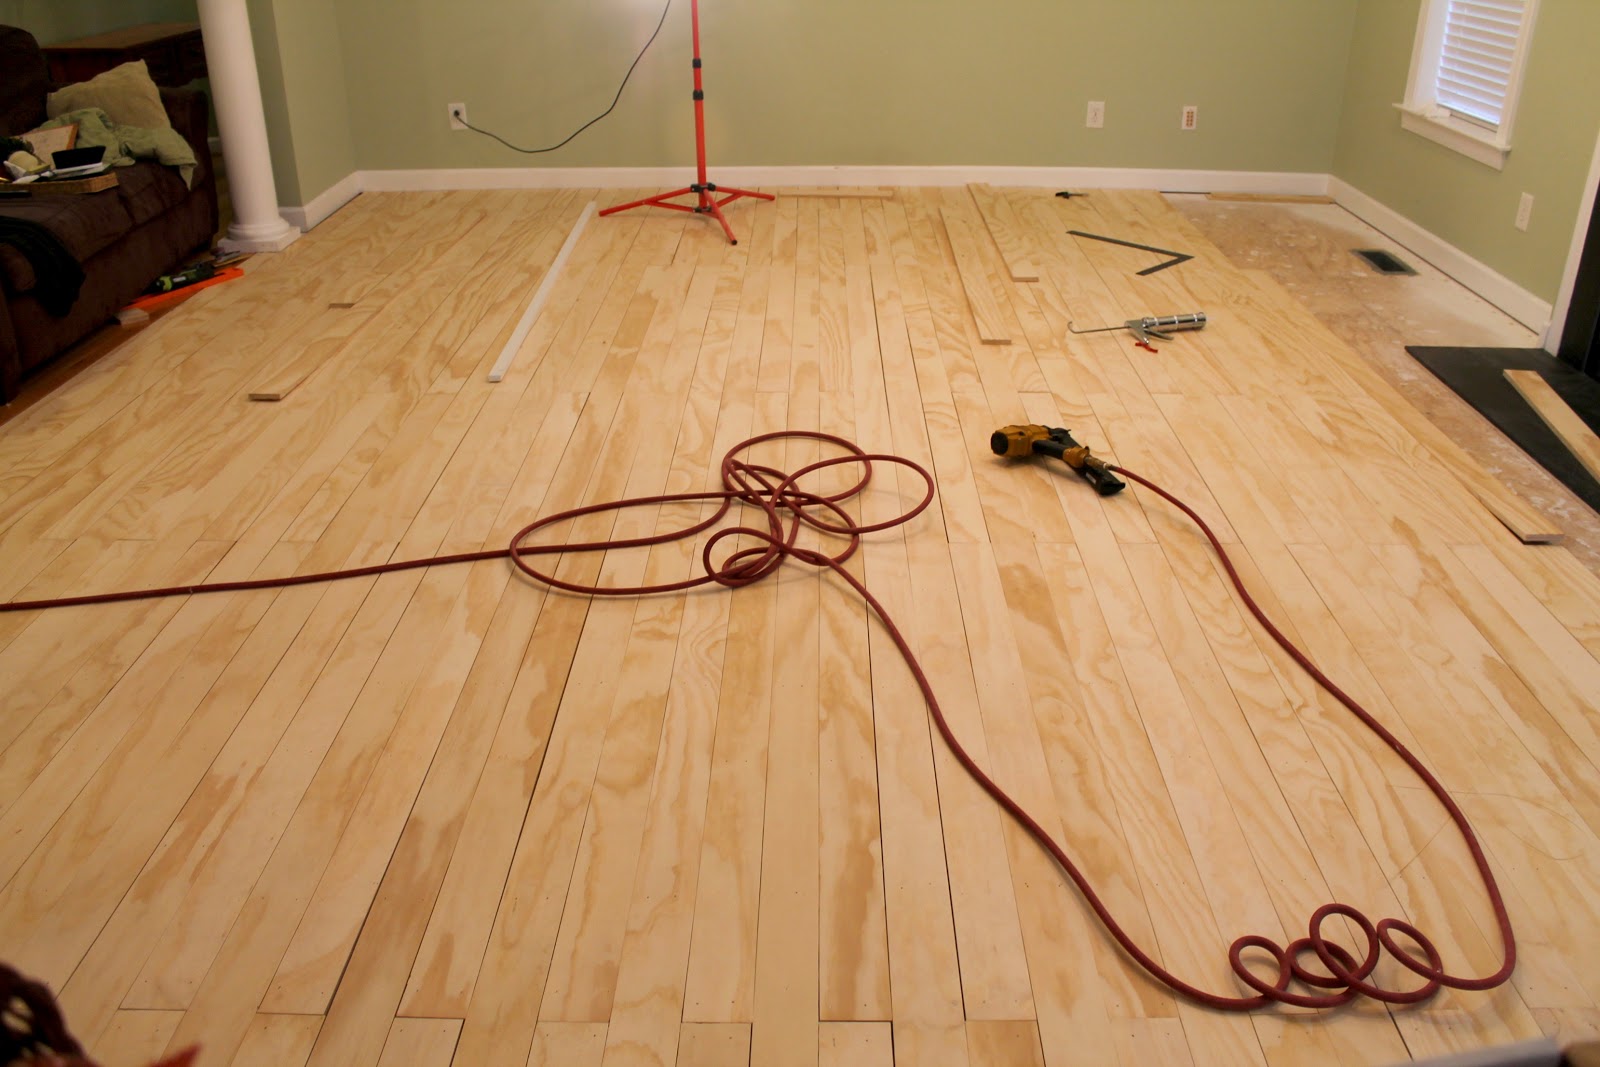
STEP #6
We started at one end of the room against the wall and finished each row progressing inward toward the fireplace. It took us two days, many cutting boo-boos, a few expletives flew, but in the end, it was worth every single second. And let me tell you, I have muscles in my legs I never knew I had and they are all screaming at me!!


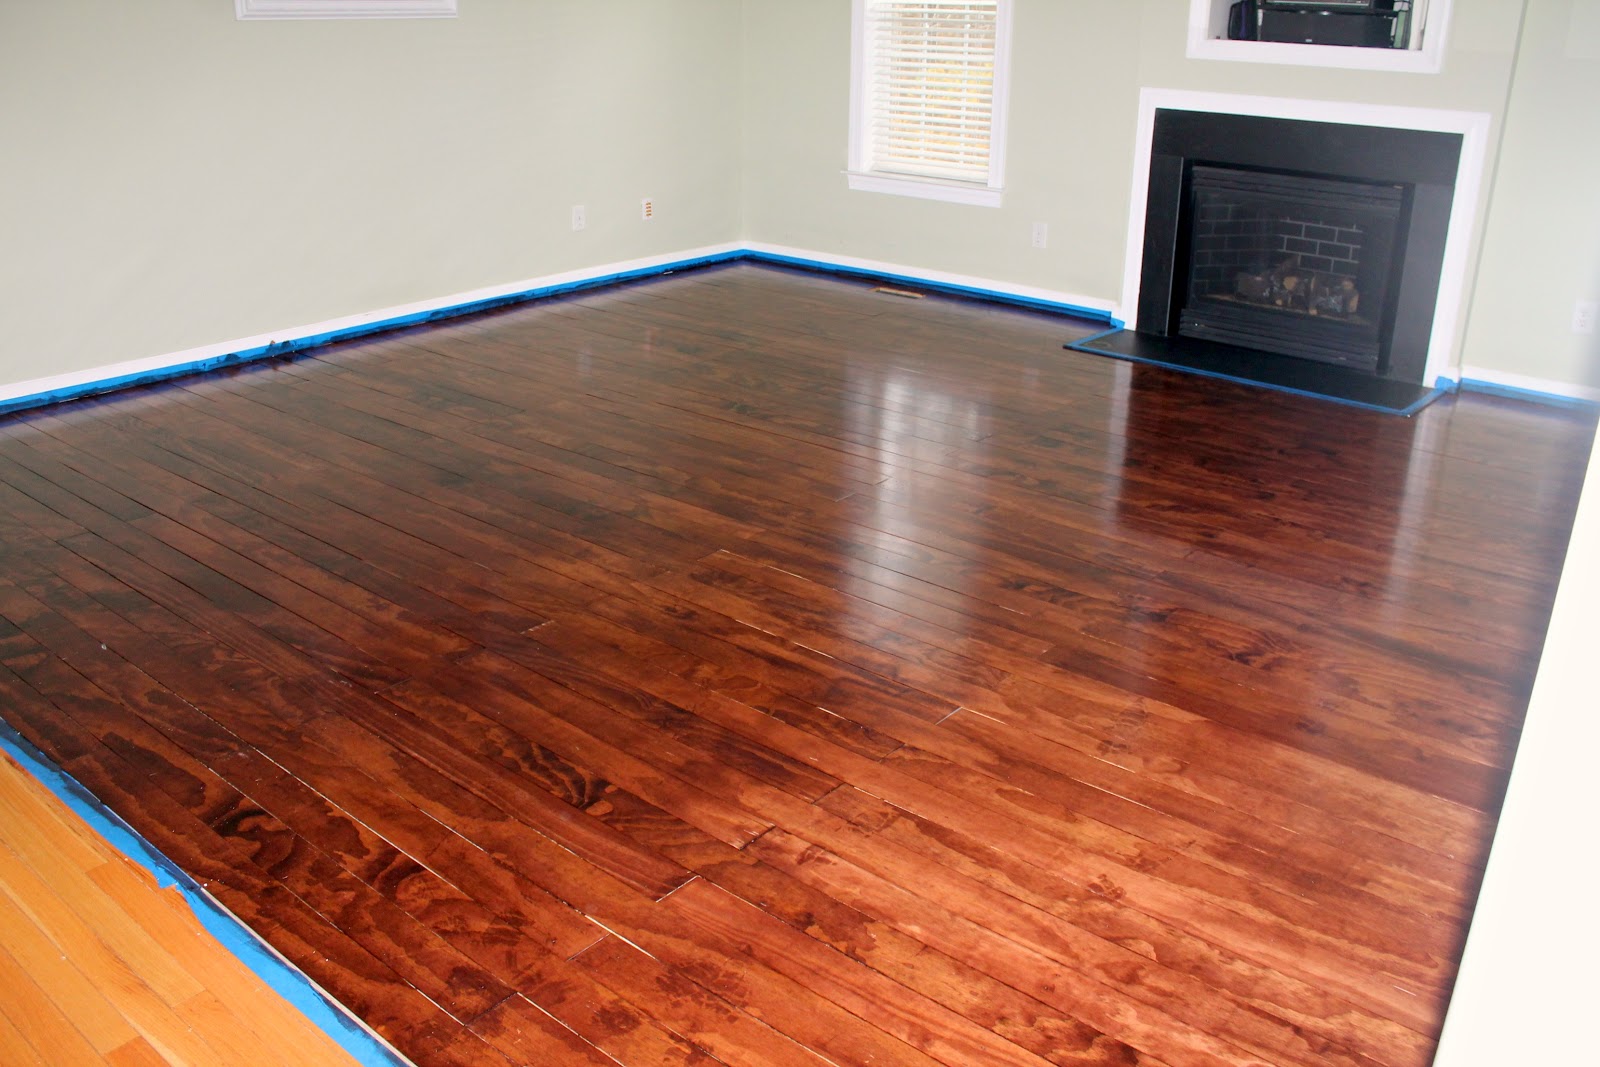
STEP #7
The staining was the fun part! What a difference between naked wood and the dark red mahogany color. I conditioned the wood first. The directions say to stain within two hours of conditioning so by the time I was done conditioning the whole room, I started staining. I used a staining pad and just rubbed the stain on. The LOML followed close behind wiping off the excess stain. We were quite the team. I looked cooler though because I had knee pads for my bony knees!! We both wore respirator masks so we didn't get headaches from the fumes.


STEP #9
We had to add a transition piece of wood between the new wood floors and the old ones in the hallway so we bought three 12 foot transition pieces at Lowes, conditioned, stained, and polyed the three pieces. Then we screwed them to the existing floor.


STEP #10
We had to add shoe molding around the whole room to hide any gaps we may have had from short boards. We bought primed shoe molding from Lowes, I painted them the same white as the trim and we nailed them all in for a nice clean look. I had to touch up a few places where we got stain on the trim, too. OOPS!


We bought the new rug at Home Depot for $199 for an 8x10 Shaw Living Castile area rug in beige/cream. It's shaggy and soft on the toes. I LOVE IT!!
It feels great to walk into our brand new family room. No dirty stained carpet anymore. YEAH!!!
A busy weekend for us. How was yours?
Linking up to Project Inspire Just Something I Whipped Up
Homemaker on a Dime Creative Bloggers' Party and Hop
Under the Table and Dreaming Sunday Showcase Party
DIY Showoff DIY Project Parade
Skip to My Lou Made By You Monday
C.R.A.F.T. Making Monday Marvelous
Craft-O-Maniac Craft-O-Maniac Monday Link Up
Making the World Cuter Monday Linky Party
I Heart Naptime Sundae Scoop Link Party
Home Stories A to Z Tutorials and Tips Link Party
Not Just a Housewife Show Me What Ya Got
Today's Creative Blog Get Your Craft On
Carolyn's Homework The Inspiration Board: Link Party
The NY Melrose Family Whimsy Wednesdays
Free Pretty Things Whatever You Want Wednesday
Southern Lovely Show and Share
Miss Information I Freakin' Did It Friday
My Romantic Home Show and Tell Friday
Somewhat Simple Blog Link Party
House of Hepworth Hookin Up with HOH
Chic on a Shoestring Flaunt it Friday
Beneath My Heart Best DIY Projects of November Linky Party
Thrifty Decor Chick December Before and After
The Dedicated House Make it Pretty Monday
Liz Marie Blog Link Up With Me
One Project Closer The Humble Brag Link Party
A Blossoming Life Frugal Crafty Home Hop

Love y’all, Linda
More posts from