
Cream Contour Tutorial
Contouring is one of the best kept secrets thats out of the box! It is my favorite trick to use when doing makeup for events. I love to enhance features of the face by contouring, but it can be hard finding the best products to use. Today I have compiled a list of my favorite contouring cosmetics to help you achieve that perfectly chiseled bone structure. There are many different ways to contour, the look I am demonstrating today will be for a more intense contour. I will do a more subtle and natural everyday contour in my second post! Have a fabulous Friday...
Enjoy!
ahhhh...scary?! Don't worry, keep reading!

Light cream: MAC Medium concealer palette "Yellow" Dark cream: MAC Medium concealer palette "Brown" Sponge: Beauty Blender "black" ** this is a must product for this look. Brush: IT Cosmetics concealer duo brush ** Used to draw on creams. {No foundation used}

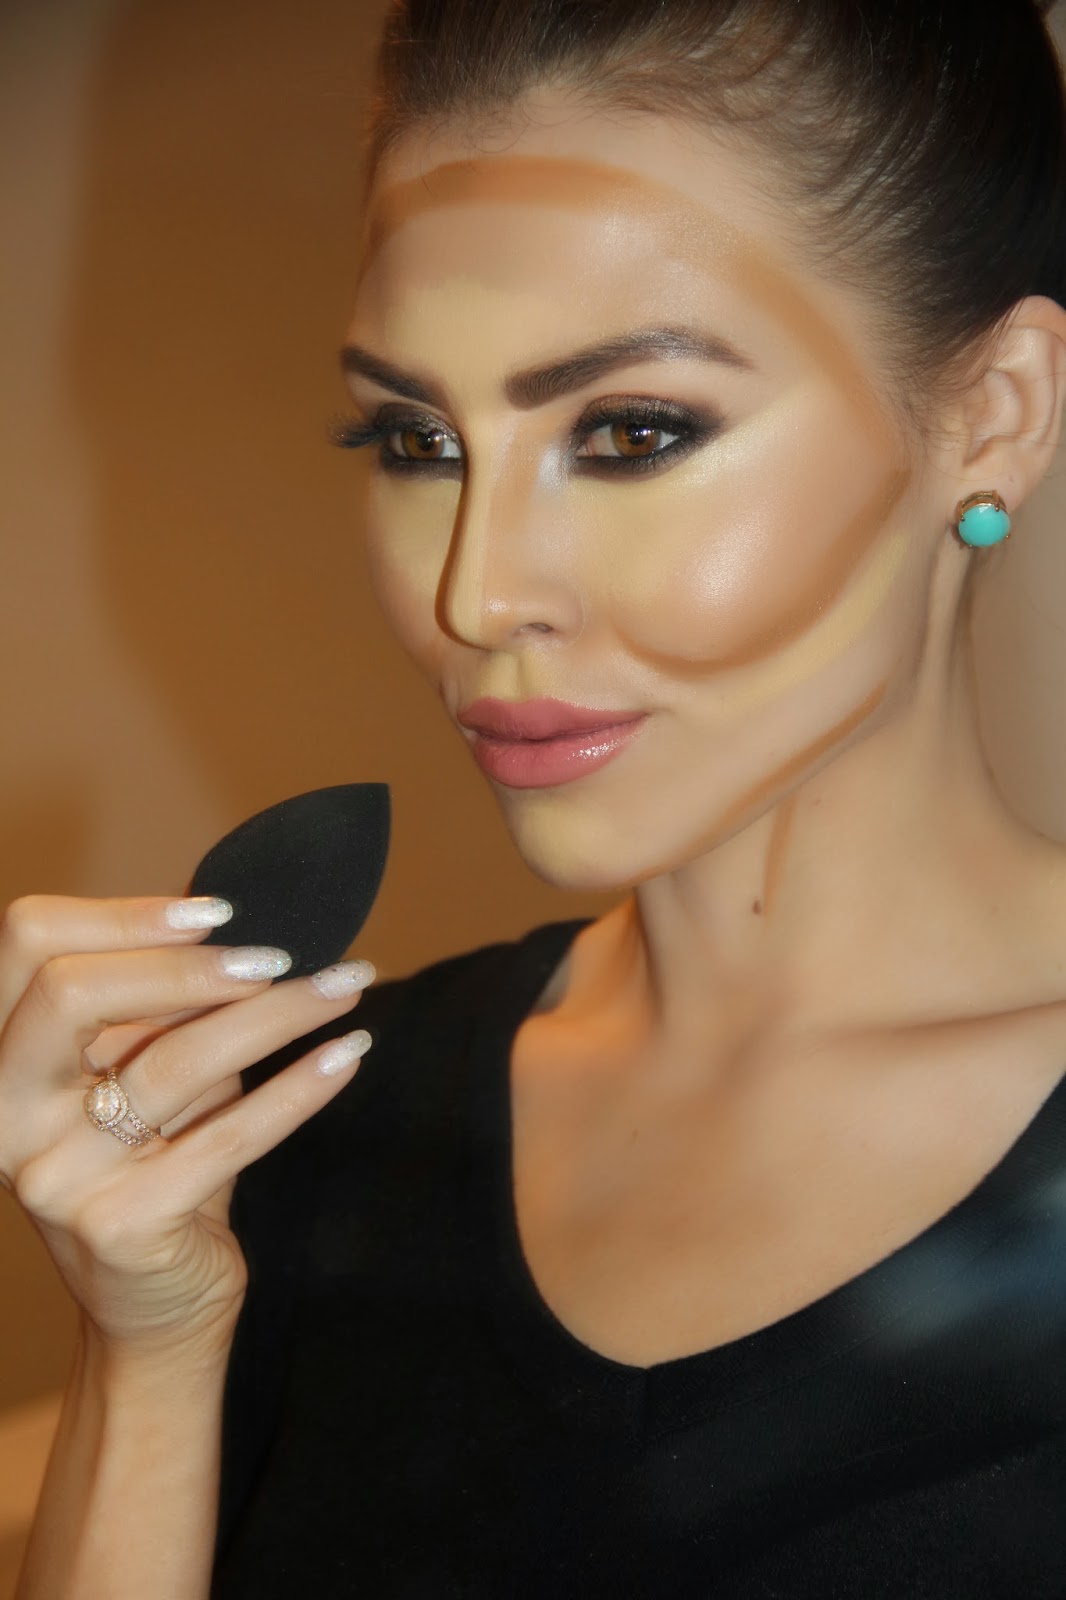
Yes, I know this look can be a bit creepy, but just wait because it works miracles! Don't be afraid to experiment with your makeup!
Step 1: Apply your eyes and brows.
Step 2: Get your light colored cream/concealer. Apply to the following areas: Under eyes, between brows, down nose, under cheekbone, on chin and upper lip.
Step 3: Apply your dark colored cream.concealer. Apply to the following areas: Entire jaw line, hollows of cheeks, sides of nose, entire hair line and temples.
Step 4: With a damp beauty blender or sponge, stipple or press the sponge onto the skin in a quick but light motion. Be sure to blend the light color first and work your way outwards towards the dark. Always blend into hairline and clean up after.
Set with a translucent and apply blush! Complete!
Translucent: Ben Nye Banana Blush: Dainty MAC

After:
{Seamlessly blending cream contour and highlighted face! Just apply a little setting powder and blush, bam!}
{Seamlessly blending cream contour and highlighted face! Just apply a little setting powder and blush, bam!}

**Be sure to damp sponge for the best application! Your sponge will grow twice its size and be a lot fluffier!


MAC Concealer palettes- {Great for all skin types except sensitive. Comes in shades for every color!}

Illamasque Cream in "hollow" and "delirium" {Great for paler skin tones/ fair skin}

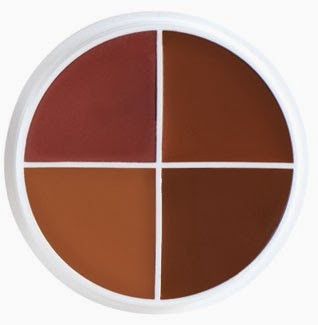
Ben Nye Sk3 Wheel {Great for darker skin tones}

BH Cosmetics 10 color cream palette {Universal palette with great pigmented creams for all types}
I hope you all enjoyed this quick tutorial on how I cream contour/highlight! I always do different looks each day but tend to wear this style of makeup once or twice a week! I am coming back to CA for a 4 weeks this weekend and can't wait to work on some amazing makeup clients, teach lessons and do some skin care! Hope you all have had a great week and have an even better weekend! Lots of love!
-KC