
Fabric Covered Storage Bins

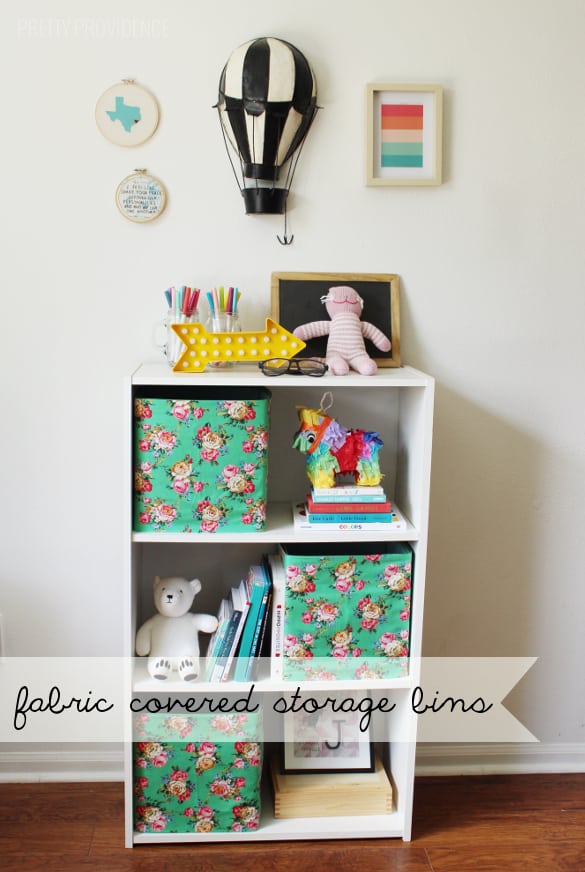
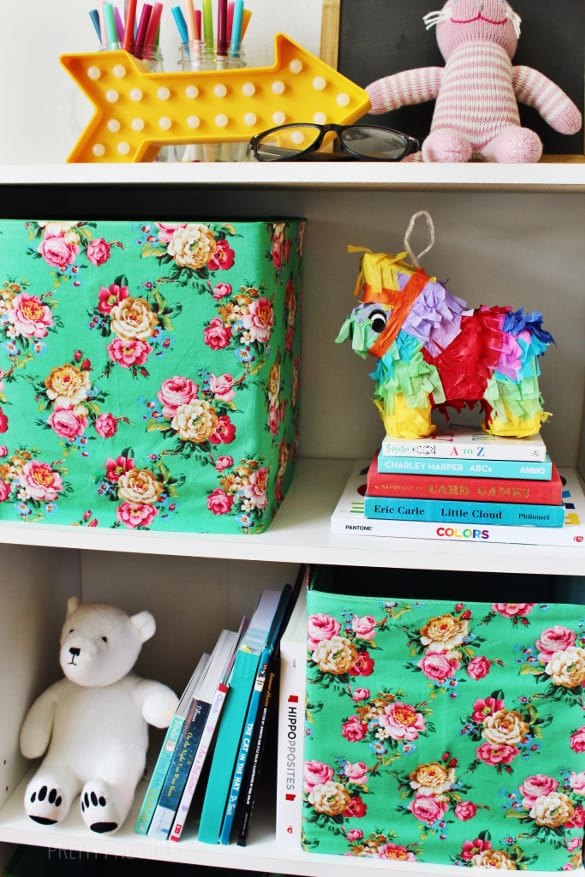
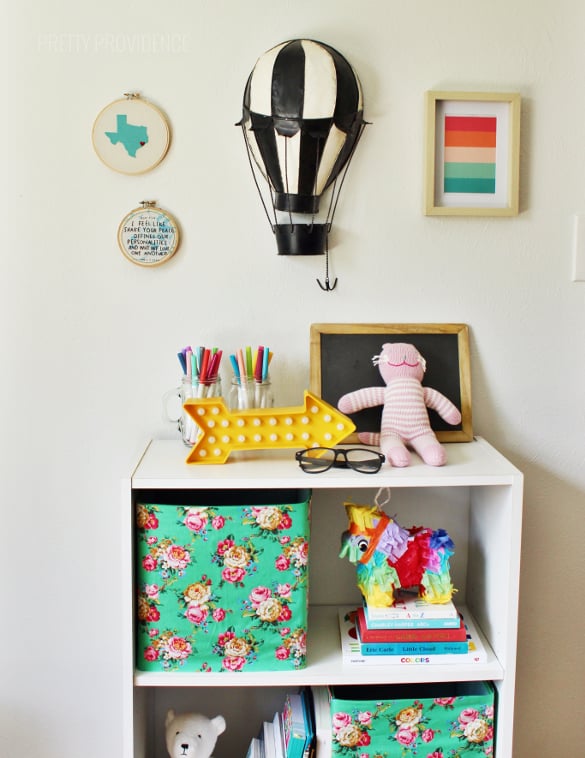
I’m so excited to share this project with y’all today because it’s the first of a few that I’ve done for my baby girl’s nursery! It’s so ridiculous how long it’s taking me to finish the room. I have had what I want it to look like in my head for almost a year now but getting it put together has been another story. I finally gave myself a deadline and it will be done in less than a month. Get excited! So, in her nursery I don’t have a dresser and her closet only has one top shelf so I got a cheap bookcase from Target and added some bins for her socks, leggings, and other stuff that isn’t easy to hang up. At first I just bought these green bins because they were on clearance at Target for $2.38 each. The green didn’t necessarily thrill me but I didn’t mind it. Later the same day I was at Joann’s and found green floral fabric that I was immediately obsessed with and realized that using it for some fabric covered storage bins would be the perfect excuse to incorporate it into the nursery!
Oh yeah, and this requires no sewing, thankyouverymuch.
Stuff you need:
storage bins
fabric
iron
fabric scissors
tape measure or ruler
heat n’ bond no sew tape
How to do it:


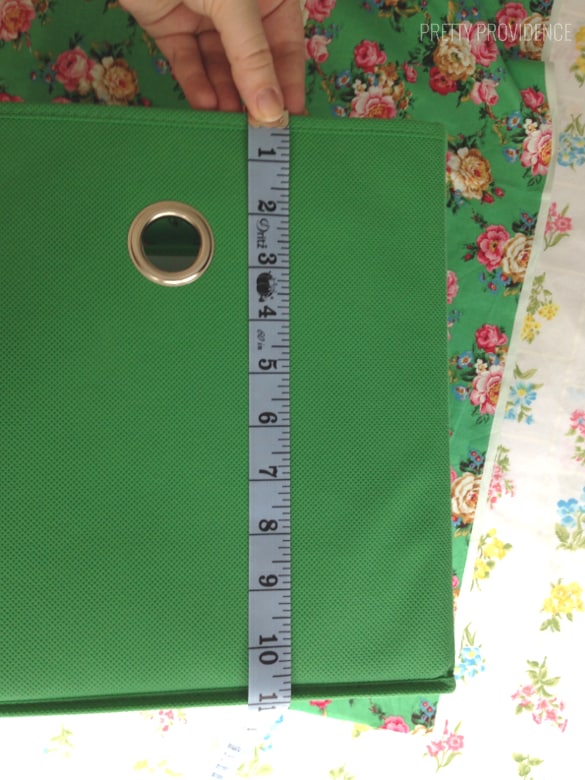
2. Measure your bins. Once you know the height of the bins, measure the height 1 inch and mark, all the way across the inside of your fabric. (You’ll need the extra half inch on top and bottom to “hem” with the no sew tape. Cut.
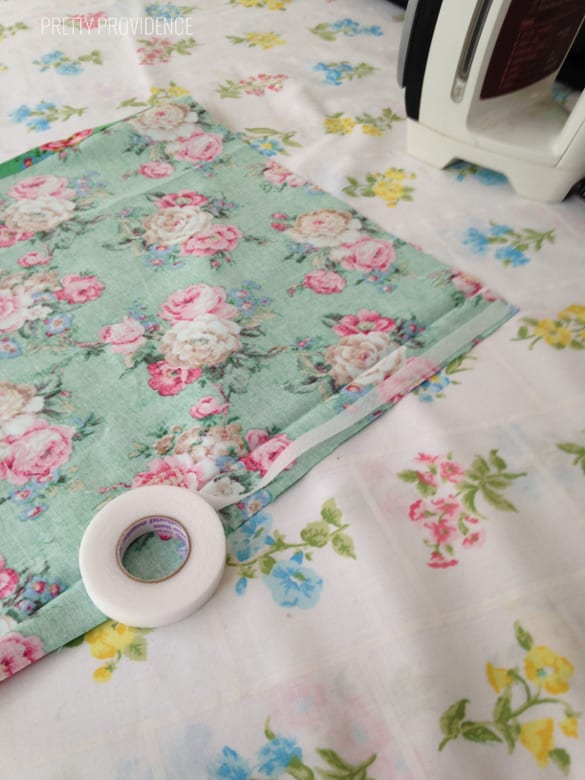
3. Measure half an inch on top and bottom of the inside of your fabric, fold the outsides in, and iron.

4. Add no sew tape inside the folds and follow the instructions on the package. (With heat n’ bond you iron both sides for 3 seconds to bond your hem.)
5. If you care about how the back looks, hem and iron another half inch on the other two edges of your fabric, and repeat the ironing/bonding step.

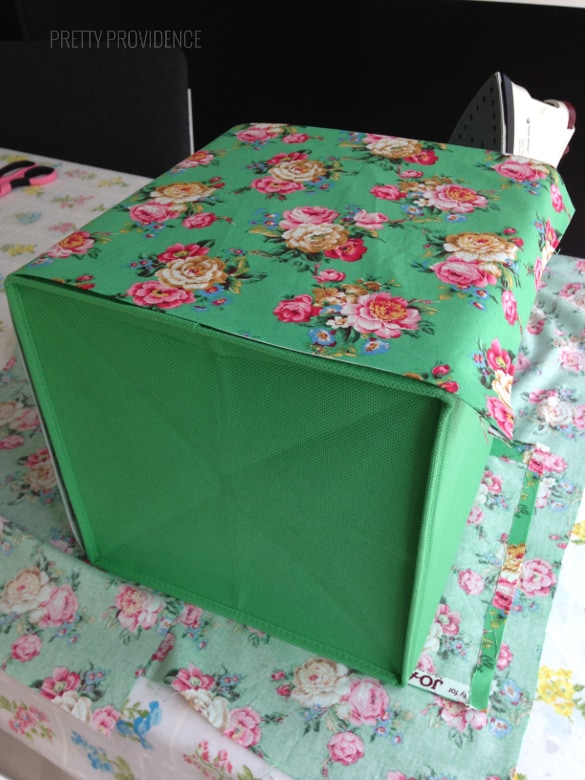
6. Wrap your storage bin with the fabric, use no sew tape along top, bottom and back edges to iron into place. Be careful not to touch the iron to your actual storage bin if it’s the cheap kind because it will melt. (Speaking from personal experience!)

7. Voila.
Disclaimer: I am not a super perfectionist and the no sew tape doesn’t adhere the fabric to the bins in a super strong way. If this bothers you I would try to find a different way to adhere it. I’m not sure, but I would imagine a mischievous toddler could probably rip it off. I guess I will find out when June gets a little older. It is strong enough that for normal every day adult use it probably isn’t going to come unraveled (it hasn’t for me!) but again, I can’t promise anything…
Now let’s talk about how awesome that hot air balloon is. I got it at a garage sale last weekend for $2! Also, that cute Texas hoop art was a gift from our friend and contributor Kelly @shophoopsydaisy.


If you are into this, you can check out my striped storage bin DIY as well, or this wrapping paper storage idea!
The post Fabric Covered Storage Bins appeared first on Pretty Providence.