
Assignment: Sailor Top

Hello and welcome to my blog if you are visiting from Selfish Sewing Week! Check out all of the fun over on Imagine Gnats this week and whip up your own selfish project! This project is also part of my study on garment sewing, in which you can read about past garments here!

Today I’m happy to share my pattern review for the Fancy Tiger Crafts Sailor Top. This pattern is available on pdf, paper, and also as a class on Creative Bug. I bought the paper pattern at the beginning of the year, and it comes in a lovely presentation.

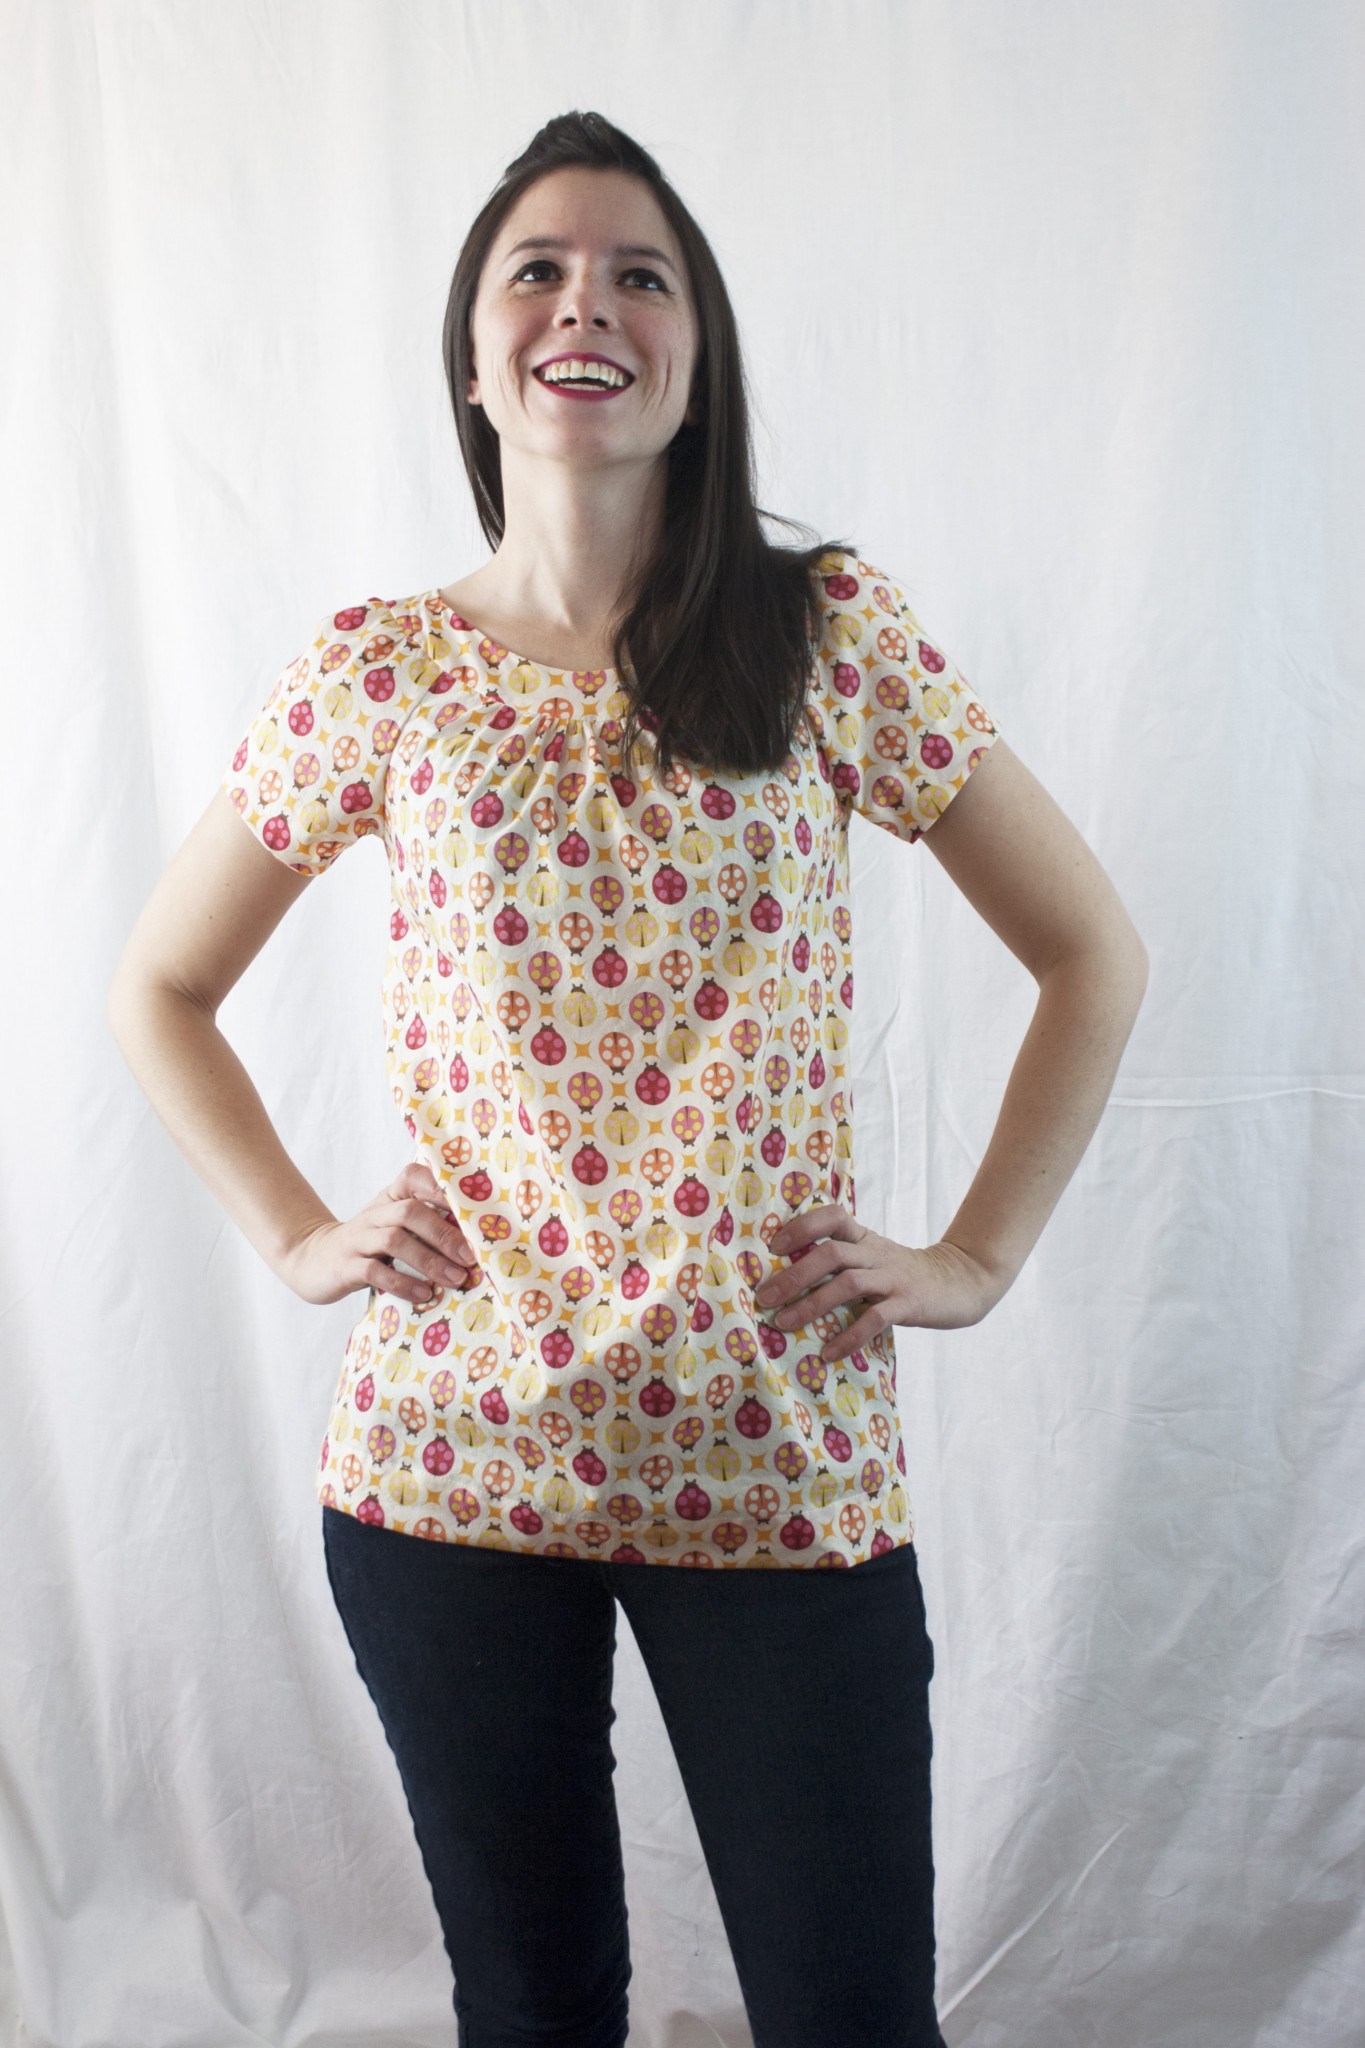
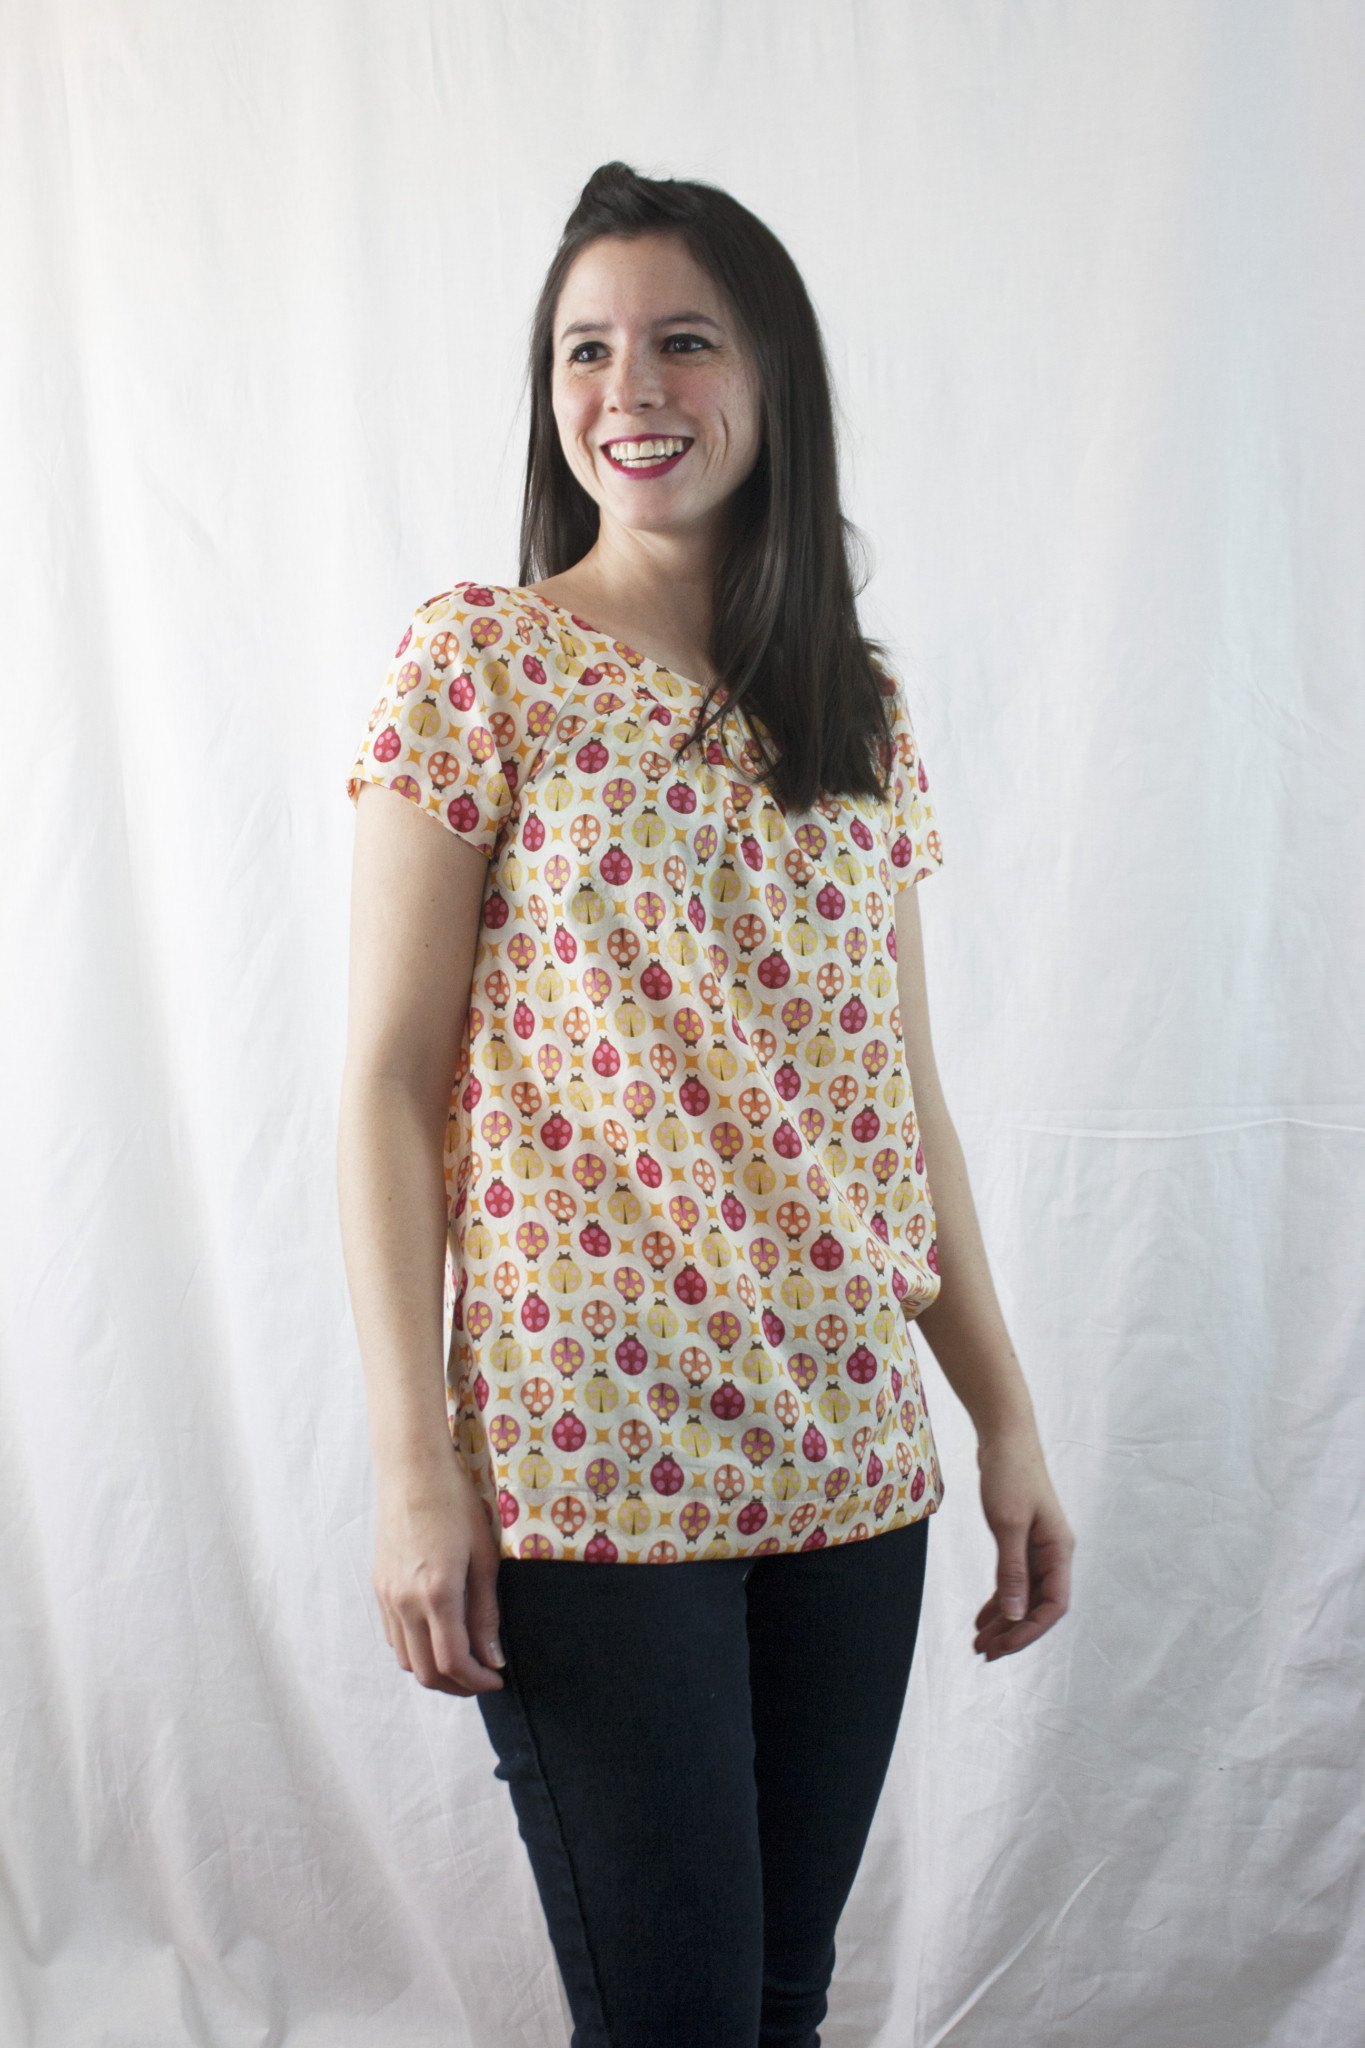
This version of the top on the blog Miss Make actually inspired me to get the pattern, and I also decided to make my top in voile as she did. In a loose-fitting top with lots of ease, I wanted to use voile because it has more drape than quilting cotton (although the quilting cotton versions that I’ve seen look fantastic as well). I used Tula Pink voile from her Birds and the Bees fabric line, which you can still find once in awhile at a decent price if you keep on the lookout for it. I sewed this mostly on my sewing machine using Omnithread polyester thread (the only serging I did was on the side seams…although it could be completed solely on the sewing machine).
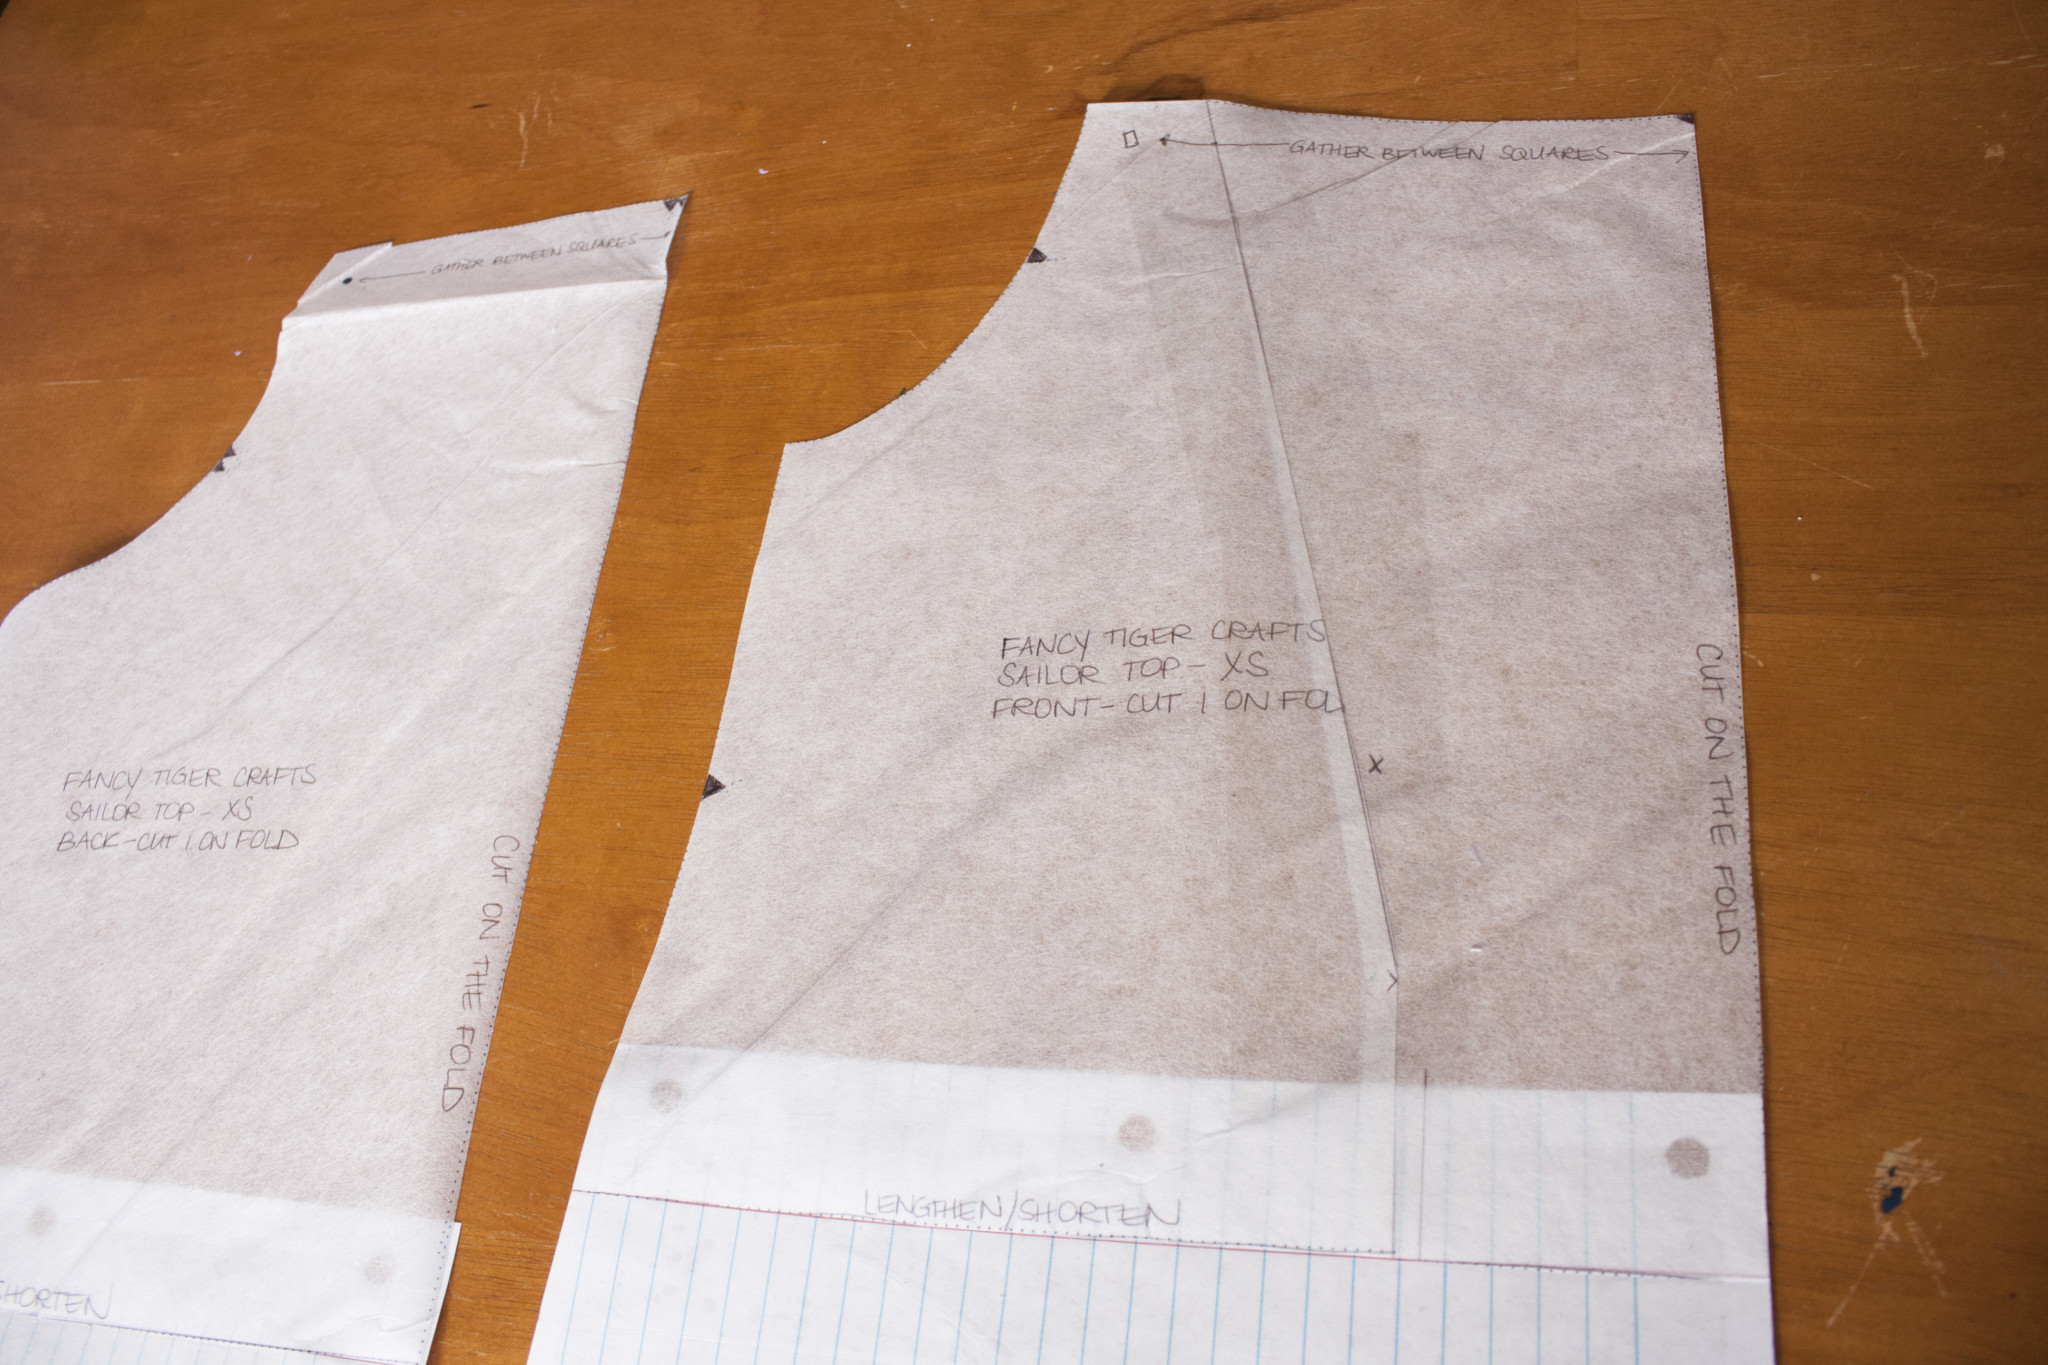
Okay! So as far as the pattern goes; my measurements are high bust 31″, bust 31-1/4″ (a difference of -1/4, which is less than 1″ and puts me at an A-cup…B cup is a difference of 2″, C a difference of 3″, and so on), waist 25-1/2″, and hip 34-1/4″. According to the back of the pattern, size XS is bust 32″, waist 25″, and hips 35″, so I cut that size and immediately made the small bust adjustment, since I’m assuming this pattern drafts for a B-cup. You can find my adjustments to the pattern in the photo below (the little sliver out of the middle of the pattern was the dart that I drew to take in the extra fabric in the bust area). I used the Craftsy class ‘Adjust the Bust‘ as my go-to to make bust adjustments.

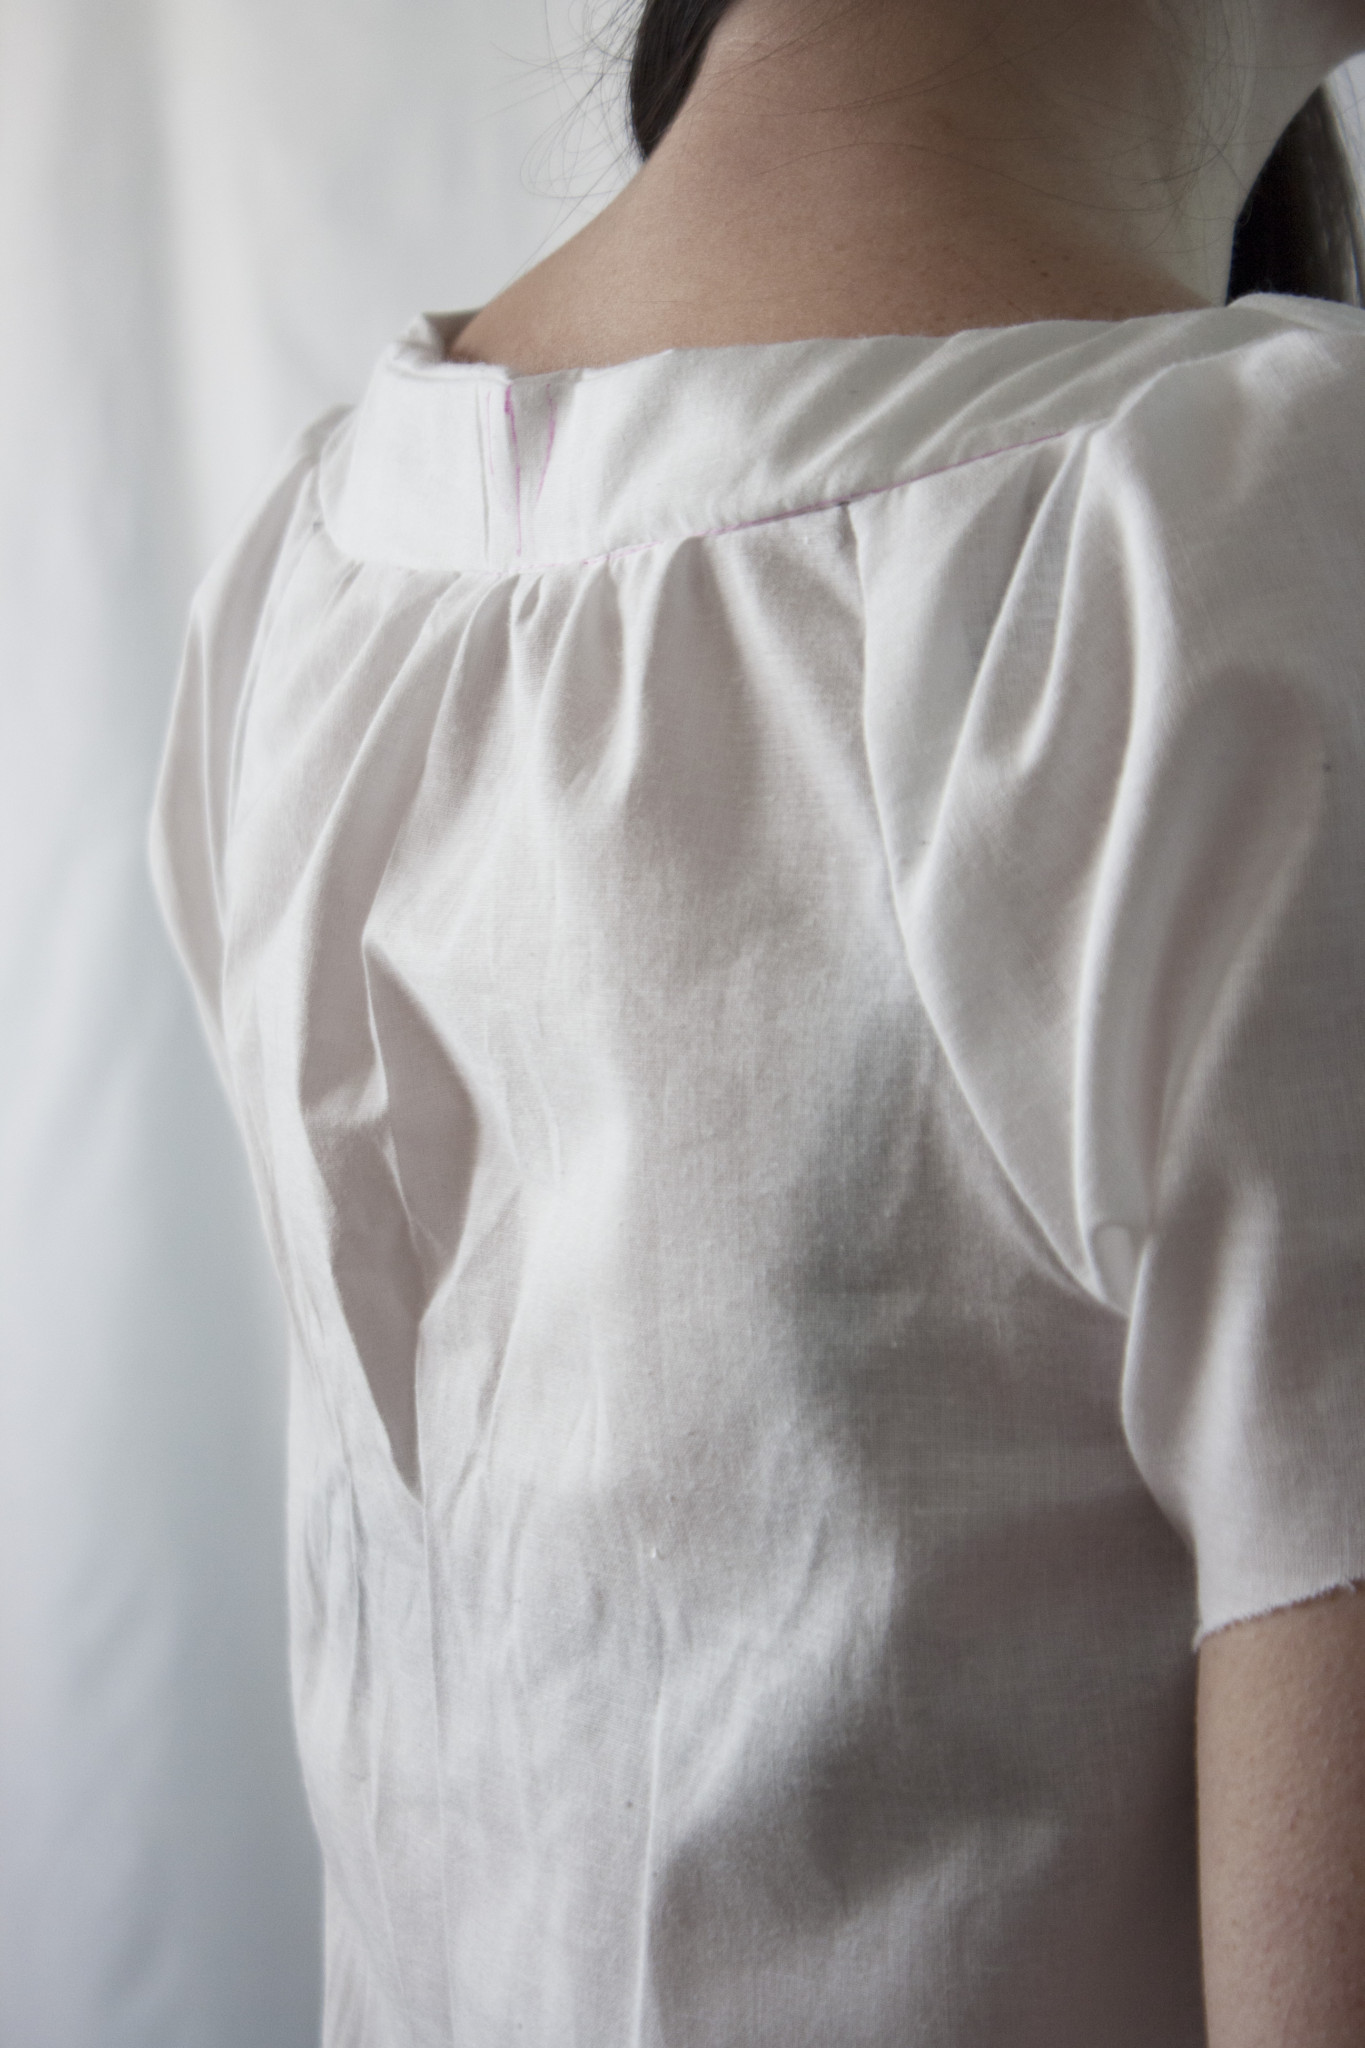
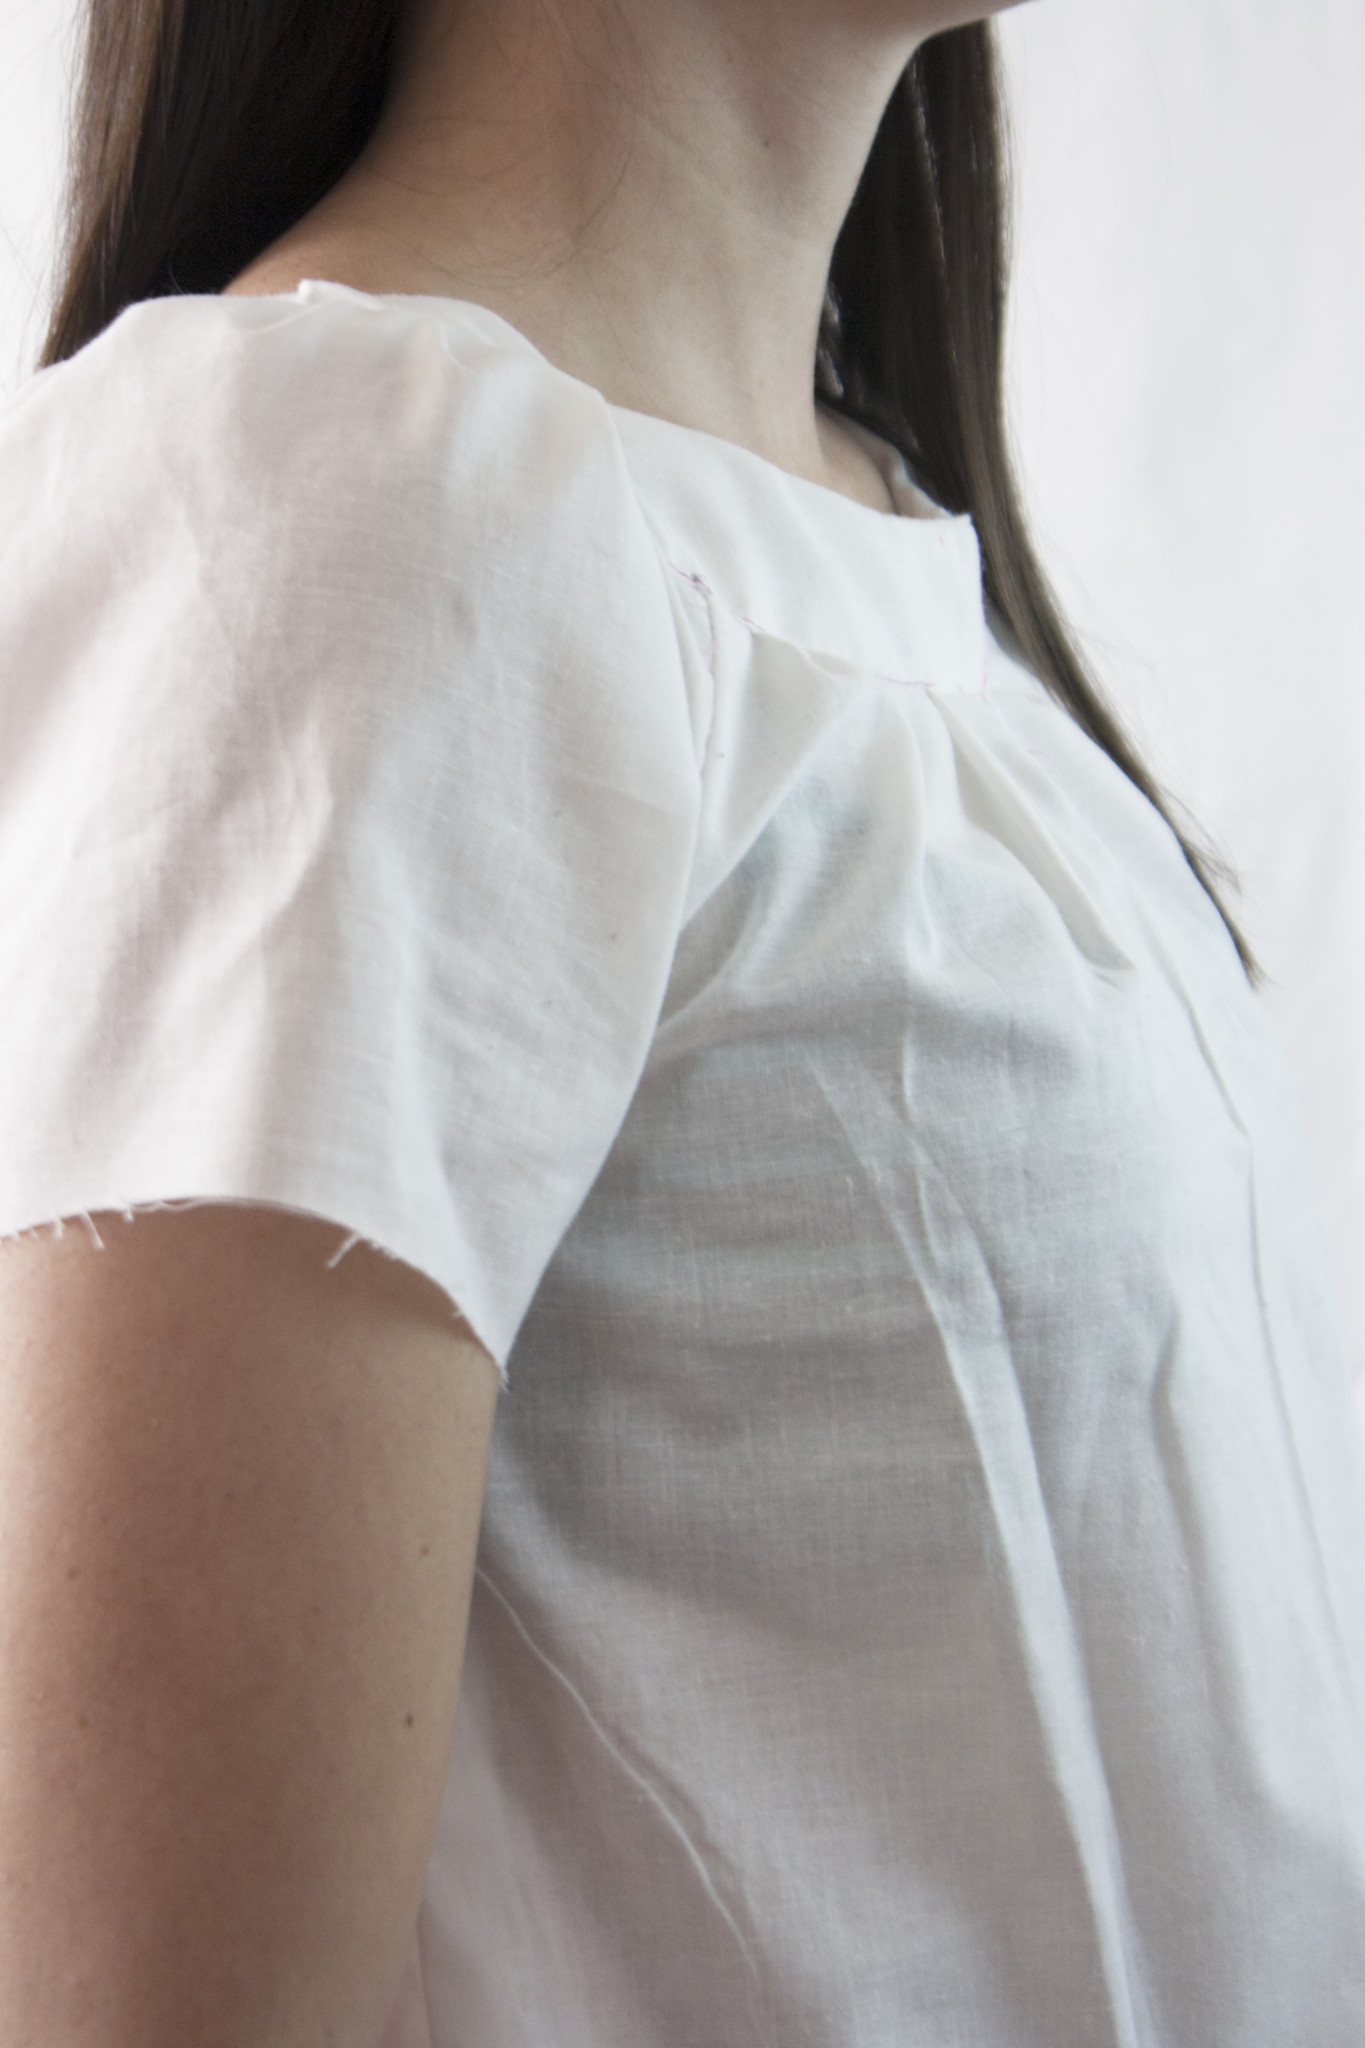
I whipped up a muslin. Sometimes I just make a muslin of the bodice, but I muslined the entire thing in order to check the sleeves and yokes. I had two very small fit issues; I got a bit of gaping at the back neckline:


You will probably notice that the gaping is very minor. However, since I am making muslins for all of my garments, the point of making a muslin is so I can fix any fit issues, big or small, and so I’m going to fix them!
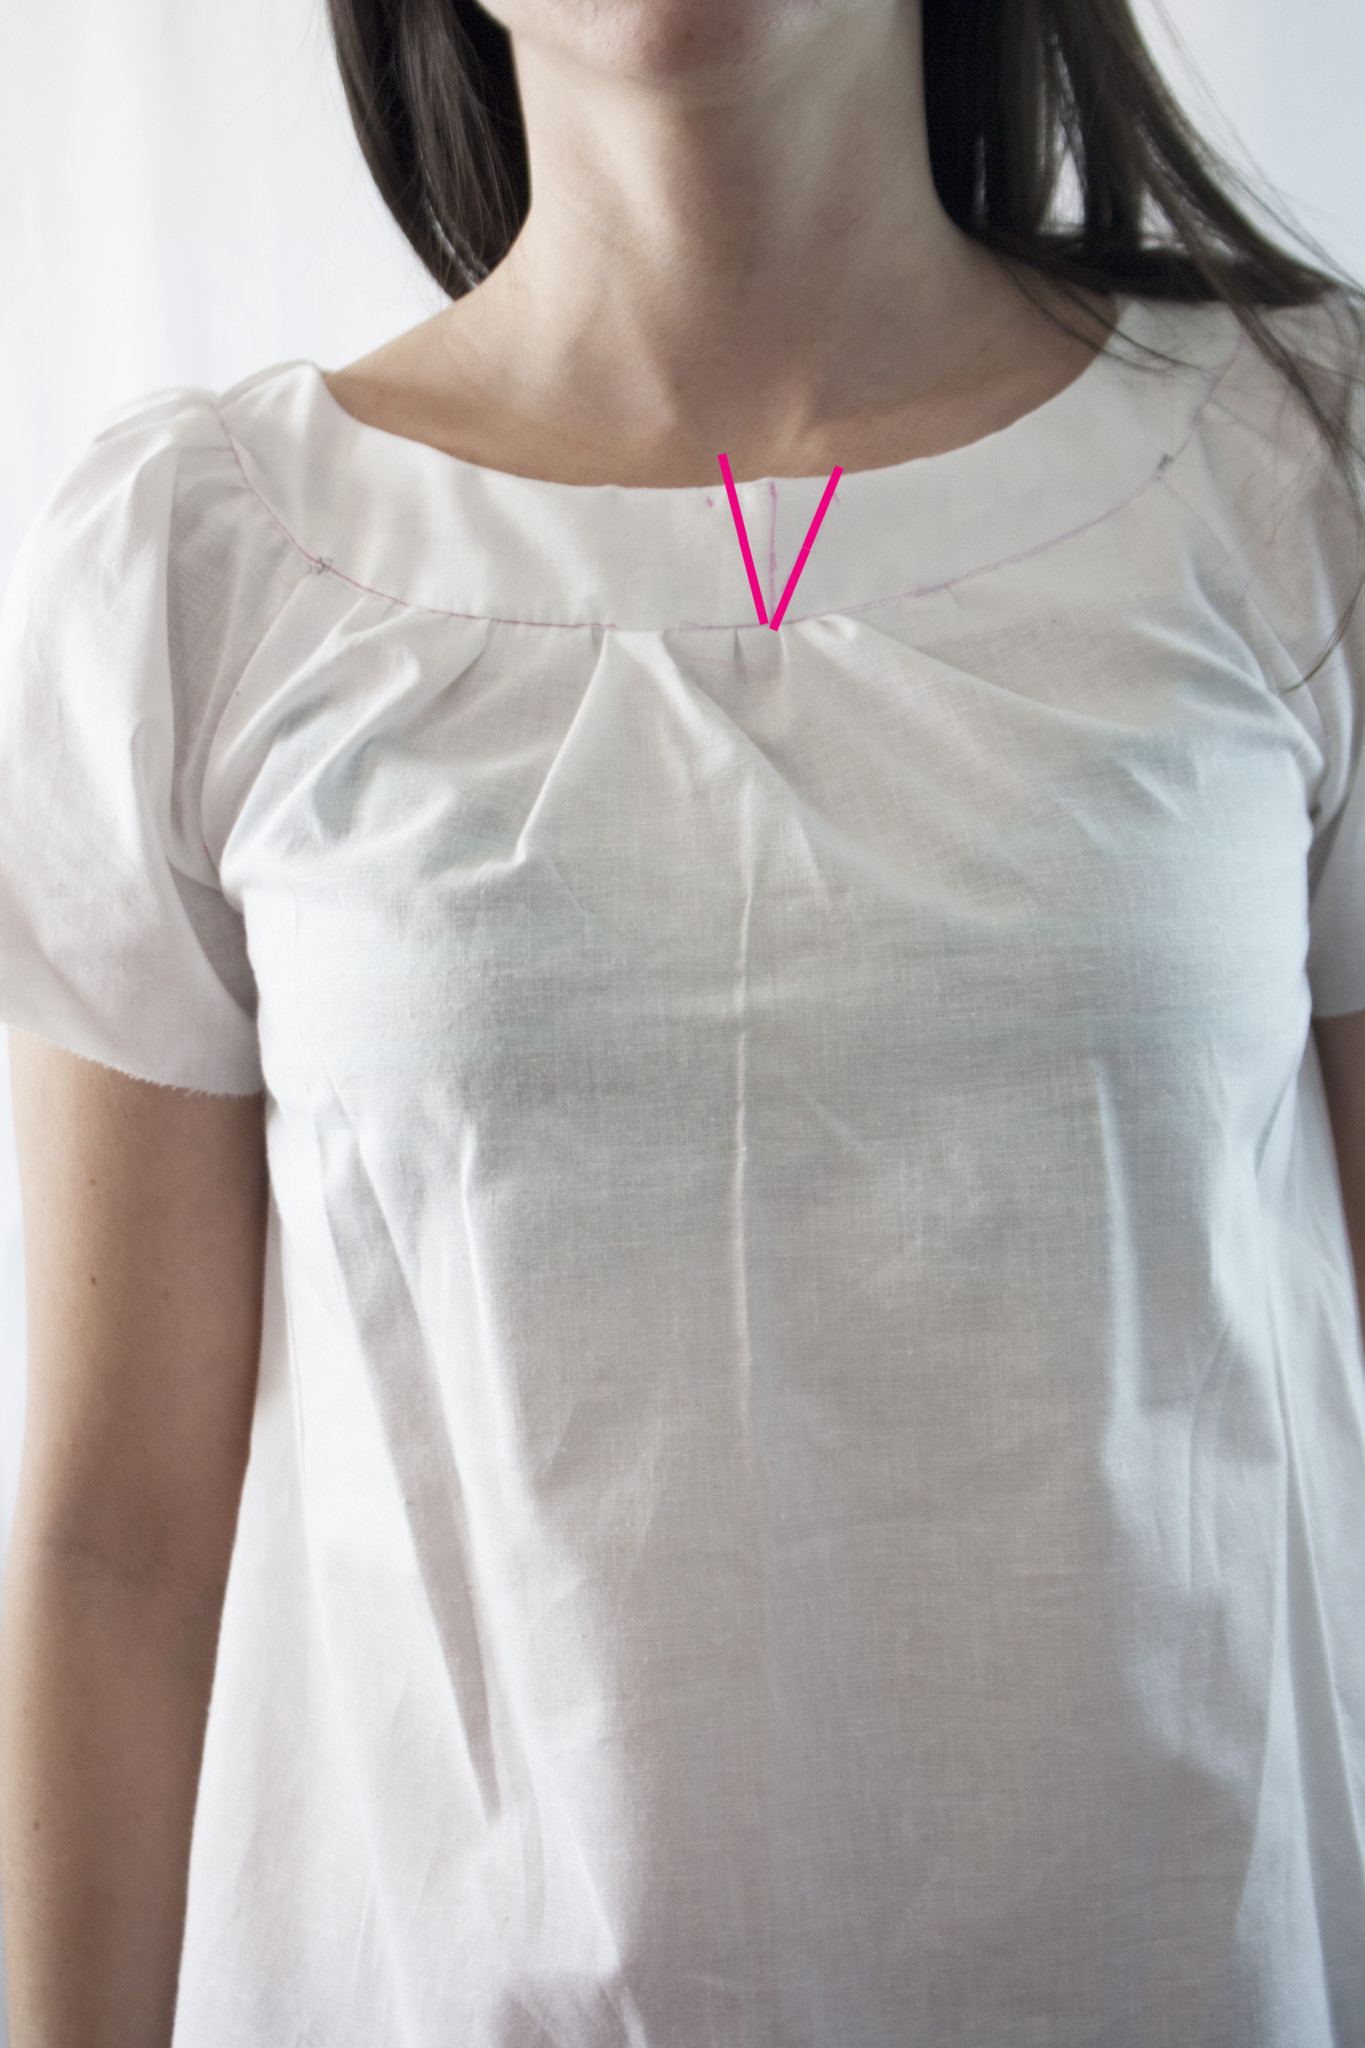
I pinched out the extra fabric in the front and in the back; I’m just going to show the front here, as I did almost the same thing with the excess in the back. The front is easy enough to do on your own without getting help (although I’d recommend getting help pinching the excess in the back, since as soon as you twist your arms around to do it yourself, it throws everything off). I used a Wonder Clip to clip the top area, and I like to draw directly on top of the muslin. The reason I drew a pink ‘V’ on my yoke neckline is that the extra fabric was only at the top of the yoke, not at the bottom. I transferred this ‘V’ (which is a dart) to my pattern piece and sliced and re-taped it to take out that excess fabric on my pattern piece. In essence, kind of what can be seen in that Craftsy class, but obviously not in the bust area.

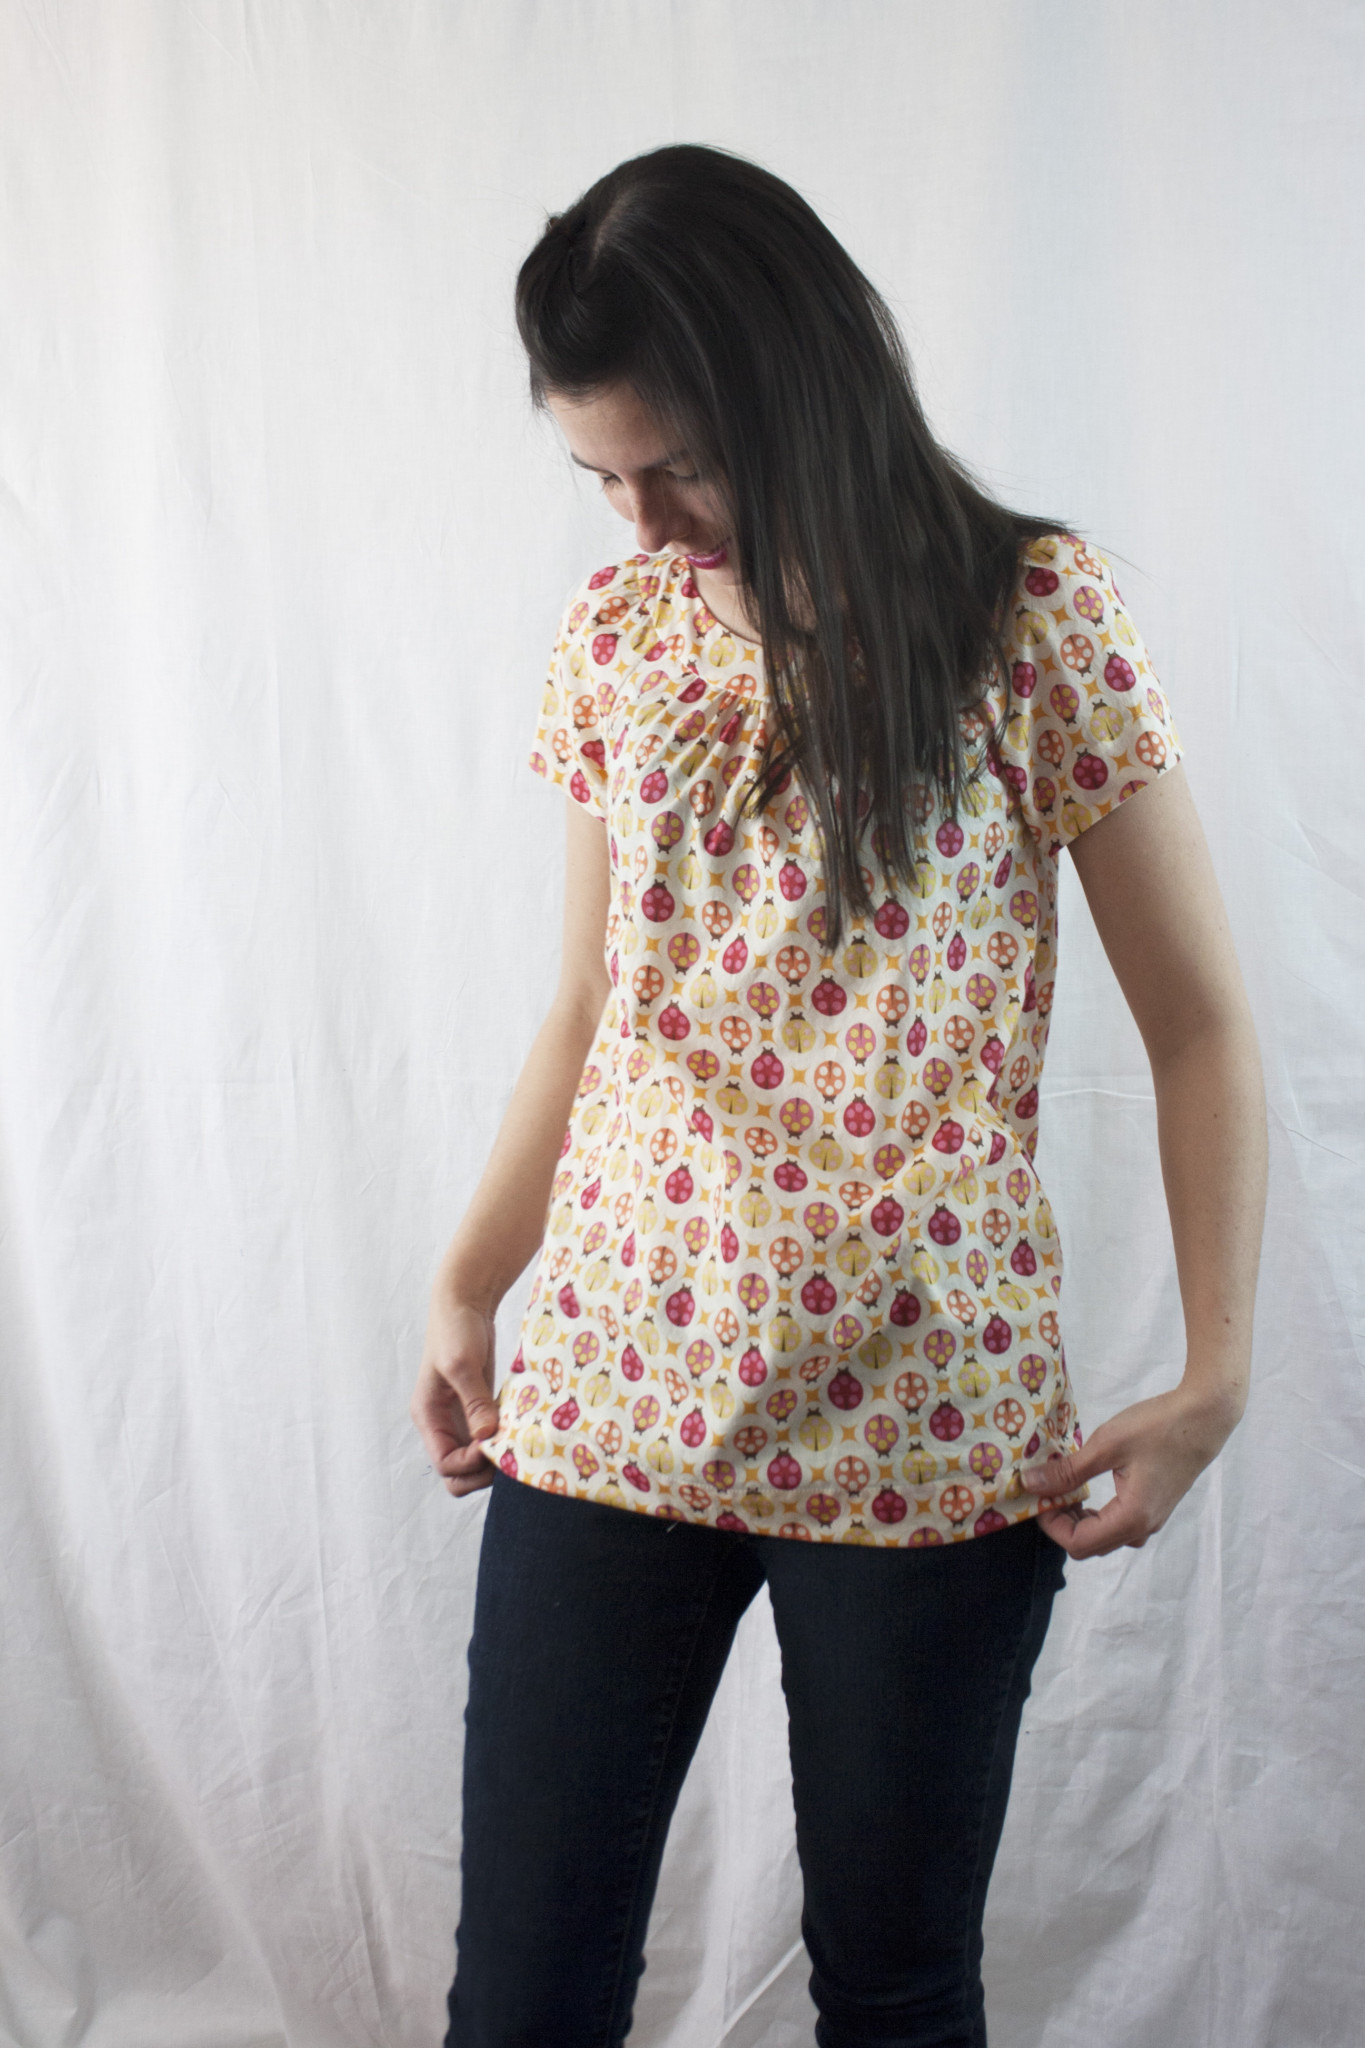
The only other modification is that I added 2″ to my top along the lengthen/shorten line. I’m 5’2″, so I guess still short, but when I made the muslin, I decided that I wanted my top longer (I like them to hit well below my waist line). After that quick fix to the pattern pieces (which I trace onto Pellon Easy Pattern so I can keep the adjusted pattern pieces for next time I make this pattern), I cut into my fabric. I used 1-1/2 yards for my top. I was very happy with the changes I made to my pieces and feel like they are spot-on in the finished garment.

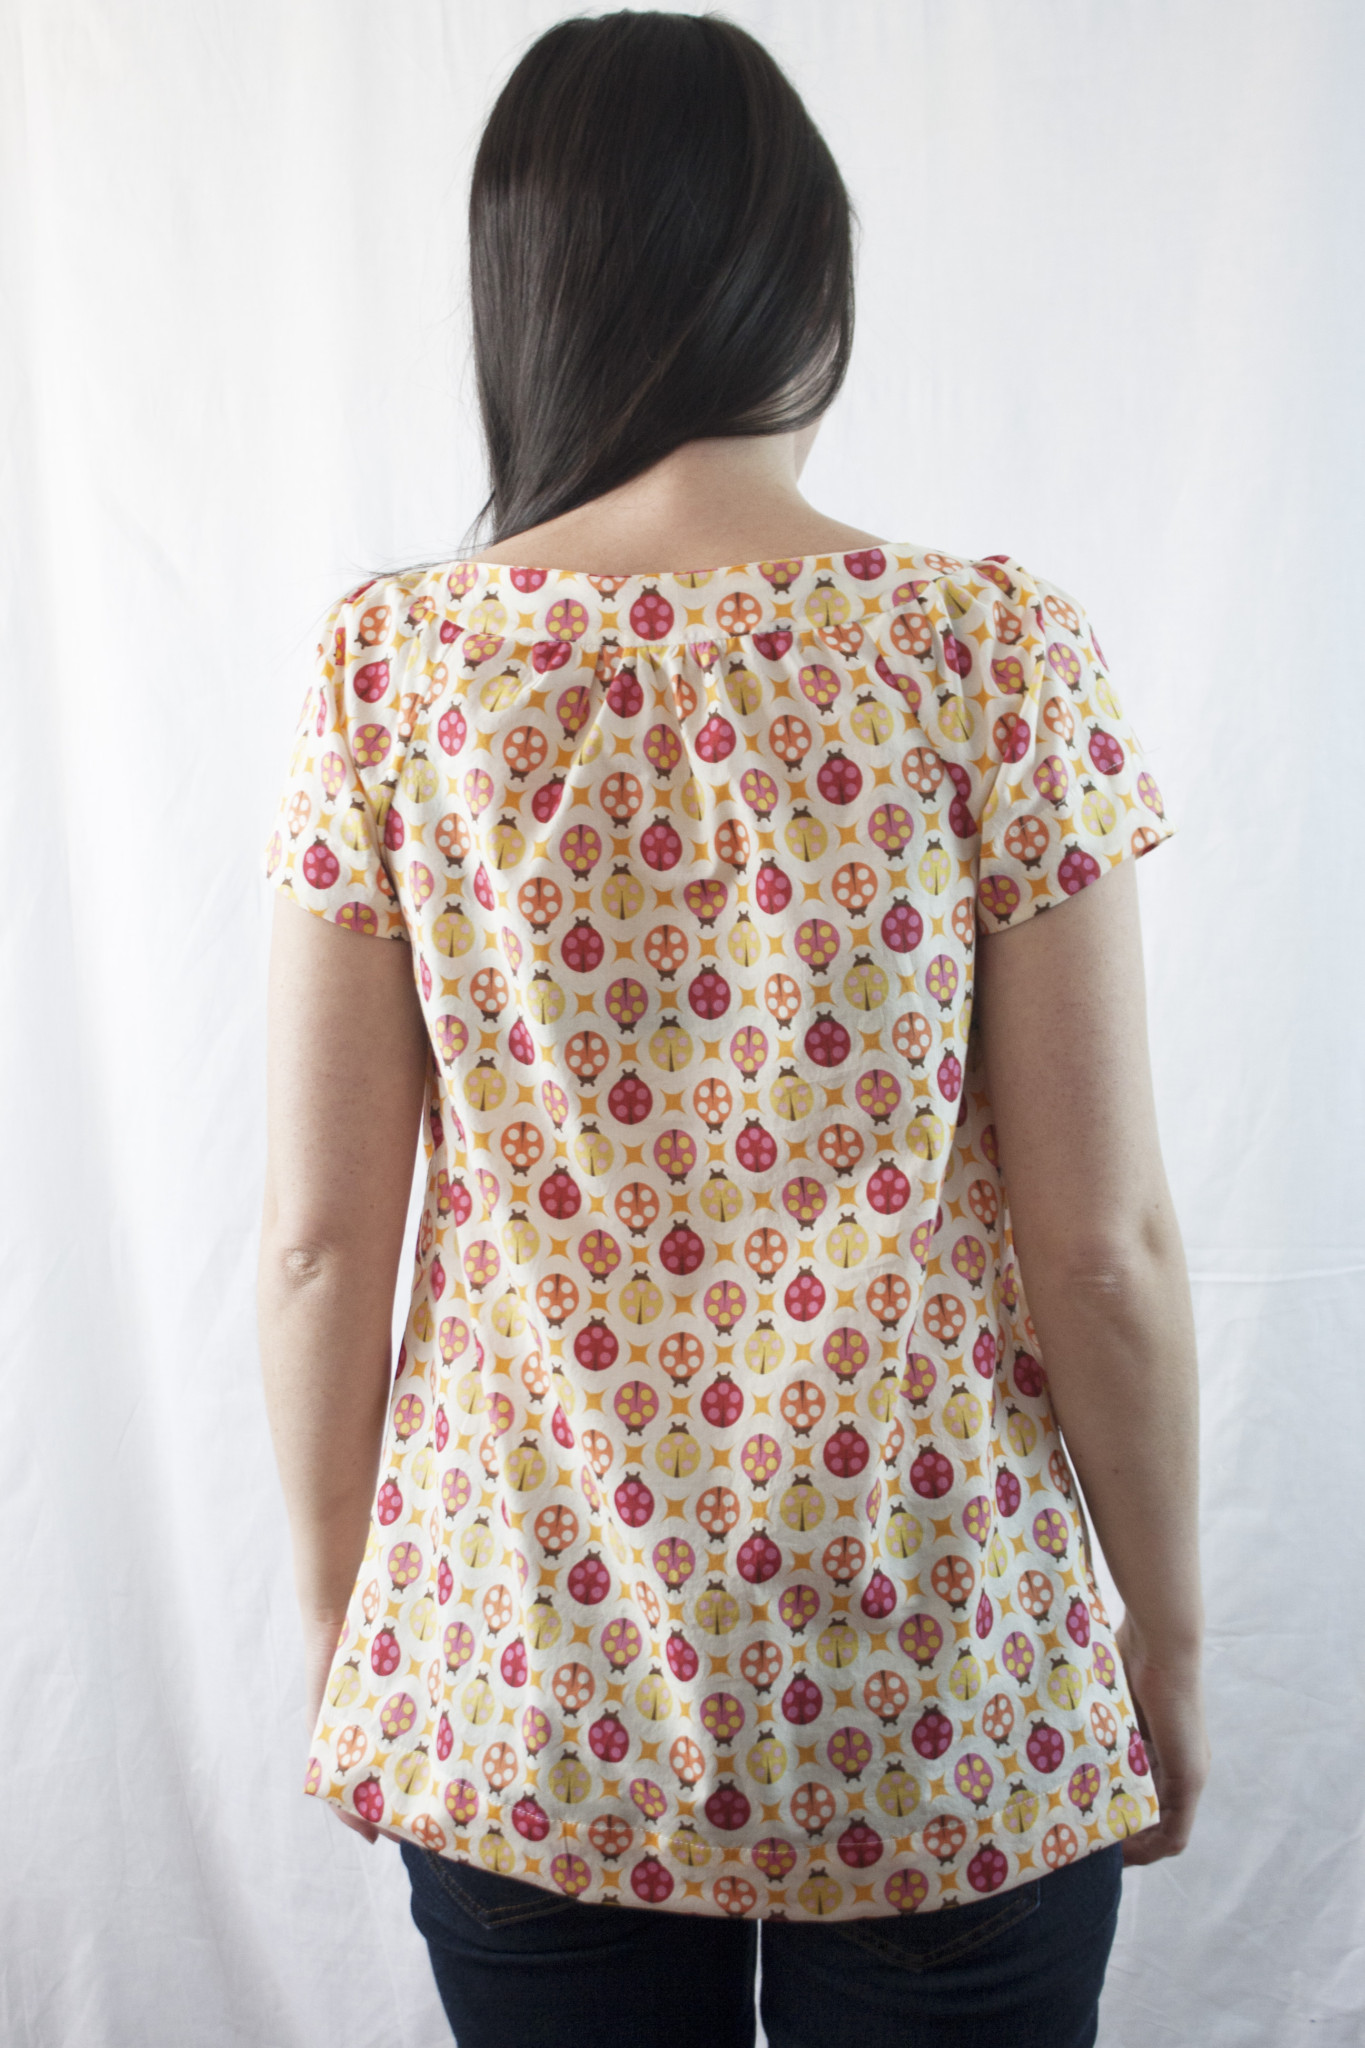
As far as the pattern goes, there are not a huge amount of pattern pieces to cut out (front, back, sleeve, front yoke, back yoke, sleeve facing). The instructions are accompanied by illustrations, which I felt were well-done and easy enough to follow. All of the raw edges (except the side seam) are covered by the yoke and sleeve facings, so there is no interfacing required. Especially made in the voile, which is very light, I feel like the facings are very effective and don’t add any extra weight to the shirt, and I like the look of the doubled fabric in the yoke, sleeves, and hemline (the hem is pressed at 1/2″ and again at 1-1/2″).

The top whips up quickly except that gathering and attaching the yoke requires more patience. Not difficult at all; I just re-stitched the yoke in several places as I wasn’t happy with how I initially stitched the gathers. It’s also helpful sewing with the gathered fabric facing you, as you can check as you sew that the gathered fabric is feeding through your machine evenly.

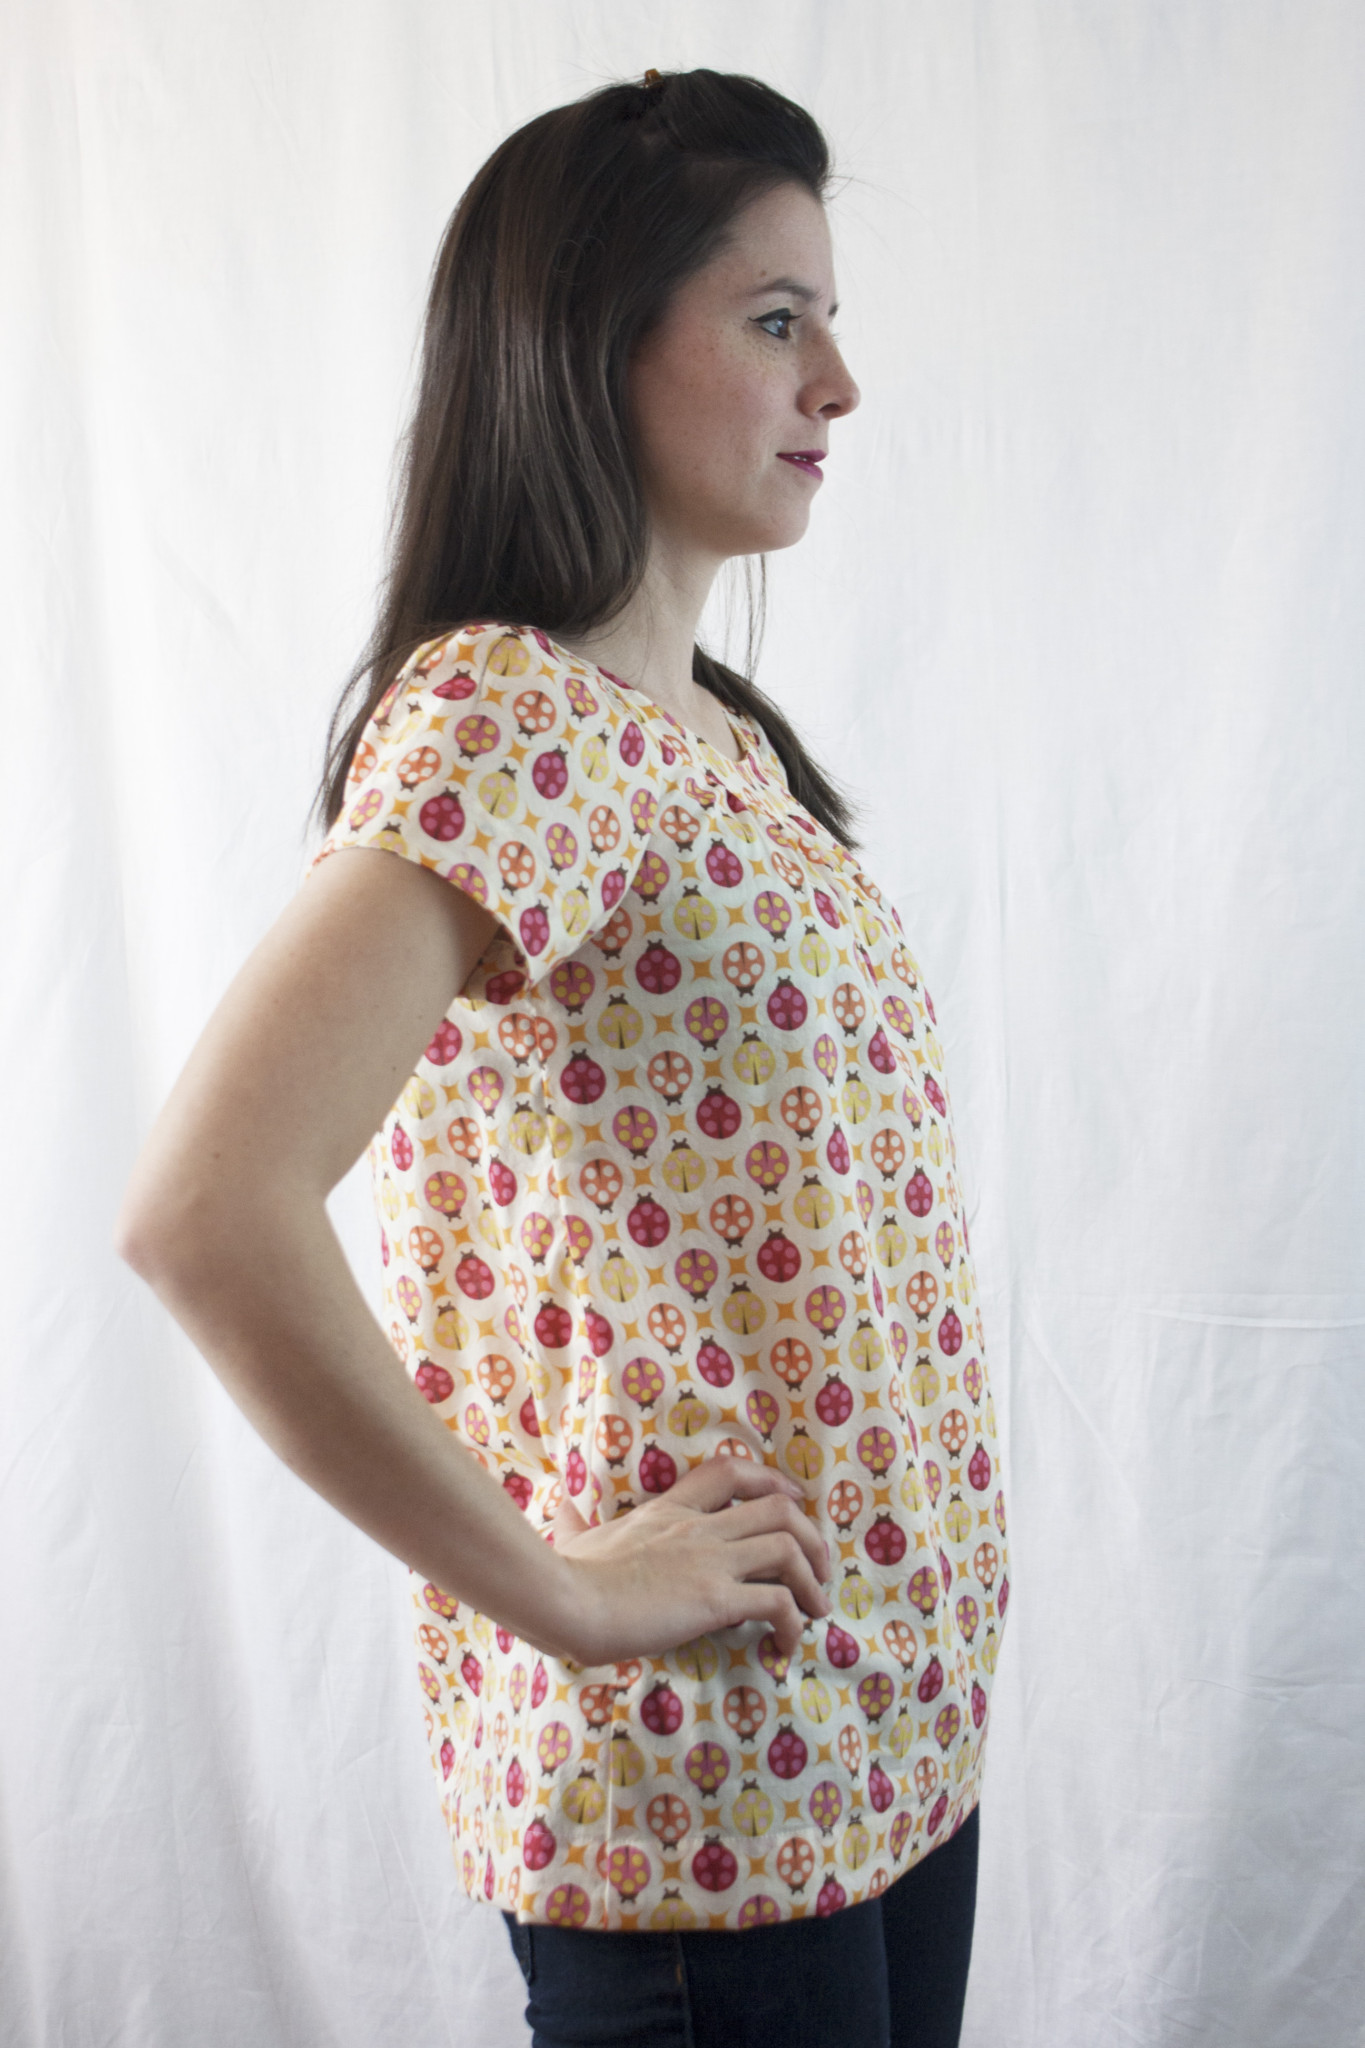
Since the top is loose, I feel like it’s most successful worn with a close-fitting pair of jeans or pants, but maybe that’s just me. I enjoyed making this and will be making it again with some more voile from my stash. Some of my blog readers commented in the past that I should smile more in my garment photos, so I made sure to get lots of smiling/laughing shots.

Thank you so much for visiting and I hope you’ve enjoyed this post! I have a couple other garment finishes to post, so I’ll get to those asap!

The post Assignment: Sailor Top appeared first on Sew Sweetness.