
Totally Tulle Tutu
Do you ever use tulle when sewing? From time to time I have used it in bunches! Really by the truck load. I once bought over 500 yards to make batches and batches of tutus. Now, you would think that would take up a boatload of room in the work space but when wrapped up on the roll, tulle is really compact.

It’s when you layer, fold and scrunch the tulle together that the start to see the volume come alive. But don’t be fooled, tulle is one of those fabrics that can be tricky. It’s so light an airy and tends to slide all around your table. So, before you get started be sure to check out my tips and tricks for working with this fun fabric.

The tutu that I’m sharing today was one of my best sellers. Store owners loved them because they made such a statement on the floor and photographers used them all the time for photo shoots. When finished this will be one of the fullest tutus you have ever laid eyes on!
How to Make a Tutu
Supplies:
- tulle
- satin fabric
- interlining
- 1″ wide elastic
Tools:
- Rotary Cutter
- Large Quilt Ruler
- Self Healing Mat
- Spray Bottle with water*
- Basic Sewing Tools
You will notice that some of my tools are unconventional but I promise, they are hard workers and will help you when cutting your project.
Notes:
- Before we get started a few basic body measurements are needed. Grab a flexible tape measure; measure and write down the following points. Waist and length from natural waist. Write down for later.

Cutting Instructions:
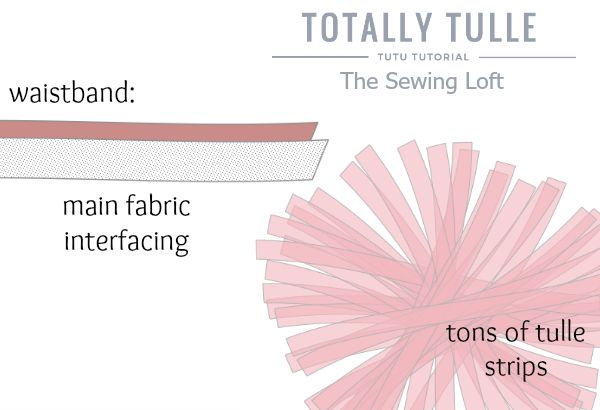
- Cut waistband for tutu from satin fabric and interlining. Hip measurement 2″ for ease & seam allowance by 5″ tall.
- Cut tulle into full length strips of fabric by 2 -3″ wide. Cut TONS of strips. The total number of strips will depend on the size of your waistband and the total fullness you desire.
- Cut elastic to waist measurement.
*Tip: Fill the spray bottle with with water and use it to keep the static at bay. Find more easy tips for working with tulle here.

Sewing Instructions:
1. Following manufactures instructions, iron fusible interfacing to the wrong side of waistband fabric. Iron waistband in half wrong sides together to crease. Turn up bottom edges 1/2″ to wrong side and press to crease. This will be your clean edge for later.

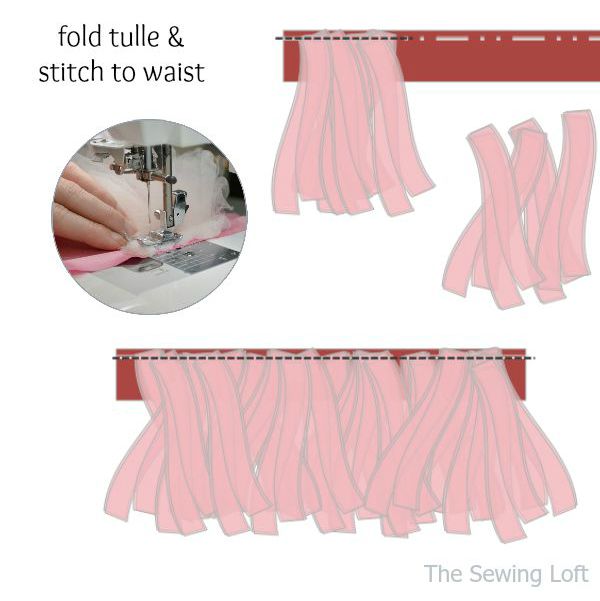
2. Taking 2 to 3 strips of tulle at a time, fold to finished length of tutu. Scrunch up folded strips; starting 1/2″ from edge, stitch folded tulle strips in place along 1/2″ crease line to right side of waistband along creased line. Continue adding additional strips all around waistband as close together as possible; stopping 1/2″ seam allowance. **Tip: Tulle layers can even overlap to create fullness.

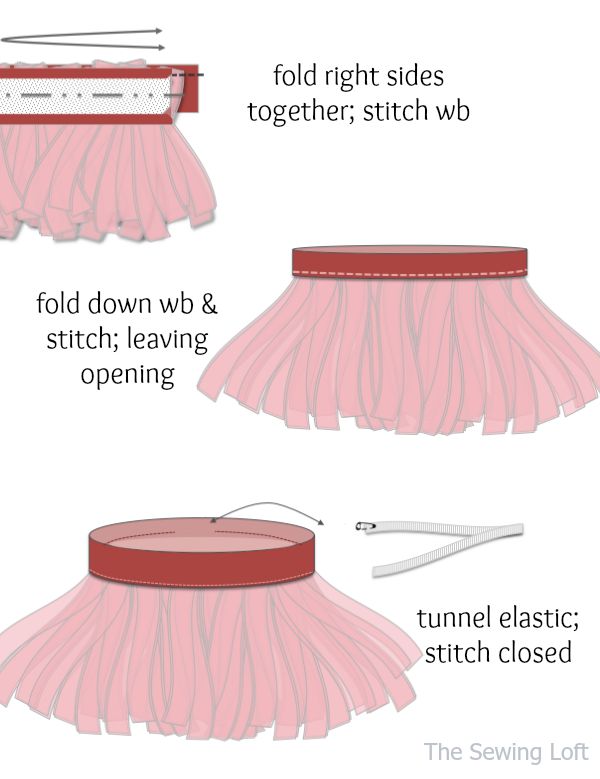
3. Fold waistband right sides and stitch short edges together to create a circle. Fold waistband wrong sides together in half on crease line. Pin and stitch in place all around leaving a small opening for elastic. Tunnel elastic; stitch to secure and close casing.

Depending on how many layers of tulle you stitch to the waistband, these tutus can have up to 30 yards of tulle on them. This layering creates amazing fullness and my girls loved them!!

Options:
- Create color variations by alternating tulle colors as you stitch along the waistband.
- Attach a silk flower to the waistline to hide the joining seam.
- Instead of using elastic, consider attaching to a tie waistband for longer wear.
*For the tutu shown in photos, each strip was folded in thirds. Once everything was stitched, I clipped the lower loop free.
These tutus are perfect for parties and can create the most amazing photos. Oh and don’t forget Halloween!! I’d love to hear how you would use them. Let me a quick note in the comments.

Hello! Are you new to The Sewing Loft?
If so, I’m glad you stopped by and hope that something has inspired you to keep your needle moving! Don’t miss a single project and subscribe via email HERE! Bonus- free download template with newsletter sign up. Another great way to connect with me is via Facebook, Pinterest, Instagram, Google or Follow along with Bloglovin. I’m looking forward to getting to know you and creating together!
This post Totally Tulle Tutu appeared first on The Sewing Loft.