
Simple Natural Make Up Look for Brunettes
Hey there! As you might have noticed, since you have eyes, I'm a brunette. My cool skintone fluctuates from very fair in the winter, to medium during the summer (yeay fake tan!). And even though I love experimenting with make up in statement colours and special techniques when I have the time, during the work week it's really nice to have a routine down that makes you look your best with minimal effort and minimal risk of your make up not matching your outfit or the occasion.
The products and colours I'll be using are specifically suited to light-medium skinned brunettes, but the basic ideas and techniques featured in this post will be of value to anyone who is looking for the kind of make up that enhances their natural features. A subtle "done"look, perfect for the office or, say, presenting the news.
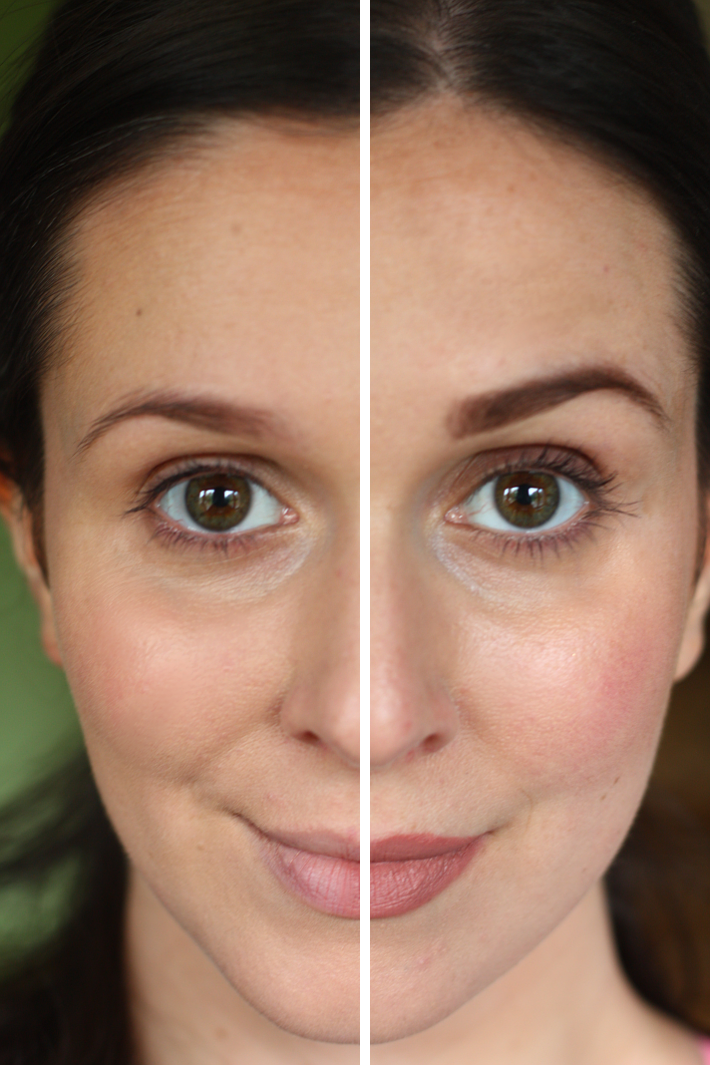
On the left, you see me wearing nothing but foundation - a mix of Bourjois Healthy Mix in Light Vanilla, and Lancôme Teint Miracle in Bisque. On the left, you have the full look: contouring powder, blush, highlighter, brow powder, eyeshadow, mascara, lipstick. I can go from left to right in about three minutes if I'm rushing, but practice makes perfect so this might take you a bit longer if you're not accustomed to some of the products I'll be using.

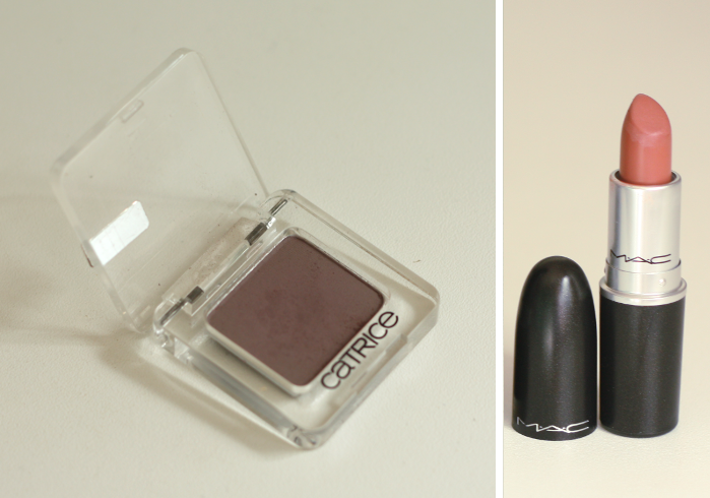
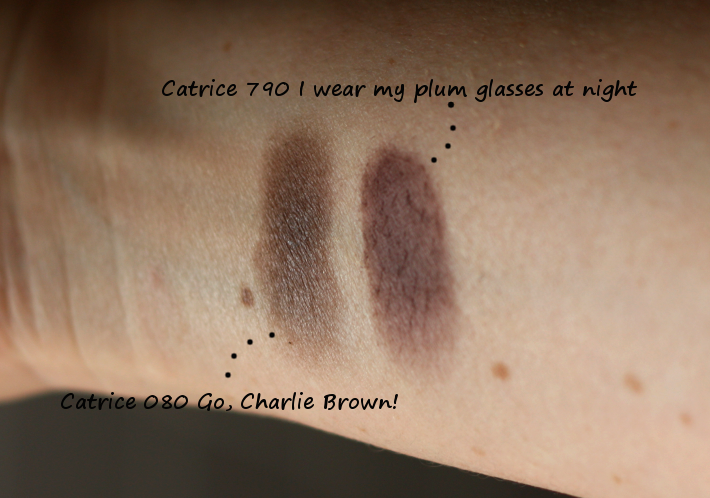
The most important new products I'll be talking about are this eyeshadow mono from Catrice in 790 I Wear My Plum Glasses at Night (love the name) and MAC lipstick in Velvet Teddy.

Velvet Teddy is my first ever MAC purchase and I am totally 100% in love. None of the others measure up! This shade looks amazing on basically everyone: just browse google or instagram for #velvetteddy and be wowed (and also, be prepared to want to order it straight away). I'll be reviewing it more thoroughly in an upcoming post where I compare it to other similar shades from more affordable brands, but today I'm just sticking to simple application. To get the nicest result, I've found that using some foundation underneath my lip colour helps me get a cleaner lip shape, and a colour that's more true to the product. My lips are fairly pigmented, so lipsticks tend to turn darker and more red when I use them without layering them over foundation.

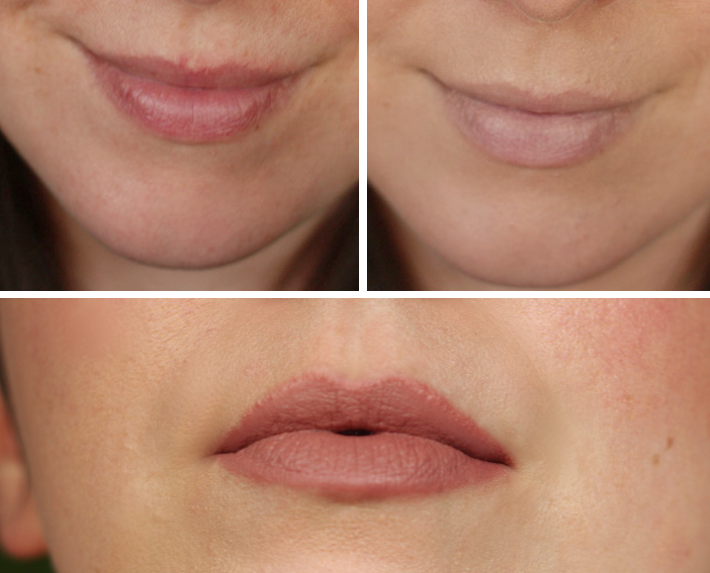
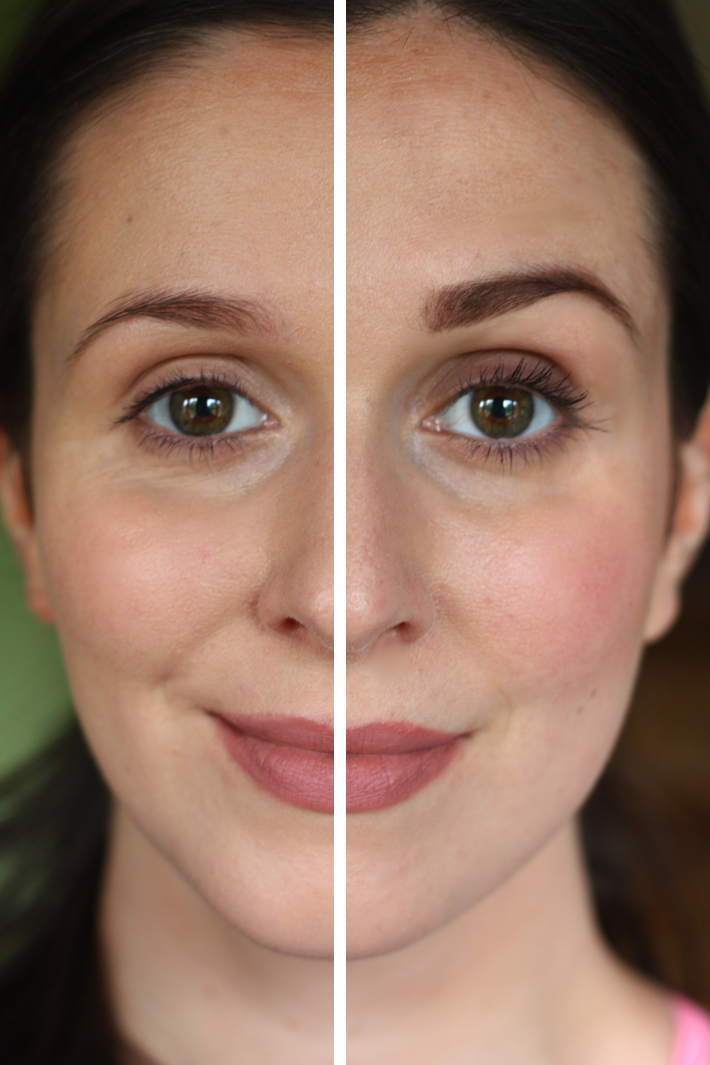
Oh, such a beautiful velvety texture, and very close to my natural lip colour. Moving on, I'm taking you from left to right once again. On the left, you see me wearing nothing but foundation and Velvet Teddy. On the right, I've added contouring, blush, highlighter, eyebrow powder, eyeshadow and mascara. Big difference but still very natural, right? I've decided against using any type of pencil or liner to emphasize my eyes because this look is all about the brows, the healthy glow and the lips. Which is a departure from my usual make up look, but one I quite like.

Let's start with the eyes. Products are Catrice mono in 080 Go, Charlie Brown and Catrice in 790 I Wear My Plum Glasses at Night. Both are matte brown shades, though Go, Charlie Brown has a hint of gloss to it now that I see them compared up close. Go, Charlie Brown is a cool dark brown, while I Wear My Plum Glasses at Night is a tiny bit lighter and leans purple.


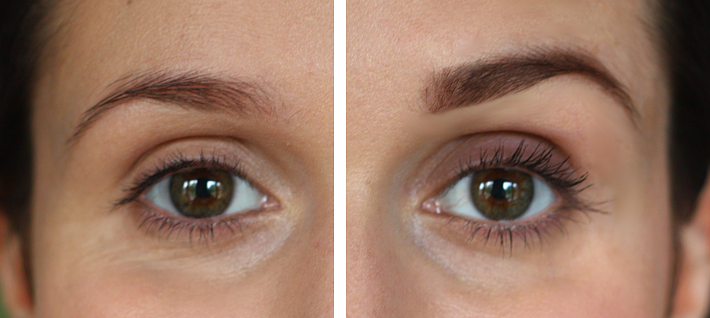
I use my trusty Catrice mono in 080 Go, Charlie Brown on my eyebrows (for a more detailed eyebrow tutorial, check this post out), while I lightly blend Catrice in 790 I Wear My Plum Glasses at Night over my eyelids up to the crease, with more colour in the outer corners than the inner corners. I also brush a little bit on the outer corners of my lower eyelids. I picked I Wear My Plum Glasses at Night up a couple of weeks ago and have been wearing it a lot because the colour is so natural and beautifully complements my eye colour. I normally wouldn't recommend using just one shade of eyeshadow all over the eyelid, but this really doesn't need anything more and actually looks like you're not really wearing make up. I finish off with a coat of my all time favourite mascara: Maybelline Volum' Express.

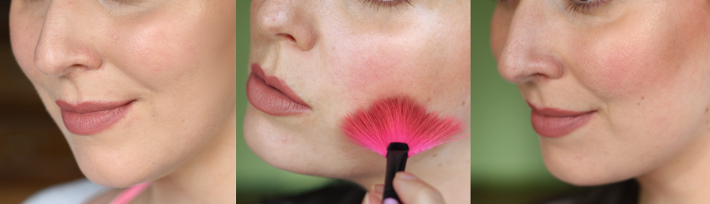
Simple but effective! And like I said, no pencil or liner, because the eyes are not the focal point (lulz) of this look. All the different components are supposed to balance each other out. Next step: contouring, blushing and highlighting. If you want step by step instructions of contouring, I did a post on that earlier so click on over! I'm still using my Sleek Face Form kit in Light, but I have changed brushes and right now I'm using this fan brush that's part of this Oasap brush set. Any fan shaped brush will do, but I do find it gives a nicer result when contouring cheekbones compared to regular brushes.


BAM. And as you can see in the pic below, all the different components really work with each other to keep the look subtle and put-together. Velvet Teddy wouldn't look nearly as sophisticated if I'd wear it without doing my eyes and cheeks (BECAUSE THAT WOULD BE TERRIFYING), but at the same time, because the colour is so flattering, it doesn't need much else.

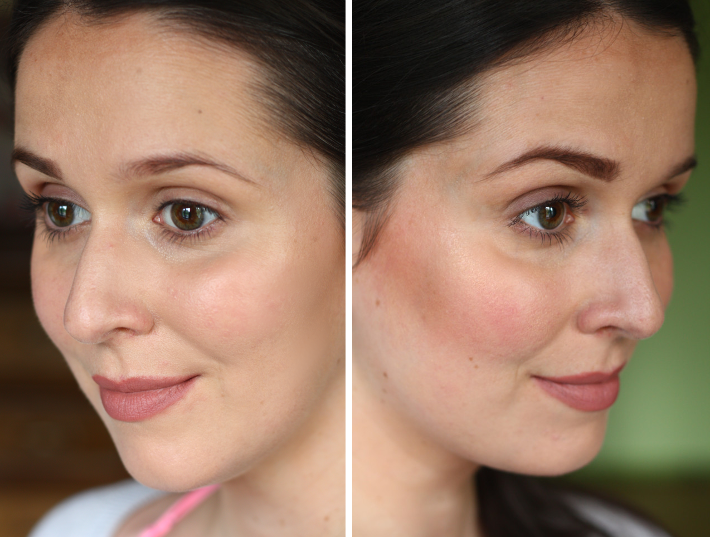
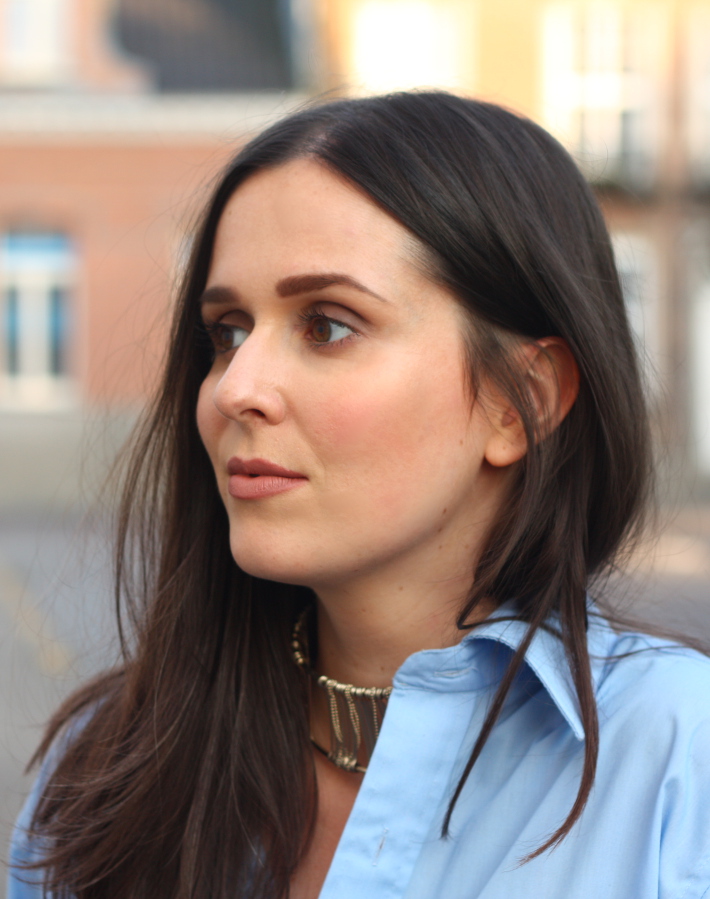
And here's the full end result from the sides and the front. I added picture we took outside for good measure, because lighting really influences colours and how obvious your make up is.


Subtle, perfect for my colouring, easy and pretty. Definitely the perfect basic make up look for me.
Hope you enjoyed this, and if you have any suggestions or questions: shoot!
More posts from Bloglover