
DIY Easy Rope Bracelets
Want something new to wear? How about making yourself a few of these easy rope bracelets? You can make them in your favorite colors or team colors or school colors! They are really fun and addictive, I dare you to only make one!

These are really easy to make. They may look intimidating but I promise you they are not! You will become addicted, they are so fun!
Supplies Needed:
- Colored Rope*
- Ribbon Clasps
- Pliers
- Scissors
- Measuring tape or ruler
*I used thin paracord, however the silk rope works well also!

Let’s start out easy! Measure your wrist! Mine was 6 inches around so I cut myself (2) 9 inch lengths of each color, 4 strands total. Let’s do the simple knot first and then we will work our way to the more twisty one!

1. Take 2 strands of the SAME color and make a loop.
2. Repeat for the SECOND set of colors and lay to TOP of the FIRST loop.
3. Take each Tail of the SECOND loop and wrap them around the first loop and through the center.
4. Gently pull the tails apart to tighten the knot and make sure that they strands are laying flat!
I told you they were easier than you think!
Now for the twisty one as my oldest calls it! Cut yourself the same length and number of strands. Two of each color.

1. Take 1 strand of each color. Loop and make sure the tails are crossed over one another.
2. Lay your second set of strings underneath the loop part of your first set.
3. Grab the TOP tail of the SECOND set and place it OVER the TOP tail of the FIRST set.
4. Next take the same TOP Tail you just used in Step 3 and place it UNDER the BOTTOM tail of the first set.
5. Using the SAME tail as in steps 3 and 4, Loop it around to go UNDER the intersection of where the LOOP from the FIRST set intersects with the SECOND set. Then it will come out THROUGH the loop of the FIRST set.
6. Gently flatten your strings and make sure the same colors are on the inside and outside on both ends and gently pull the knot tighter. Now you made your knot!
Next you will trim all the edges of the ropes to the same length and then put them in the mouth of the jewelry clasp.

Jewelry Clasps are just little jaws that keep everything in their place! Using pliers, flatten the clasp closed tightly. Repeat for other end of bracelet!

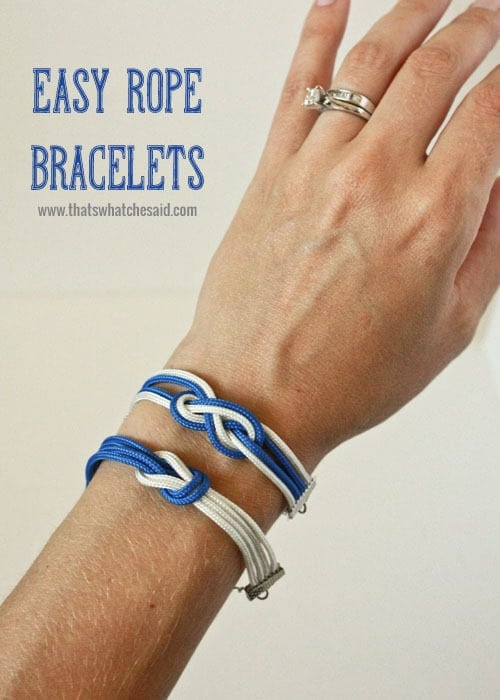
Now you have some fabulous rope bracelets! Mix and match colors for your favorite sports teams, holidays or school colors! So many options!


If you are looking for any more fun jewelry projects, I have this Puzzle Piece Interlocking Necklace project that is a huge hit! Perfect for best friend necklaces, Autism Awareness, Mother/Daughter, Sister/Sister, or just because they are plain cute!

Also these Ribbon & Pear Bracelets are so dainty and feminine! I have to wear one once in a while because I live in a house if all boys! :)

And my personal favorite are these Heart Thumbprint Pendants! Perfect for Valentine’s Day, Mother’s Day or a special loved ones’ birthday! They are made with sculpey clay and some metallic paint! So easy!


ENTER YOUR EMAIL ADDRESS TO RECIEVE ALL UPDATES:
The post DIY Easy Rope Bracelets appeared first on That's What {Che} Said....
I'd Love to Connect With You!
