Super-delicious papier-mache ice cream cones!!!

My three sweet DragonWing Arts students, two 4th graders and a 3rd grader, have just completed their totally awesome papier-mache ice cream cones! I fell in love with this project when I did it with my 4th graders while I was still teaching, because it was the fastest papier-mache project ever, and it made absolutely everybody happy. Click HERE to see a post of all those completed 4th grade cones, and HERE and HERE to see them in progress.
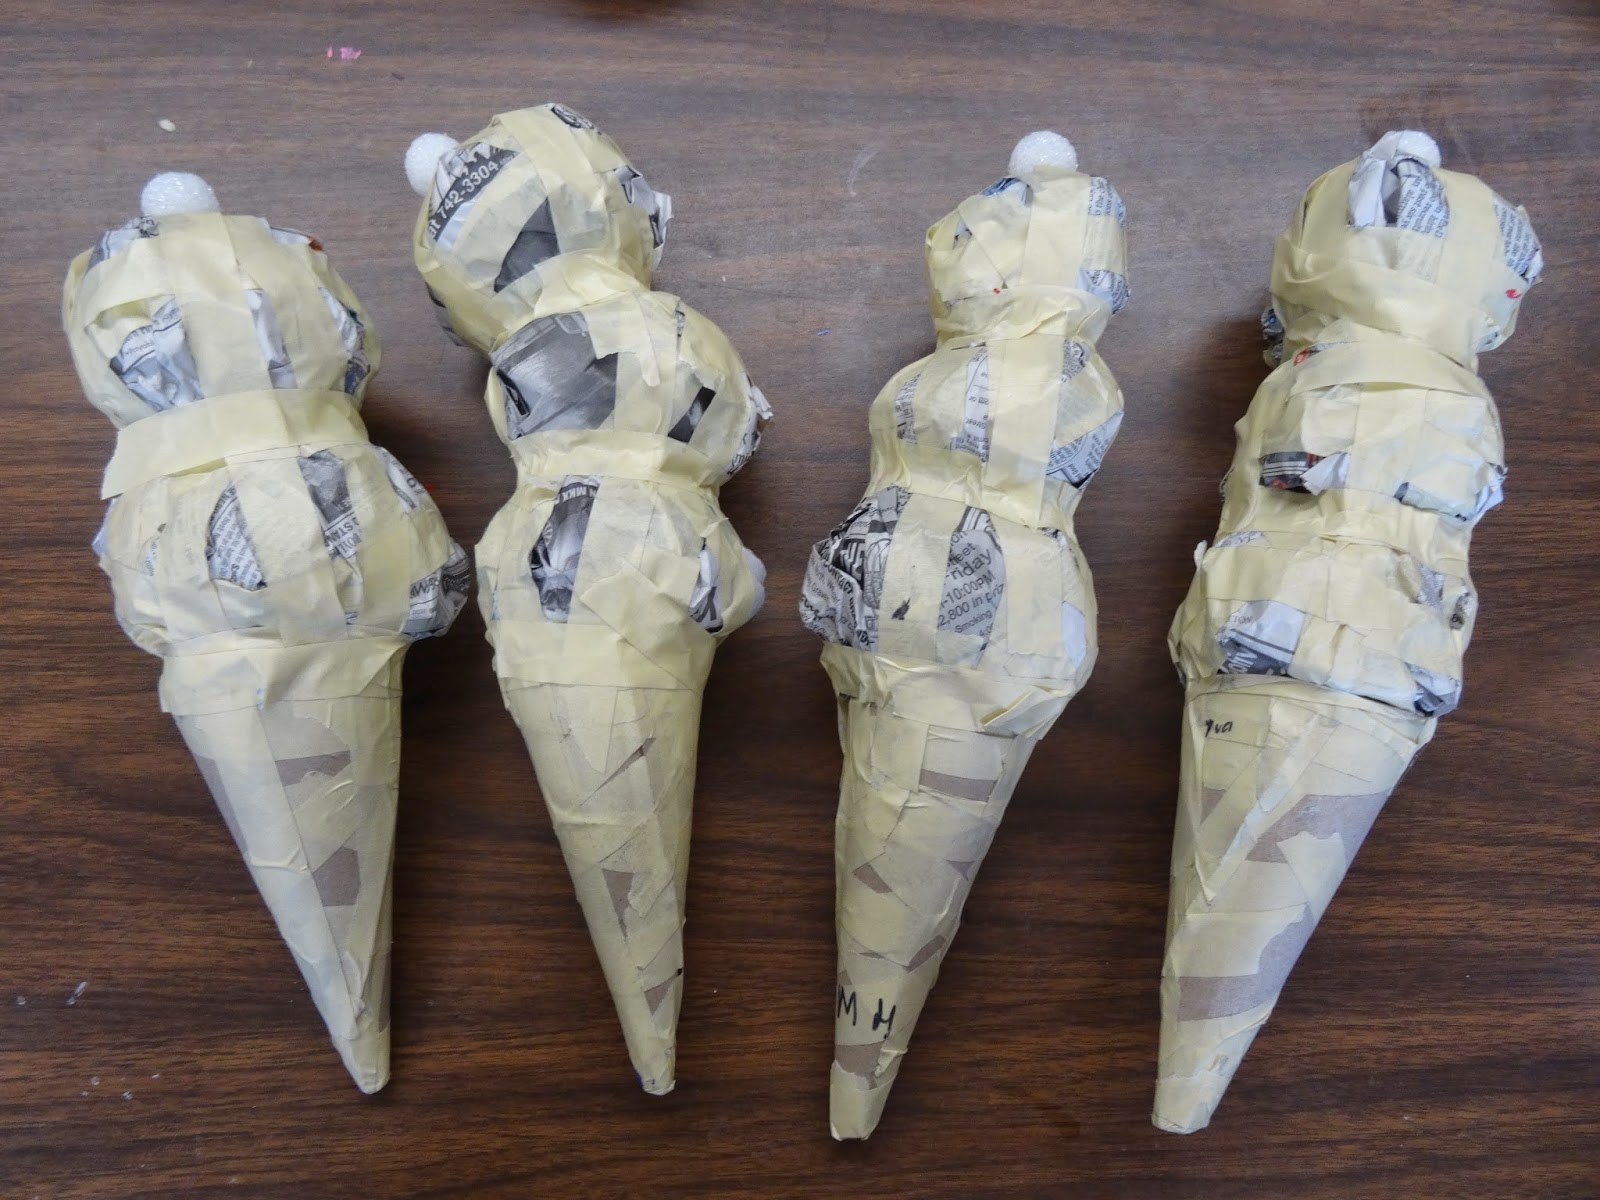
So here's the process: First, you need a cone shape, obviously. Last time, we used paper cones, that had been donated to me, for the cone shape. They were an awkward to hold size. I considered using flowerpots for a flat-bottom cone, but since everyone prefers sugar cones, I decided that's what these had to be. So we cut semi-circles out of cereal box cardboard, and curled them up into a cone shape. I hot glued them together, and the kids taped them for extra reinforcement.
We stuffed the cones full of newspaper. Then, we started making ice cream scoops, by balling up newspaper, wrapping the ball with a smooth piece of newspaper, and then taping the ball with a couple of 'belts' of tape, with extra tape to smooth any loose paper.

Each scoop was hot glued onto the cone or scoop below it. Then it was strapped up and over with a couple of long pieces of tape, crossing like an X on top of the scoop. Another piece of tape belted between the scoops, or between the scoop and the cone. Each additional scoop was added the same way.


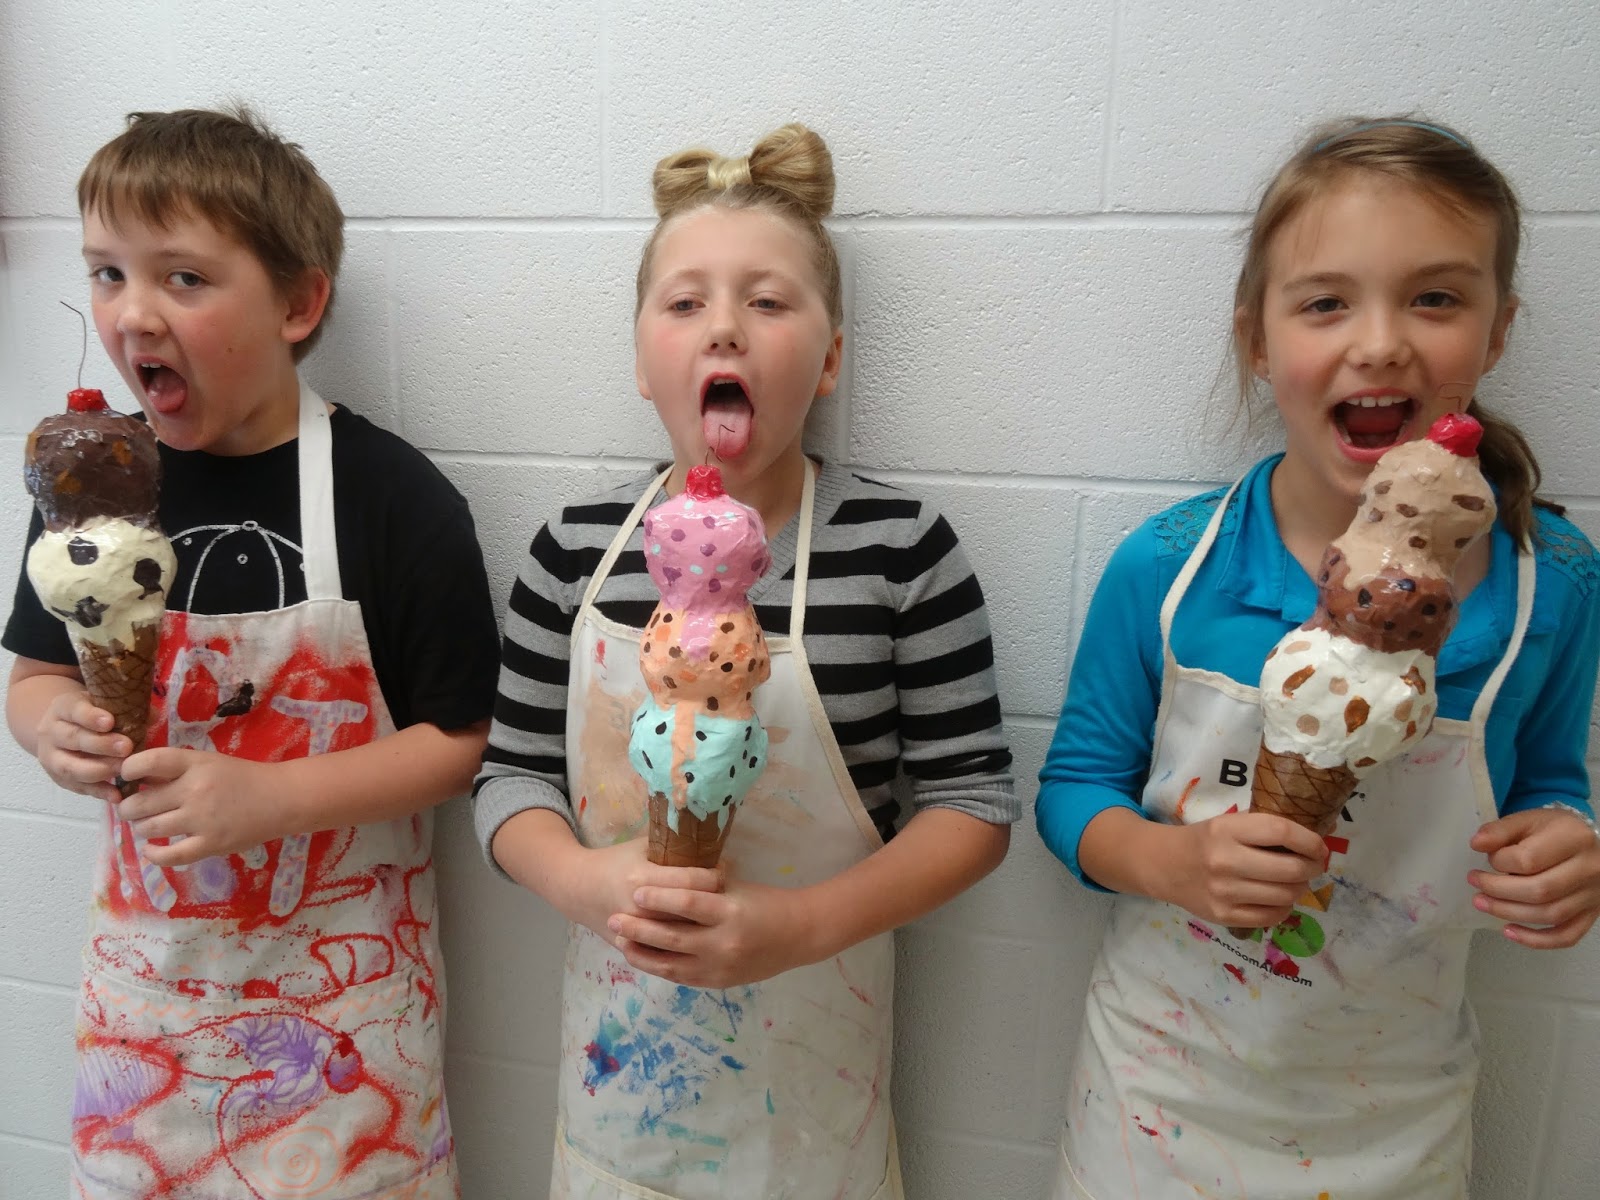
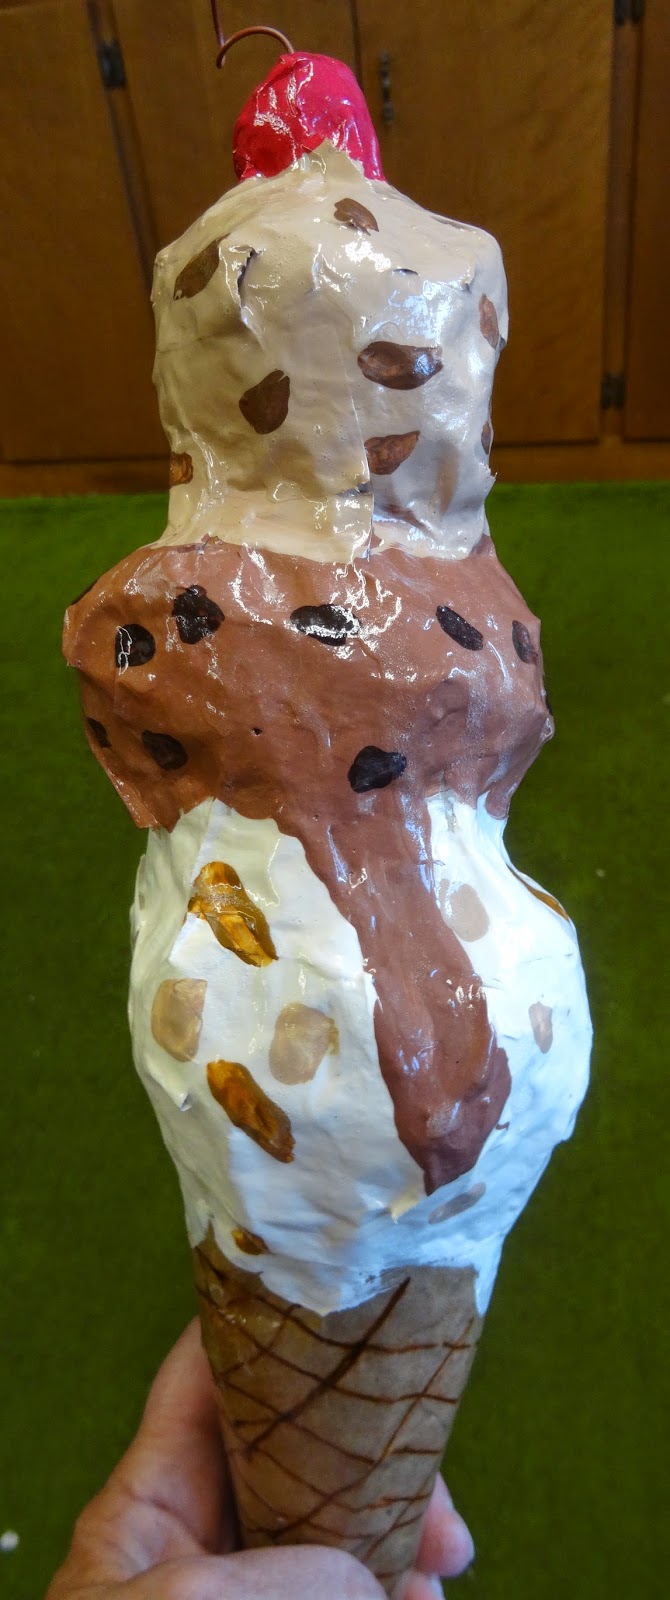
I told the kids they could put on as many scoops as they wanted, and that I had a former student who had made seven scoops! But they wanted their cones to look like ones they'd really eat, and didn't want to go extreme. The two girls chose to put three scoops on their cones, and the boy wanted just two scoops. My demo cone also has three scoops.

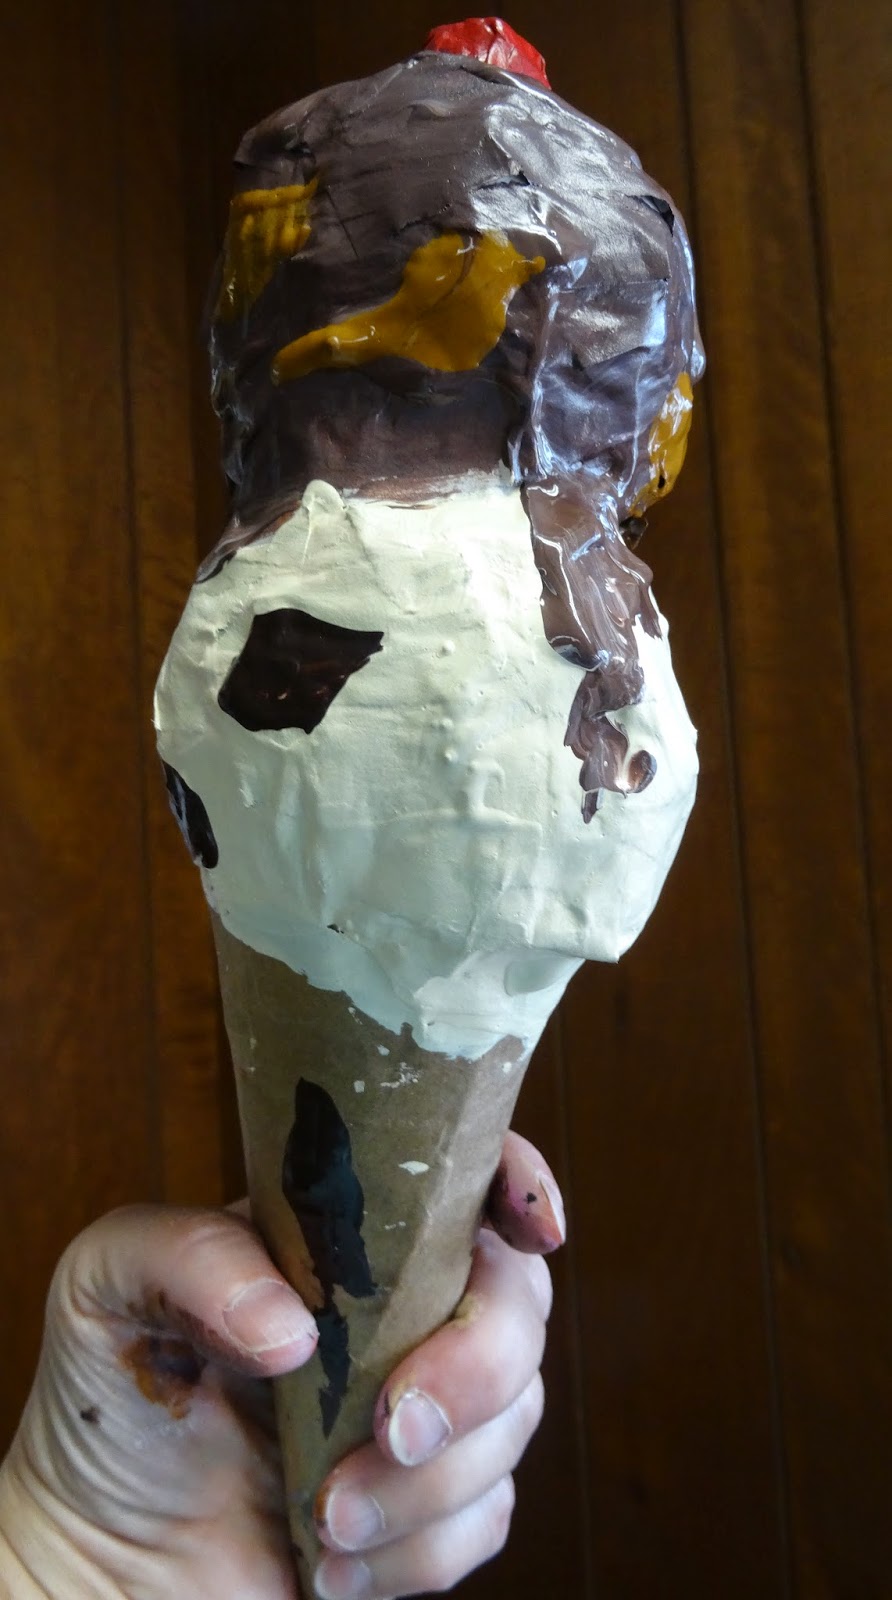
We hot glued and taped Styrofoam balls on top for cherries. Even though you don't usually get a cherry on your ice cream cone, we just thought they looked cute!

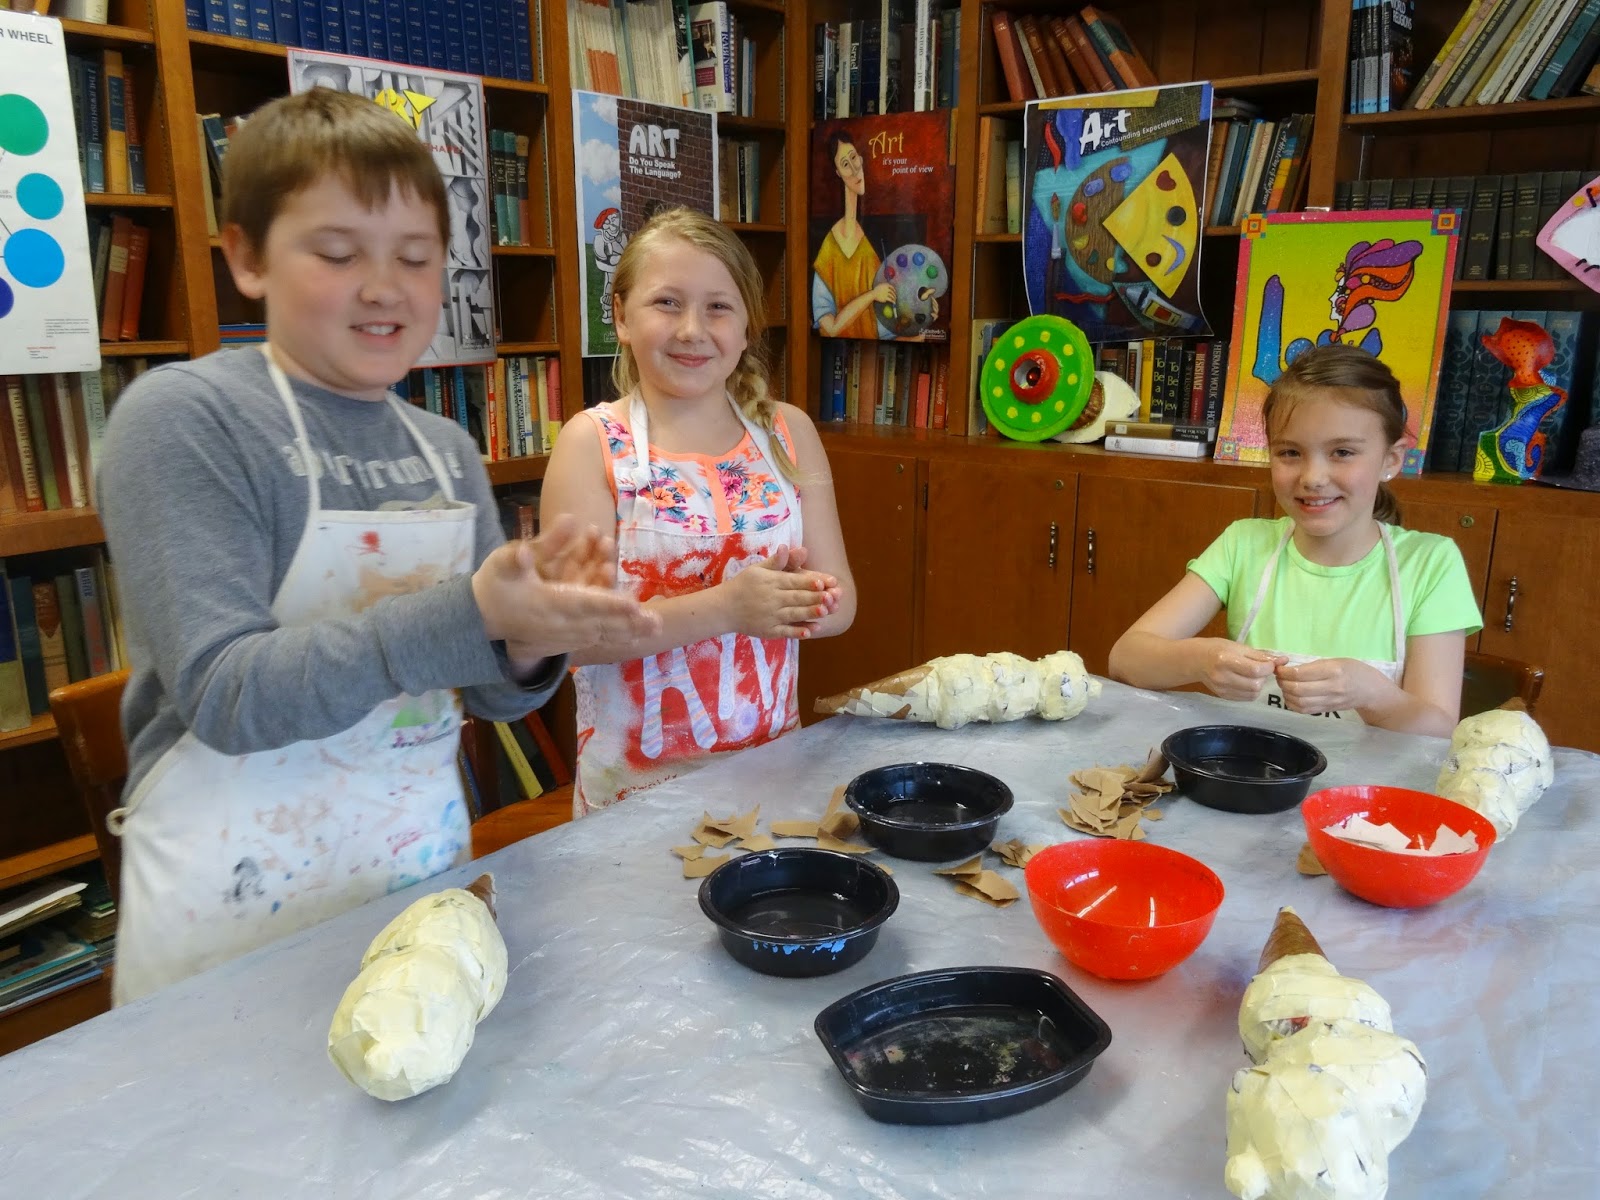
Art Paste was our papier-mache goo; my students and I call it dragon drool. We did the papier-mache using brown Kraft paper for the cone, and white newsprint paper for the ice cream scoops.

Rather than dipping the torn paper in the dishes of 'dragon drool', I have the students dip their fingertips, and then rub the goo between their palms. Then, all they need to do is touch a piece of paper to pick it up, rub it between their palms to saturate it (vocab word!). It should look translucent (another great vocab word!). The saturated paper is then smoothed onto the project. We regularly massaged the projects to make them smooth.

Unpainted, they already look good enough to eat! My silly students decided to flap their arms to dry the goo on their hands. They liked the way it felt! Cutie-pies!!

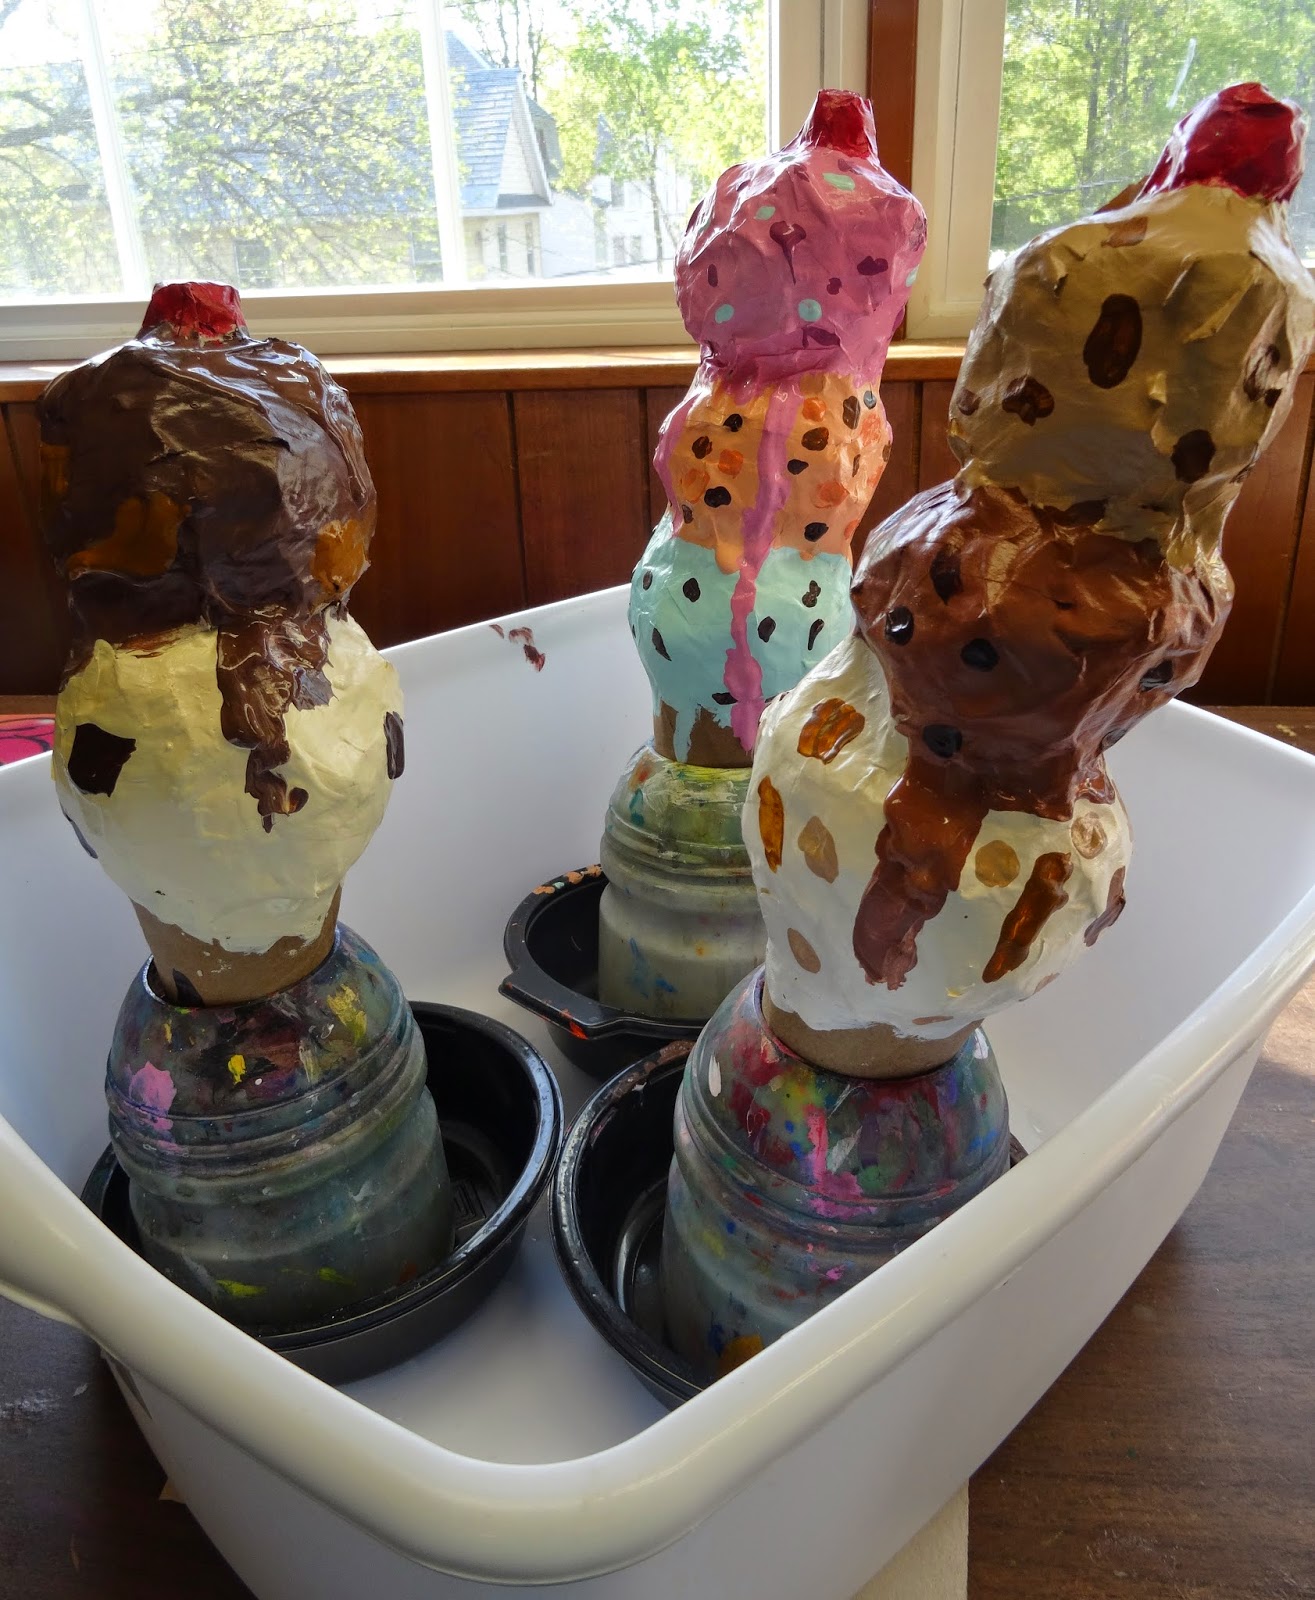
In our next class session, the kids got to paint the ice cream. The kids told me what flavors they wanted, and I mixed colors for them with acrylics. They were fascinated with how we made the colors for chocolate, caramel, peanut butter, and so on, especially when they discovered that there was no bottle of brown paint. It was a good color lesson, talking about how complementary colors, or a mix of all three primaries, will make browns and grays, and how to figure out what to add when it looks wrong. For example, if the brown has a greenish cast, and we know that green is made with blue and yellow, then to neutralize the green you need to add more red, the complement of green. I loved that kids understood this, and when I was mixing a color, they were able to tell me what to add. "It's too purple-y, Mrs. Brown; that means you should add more yellow!".

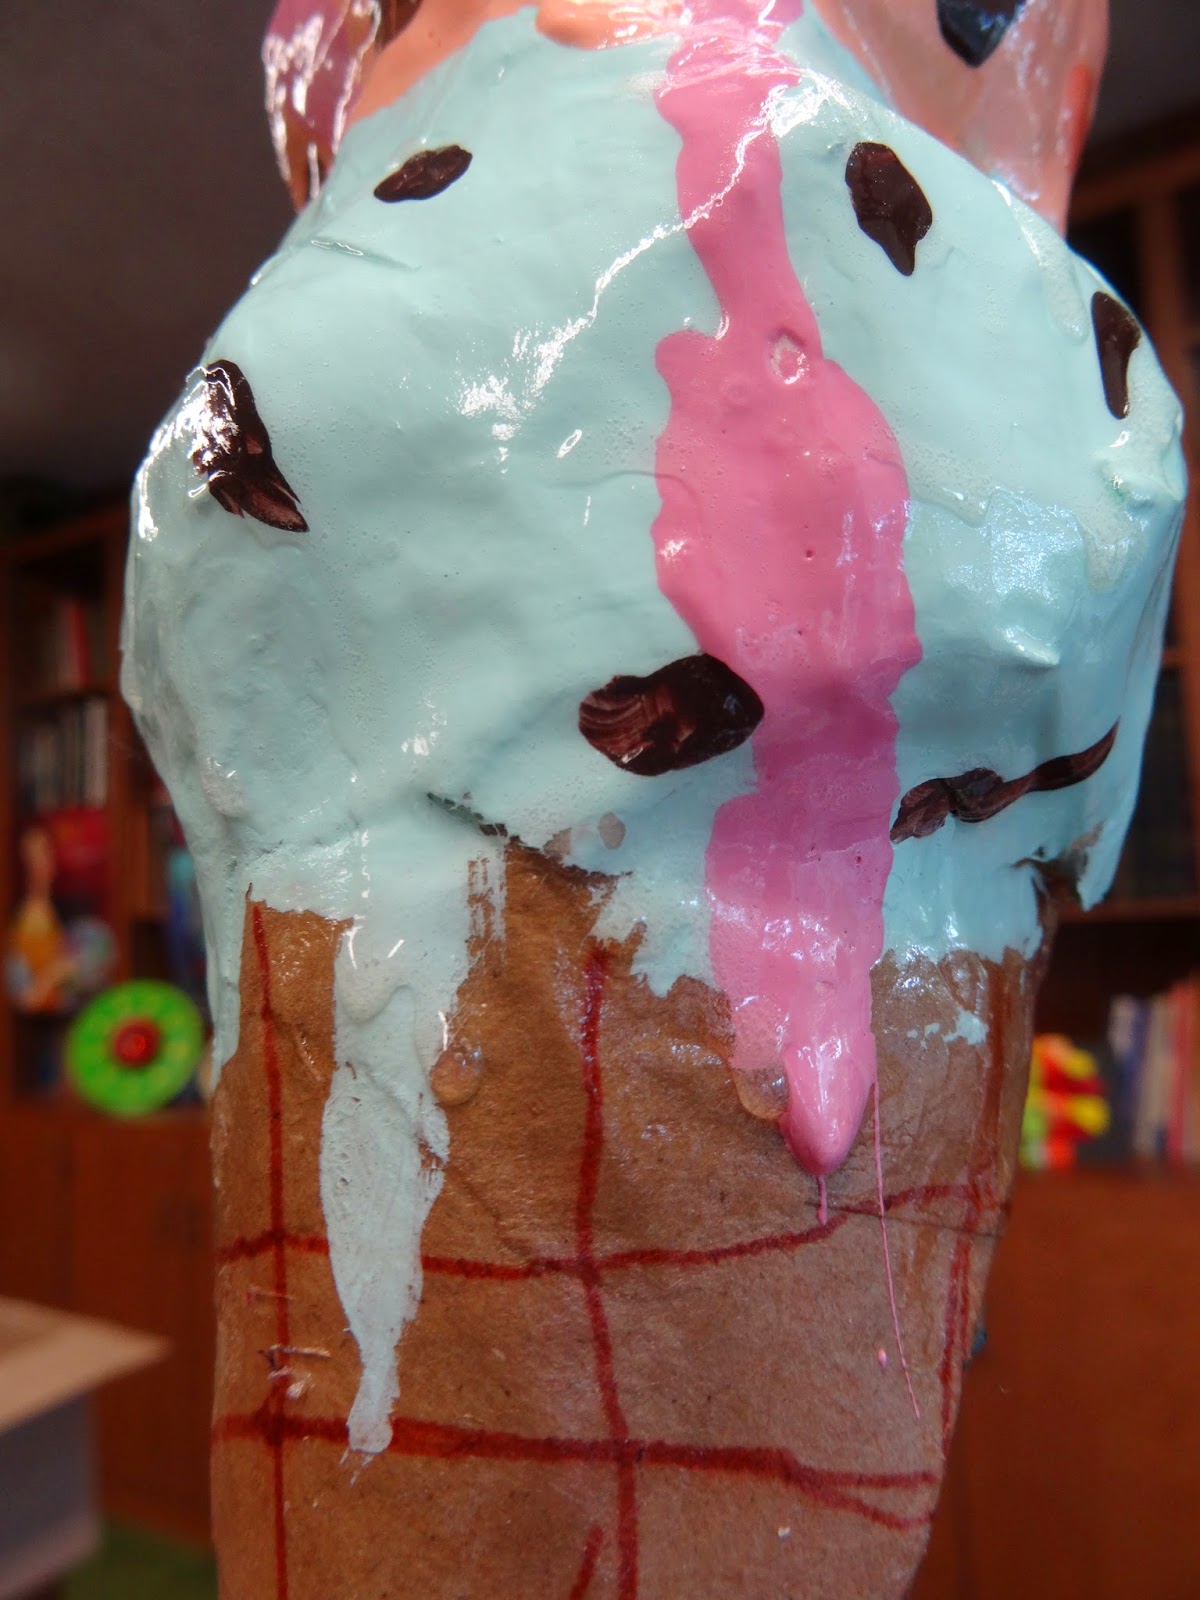
Anyhow, the rule was to start painting with the bottom scoop, and then the one above it, and so on. Put too much paint on your brush (on purpose!!) and let it drip (also on purpose!!) Below, the flavors include double chocolate with peanut butter and vanilla with chocolate chunks; mint chocolate chip, peach with peach chunks and chocolate chips, and strawberry with various chips; and cookie dough, chocolate brownie, and I think vanilla with caramel and peanut butter perhaps??


Above, the cones with fresh paint, cones unpainted. The kids loved the drips and had trouble believing they'd dry that way. But they did! Finally, below, we drew some lines on the cones, and coated everything with Mod Podge to make the ice cream look wet and melty.


.JPG)

.JPG)

.JPG)


More posts from